


29
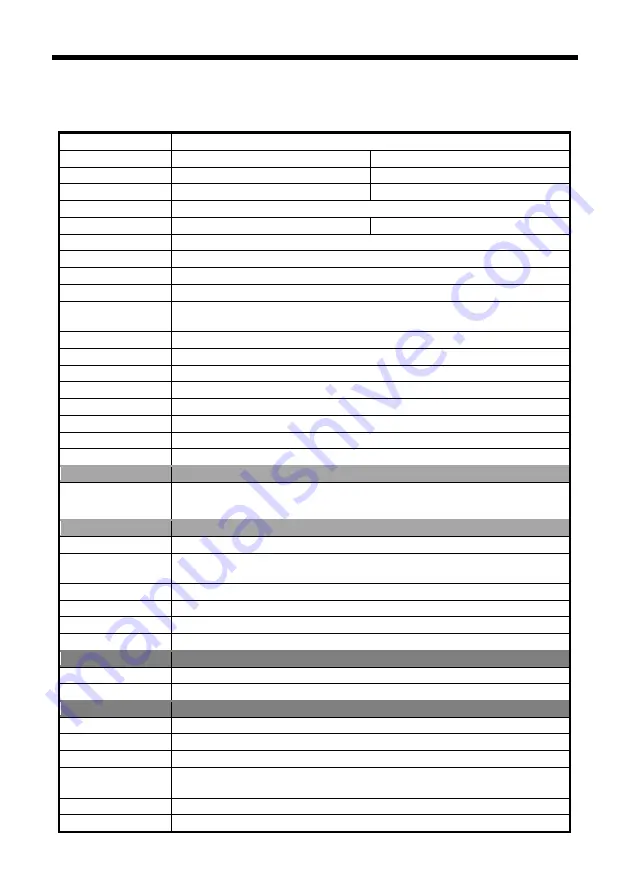
ANNEX 1 TECHNICAL SPECIFICATIONS
Image Sensor
1/2.8" CMOS,214 megapixel
Focal Lens
f=3.9mm-46.8mm
f=4.7mm-94.0mm
Iris
F1.6-F2.8
F1.6-F3.5
Optical Zoom
12 x
20 x
Digital Zoom
12 x
Field of View
72.5°-6.3°
59.5°-2.9°
Focus System
Auto, Manual, PTZ Trigger, One Push Trigger
Min. Illumination
0.5 lux(color), 0.1Lux (B/W)
Shutter Speed
1/1-1/10,000 s
Gain
Auto /Manual
White Balance
Auto, Indoor, Outdoor, One Push, Manual, Auto Tracking,
Sodium Lamp
,
Fluorescent Lamp
Wide Dynamic
Yes
Exposure Control
Auto, Manual, Shutter Priority, Iris Priority, Brightness Priority
S/N
≥50dB
DNR
Yes
BLC
Support
Preset Number
256
OSD
Yes
Image flip
Yes
SDI output
Video output
1080p60, 1080p50, 1080p30, 1080p25,
1080
i
60, 1080
i
50, 720p60, 720p50
Network
Max Resolution
1920*1080@60fps
Video
Compression
H.265, H.264
Network Protocol
HTTP, RTSP, RTMP, TCP, UDP, ONVIF
Max View Channel 10 Channel
Network Interface
RJ45, 100M, optional POE
Dual Stream
Yes
Interface
Video output(HD)
1channel 3G-SDI interface
Comm. Port
RS-232, RS-485
General
Protocol
VISCA/PELCO-D/ PELCO-P
Address
1-7 (VISCA), 0-255 (PELCO-D/ PELCO-P )
Power
DC12V
Power
Consumption
<
12W
Working Temp
0°C~+40°C
Storage Temp
-20°C~+60°C
Содержание ZC4-A2001N
Страница 1: ...IP HD SDI Integrated Camera User manual V1 0 ...
Страница 2: ......
Страница 6: ......
Страница 36: ...30 Dimensions 170mm 80mm 70mm Weight 0 83KG Color Grey ...
Страница 37: ...31 ANNEX 2 SIZE AND DIMENSION Front Bottom Top Side ...
Страница 39: ......


