background image

ENGLISH

11

INSTALLATION INSTRUCTIONS

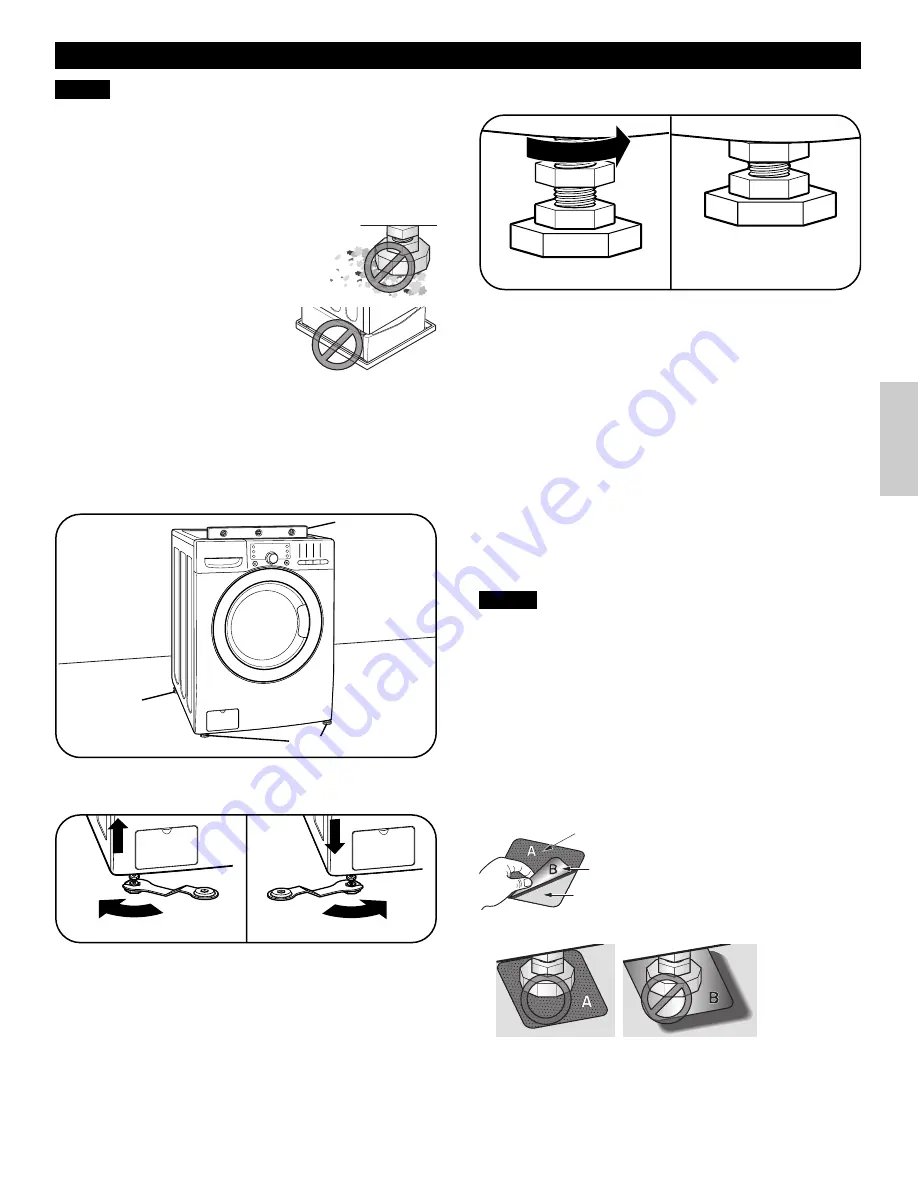
LEVELING THE WASHER

Raise

Level

Leveling Feet

Leveling

Feet

Lower

Tighten all 4 lock nuts

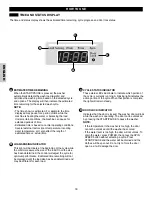
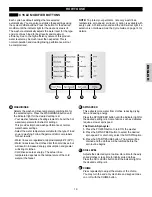
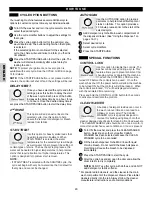
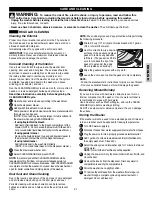
securely using the

wrench.

The drum of your new washer spins at very high speeds. 
To minimize vibration, noise, and unwanted movement, 
the floor must be a level, solid surface.

NOTE:

Adjust the leveling feet only as far as necessary to level

the washer. Extending the leveling feet more than necessary
can cause the washer to vibrate.

NOTE:

Before installing the washer, make

sure the floor is clean, dry and free of dust,
dirt, water and oils so the washer feet can
not slide easily.  Leveling feet that can move
or slide on the floor can contribute to excess
vibration and noise due to poor contact
with the floor.  See INSTALLATION OF
NON-SKID PADS below for more
information.

NOTE:

If a drip pan must be used, take extra care to follow the

instructions provided with the drip pan and make sure the
leveling feet are adjusted for firm and even contact with the
pan. Use of drip pans and failure to properly level the machine
may result in increased vibration and noise during operation.
• All four leveling feet must rest solidly on the floor. Attempt to

rock the washer from corner to corner to make sure that all
four leveling feet are in firm contact with the floor.

1.

Position the washer in the final location, taking special care
to not pinch, strain, or crush the water and drain lines. Place
a level across the top of the washer.

2.

Loosen the locknuts on all 4 leveling feet with the wrench
until you can adjust the feet.  Use the wrench to turn the feet
clockwise to raise the washer and counterclockwise to lower
the washer.  Using a level, adjust the feet until the washer is
level from side to side and front to back. Make sure all 4 feet
are in firm contact with the floor. 

NOTE:

If you are installing the washer on the optional pedestal,

the washer leveling feet should be fully retracted. Use the
leveling feet on the pedestal to level the washer.

3.

Once the washer is level from side to side and front to
back, use the adjusting wrench to tighten all four lock nuts
securely to prevent the legs from getting out of
adjustment during operation. 
Make sure that all 4 leveling feet are in firm contact with
the floor.

NOTE:

To make sure that the washer is properly level, run

the washer with a test load: place a medium-sized load of
laundry in the machine. Then press POWER, select RINSE
& SPIN, and then press the START/PAUSE button. See the
following sections for additional information on cycle
selection and operation. Verify that the washer does not
rock or vibrate excessively during the spin cycle. If the
washer vibrates or shakes, adjust the leveling feet, while the
washer is spinning, until the vibrations are reduced to a
minimum.

Some floor surfaces are too slippery to prevent the washer
from moving on the floor during heavily unbalanced loads.
While it is normal for an occasional load to be out of
balance, excess noise and vibration can result from the
washer moving out of position.  If these conditions are
encountered, follow the instructions below for installation of
the non-skid pads.  These pads will help prevent the washer
from moving during heavy out of balance conditions thereby
reducing noise and vibration.

Non-skid pads

INSTALLATION OF NON-SKID PADS

(optional)

✻ 

Place the pads under both front feet.

This side up

Stick adhesive side to floor

Remove backing

Содержание 796.4002 Series

Страница 1: ...ario Canada M5B 2B8 www sears com www sears ca Designed to use only HE High Efficiency detergent Diseñado para utilizar solamente detergente de alta eficacia Conçu pour l utilisation d un détergent haute efficacité seulement Protocol P172 Sanitization Performance of Residential and Commercial Family Sized Clothes Washers Protocolo P172 Ejecucion de Saneamiento en la zona residencial y comercial la...

Страница 2: ...money and aggravation The Master Protection Agreement also helps extend the life of your new product Here s what the Agreement includes Parts and labor needed to help keep products operating properly under normal use not just defects Our coverage goes well beyond the product warranty No deductible no functional failure excluded from coverage real protection Expert service by a force of more than 1...

Страница 3: ...ROGEN GAS IS EXPLOSIVE If the hot water system has not been used for such a period before using the washer turn ON all hot water faucets and let the water flow from each for several minutes This will release any accumulated hydrogen gas As the gas is flammable do not smoke or use an open flame during this time Do not allow children to play on or in the washer Close supervision of children is neces...

Страница 4: ...this appliance This washer must be plugged into a 120VAC 60Hz grounded outlet Failure to follow this warning can cause serious injury fire electrical shock or death Have the wall outlet and circuit checked by a qualified electrician to make sure the outlet is properly grounded Failure to follow this warning can cause serious injury fire electrical shock or death Where a standard 2 prong wall outle...

Страница 5: ... conductor and grounding plug The plug must be plugged into an appropriate outlet that is properly installed and grounded in accordance with all local codes and ordinances Improper connection of the equipment grounding conductor can result in risk of electric shock Check with a qualified electrician or serviceman if you are in doubt as to whether the appliance is properly grounded Do not modify th...

Страница 6: ...ra large door locks during operation and has a delay feature to prevent the door from being opened until it is safe to do so F FILTER ACCESS PANEL Provides easy access to the drain pump filter which allows you to clean the filter or retrieve lost items without a service call G LEVELING FEET Four leveling feet two in the front and two in the back adjust to improve washer stability on uneven floors ...

Страница 7: ...be positioned so that the plug is easily accessible Do not overload the outlet with more than one appliance The outlet must be grounded in accordance with current wiring codes and regulations Time delay fuse or circuit breaker is recommended NOTE It is the personal responsibility and obligation of the product owner to have a proper outlet installed by a qualified service person Allow at least 211 ...

Страница 8: ...ers MUST be removed before operating the washer Failure to remove shipping bolts and retainers may cause severe vibration and noise which can lead to permanent damage to the washer NOTE The power cord is secured to the back of the washer with a shipping bolt to help prevent operation with shipping bolts in place 1 Starting with the bottom 2 shipping bolts use the included wrench to fully loosen al...

Страница 9: ...ectly Other hoses may not tighten correctly and could cause leaks Subsequent damage to product or property will not be covered under the terms of the product warranty Water supply pressure must be between 14 5 psi and 116 psi 100 800 kPa If the water supply pressure is more than 116 psi a pressure reducing valve must be installed Periodically check the hose for cracks leaks and wear and replace th...

Страница 10: ...ain hose more than 4 inches past the end of the elbow bracket Use tie strap to secure the drain hose in place NOTE Total height of the hose end should not exceed 96 in 243 8 cm from the bottom of the washer The drain hose should be inserted no more than 8 12 inches into the standpipe Extending the drain hose more than 4 inches past the end of the elbow bracket can cause mold or microorganisms to s...

Страница 11: ...e washer and counterclockwise to lower the washer Using a level adjust the feet until the washer is level from side to side and front to back Make sure all 4 feet are in firm contact with the floor NOTE If you are installing the washer on the optional pedestal the washer leveling feet should be fully retracted Use the leveling feet on the pedestal to level the washer 3 Once the washer is level fro...

Страница 12: ...cycle See the cycle guide on page 14 for allowable settings To protect your fabrics not all settings are allowed in all cycles C START PAUSE BUTTON Press this button to start the selected cycle If the washer is running use this button to pause the cycle without losing the current settings NOTE If you do not press the START PAUSE button within 4 minutes of selecting a cycle the washer automatically...

Страница 13: ...ngs for that cycle will be shown Refer to page 12 5 SELECT CYCLE MODIFIERS Default settings for the selected cycle can now be changed if desired This can be done using the cycle modifier buttons as shown on page 19 Wash Rinse Spin Speed Soil Level and Chime NOTE To protect your fabrics not all modifiers are available on all cycles 2 ADD DETERGENT AND OTHER PRODUCTS Open the dispenser drawer and ad...

Страница 14: ...mal Heavy Light Express Wash Lightly soiled clothing and small loads Hot Cold Cold Cold Warm Cold Warm Warm High Extra High No Spin Low Medium Normal Heavy Light Cold Clean Small loads of cotton linen towels shirts sheets jeans mixed loads Cold Cold High Extra High No Spin Low Medium Normal Light Sanitize Heavily soiled items such as work clothes diapers etc Cold Cold Warm Cold Warm Warm Medium No...

Страница 15: ...amage to the clothing care should be taken to sort the clothing into loads that are made up of similar items Mixing different fabric types and or soil levels can result in poor wash performance color transfer or discoloration fabric damage or linting Fabrics should be sorted into groups as described below Colors Sort articles by color Wash dark clothes together in a separate load from light colors...

Страница 16: ...abrics Never pour undiluted liquid chlorine bleach directly onto the load or into the drum Fabric damage can occur Liquid Bleach Compartment This compartment holds liquid fabric softener which will be automatically dispensed during the final rinse cycle Never exceed the manufacturer s recommendations when adding softener Using too much fabric softener can result in buildup in clothing and the wash...

Страница 17: ...ne care must be used when measuring the detergent For most normal loads no more than 1 2 to 3 4 of a cup or scoop of HE detergent should be used NOTE Extra care must be exercised when using 2X and 3X concentrated detergents because even a little bit extra can contribute to the problems mentioned above NOTE Detergents designated as HE COMPATIBLE may not provide optimal results The normal amount nee...

Страница 18: ...tion of the cycle When that portion is complete the light will remain steady D DOOR LOCK INDICATOR Indicates that the door is locked The washer door will lock while the washer is operating The door can be unlocked by pressing the START PAUSE to pause the washer NOTE If the temperature in the washer is too high the door cannot be unlocked until the washer has cooled If the water level is too high t...

Страница 19: ...SPIN SPEED button to select the desired spin speed For drain only select the NO SPIN option 3 Press the START PAUSE button The water will be drained and the clothes will be tumbled before the spin routine begins C SOIL LEVEL Adjusts the selected cycle to allow more time for heavily soiled clothes or less time for lightly soiled clothes Press the SOIL LEVEL button until the indicator light for the ...

Страница 20: ...t at higher temperatures This option is designed for optimum stain removal NOTE If STAIN TREAT is selected with the SANITIZE cycle the cycle will begin with very hot water since that is default for that cycle and cannot be changed NOTE To protect your garments not every option is available with every cycle See the CYCLE GUIDE on page 14 for details NOTE If the START PAUSE button is not pressed wit...

Страница 21: ...riod of time and is in an area that could be exposed to freezing temperatures Storing the Washer 1 2 3 4 Turn OFF water supply tap Disconnect hoses from water supply and drain water from hoses Plug the power cord into a properly grounded electrical outlet Add 1 gallon of nontoxic recreational vehicle RV antifreeze to the empty wash drum Close door Select the spin cycle and let washer spin for 1 mi...

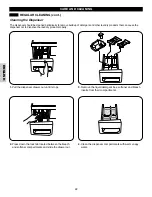
Страница 22: ...between the bleach and softener compartments and slide the drawer out SOFTENER MAX 4 Clean the dispenser compartments with warm soapy water 1 Pull the dispenser drawer out until it stops The dispenser should be cleaned periodically to remove buildup of detergent and other laundry products that can cause the dispenser not to dispense the laundry product properly Cleaning the Dispenser ...

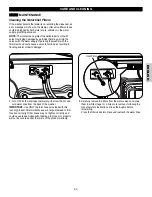
Страница 23: ...n flooding and or property damage 1 Turn OFF both water taps completely Unscrew the hot and cold water lines from the back of the washer IMPORTANT Use ONLY the inlet hoses provided with this laundry product Aftermarket hoses are not guaranteed to fit or function correctly Other hoses may not tighten correctly and could cause leaks Subsequent damage to product or property will not be covered under ...

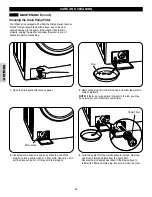
Страница 24: ... from the drain hose and allow the water to drain completely NOTE If there is a large amount of water in the tub you may have to empty your container several times 2 Unclip the drain hose and pull it out Place the end of the drain hose into a shallow pan or a floor drain Use care not to pull the hose out too far or it may not drain properly 4 Twist the pump filter counterclockwise to remove Remove...

Страница 25: ...urgling Drain pump pumping water from the washer at the end of a cycle Splashing Clothes tumbling in the drum during the wash and rinse cycles Fill hose connection is loose at tap or washer House drain pipes are clogged Drain hose has come out of drain Drain hose is not inserted far enough Check hoses Check and tighten hose connections Unclog drain pipe Contact a plumber if necessary Tie drain hos...

Страница 26: ...er supply connected with leak limiting hoses Make sure that the water taps are open fully Make sure the hoses are not kinked or pinched Be careful when moving the washer Clean the inlet filters See Maintenanse in the Care and Cleaning section on page 23 Check another faucet in the house to make sure that household water pressure is adequate Hoses designed to limit leaks can trip falsely and preven...

Страница 27: ... only an estimate Actual time may vary Wash cycle time is longer than usual Check if Then Washer not unloaded promptly Washer overloaded Hot and cold water inlet hoses are reversed Always remove items from the washer as soon as the cycle is complete The washer can be fully loaded but the drum should not be tightly packed and the door should close easily Hot water rinse can set wrinkles in garments...

Страница 28: ... display shows Check if Then Water level is too high due to a faulty water valve Close the water taps unplug the washer and call for service The display shows Check if Then The water level sensor is not working correctly Close the water taps unplug the washer and call for service The display shows Check if Then Thermal overload protection circuit in the motor has been tripped Allow the washer to s...

Страница 29: ... to all the instructions supplied with the product 5 Damage to or failure of this product resulting from accident abuse misuse or use for other than its intended purpose 6 Damage to or failure of this product caused by the use of detergents cleaners chemicals or utensils other than those recommended in all instructions supplied with the product 7 Damage to or failure of parts or systems resulting ...

Страница 30: ... une aggravation Il vous permet en outre d allonger la durée de vie de votre nouveau produit Voici les termes de l accord Les pièces et main d œuvre nécessaires au bon fonctionnement de l appareil dans des conditions normales d utilisation Notre couverture s étend bien au delà de la garantie du produit Aucune franchise ni panne de fonctionnement n est exclue de la couverture une vraie protection U...

Страница 31: ...nes ou plus L HYDROGÈNE EST UN GAZ EXPLOSIF Si le système à eau chaude n a pas été utilisé pendant une telle période avant de faire fonctionner la machine à laver faites couler tous les robinets d eau chaude pendant plusieurs minutes Cette technique libérera tout hydrogène accumulé Comme ce gaz est inflammable ne fumez pas et n utilisez aucune flamme pendant ce temps Ne laissez pas les enfants jou...

Страница 32: ...de la prise en la tirant droit Tout non respect de cet avertissement peut entraîner des blessures graves un incendie une électrocution ou la mort Quand vous installez ou déplacez votre machine à laver prenez soin de ne pas pincer écraser ou endommager le cordon d alimentation Tout non respect de cet avertissement peut entraîner des blessures graves un incendie une électrocution ou la mort Vous dev...

Страница 33: ...e mise à la terre de l appareil et d une fiche de mise à la terre La fiche doit être branchée dans une prise appropriée correctement installée et raccordée à la terre conformément à toutes les normes et réglementations locales Un raccordement incorrect du conducteur de mise à la terre de l appareil peut entraîner un risque de déchargement électrique Consultez un électricien ou un technicien qualif...

Страница 34: ...t dispose d une fonction d ouverture différée pour empêcher qu elle ne s ouvre les conditions de sécurité doivent être réunies F PANNEAU D ACCÈS AU FILTRE Permet d accéder facilement au filtre de la pompe de vidange pour nettoyer le filtre ou récupérer les objets perdus sans avoir à contacter le service de maintenance G PIEDS DE NIVELLEMENT Quatre pieds de nivellement deux à l avant et deux à l ar...

Страница 35: ... de prévoir suffisamment d espace pour les moulures murales de portes ou de plancher qui peuvent augmenter les espaces requis Pour minimiser le bruit et la vibration la machine à laver DOIT être installée sur un plancher solide Consultez la NOTE à droite La pente permise sous la machine à laver dans son entier est d un maximum de 1 Les revêtements de tapis et de tuiles souples ne sont pas recomman...

Страница 36: ...xation de transport avant d utiliser la machine à laver ils risquent de provoquer d importantes vibrations et bruits qui au final peuvent détériorer irrémédiablement la machine à laver REMARQUE le cordon d alimentation est sécurisé à l arrière de la machine à laver par un boulon de transport qui permet d empêcher le fonctionnement de la machine 1 En commençant par les 2 boulons d expédition du bas...

Страница 37: ...ENT les tuyaux d entrée fournis avec cet appareil électromén ager Il n est pas garanti que les tuyaux de rechange s adaptent ou fonctionnent correct ement Les autres tuyaux pourraient ne pas bien se serrer et causer des fuites Les dommages subséquents au produit ou à la propriété ne seront pas couverts confo rmément aux modalités de la garantie La plage de pression de l alimentation d eau est de 1...

Страница 38: ...bride de retenue Utilisez une courroie de fixation pour maintenir en place le tuyau d évacuation REMARQUE La hauteur totale de l extrémité du tuyau ne doit pas être supérieure à 96 po 243 8 cm à partir du bas de la machine à laver N insérez pas le tuyau de vidange plus de 8 12 pouces 20 30 centimètres dans le tuyau de renvoi Si le tuyau d évacuation se prolonge de plus de 10 centimètres au delà de...

Страница 39: ...ajustez les pieds jusqu à ce que le lave linge soit parfaitement de niveau dans tous les sens Assurez vous que les 4 pieds soient fermement en contact avec le sol REMARQUE si vous installez la machine à laver sur le socle optionnel les pieds de mise à niveau de la machine à laver doivent être totalement rétractés Utilisez les pieds de mise à niveau sur le socle pour niveler la machine à laver 3 Dè...

Страница 40: ...our connaître les réglages autorisés Pour protéger les tissus les réglages ne sont pas tous autorisés pour l ensemble des cycles C BOUTON DE MISE EN MARCHE PAUSE Appuyez sur ce bouton pour DÉMARRER le cycle sélectionné Si la machine à laver est en fonction utilisez ce bouton pour faire une PAUSE dans le cycle sans perdre les paramètres actuels REMARQUE si vous n appuyez pas sur le bouton START PAU...

Страница 41: ...TEURS DE CYCLE Les paramètres par défaut pour le cycle sélectionné peuvent désormais être modifiés si vous le souhaitez Pour cela vous pouvez utiliser les boutons de modificateur de cycle comme indiqués à la page 77 Wash Rinse lavage rincage Spin Speed vitesse d essorage Soil Level niveau de saleté et Chime sonnerie REMARQUE Pour protéger les tissus les modificateurs ne sont pas tous disponibles p...

Страница 42: ...haud Froid Chaud Chaud Très chaud Froid Froid Froid Rapide Très rapide Pas de rotation Lente Moyen Normal Lourd Léger Cold Clean Lavage à froid Petites charges de coton linge de maison serviettes chemises draps jeans charges mixtes Très chaud Froid Froid Froid Chaud Froid Chaud Chaud Rapide Très rapide Pas de rotation Lente Moyen Normal Lourd Léger Sanitize Hygiénique Vêtements très sales tels que...

Страница 43: ...tri des vêtements Mélanger différents types de tissus et ou de niveaux de saleté peut entraîner un faible rendement de lavage un transfert de couleur ou une décoloration endommager ou effilocher les tissus Les tissus doivent être regroupés comme indiqué ci dessous Couleurs Trier les vêtements selon la couleur Lavez les vêtements foncés dans un même chargement séparés des vêtements blancs ou de cou...

Страница 44: ...r les tissus Trop de javellisant peut endommager les tissus Ne versez jamais de javellisant non dilué directement dans la brassée ou dans le tambour Vous pourriez endommager les tissus Compartiment à javellisant liquide Ce compartiment contient l assouplissant liquide qui sera automatiquement distribué durant le cycle du rinçage final Ne dépassez jamais les doses d adoucissant recommandées par le ...

Страница 45: ...ines normalement chargées il ne faut pas utiliser plus de 1 2 à 3 4 d une dose de lessive HE REMARQUE Il faut être tout particulièrement attentif lorsqu on utilise une lessive 2 ou 3 fois plus concentrée car même un tout petit surdosage peut contribuer à l apparition des problèmes indiqués ci dessus REMARQUE certaines lessives désignées comme COMPATIBLES HE peuvent ne pas donner des résultats opti...

Страница 46: ... D INDICATEUR DE DOOR LOCK VERROUILLAGE DE LA PORTE Indique que la porte est verrouillée La porte de la machine à laver se verrouillera automatiquement lorsqu elle est en fonction La porte peut être déverrouillée à l aide du bouton START PAUSE MARCHE PAUSE pour arrêter la machine REMARQUE Si la température dans la machine à laver est trop élevée la porte ne peut pas être déverrouillée jusqu à ce q...

Страница 47: ...essorage souhaitée Pour procéder uniquement à l évacuation de l eau choisir l option NO SPIN pas d essorage 3 Appuyer sur le bouton START PAUSE MARCHE PAUSE L eau sera évacuée et les vêtements seront balancés dans le tambour avant le début du cycle d essorage C SOIL LEVEL niveau de saleté Ajustez le cycle sélectionné pour permettre davantage de temps pour les vêtements très sales ou moins de temps...

Страница 48: ...1 2 3 4 Mettez en marche la machine a laver et tournez le bouton selecteur de cycle au cycle desire Utilisez les boutons de reglage de cycle pour ajuster les parametres de ce cycle Appuyez sur le ou les boutons d options de cycles afin de sélectionner les paramètres que vous aimeriez ajouter Les boutons d options de cycles s allumeront lorsqu ils sont sélectionnés Si l option sélectionnée n est pa...

Страница 49: ...ez les tuyaux de l alimentation d eau et purgez l eau qu ils contiennent Branchez le cordon électrique dans une prise correctement mise à la terre Ajoutez 1 gallon d antigel non toxique pour véhicule récréatif VR au tambour vide de la machine à laver Fermez la porte Sélectionnez le cycle d essorage et laissez la machine à laver essorer pendant 1 minute pour vidanger toute l eau REMARQUE Le liquide...

Страница 50: ... de l adoucissant puis retirez le tiroir en le faisant glisser SOFTENER MAX 1 Tirez sur le tiroir du distributeur jusqu à ce qu il s arrê te de lui mê me Le distributeur doit être nettoyé régulièrement afin d éliminer éliminer les accumulations de lessive et autres produits qui peuvent empêcher le distributeur de répartir le produit de façon homogène le produit Nettoyage du distributeur 4 Nettoyez...

Страница 51: ...erture de la soupape et entraîner une inondation et ou des dégâts matériels 1 Fermez complètement les deux robinets Dévissez les conduites d eau chaude et d eau froide de l arrière de la machine à laver IMPORTANT soyez extrêmement prudent lorsque vous retirez et nettoyez les filtres Si les filtres ne peuvent pas être nettoyés ou qu ils sont endommagés ne faites PAS fonctionner la machine à laver s...

Страница 52: ...t laissez l eau se vider complètement REMARQUE si la cuve contient beaucoup d eau il faudra peut être vider le récipient plusieurs fois 2 Déclipsez la sortie d eau puis retirez la Placez l extrémité de la sortie d eau dans un récipient peu profond ou une bouche d évacuation Veillez à ne pas à ne pas trop tirer sur le tuyau afin que l évacuation s effectue correctement 4 Tournez le filtre de pompe ...

Страница 53: ...e de vidange s écoulant de la machine à laver à la fin d un cycle Eclaboussures Vêtements tournant dans le tambour durant les cycles de lavage et de rinçage Le raccord du tuyau de remplissage est desserré au niveau du robinet ou de la machine à laver Les conduites de vidange de la maison sont obstruées Le tuyau d évacuation est sorti du drain Le tuyau d évacuation n est pas suffisamment enfoncé Vé...

Страница 54: ...conçus pour limiter les fuites Assurez vous que les robinets sont entièrement ouverts Assurez vous que les tuyaux ne sont pas tordus ou pincés Attention lorsque vous déplacez la machine à laver Nettoyez les filtres de remplissage Consultez Entretien dans la section Entretien et Nettoyage page 81 Vérifiez les autres robinets pour vous assurer que la pression d eau dans la maison est suffisante Les ...

Страница 55: ...r si Alors La machine à laver ne se vide pas rapidement La machine à laver est surchargée Les tuyaux d alimentation en eau chaude et froide ont été inversés Sortez toujours les articles de la machine à laver dès que le cycle est terminé La machine à laver peut être complètement chargée mais les articles ne doivent pas être compressés dans le tambour La porte de la machine à laver doit pouvoir se f...

Страница 56: ...Le niveau d eau est trop élevé à cause d un dysfonctionnement de la soupape d eau Fermez les robinets débranchez la machine et appelez le service L écran affiche Vérifier si Alors Le capteur de niveau d eau ne fonctionne pas correctement Fermez les robinets débranchez la machine et appelez le service L écran affiche Vérifier si Alors Le circuit de protection de surcharge thermique du moteur s est ...

Страница 57: ...e ou entretenue conformément à toutes les instructions fournies avec le produit 5 Tout dégât ou panne de la machine causé par un accident un usage abusif une mauvaise utilisation ou une utilisation dans un but autre que le but prévu par le fabricant 6 Tout dégât ou panne de la machine causé par l utilisation de lessives de produits nettoyants de produits chimiques ou d accessoires autres que ceux ...

Страница 58: ...MFL62526817 ...

Отзывы: