background image

Содержание 790.9760

Страница 1: ...e Guide Manual de Uso y Cuidado English Espaiol Models Modelos 790 9760 790 9763 _ Ke OFIO P N 318205227B 1301 Sears Brands Management Corporation Hofl man Estates IL 60179 U S A www kenmore com www sears com ...

Страница 2: ...ther than those recommended in all instructions supplied with the product 9 Damage to or failure of parts or systems resulting from unauthorized modifications made to this product Disclaimer of implied warranties limitation of remedies Customer s sole and exclusive remedy under this limited warranty shall be product repair as provided herein Implied warranties including warranties of merchantabili...

Страница 3: ...tions supplied with your range for proper installation In case of an emergency know how to disconnect the electrical power to the appliance at the circuit breaker or fuse box User Servicing Do not repair or replace any part of the appliance unless specifically recommended in the manuals All other servicing should be done only by a qualified technician to reduce the risk of personal injury and dama...

Страница 4: ...ng flat bottoms large enough to cover the surface unit The use of undersized utensils will expose a portion of the surface heating unit to direct contact and may result in ignition of clothing Proper relationship of utensil to the surface unit will also improve efflciency Utensil handles should be turned inward and not extend over adjacent surface units To reduce the risk of burns ignition of flam...

Страница 5: ...of the appliance remove the broiler pan and any utensils stored in the appliance Do not clean the oven door gasket The door gasket is essential far a good seal Care should be taken not to rub damage or move the gasket Do not use oven cleaners No commercial oven cleaner or oven liner protective coating of any kind should be used in or around any part of the appliance The health of some birds is ext...

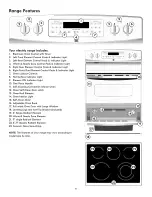
Страница 6: ...s 8 Hot Surface Indicator Light 9 Element ON Indicator Light 10 One Piece Handle 11 Self Cleaning Convection Interior Oven 12 Oven Self Clean Door Latch 13 Oven Broil Element 14 Oven Interior Light 15 SeJf CJeanOven 16 Adjustable Oven Rack 17 Full width Oven Door with Large Window 18 Leveling Legs and Anti Tip Bracket included 19 6 Single Radiant Element 20 Warm Ready Zone Element 21 9 single Radi...

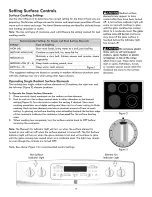
Страница 7: ... radiant surface elements are located on the cooktop as follows Two 6 inch radiant elements located at both right left rear positions One dual 6 or 9 inch radiant element located at the right front position One 9 inch radiant elements located at the left front position a Warmer Zone located at the center rear position Note Please read detailed instructions for ceramic glass cooktop cleaning in the...

Страница 8: ... a higher setting and then turn to a lower setting to finish cooking Each surface element provides a constant amount of heat at each setting A glowing red surface heating area extending beyond the bottom edge of the cookware indicates the cookware is too small for the surface heating area 3 When cooking has completed turn the surface control knob to OFF before removing the cookware Note The Elemen...

Страница 9: ...o keep hot cooked foods at serving temperature Use the Warmer Zone to keep cooked foods hot such as vegetables gravies casseroles soups stews breads pastries and oven safe dinner plates Always start with hot food it is not recommended to heat cold food on the Warmer Zone The Warmer Zone will not glow red when it is hot but becomes hot enough to cause burns Always use potholders or oven mitts when ...

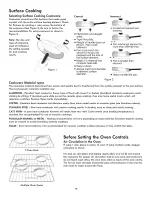
Страница 10: ... to darken Anodized aluminum cookware resists staining pitting If aluminum pans slide across the ceramic glass cooktop they may leave metal marks which will resemble scratches Remove these marks immediately COPPER Excellent heat conductor but discolors easily May leave metal marks on ceramic glass see Aluminum above STAINLESS STEEL Slow heat conductor with uneven cooking results Is durable easy to...

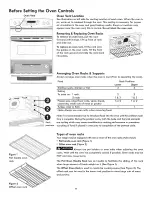
Страница 11: ... 1 or 2 1 or 2 casseroles small cuts of meat or poultry Turkey roast or ham 1 1 Note Always use oven mitts when removing food Note It is recommended not to introduce food into the oven until the preheat cycle time is complete During the preheat cycle both the bake and the broil elements are cycling which may cause unsatisfactory cooking performance or premature scorching of food if placed in oven ...

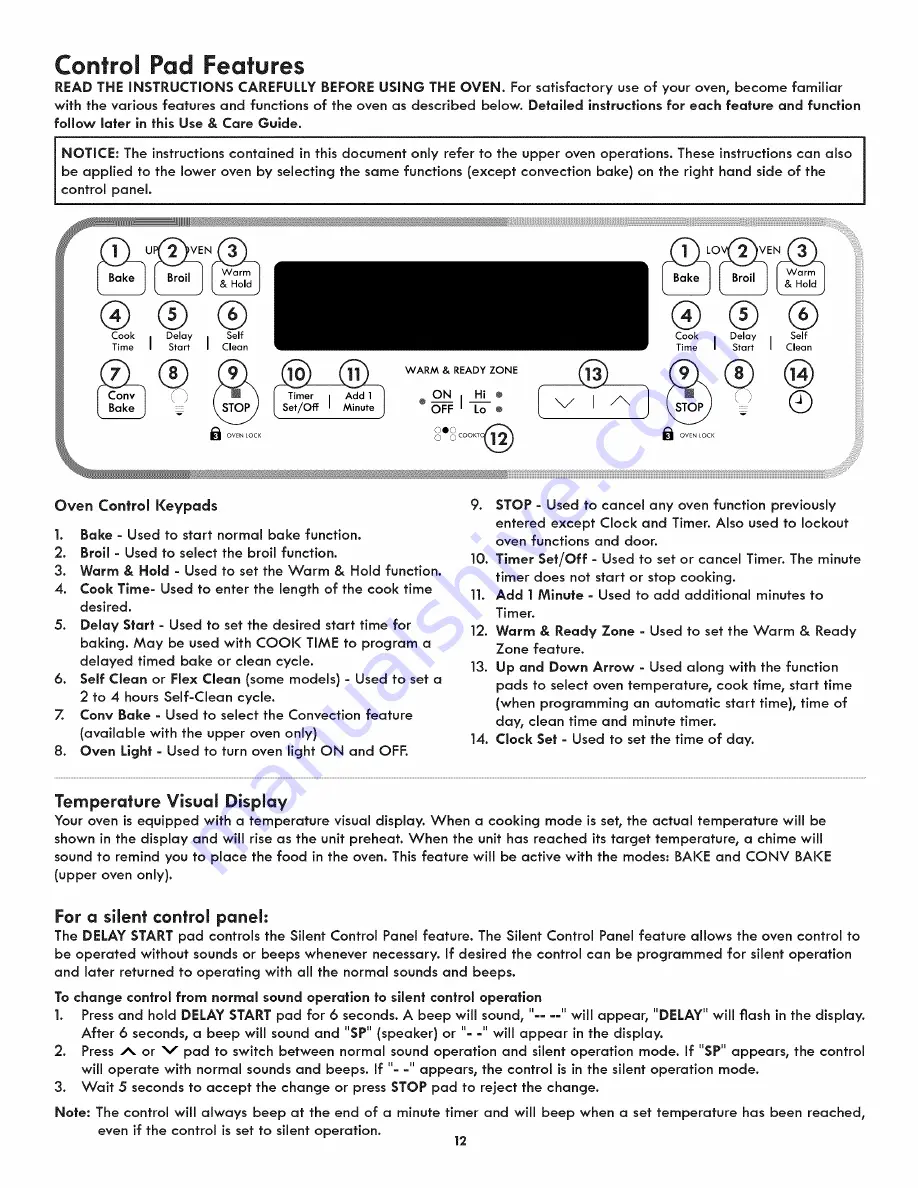
Страница 12: ...e Used to set the Warm Ready Zone feature 13 Up and Down Arrow Used along with the function pads to select oven temperature cook time start time when programming an automatic start time time of day clean time and minute timer 14 Clock Set Used to set the time of day Temperature Visual Display Your oven is equipped with a temperature visual display When a cooking mode is set the actual temperature ...

Страница 13: ...lash in the display 2 Press A or V pad to set the desired time in the display Wait 5 seconds and the time will begin to count down with the set time and TIMER will stay in the display 3 When the set time has run out End and TIMER will show in the display The clock will sound with 3 beeps every 7 seconds until TUMER SET OFF pad is pressed To cancel the Minute Timer before the set time has run out P...

Страница 14: ...y Saving The TIMER SET OFF pad controls the Continuous Bake or 12 Hour Energy Saving Features The oven control has a factory preset built in 12 Hour Energy Saving feature that will shut off the oven if the oven control is left on for more than 11 hours and 59 minutes The oven can be programmed to override this feature for Continuous Baking To set control for continuous baking 1 Pressand hold TIMER...

Страница 15: ...ure The automatic timer of the Delayed Bake will turn the oven ON at the time you select in advance Note If your clock is set for normal 12 hour display mode the Delayed Bake or Delayed Convection cycle can never be set to start more than 12 hours in advance If a 12 24 hours delay is needed set the control for 24 hours time of day display mode To Program Oven for a Delayed Start Time 1 Be sure tha...

Страница 16: ...n door opened too frequently Allow oven to preheat to the selected temperature before placing food in oven Choose pan sizes that will permit 5 1cm to 10 2cm 2 to 4 of air space on all sides when placed in the oven Use a medium weight aluminum baking sheet Allow oven to preheat to the selected temperature before placing food in the oven Use proper rack position for baking needs Set oven temperature...

Страница 17: ...is in the broil stop position 8 Broil on one side until food is browned turn and cook on the second side Season and serve Note Always pull the rack out to the stop position before turning or removing food 9 To cancel broiling press STOP pad Note The broil temperature setting may be changed at any time Not supplied with appliance Note Broiler pan and its insert allow dripping grease to drain and be...

Страница 18: ...ll remain in the display Note The Keep Warm feature will automatically turn OFF after 3 hours Pressing STOP pad at any time will stop all oven baking operations Setting Convection Upper Oven Only The CONV BAKE pad controls the Convection feature Use the Convection feature when cooking speed is desired The oven can be programmed for Convection at any temperature between 170 F 77 C to 550 F 288 C Co...

Страница 19: ...his time If not skip this step and continue to step 8 Refer to the Timed Bake complete steps 6 8 Delayed Start Bake complete steps 6 8 section for complete instructions Remember the oven will shut down after using Timed Bake or Delayed Timed Bake and therefore may only be used once during the Sabbath Jewish Holidays The maximum Delayed Timed Bake time is 11 hours 59 minutes 7 The oven will turn ON...

Страница 20: ...perature 1 Press and hold upper or lower oven BAKE pad for 6 seconds The preset adjustment number will appear and UPPER or LOWER will flash in the display 2 To increase the temperature use the A pad to enter the desired change The temperature may be increased as much as 35 F 19 C To decrease the temperature use the v pad to enter the desired change The temperature may be decreased as much as 35 F ...

Страница 21: ...e oven door gasket The woven material of the oven door gasket is essential for a good seal Care should be taken not to rub damage or remove the gasket DO NOT use any cleaning materials on the oven door gasket Doing so could cause damage Remove all utensils and any aluminum foil These items canno_ wlfhsfand high cleaning temperatures Oven racks do not have to be removed but remaining in the oven du...

Страница 22: ...he oven door is closed 2 Press DELAY START DELAY will flash 3 Press and hold the A pad to scroll to the time to start the delayed Self Clean cycle Release the pad when the desired time is displayed 4 Press SELF CLEAN or FLEX CLEAN some models CLN appears in the display 5 Press the j_ or V once 3 00 appears in the display for a 3 hour cycle To change to a 2 hour cycle pressV 2 00 appears in the dis...

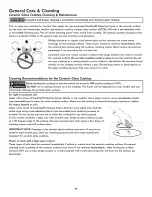
Страница 23: ...es of both the knob and the shaft then push the knob into place Clean stainless steel with hot soapy water and a dishcloth Rinse with clean water and a cloth Do not use cleaners with high concentrations of chlarldes or chlorlnes Do not use harsh scrubbing cleaners Only use kitchen cleaners that are especially made for cleanincj stainless steel Always be sure to rinse the cleaners from the surface ...

Страница 24: ...top be sure the controls are turned to OFF and the cooktop is COOL DO NOT use a cooktop cleaner on a hot cooktop The fumes can be hazardous to your health and can chemically damage the ceramic glass surface For llghf fo moderate soil Apply a few drops of CookTop Cleaning Creme directly to the cooktop Use a paper towel or use a non abrasive plastic type no scratch pad to clean the entire cooktop su...

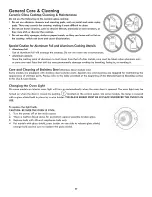
Страница 25: ...breaking fusing to or marking it Care and Cleaning of Stainless Steel Stainless Steel models only Some models are equipped with stainless steel exterior parts Special care and cleaning are required for maintaining the appearance of stainless parts Please refer to the table provided at the beginning of the General Care Cleaning section in this Use Care Guide Changing the Oven Light On some models a...

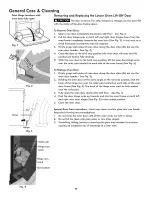
Страница 26: ...de of the oven frame See Fig 4 To Replace Oven Door 1 Firmly grasp both sides of oven door along the door sides Do not use the oven door handle See Fig 3 2 Holding the oven door at the same angle as the removal position seat the hook of the hinge arm over the roller pins located on each side of the oven door frame See Fig 4 The hook of the hinge arms must be fully seated onto the roller pins 3 Ful...

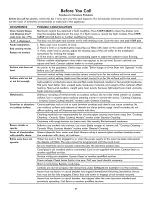
Страница 27: ...s and weight of the material affect heating Heavy and medium weight pans heat evenly Because lightweight pans heat unevenly foods may burn easily Sliding or scraping of metal utensils on cooktop surface Do not slide metal utensils on cooktop surface Use a ceramic glass cooktop cleaning cream to remove the marks Cooktop Cleaning Ceramic Glass Cooktop Models section under General Cleaning Coarse par...

Страница 28: ...ee Baklng for hints causes and corrections See Adjusflng Oven Temperature Burned out or loose bulb Follow the instructions under Changlng Oven Light to replace or tighten the bulb A cooling fan may automatically turn on and off to cool internal parts This is normal and the fan may continue to run even after oven is turned off Make sure the oven door is closed Controls not set properly Follow instr...

Страница 29: ...a durabilidad de su nuevo producto El acuerdo incluye Io siguiente Piezas y mano de obra necesarias para contribuir a mantener el funcionamiento adecuado de los productos utilizados en condiciones normales de uso no s61o en caso de defectos de los productos Nuestra cobertura va mucho m_is alibi que la garantia del producto No se aplican deducibles ni exclusiones por fallas del funcionamiento es de...

Страница 30: ...n items like vacuums lawn equipment and electronics call anytime for the location of your nearest Sears Parts Repair Service Center 1 800 488 1222 U S A 1 800 469 4663 Canada www sears com www sears ca To purchase a protection agreement on a product serviced by Sears 1 800 827 6655 U S A 1 800 361 6665 Canada Para pedir servicio de reparaci6n a domicilio y para ordenar piezas 1 888 SU HOGAR 1 888 ...

Отзывы: