background image

Содержание 7560 30" Gas Range

Страница 1: ...ANTI TIP DEVICE PACKED WiTH RANGE SEE iNSTALLATiON iNSTRUCTiONS RANGE OVERALL DIMENSIONS 253 4 47 3 4 Maximum 36 1 8 FRONT Wall on Either Side of Range Above 36 Height Note 3 30 Clearance Minimum if Equipped 2 with 11000 or greater BTU Burners SIDE VIEW t Minimumto 14 13 _1 18 Cabinets on Maximum Depth Either Side for Cabinets of Range Above Range Top Clearances and Dimensions 1 Location Check loc...

Страница 2: ...n air at the oven vent nor around the base or beneath the lower front panel of the range Avoid touching the vent openings or nearby surfaces as they may become hot while the oven is inoperation This range requires fresh air for proper burner combustion Never leave children alone or unattended in the area where an appliance is in use As children grow teach them the proper safe use of all appliances...

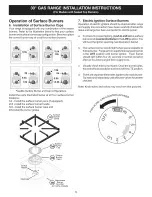
Страница 3: ... installation in wood or cement fastened to either the floor or wall When installed to the wall make sure that screws completely penetrate dry wall and are secu red in wood or metal When fastening to the floor or wall be sure that screws do not penetrate electrical wiring or plumbing A Locate the Bracket Using the Template Bracket may be located on either the left or right side of the range Use th...

Страница 4: ... manifold pressure A convertible pressure regulator is connected to the manifold and MUST be connected in series with the gas supply line If the LP Propane conversion kit has been used follow instructions provided with the kit for converting the pressure regulator to LP Propane use The LP kitcan be found on the back side of the range 4 Connect the range to the gas supply To prevent leaks put a pip...

Страница 5: ... gas supply inlet pressure is at least one inch above specified range manifold pressure The gas supply pressure should never be over 14 water column When properly adjusted for Natural Gas the manifold pressure is 4 For LP Propane Gas the manifold pressure is 10 5 Read electrical connection details below and connect electricity to range Before servicing disconnect electrical supply at circuit break...

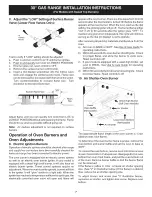
Страница 6: ...hen gas is available to thetop burner Purge airfrom supply lines by leaving knob in the LITE position until burner ignites Each burner should light within four 4 seconds in normal operation after air has been purged from supply lines c Visually check that burner has lit Once the burner lights the control knob should be turned out of the LITE position d There are separate electrodes igniters for ea...

Страница 7: ...e oven burner There is a time lapse from 30 to 60 seconds after the thermostat is turned ON before the flame appears at the oven burner When the oven reaches the dial setting the glowing igniter will go off The burnerfiame will go out in 20 to 30 seconds after the igniter goes OFF To maintain any given oven temperature this cycle will continue as long as the dial or display is set to operate After...

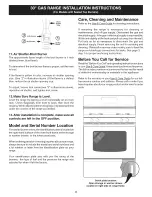
Страница 8: ...n your Use Care Guide It may save you time and expense The list includes common occurrences that are not the result of defective workmanship or materials in this appliance Refer to the warranty in your Use Care Guide for our toll free service number and address Please call or write if you have inquiries about your range product and or need to order parts 12 Make Sure Range is Level Level the range...

Отзывы: