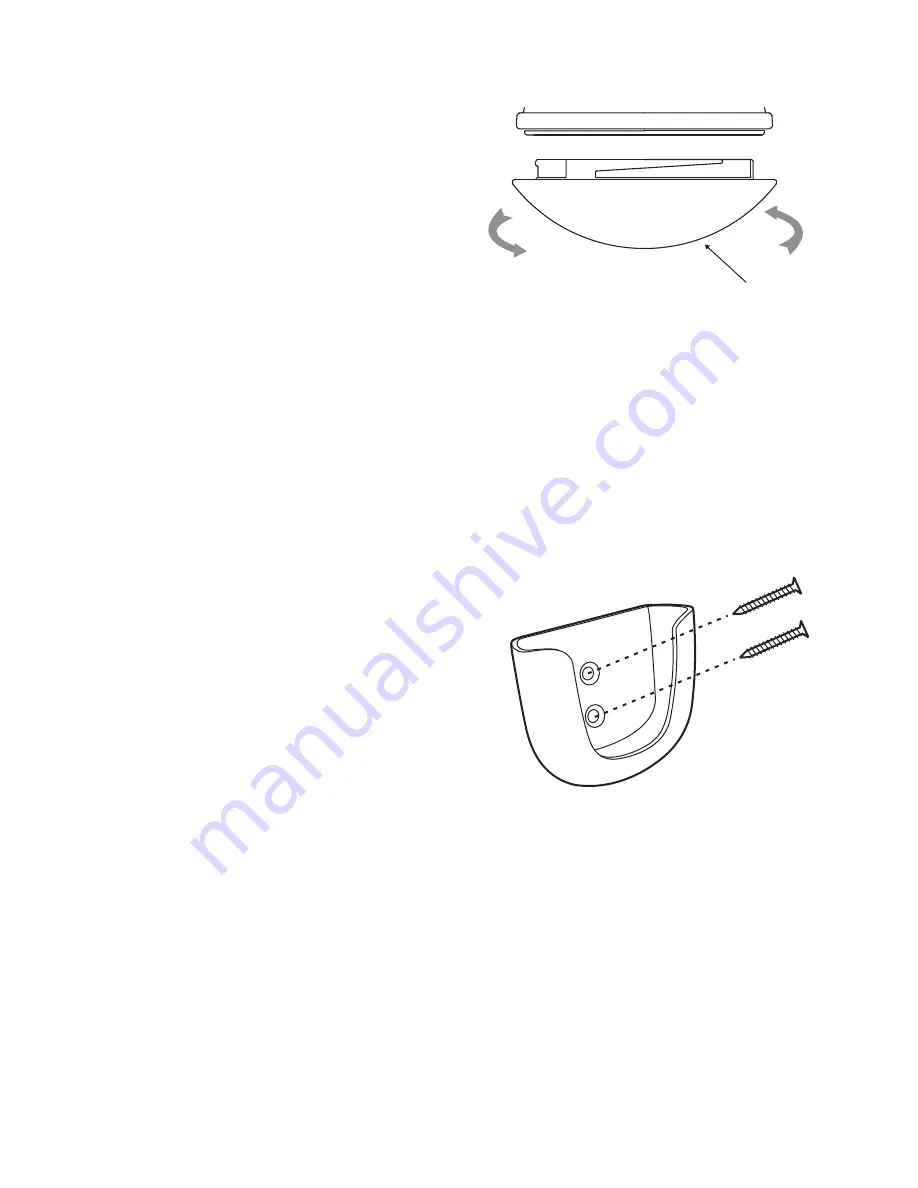
Kendal Lighting AC-20070 Скачать руководство пользователя страница 9

8

Figure 15

Figure 16

12. ATTACHING THE 

GLASS SHADE


Install  the  glass  shade  by  carefully 

turning  it  clockwise  until  snug. 

DO  NOT 

OVERTIGHTEN.

 (Fig. 15)

Glass shade

13. INSTALLING THE 

TRANSMITTER 

HOLDER

Attach the remote control holder with the two 

remote control holder mounting screws.

(Fig.16)

Содержание AC-20070

Страница 1: ...UCTIONS INSTALLATION INSTRUCTIONS C E T L LISTED MODEL CF570ER BRD Weight of Fan 12 30Kgs KENDAL LIGHTING Kendal Lighting BC Inc 110 6780 Dennett Place Delta BC V4G 1N4 Canada Tel 604 952 5510 Fax 604...

Страница 2: ...nger bracket b Canopy c Canopy cover d Coupling cover e Downrod assembly f Fan motor assembly g Mounting plate h 17W LED assembly i Glass shade j Blade set 5 k Blade holder 5 l Transmitter m Transmitt...

Страница 3: ...d blades stopped before reversing blade direction 7 Avoid placing objects in the path of the blades WARNING TO REDUCE THE RISK OF FIRE ELECTRIC SHOCK OR PERSONAL INJURY MOUNT FAN TO OUTLET BOX MARKED...

Страница 4: ...weight of the fan at least 50 lbs Do not use plastic outlet boxes Figures 1 2 and 3 are examples of different ways to mount the outlet box Note You may need a longer downrod to maintain proper blade c...

Страница 5: ...ottom of the downrod with the holes in the collar on top of the motor housing Fig 6 Carefully insert the hanger pin through the holes in the collar and downrod Be careful not to jam the pin against th...

Страница 6: ...provided Step 2 Figure 8 If your outlet box has a ground wire green or bare copper connect it to the fan ground wires otherwise connect the hanging bracket ground wire to the hanger ball ground wire...

Страница 7: ...atly into ceiling outlet box Step 2 Slide the canopy up to hanger bracket and place the key hole on the canopy over the screw on the hanger bracket turn canopy until it locks in place at the narrow se...

Страница 8: ...ning off the circuit breaker or removing the fuse at fuse box Turning power off using the fan switch is not sufficient to prevent electric shock Figure 14 Screw Mounting plate 17W LED assembly White w...

Страница 9: ...S SHADE Install the glass shade by carefully turning it clockwise until snug DO NOT OVERTIGHTEN Fig 15 Glass shade 13 INSTALLING THE TRANSMITTER HOLDER Attach the remote control holder with the two re...

Страница 10: ...he battery is secure with the matching terminals The remote hand set will have illumination lights that will come on once a function is pressed This light indicates the remote has a good battery If yo...

Страница 11: ...you to set your heating unit on a cooler setting without affecting your comfort Special Notes The fan comes with a fully functional remote control system The system is preprogrammed at the factory for...

Страница 12: ...appearance over the years Use only a soft brush or lint free cloth to avoid scratching the finish The plating is sealed with a lacquer to minimize discoloration or tarnishing Do not use water when cl...

Страница 13: ...nce from the ceiling to the canopy It should not touch the ceiling 7 Make sure your ceiling box is secure and rubber isolator pads are used between mounting bracket and outlet box 2 Battery replacemen...

Отзывы: