Ken A Vision M2013 Скачать руководство пользователя страница 2

Contents 


I.  Parts of Ken-A-Vision M Eye


Camera

…………………………

p.3


II.   User Interface Description

……

p.4


III.   Software Installation

……………p.9 

 
IV.   Vision Explorer

….………………p.12 

 
V.   Photo Suite III

….………………..p.14


VI.   Video Wave

……………………

p.16 

 
VII.   Safety & FAQ

…………………...p.18 


VIII. Hardware Specification

………p.20 


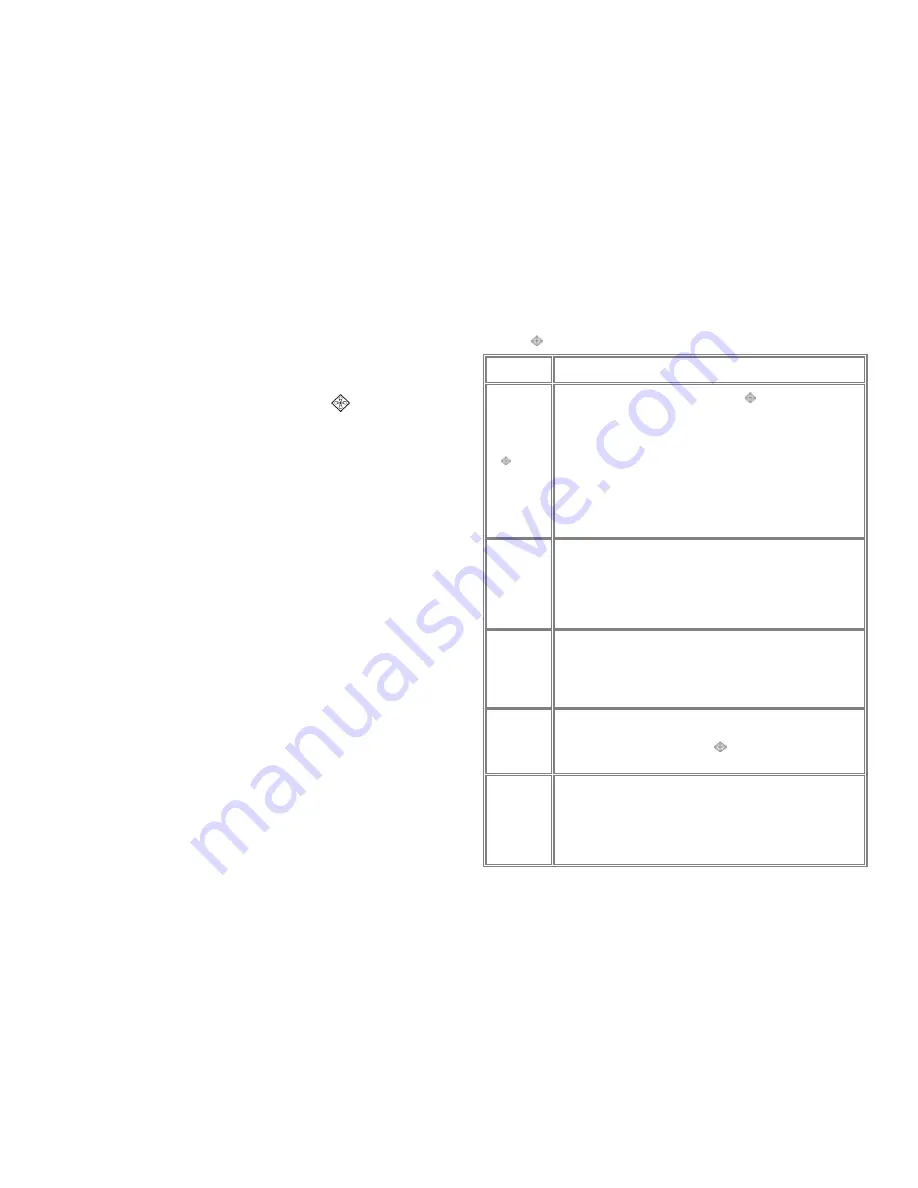
7.2 Frequently Asked Questions (FAQ): 

Following are some basic troubleshooting tips regarding Ken-A-
Vision M Eye hardware or software problems: 

Symptom


Solution


Windows 
does not 
detect my 
Ken-A-
Vision 
M Eye


during first-
time 
installation 

• 

Check connection if Ken-A-Vision M Eye

 is properly 

plugged-in. Unplug and replug the camera.  

• 

Check the BIOS Setup of the computer if there is any settings 
that can enable or disable the USB port or controller.  

• 

Check if the USB controller device is installed and working 
properly. Go to Control Panel-System-Device Manager and 
check for the device “Universal serial controller” if it is 
installed and has no conflict. Contact your computer dealer on 
how to fix USB controller device conflict. 

Windows 
reports that 
there is no 
video 
capture 
adapter 

• 

Same as above. 

The color 
display is 
bad 

• 

Check the Display Properties if the color is set at High Color 
(16-bit), True Color (24-bit), or True Color (32-bit)---
recommended.  

• 

Check if the VGA driver of the computer is properly installed. 

Driver 
Installation 
cannot be 
completed 

• 

Check the driver CD if it is dirty or cannot be read.  

• 

Contact your Ken-A-Vision M Eye dealer for a copy of the 
CD or an update driver. 

Captured 
video 
appears to 
be slow or 
dropping 
frames 

• 

The CPU in your computer may be very busy. Try to close 
other programs.  

• 

Your memory resource may be running low. Restart your 
computer and run the capture program again. 

19 


Содержание M2013

Страница 1: ...ctures VGA 640 x 480 70 Second video recording 67 minute voice recording LCD Indicator status Mode Flash Audio and Speaker Flash Modes Red eye reduction auto and standard Microscope Adapter 28mm included Software Photo Suite III Video Wave Vision Explorer Operating System Win 98 Win 2000 Win ME Win XP Computer Pentium 166MMX minimum 266 MHz recommended 32MB of RAM XVGA video card 2 MB Video RAM 20...

Страница 2: ...s installed and working properly Go to Control Panel System Device Manager and check for the device Universal serial controller if it is installed and has no conflict Contact your computer dealer on how to fix USB controller device conflict Windows reports that there is no video capture adapter Same as above The color display is bad Check the Display Properties if the color is set at High Color 16...

Страница 3: ...o not put things on top of it or apply pressure on it 4 Clean the camera using a clean dry cloth Do not use harsh or abrasive solvents or cleaners 5 When cleaning the lens use a soft lint free cloth Do not apply pressure on the lens Moisten the lens by breathing gently on it Avoid scratching the lens of the camera 6 Do not try to pull or twist the cable of the camera as this might damage it 7 Do n...

Страница 4: ...ns A Operation mode button This button will toggle between the 8 modes of operation Single shot High quality 1024 x 768 Single shot Normal quality 640 x 480 Single shot Super High quality 1280 x 960 4 6 3 Icons 6 4 Details for more details go to Help in the menu or click 17 To delete Photos from camera memory press and hold the Snap and Mode buttons Simultaneously for 3 seconds Menu Pull down the ...

Страница 5: ...allation Select Yes to restart now F Your computer has now successfully installed Video Wave software 6 2 Using Video Wave A Click the MGI Video Wave III icon B The following screen will appear C Connect ken A Vision M Eye to your computer and the capture icon for a live image D After selecting the capture icon the following options will appear Video Audio Video Audio Image or Sequence and save th...

Страница 6: ...s Organize your vast collection of photos Share your photos with others Print your photos and projects 5 3 HOW TO DOWNLOAD PHOTOS FROM KEN A VISION M EYE CAMERA TO YOUR COMPUTER 5 3 1 Connect Ken A Vision M Eye to the USB port in your computer and open Photo Suite III 5 3 2 Click and select Digital Camera TWAIN 5 3 3 Enter file name prefix and click 5 3 4 To import images to your computer click 5 ...

Страница 7: ... To complete the setup click finish when prompted You MAY be asked to restart your computer to complete the installation Select Yes to restart now L Your computer has now successfully installed Photo Suite III software 5 2 Using Photo Suite III ICONS Get a photo into your computer 14 LCD Icons Continued When the camera is first turned on the default state for flash is auto flash When the flash mod...

Страница 8: ...me Same USB port Min 1 Refer to the HELP menu for more details in using Vision Explorer software Camera Control The Camera Panel is used to show the current image by the camera Image Browser The Browser Panel allows you to browse your computer to look for saved images Image Viewer If an image has been captured or selected the image viewer will display the image Movie Player If a video has been sel...

Страница 9: ... to install to a different folder Then click Next Q When installation is complete click finish You MAY be asked to restart your computer to complete the installation Select Yes to restart now Your computer has now successfully installed Vision Explorer software Note The M Eye Driver must be installed to use the camera with your computer 12 III Software Installation 3 1 Ken A Vision M Eye Software ...

Страница 10: ...M Eye Driver must be installed to operate the camera with your computer 10 3 6 Checking the Device Installation To check if the Ken A Vision M Eye has been installed 1 Plug in M Eye Camera 2 Click on Start Settings Control Panel 3 For Windows 98 users Select Device Manager For Windows XP and 2000 users Select System then Hardware then Device Manager 4 Look for Imaging Device and double click it Yo...

Отзывы: