background image

Operating the Pickup

KM00321,0000270 -19-31JAN14-1/1

Continued on next page

KM00321,0000A58 -19-30APR20-1/3

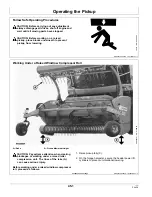
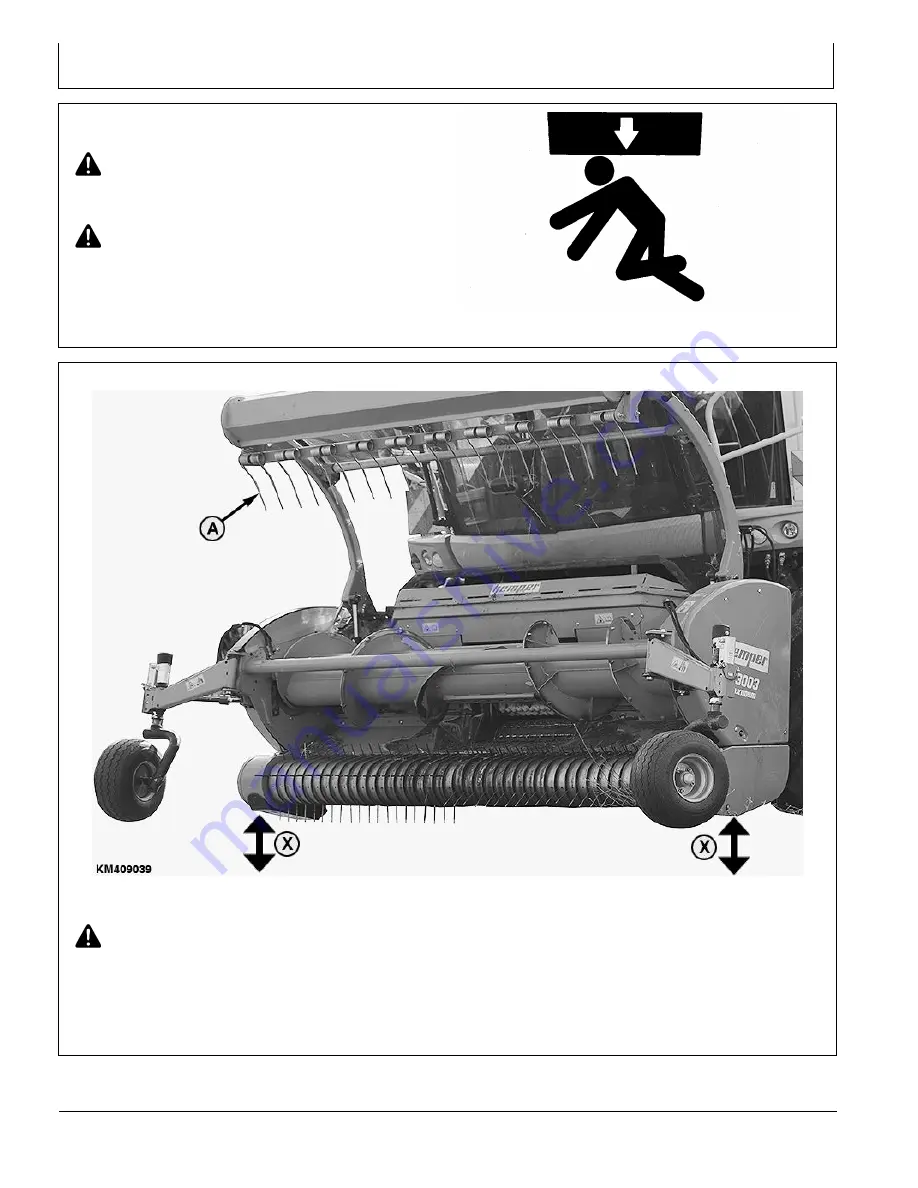
Follow Safe Operating Procedures

CAUTION: Before carrying out any adjustment

always disengage all drives, shut off engine and
wait until all moving parts have stopped.

CAUTION: Before working on a raised

pickup, place blocks underneath to prevent
pickup from lowering.

TS261

—UN—23AUG88

Working Under a Raised Windrow Compressor Roll

KM409039

—UN—21APR20

A—Rake

X—Pickup Maximum Height

CAUTION: Pay extreme attention when clearing

blockages or working under a raised roller
compression unit. The tines of the rake (A)
can cause serious injury.

Before working under a raised windrow compressor
roll, proceed as follows:

1. Raise pickup fully (X).

2. On the forage harvester, secure the header power lift

cylinders to prevent unintentional lowering.

45-1

010421

PN=38

Содержание Pickup N3003

Страница 1: ...Pickup N3003 OMKM129570 OPERATOR S MANUAL Pickup N3003 OMKM129570 ISSUE L0 ENGLISH Maschinenfabrik Kemper GmbH Co KG European Editions PRINTED IN U S A...

Страница 2: ...ely record all the numbers to help in tracing the machine should it be stolen Your KEMPER dealer also needs these numbers when you order parts File the identification numbers in a secure place away fr...

Страница 3: ...Introduction AG CC03745 280 19 09FEB00 1 1 Dealer s Record Owner s Name Date Sold Address Model Number City Serial Number State Zip 010421 PN 3...

Страница 4: ...Introduction 010421 PN 4...

Страница 5: ...d topped up if necessary 6 Chains are correctly tensioned and lubricated 7 All moving parts can move freely 8 Check tire pressure adjust if necessary The correct tire pressure is 450 kPa bar 4 5 bar 6...

Страница 6: ...Introduction 010421 PN 6...

Страница 7: ...ake 10 4 Haulage Windrow Pickup Hanging Points 15 1 Securing Pickup for Haulage Lashing Points 15 2 Preparing the Pickup Unpacking and First Setup 25 1 Set Gauge Wheel Height 25 1 Check Adjustment of...

Страница 8: ...g Pickup Operation 60 1 Service Metric Bolt and Screw Torque Values 65 1 Adjust the Drive Chains 65 2 Mounting Orientation of Roller 65 2 Trash Net 65 3 Oil Reservoir of Central Chain Lubrication 65 3...

Страница 9: ...Identification View KM00321 0000A54 19 21APR20 1 1 Identification View KM409038 UN 21APR20 N3003 Pickup 00 1 010421 PN 9...

Страница 10: ...thorized modifications to the machine may impair the function and or safety and affect machine life If you do not understand any part of this manual and need assistance contact your KEMPER dealer TS20...

Страница 11: ...tally and physically capable of accessing the operator station and or controls and operating the machine properly and safely Never allow a child or an untrained person to operate the machine Instruct...

Страница 12: ...aring Wear a suitable hearing protective device such as earmuffs or earplugs to protect against objectionable or uncomfortable loud noises Operating equipment safely requires the full attention of the...

Страница 13: ...or damaged items TS951 UN 12APR90 Operate Pickup Safely To avoid injury or death by being pulled into the machine DO NOT attempt to feed crop into the machine or unplug feed area WHILE PICKUP IS RUNN...

Страница 14: ...ect wiring harnesses from tractor before servicing electrical system components or welding on machine Falling while cleaning or working at height can cause serious injury Use a ladder or platform to e...

Страница 15: ...deform the wheel When inflating tires use a clip on chuck and extension hose long enough to allow you to stand to one side and NOT in front of or over the tire assembly Use a safety cage if available...

Страница 16: ...or attachment be lifted provide secure support for them If left in a raised position hydraulically supported devices can settle or leak down Do not support the machine on cinder blocks hollow tiles o...

Страница 17: ...contact ballast the harvester at the rear end as necessary Observe the maximum permissible axle loads and total weights KM239211 UN 18MAR15 Remove Paint Before Welding or Heating Avoid potentially to...

Страница 18: ...or damaged safety decals Replacement safety decals are available from your KEMPER dealer CC1021545 CC1021545 UN 23APR02 Dispose of Waste Properly If waste disposal is carried out improperly this may...

Страница 19: ...l state and local laws regulations or ordinances governing the handling or disposal of waste fluids example oil fuel coolant brake fluid TS1133 UN 15APR13 filters batteries and other substances or par...

Страница 20: ...placement on the machine and a brief explanatory text are shown below TS231 19 07OCT88 Replace Safety Signs Replace missing or damaged safety signs Use this operator s manual for correct safety sign p...

Страница 21: ...remove ignition key KM400155 UN 16JAN20 Pickup DANGER stay clear of header Disengage header drive shut off engine and remove ignition key before servicing or unclogging header Do not allow persons or...

Страница 22: ...clear of rotating driveshaft Entanglement in rotating driveshafts can cause serious injury or death Keep driveshaft shields in place at all times KM410689 UN 30APR20 Pickup Wheels To avoid crushing i...

Страница 23: ...ydraulic oil and gas under pressure KM404027 UN 06FEB20 Roller Compression Unit Tips of Rake DANGER Pay extreme attention when clearing blockages or working under a raised roller compression unit The...

Страница 24: ...0321 0000268 19 07FEB14 1 1 Windrow Pickup Hanging Points Should the pickup be moved without attaching it to a self propelled forage harvester use the hanging points shown KM1002393 UN 17JAN14 15 1 01...

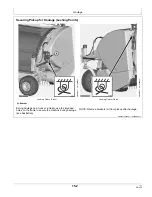
Страница 25: ...404028 UN 06FEB20 Lashing Points Front KM404029 UN 06FEB20 Lashing Points Rear A Bracket During haulage on a truck or a trailer use the intended holes on the frame to secure the machine during haulage...

Страница 26: ...ave been incurred during transport Complete pickup and assemble all options per instructions delivered with the pickup KM1000781 UN 30MAR12 Set Gauge Wheel Height Adjust the pickup so that the cylinde...

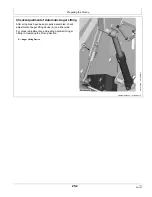
Страница 27: ...atic Auger Lifting After all options have been properly assembled check adjustment of auger lifting device A on either side For proper adjustment see Adjusting Automatic Auger Lifting in Operating the...

Страница 28: ...the outer shields at left and right There are several positions for screw B Screw B is installed in the third borehole when it leaves the factory When the forage harvester is equipped with 42 inch ti...

Страница 29: ...to the machine NOTE The pickup must be attached on level ground Attach the pickup as follows 1 Open cam lock levers on forage harvester A Cam Lock Lever KM409046 UN 24APR20 2 Lower the cutterhead asse...

Страница 30: ...1 19 30APR20 3 7 5 Close cam lock levers A on forage harvester and secure with quick lock pin B IMPORTANT Check that the locking pawl C is fully closed A Cam Lock Lever B Quick Lock Pin C Locking Pawl...

Страница 31: ...ollows Loosen nut B Turn plate A in the direction of the arrow until plate A rests under the locking pawl C Tighten nut B A Pickup B Pickup rail C Locking Pawl KM409050 UN 24APR20 KM409051 UN 24APR20...

Страница 32: ...on a forage harvester for the first time the clearance between auger flights and scrapers must be adjusted Proceed as follows 1 Slacken off nuts A 2 Move scrapers B forward to obtain specified clearan...

Страница 33: ...attached to the machine at a later time Never select a height that is too low 2 Shut off the engine remove the key from key switch and apply park brake 3 Unlatch handle A then disconnect the multicoup...

Страница 34: ...on next page KM00321 0000A62 19 24APR20 4 5 6 Remove driveshaft A A Driveshaft KM410684 UN 24APR20 7 Open the cam lock lever A so that the locking pawl B is fully retracted A Cam Lock Lever B Locking...

Страница 35: ...5 8 Start the engine of the forage harvester Lower the cutterhead assembly until the suspension rail A is a little below the frame tube B of the pickup Move out of the pickup frame A Suspension rail B...

Страница 36: ...ndrow Compressor Roll in Transport Position 1 Drive forage harvester backwards until depth gauge wheels A are fully turned towards the front 2 Raise front shield of forage harvester so that depth gaug...

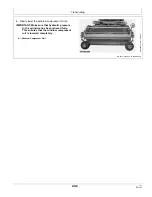
Страница 37: ...lower the windrow compressor roll A IMPORTANT Make sure that hydraulic pressure in the cylinders has been relieved fully This ensures that the windrow compressor roll is lowered completely A Windrow C...

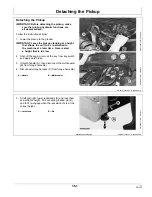
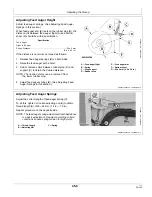
Страница 38: ...underneath to prevent pickup from lowering TS261 UN 23AUG88 Working Under a Raised Windrow Compressor Roll KM409039 UN 21APR20 A Rake X Pickup Maximum Height CAUTION Pay extreme attention when cleari...

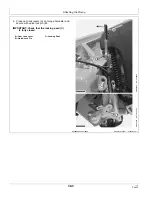
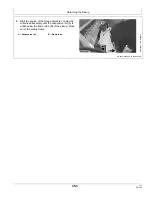
Страница 39: ...aised windrow compressor roll while the driver is still in the cab A Windrow Compressor Roll KM402915 UN 21JAN20 4 Close safety valve A to prevent windrow compressor roll from unintentional lowering A...

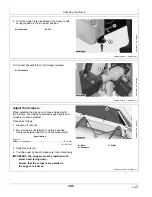
Страница 40: ...heel KM409040 UN 21APR20 3 Slowly lower the windrow compressor roll A NOTE Depth gauge wheels are automatically unlocked and can turn freely when they are lowered onto the ground Lower pickup onto the...

Страница 41: ...ator Raise roller compression unit so that roller B on the roller compression unit does not push the crop up but always lies on top of the windrow see illustration NOTE The oil pressure in the pressur...

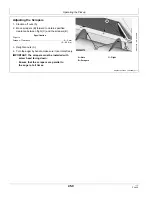
Страница 42: ...l there is a distance X of 3 5 mm 0 12 0 19 in between rake and feed auger wings A Shims X 3 5 mm 0 12 0 19 in KM204376 UN 05FEB14 KM1001013 UN 05OCT09 Adjusting Roller of Roller Compression Unit 1 Lo...

Страница 43: ...ve the tube C 2 If the slot holes of downstop A are not sufficient for adjustment the valve D on the back can be adjusted via a row of holes E Set valve D higher to decrease space between stop B and t...

Страница 44: ...teeth from the ground take out locking pin A and set gauge wheel B higher along the row of holes Reinstall locking pin A and secure with spring cotter C IMPORTANT Make sure that the value on scale D i...

Страница 45: ...stop D and support C to obtain the desired distance NOTE The needed shims can be removed from the lower rubber stop 4 Adjust feed auger springs B See Adjusting Feed Auger Springs in this section KM10...

Страница 46: ...light C and the scrapers B Specification Flight to Scraper Clearance 0 2 mm 0 0 08 in 3 Retighten nuts A 4 Turn the auger by hand to make sure it can rotate freely IMPORTANT The scrapers must be insta...

Страница 47: ...se to decrease distance X CAUTION Make sure that threaded rod D is always fully screwed in plastic ring of lock nut C 3 Raise roller compression unit completely to check distance X Repeat procedure as...

Страница 48: ...Feed Auger Paddles Short Crops The paddles B improve feeding in light and short crops NOTE Move paddle B further outward in short crop and further inward in higher crop 1 Loosen bolts A 2 Move paddle...

Страница 49: ...rops When harvesting high crops or winter forage crops remove paddles A and paddle brackets B bolted on auger for smoother feeding 1 Loosen bolts C 2 Remove paddle A and paddle bracket B Repeat proced...

Страница 50: ...nd the expected air temperature range during the service interval AVIA AVIALITH 2 EP grease is recommended Other greases may be used if they meet the following specification NLGI Service Classificatio...

Страница 51: ...ed to identify their contents Properly dispose of all old containers and any residual lubricant they may contain Mixing Lubricants In general avoid mixing different brands or types of oil Oil manufact...

Страница 52: ...0000A5C 19 22APR20 1 1 KM00321 00009FB 19 11FEB20 1 1 Every 10 operating hours Pickup Driveshaft Lubricate with grease KM409043 UN 22APR20 Every 50 Hours Pivoting Gauge Wheels Lubricate with grease KM...

Страница 53: ...19 1 1 Every 50 Hours Lift Arms of Roller Compression Unit Lubricate with grease KM1002436 UN 31JAN14 Every 50 Hours Cylinder of Roller Compression Unit Lubricate with grease KM1002437 UN 31JAN14 KM10...

Страница 54: ...Lubrication and Maintenance KM00321 000091B 19 11APR19 1 1 Every 50 Hours Jackstands Lubricate with grease KM1002441 UN 31JAN14 55 5 010421 PN 54...

Страница 55: ...djust scrapers properly Feed auger paddles are set too far outward Move feed auger paddles further inward Slip clutch worn Replace worn parts Only part of crop is picked up Pickup teeth turn too slowl...

Страница 56: ...and or excessive ground speed Reduce volume of windrows or slow down Loss of pickup teeth Replace lost teeth Rake of roller compression unit option collides with feed auger Working height of roller c...

Страница 57: ...840 1263 932 M30 932 687 1029 759 1327 979 1466 1081 1553 1145 1715 1265 M33 1258 928 1398 1031 1788 1319 1986 1465 2092 1543 2324 1714 M36 1617 1193 1789 1319 2303 1699 2548 1879 2695 1988 2982 2199...

Страница 58: ...ket C to tighten chain D which drives the pickup drum Adjust idler sprocket C to get a slack of 10 to 15 mm 0 4 to 0 6 in on the strand opposite the drive chain idler gear A Idler Sprocket B Conveyor...

Страница 59: ...NT Never use an oil that is not biodegradable Specification Oil reservoir Capacity 4 L 1 US gal IMPORTANT Depending on the pump flow adjustment refill reservoir as required KM404045 UN 11FEB20 Bleedin...

Страница 60: ...just the oil flow of the relevant brush 3 Turn the screw clockwise to increase oil flow and counterclockwise to decrease oil flow NOTE The pump is very precise Turn screw 1 4 turn by 1 4 turn to adjus...

Страница 61: ...hains and wash them in solvent Then dry them and coat them with heavy oil Touch up any worn or damaged paintwork List replacement parts that will be needed for the next season and order them early Tak...

Страница 62: ...tion See separate decommissioning section of this manual for information on disposal and recycling of machine components No machine should be operated if safety related components are missing or in ne...

Страница 63: ...ricultural Machinery Safety Part 7 DIN EN ISO 4254 7 Self certification Safety of machinery DIN EN ISO 12100 Self certification Universal jointed shafts and their protection devices DIN EN 12965 Self...

Страница 64: ...ght E Year of Manufacture F Model Year KM1001134 UN 24FEB10 Record Serial Number The serial number plate is located on the right hand side of the pickup KM371491 UN 12APR19 Keep Machines Secure 1 Inst...

Страница 65: ...s 15 2 Page Lubricant Storage Storage Lubricant 55 2 Lubricants Mixing 55 2 Lubrication Drive chains 55 2 Feeding Auger Pivot Points 55 4 Gauge Wheels 55 3 Jackstands 55 5 Pickup Driveshaft 55 3 Lubri...

Страница 66: ...ason 70 1 Beginning of season 70 1 Synthetic lubricants 55 1 T Torque charts Metric 65 1 Page Transport Road Traffic Regulations 40 1 Windrow Compressor Roll Transport Position 40 1 Trash Net 65 3 Tro...

Страница 67: ...Index Index 3 010421 PN 3...

Страница 68: ...Index Index 4 010421 PN 4...

Отзывы: