KAYO MOTOR FOX 70 Скачать руководство пользователя страница 60

ZHEJIANG KAYO MOTOR CO., LTD.


WWW.RIDEKAYO.COM 


60 


Содержание FOX 70

Страница 1: ...ZHEJIANG KAYO MOTOR CO LTD WWW RIDEKAYO COM 1 Model AY70 2 FOX 70 Service Manual...

Страница 2: ...he instructions closely when performing inspections and repairs this will increase the reliability performance and overall lifespan of the vehicle Contents Chapter 1 Maintenance information Chapter 2...

Страница 3: ...ion Be on alert for minor danger This manual may contain some potential risks when performing engine work and maintenance Please pay close attention to the above explanations Service technician or mec...

Страница 4: ...ccidentally touches clothes or skin rinse immediately with clean cold water If the battery solution is touches eyes please flush immediately with plenty clean cold water and get medical treatment as s...

Страница 5: ...her fasteners shall be pre tightened and then tightened in accordance with the specified tightening torque in a diagonal sequence From large to small and from inside to outside 9 Inspect all rubber pa...

Страница 6: ...ot let burr scratch oil seal lip during assembly Grease the oil seal lip before assembly 18 When installing rubber hose parts insert the rubber pipe into the fitting If there is a hose clamp install t...

Страница 7: ...ne cool for 5 to 10 minutes after each hour of operation Avoid quick acceleration 0 20 hours Operate at no more than 3 4 throttle Do not operate for extended amounts of time with a fixed throttle posi...

Страница 8: ...ZHEJIANG KAYO MOTOR CO LTD WWW RIDEKAYO COM 8 VIN Number Frame stamp Engine number VIN Nameplate 1 3 2...

Страница 9: ...ny ZHEJIANG KAYO MOTOR CO LTD Dimensions Vehicle Specifications 1 Dimension L W H mm 1230 800 870 2 Handlebar height mm 870 3 Handlebar width mm 800 4 Rear height mm 650 5 Ground clearance of seat mm...

Страница 10: ...way SOHC chain drive 4 Cylinder diameter mileage mm 47 41 4 5 Compression ratio 8 8 1 6 Lubrication mode Combination splash and pressure feed 7 Oil pump type Rotor 8 Lubricating oil filter type All f...

Страница 11: ...spension type Freestanding double rocker 24 Frame type Steel tube and steel plate welded type Lubrication system Item Standard Limitatio n Engine oil capacity Change oil 800mL No oil filter element re...

Страница 12: ...intake system see engine section Cooling device without Wheel front and rear wheels Item Standard Limitation Rim jump Vertical 1 0mm 2 0mm Horizontal 1 0mm 1 8mm Tire Residual groove 3 0mm Air pressur...

Страница 13: ...e bar Spark advance angle Ignition coil resistance Primary 0 43 0 57 Secondary 10 1 11K Peak voltage Primary ignition coil 150V Pulse 2V Light Instrument Switch Item Standard Relay insert fuse 15A Lig...

Страница 14: ...nting bolt M8 10 9 37 50 2 Upper mounting bolt M8 10 9 37 50 3 Bottom mounting bolt M8 8 8 18 25 4 Suspensio n Brake bolts M10 1 25 8 8 35 45 5 Axle of upper rocker arm M10 1 25 8 8 35 45 6 Rear rocke...

Страница 15: ...ts Battery box M8 8 8 15 20 19 Muffler installation M8 8 8 15 20 20 Voltage regulator ignition coil M6 8 8 7 11 21 Fuel tank body parts plastic fuel tank M6 8 8 7 11 22 fuel tank switch M6 8 8 7 11 23...

Страница 16: ...hub 5 Installation axle for rear fork 6 Inner sleeves of rear fork 7 Rear axle liner pipe 8 Rear axle bearing and oil seal 9 Steering column clamp Note please coat inside of handlebar grip with grip...

Страница 17: ...ZHEJIANG KAYO MOTOR CO LTD WWW RIDEKAYO COM 17 1 7 Wiring diagram of cable hosepipe and inhaul cable Main cable Front Brake Line Throttle cable Rear Brake Line Choke cable...

Страница 18: ...YO COM 18 Headlight MultiFunctional switch Electrical lock Reverse gear display Neutral display Kill tether switch Brake switch wires Positive battery cable Negative battery cable Starter relay connec...

Страница 19: ...ZHEJIANG KAYO MOTOR CO LTD WWW RIDEKAYO COM 19 Voltage Regulator Taillight CDI Ignition coil...

Страница 20: ...When replacing plastics parts please install new warning labels stickers and riveted tags to the new plastics This chapter is about the dismounting the body plastics Pipe inhaul cable should be equip...

Страница 21: ...ny of the tabs broke during disassembly 2 3 2 Handlebar Disassembly 1 Cut off power first disconnect battery 2 Cut plastic ties first then pluck functional switch stop switch and brake cable plug in s...

Страница 22: ...flame out switch connector function switch connector brake connector etc in case of misconnection or looseness 2 Check if the dumper cable and throttle cable in right position 3 Front and rear brake i...

Страница 23: ...he seat cushion back Installation Take it back in reverse order from disassembly Check if the seat is installed in place and firm Note the seat cushion front hook must be installed in the frame limit...

Страница 24: ...place it to same specification in time 2 3 5 Plastic Body Disassembly 1 Disconnect all necessary electrical connectors 2 Disassemble plastic parts fixing bolts1 2 3 4 5 6 7 8 9 10 in order note 2 4 6...

Страница 25: ...ZHEJIANG KAYO MOTOR CO LTD WWW RIDEKAYO COM 25 Oil tank cap 1 3 2 4 5...

Страница 26: ...olt or nut is broken replace it to same specification in time After installation check headlight connector electric connector reverse indicator connector etc in case of looseness or misconnect 2 3 6 L...

Страница 27: ...same specification in time The removal of the left pedal is the same as the right one 3 Regular maintenance and adjustment 3 1 Maintenance information 3 2 Maintenance period 3 3 Inspection ways 3 4 S...

Страница 28: ...to open flame or sparks please refuel in well ventilated areas Being careful of drive system and rotating parts keep fingers loose clothing and hair away from these parts Note Keep the vehicle in a fl...

Страница 29: ...ngine leakprofness I I Engine suspension I I Air filter C R Sparking plug I I R Fuel system carburetor I I L Driving wheel driven wheel I C clutch I Item Period Criterion Parts Item Daily Half year On...

Страница 30: ...than3mm Loose of wheel nut and axle Front wheel bearing vibration Rear wheel bearing vibration Buffer device Suspension arm Shaking of connection part and damage of rocker arm Damper Leakage and damag...

Страница 31: ...ing check it s caused by steering column or other parts then repair If it s caused by steering column fastening the lock nut on steering column or you can also disassemble the steering column Keep veh...

Страница 32: ...ts due to out of control Clearance for front and rear handlebars Check the effect and movement before operation The clearance is 5 10mm Front brake pump assembly Check the fluid level at the sight gla...

Страница 33: ...brake pads wear of brake block The brake pads caliper and disc are normal wear and tear items Check or replace the brake disc Check the surface of brake disc if it is worn damaged bent or grooved repl...

Страница 34: ...gs ball joints a arm bushings Replace if worn or damaged Front wheel size On a level surface with handle bars straight check the front wheel toe in The front wheel relative to the forward direction of...

Страница 35: ...hile the tire is cool If tire pressure is out of specification please adjust to within range specified Riding with tires out of specified range will affect vehicle handling and may cause premature wea...

Страница 36: ...or abnormal sound check whether there is oil leakage in the shock absorber and whether there is damage or loosening in the fastening parts 3 8 Throttle check Check the free stroke of the throttle but...

Страница 37: ...ZHEJIANG KAYO MOTOR CO LTD WWW RIDEKAYO COM 37 Freeplay 3 5mm Adjust throttle free play if out of specification 1 3 4 2...

Страница 38: ...w Thread length a 25mm Adjustment Loosen the lock nut then adjust it with a phillips screwdriver Note For beginners the speed limiter should be in a tight position and until the technology has reached...

Страница 39: ...n 4 2 Fuel system 4 3 Air intake system 4 4 Exhaust system 4 5 Disassembly and installation of engine 4 1 Maintenance information Precautions Before performing maintenance please make sure that the en...

Страница 40: ...responding containers should be prepared to receive coolant oil and fuel oil for environmental protection and the coolant and oil should be supplemented as required during installation The engine does...

Страница 41: ...explode if exposed to open flame or sparks please choose well ventilated areas away form these hazards when refueling or working on the fuel system and its related components Fuel tank removal Remove...

Страница 42: ...r Installation Installation shall be in the reverse order of removal Make hose clamp is in the groove and any vacuum lines are hooked up correctly 4 4 Exhaust system Disassembly Disassemble the clamp...

Страница 43: ...4 graphite sleeve 5 for muffler mounting and locking nut damaged replace at once 4 5 Disassembly and installation of engine Disassembly Note Remove pedal first 1 Remove the engine side cover then rem...

Страница 44: ...Remove the power bolts lug and bolt of engine bottom 4 Remove the engine from the right side of vehicle Installation Installation shall be in the reverse order of removal ignition coil cap Gearshift l...

Страница 45: ...ake it seriously it s important for maintenance Danger Be on high alert for danger Warn to be alert to moderate danger Attention to be alert to minor danger This manual may doesn t contain some potent...

Страница 46: ...e environment oil replacement parts can t be disposed Warning If parts need to be replaced during maintenance please choose parts which recommended or provided by Kayo Disassembled parts that need to...

Страница 47: ...wheel etc therefore a standard break in is very important at the beginning of the its use it can make the moving parts to adapt to each other correction work form good heavy load to bear a smooth fri...

Страница 48: ...ZHEJIANG KAYO MOTOR CO LTD WWW RIDEKAYO COM 48 5 4 Engine number Engine head displacement label 5 4 Maintenance Engine Number displacement...

Страница 49: ...Clean Clean Timing chain Check Adjust Adjust Adjust Carburetor idle speed Adjust Adjust Adjust Adjust Drive chain Adjust and lubricate per 5000km Battery Charge Charge Charge Charge Brake disc Check A...

Страница 50: ...ZHEJIANG KAYO MOTOR CO LTD WWW RIDEKAYO COM 50 Left view of the 125 engine is shown in the figure Remove the locknut of cylinder head from its holding place...

Страница 51: ...ZHEJIANG KAYO MOTOR CO LTD WWW RIDEKAYO COM 51 Remove cylinder head Check the state of paper pad Replace if necessary Dismantle the fixing bolt of left cover...

Страница 52: ...W RIDEKAYO COM 52 Remove left cover and inspect the paper pad for damage Replace if necessary Dismantle the fixing bolt of right cover Remove the right cover of cylinder head Inspect the gasket for da...

Страница 53: ...KAYO MOTOR CO LTD WWW RIDEKAYO COM 53 Remove inlet exhaust valve cap Check the state of seal ring of valve cap and replace if worn or if reuse is questionable Remove the fixing bolt of timing driven...

Страница 54: ...ZHEJIANG KAYO MOTOR CO LTD WWW RIDEKAYO COM 54 Remove the connecting bolt of cylinder head Remove cylinder head assembly...

Страница 55: ...wear and damage Replace if necessary Check whether there is excessive carbon deposit in combustion chamber Clean and replace if necessary Remove the cylinder head Pour gasoline into inlet exhaust pipe...

Страница 56: ...ZHEJIANG KAYO MOTOR CO LTD WWW RIDEKAYO COM 56 Remove inlet exhaust valve spring and check the state Replace if necessary Inspect the oil seal of inlet exhaust valve for damage Replace if necessary...

Страница 57: ...ZHEJIANG KAYO MOTOR CO LTD WWW RIDEKAYO COM 57 Remove the spark plug to clean the carbon Deposit and dust Check the spark plug gap and set it to 0 6 to 0 7 if necessary...

Страница 58: ...muffler pipe Replace the valve guide The cylinder gasket is broken Air leakage between the cylinder head and cylinder The engine starts hard or fails to start Insufficient engine output Engine speed...

Страница 59: ...sket and dowel pin to check for wear and damage Replace if necessary Dismantle the fixing bolt of timing chain of guide wheel Remove the guide wheel of timing chain to inspect for wear and damage Repl...

Страница 60: ...ZHEJIANG KAYO MOTOR CO LTD WWW RIDEKAYO COM 60...

Страница 61: ...O COM 61 Remove the piston of piston pin to check whether it is damaged Replace if necessary Inspect the paper pad for worn or damage Replace if necessary Check whether there is residual gasket on cyl...

Страница 62: ...cylinder inner wall Replace if worn or if reuse is questionable Check whether the internal diameter has exceed the limit value Measure the diameter form upper middle and lower position The limit value...

Страница 63: ...ZHEJIANG KAYO MOTOR CO LTD WWW RIDEKAYO COM 63...

Страница 64: ...he cylinder and cylinder head The engine starts hard or fails to start Insufficient engine output poor idle speed and high fuel consumption Grind the cylinder end surface or replace the cylinder body...

Страница 65: ...assemble assemble and maintain crankcase Remove the cover of right crankcase half Check whether the oil seal of starting shaft and seal edge of gearshift lever are worn Replace if necessary Check the...

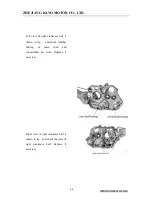
Страница 66: ...t view of right crankcase half is shown in fig and check whether bearing of main shaft and countershaft are worn Replace if necessary Right view of right crankcase half is shown in fig and check the s...

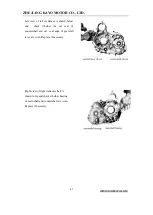
Страница 67: ...ase is shown below and check whether the oil seal of countershaft and oil seal edge of gearshift lever are worn Replace if necessary Right view of right crankcase half is shown in fig and check whethe...

Страница 68: ...DEKAYO COM 68 Dismantle fixing bolt of left crankcase cover Remove the neutral indicator and check the state Replace if necessary Dismantle the fixing bolt of magneto stator and remove the stator Chec...

Страница 69: ...inder head and cylinder The engine starts hard or fails to start Insufficient engine output Engine speed changes during idle run Repair the threaded or replace the crankcase The bolt of the cylinder i...

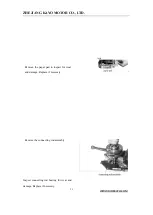
Страница 70: ...rankshaft Connecting Rod Disassemble assemble and maintain crankshaft connecting rod Remove the fixing bolt of crankcase from its holding place Remove left crankcase half Take care not to forget the w...

Страница 71: ...MOTOR CO LTD WWW RIDEKAYO COM 71 Remove the paper pad to inspect for wear and damage Replace if necessary Remove the connecting rod assembly Inspect connecting rod bearing for wear and damage Replace...

Страница 72: ...TOR CO LTD WWW RIDEKAYO COM 72 Check gap of big end of connecting rod Reset the gap if necessary Check diameter of piston pin using a micrometer Replace the piston pin if the value is over the mainten...

Страница 73: ...KAYO COM 73 Check the axial and radial jumping of connecting rod bearing Replace the conrod if the jumping is large Check the side gap between piston ring and piston groove using a feeler gauge Replac...

Страница 74: ...ve if necessary Check the state of piston and replace if worn or if reuse is questionable Measure diameter of piston skirt Replace it if the value is beyond the maintenance limit value Assemble the pi...

Страница 75: ...tarts hard or fails to start Insufficient engine output Thick blue and white fume form the exhaust muffler pipe Scuffing or scratches on the surface of piston skirt Scuffing or scratches on the surfac...

Страница 76: ...gap is too wide Insufficient elasticity of piston ring It is impossible to tight the piston ring and the cylinder properly Improper fixing The piston ring gap is not staggered Thick blue and white fum...

Страница 77: ...enance of Mechanism 5 5 1 Disassemble assemble and maintain valve mechanism Remove rocker arm shaft Remove the rocker arm of inlet exhaust valve and check the state Remove the timing cam rocker arm ro...

Страница 78: ...stem and exhaust valve stem take care and don t miss the valve clip Measure length of valve spring to check whether the spring is damaged or worn Replace if necessary Remove the spring of inlet and ex...

Страница 79: ...ter of valve stem using a verier clipper Replace the valve stem if the valve is beyond the maintenance limit valve Measure the width of valve contact surface to check whether the contact surface is ro...

Страница 80: ...the valve stem is distored Replace if necessary Inspect the timing camshaft bearing for wear and check the state of camshaft Replace if necessary Check the gap of rocker arm shaft and rocker arm Repl...

Страница 81: ...ZHEJIANG KAYO MOTOR CO LTD WWW RIDEKAYO COM 81 Check the external diameter of rocker arm using a micrometer Replace the rocker arm shaft if the valve is beyond the maintenance limit valve...

Страница 82: ...wheel of timing chain to inspect for wear and damage Replace if necessary Remove the fixing bolt of timing tensioner and check the state Replace if worn or if reuse is questionable Remove the timing t...

Страница 83: ...EKAYO COM 83 Remove the oil tube and spring and check the state Replace if necessary Remove the small timing chain and check the state Replace if necessary Adjust valve clearance as follows Remove the...

Страница 84: ...n magnetic rotor counterclockwise to make piston locate at top dead center and make T mark aimed to the mark of left crankcase cover Check whether the O mark on cam sprocket is aimed to the gap of cyl...

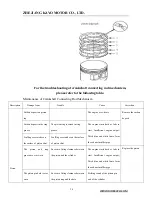
Страница 85: ...MOTOR CO LTD WWW RIDEKAYO COM 85 For the troubleshooting of engine distribution mechanism please refer to the followingtable Maintenance of Distribution Mechanism Descriptions Damage form Trouble Cau...

Страница 86: ...arm The rocker arm shaft hole is over worn Big gap between the rocker arm and rocker arm shaft Valve striking sound Replace the rocker arm The rocker arm shaft is over worn Big gap between the rocker...

Страница 87: ...s over worn The fitting clearance between the valve stem and the valve guide is too wide Sound of valve leakage Thick blue and white fume form the exhaust muffler pipe Replace the valve The valve stem...

Страница 88: ...lt of carburetor and circlip of air cleaner Remove the carburetor Remove and clean throttle cap Clean the carburetor as follows Remove the dirt and clean inner oil way Dismantle the fixing bolt of flo...

Страница 89: ...needle valve to inspect for wear and damage Replace if necessary Remove the throttle and oil needle and check the condition replace if necessary Check the state of float case and replace as necessary...

Страница 90: ...ether small hole is clogged Clean with compressed air if necessary Remove the idle jet and check for plugged Clean the jet with compressed air if necessary Dismantle the mixture adjustment screw and i...

Страница 91: ...in the case If height is incorrect which indicates carburetor leaks or the oil supply is insufficient Adjust the oil needle to the third tier If the clip rises concentration of mixture becomes dilute...

Страница 92: ...ion Air filter Too much dust on the filter core The engine starts hard or fails to start Insufficient engine output poor performance of engine during idle run Excessive fuel consumption The exhaust mu...

Страница 93: ...Dismantle suspension bolt of muffler to check whether the suspension support is damaged Repair or or replace if necessary Remove the muffler to inspect for broken and damage Replace or repair if neces...

Страница 94: ...ain the environmental protectionvalve Inspect the locknut for tightness and tighten as necessary Description Damage form Trouble Cause Correction Exhaust pipe gasket The gasket is broken Exhaust pipe...

Страница 95: ...W RIDEKAYO COM 95 Inspect the connecting circlip of air pump for tightness Tighten if necessary Dismantle the fixing bolt of air pump and check the state of air pump Replace the air pump if it is worn...

Страница 96: ...ting of environment protection valve please refer to the following table Maintenance of environment protection valve Parts Damage form Trouble Cause Correction air pump air pump broken or plugged defe...

Страница 97: ...indicator and check for wear and damage Replace if necessary connecting hose connecting hose get loose noise is too big Emission fails to meet the standard Replace Gasket large noise from secondary in...

Страница 98: ...ZHEJIANG KAYO MOTOR CO LTD WWW RIDEKAYO COM 98 Remove the left crankcase cover Remove washer and check condition Replace if worn or reused Remove the magnetic stator fixing bolt and trigger bolt...

Страница 99: ...ZHEJIANG KAYO MOTOR CO LTD WWW RIDEKAYO COM 99 Check stator state with multimeter if worn or reused replace the parts with new ones Remove rotor retaining nut...

Страница 100: ...ZHEJIANG KAYO MOTOR CO LTD WWW RIDEKAYO COM 100 Remove the rotor with a special tool Remove the rotor and check for demagnetization Replace if necessary Remove the overclutch retaining bolt...

Страница 101: ...DEKAYO COM 101 Remove clutch Inspect clutch seats rollers and springs for wear and damage Replace if necessary Check for wear and damage of drive sprocket and drive gear and replace if necessary Remov...

Страница 102: ...02 Remove the tension band of the clutch and check its condition If the tension belt is found to be worn or has problems the tension belt should be replaced Remove the snap ring of the starting motor...

Страница 103: ...LTD WWW RIDEKAYO COM 103 Remove starter motor retaining bolts Remove the starting motor Check whether the starter windings are damaged Replace if necessary Remove oil separation disc and check conditi...

Страница 104: ...whether the oil seal is worn Replace if necessary Remove the seal ring Check the Condition of the oil seal ring and replace it is worn For the troubleshooting of engine electric starter please refer t...

Страница 105: ...motor has insufficient rotation force Clean the commentator surface With gasoline or alcohol Armature commentator surface is spotted burnt or damaged Starter motor has insufficient rotation force Pol...

Отзывы: