


Instructions for use Display
7 Glossary
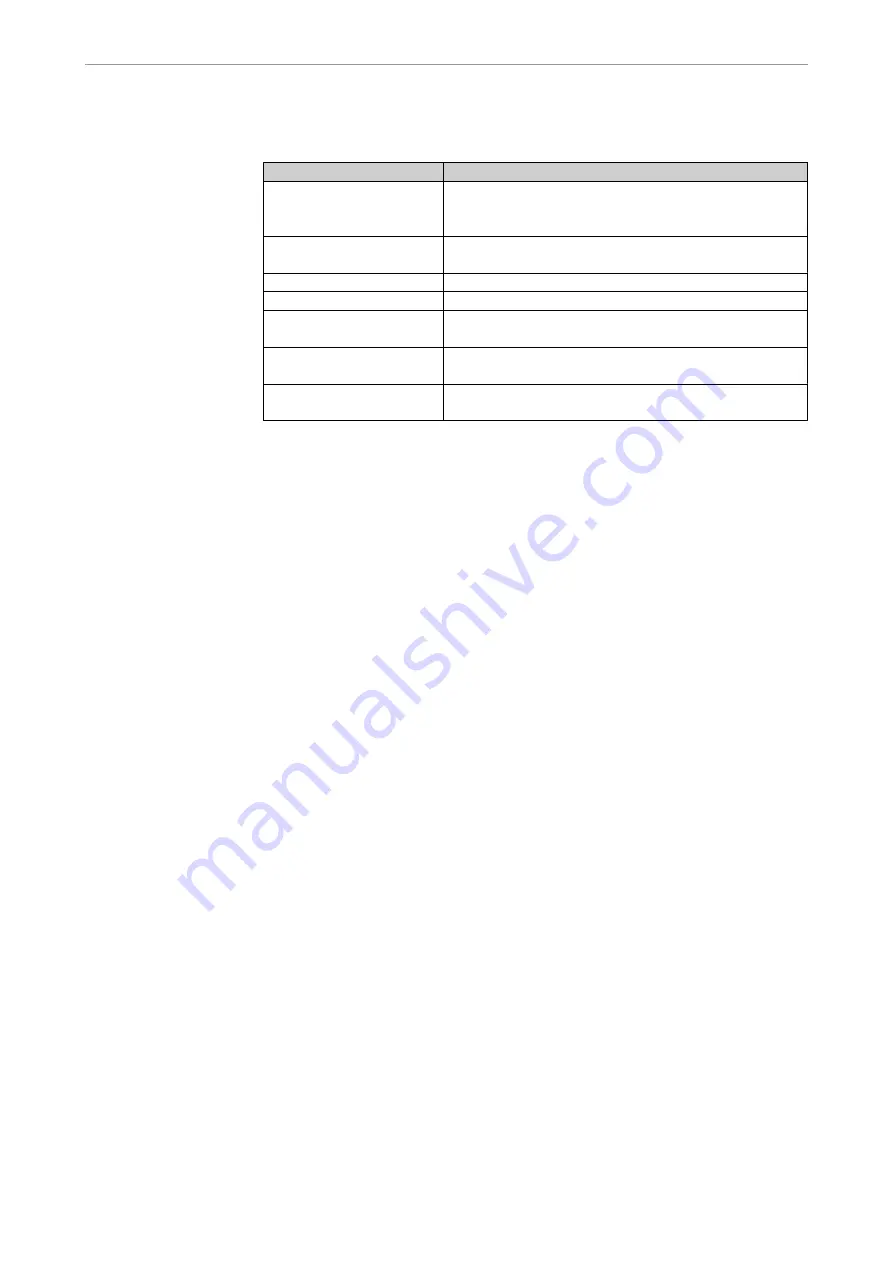
7 Glossary
Term
Description
Screen 1
Screen 1 is the screen connected to the VGA Monitor
interface and is installed on the upright operating light‐
post.
Screen 2
Screen 2 is the screen connected to the VGA OUT in‐
terface.
Full screen mode
A full-screen image is displayed.
Quad mode
Four separate images are shown on screen.
OSD menu ERGOcom 3
comfort/excellence
The on-screen menu of the display interface. This is
controlled via ERGOcom 3 and displayed on screen 1.
Configuration menu
The ERGOcom 3 specific configuration menu. This is
shown in the status display of ERGOcom3.
OSD menu
The ERGOcom 3 screen-specific OSD menu. This is
controlled and shown on screen.
40/40
Содержание EC3
Страница 1: ...Instructions for use Display Always be on the safe side...
Страница 43: ......
Страница 44: ...1 003 1620 Fi 2004 08 01 en...


