background image

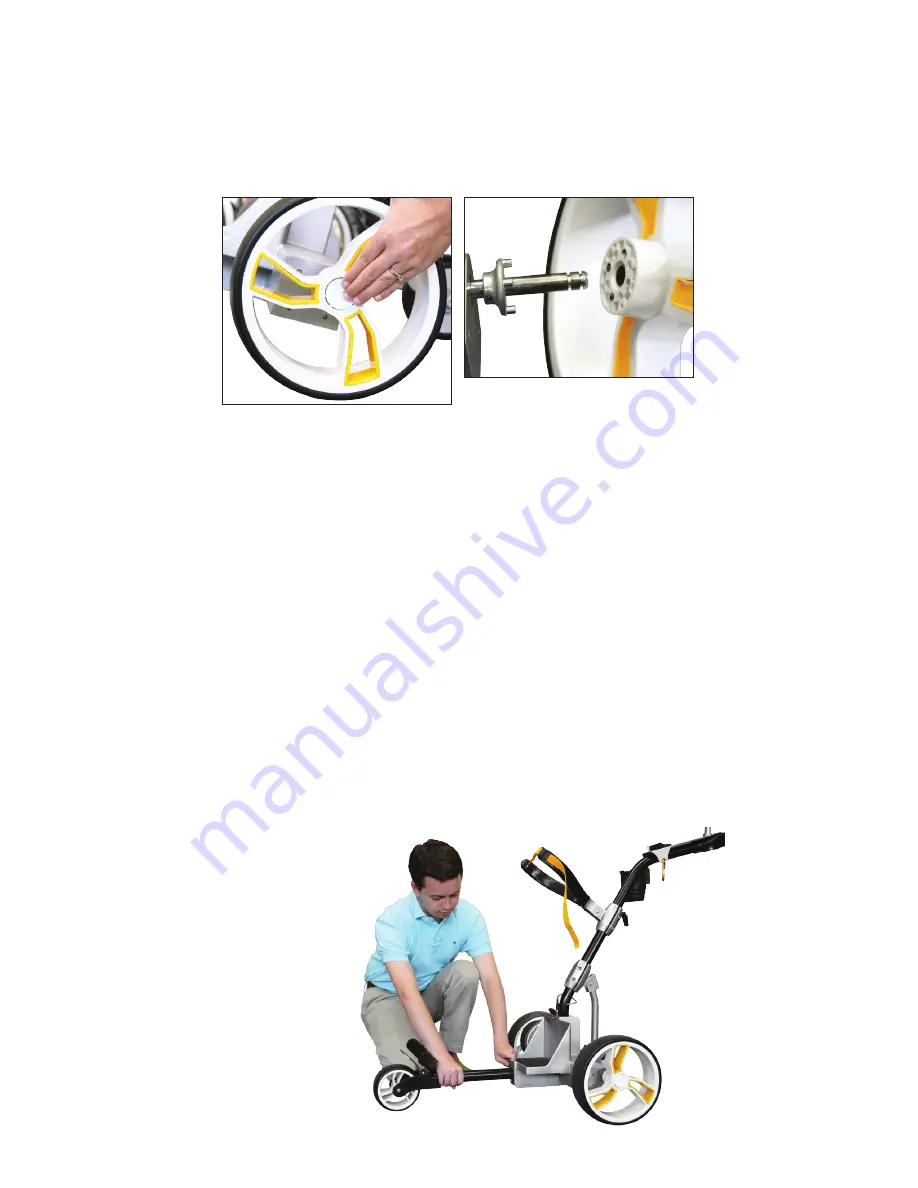
Step 2: Attach Front Wheel Assembly 
to Chassis

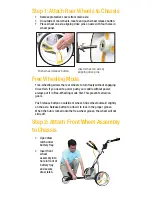
Step 1: Attach Rear Wheels to Chassis

Free Wheeling Mode

Free-wheeling allows the rear wheels to turn freely without engaging 
drive train. If you need to pull or push your caddie without power, 
always put it in Free-Wheeling mode first. This prevents strain on 
gears. 

Push release button on outside of wheel. Slide wheel outward slightly 
on the axle. Release button to allow it to lock in the proper groove. 
When the hub is locked onto the free-wheel groove, the wheel will not 
slide off.

•  Remove protective covers from main axle.
•  On outside of rear wheels, locate and push wheel release button.
•  Place wheel on axle, aligning drive pins on axle with four holes in 

wheel panel.

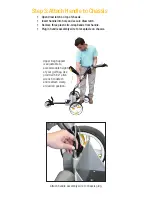
•  Open draw 

latch under 
battery tray.

•  Insert front 

wheel 
assembly

 into 

hole in front of  
 battery tray 
and secure 
draw latch.

Push wheel release button.

Insert wheel on axle by 
aligning drive pins.

Содержание Vortex

Страница 1: ...ll arrive in five separate pieces They are the handle chassis rear wheels and front wheel assembly T H E G O L F E X E R C I S E M A C H I N E TM QUICK START GUIDE Handle Chassis Front Wheel Assembly Quick Release Rear Wheels ...

Страница 2: ...l Slide wheel outward slightly on the axle Release button to allow it to lock in the proper groove When the hub is locked onto the free wheel groove the wheel will not slide off Remove protective covers from main axle On outside of rear wheels locate and push wheel release button Place wheel on axle aligning drive pins on axle with four holes in wheel panel Open draw latch under battery tray Inser...

Страница 3: ...aw latch Remove three plastic tie wrap bands from handle Plug in handle assembly wire to receptacle on chassis Upper Bag Support is adjustable to accommodate height of your golf bag Use provided 5 32 allen wrench to detach and reattach clamp at desired position Attach handle assembly wire to chassis plug ...

Страница 4: ...ved braking system AutoBrake 2 0 works like this As you go down a slope your caddie will continue to travel at whatever speed you have set No matter how steep the incline AutoBrake will adjust its power as needed to maintain the same speed There are no sudden stops or bumping into your Kangaroo and no reason to constantly turn your caddie on and off while navigating hills Enjoy the peace of mind a...

Страница 5: ... battery then plug charger into wall socket When green light turns on battery is fully charged Disconnect battery from charger when charge is complete Connect specially designed T bar to your battery by matching positive to positive and negative to negative After any round even 9 holes recharge battery completely and promptly after use ...

Страница 6: ...rtex Natasha Morales at our factory in Columbus North Carolina will be glad to help you Natasha Morales Customer Service 828 436 2101 ext 2460 Natasha KangarooGolf com Packing Shipping Material We suggest saving the box and packing material that was packed with your Vortex in case you need to send in your caddie for repair ...

Отзывы:

Похожие инструкции для Vortex