and the high-voltage pads are voltage free. For this reason, please fit the device so that the plug connection
and fuse holder can be reached easily.
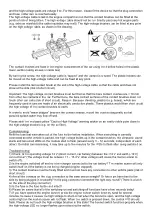
The high-voltage cable is laid in the engine compartment so that the contact brushes can be fitted at the
points of risk of being bitten. The high-voltage cable should not be run directly past very hot engine parts
(e.g. exhaust manifold) (the cable insulation may melt). The high-voltage brushes can be fitted at any point
on the high voltage cable, as shown in the drawing.
The contact brushes are fixed in the engine compartment of the car using the 4 drilled holes in the plastic
lower section (using screws or cable ties).
By turning the screw, the high-
voltage cable is “tapped” and the contact is created. The plastic holders can
be moved on the high-voltage cable and can be fixed at any point.
Please install the last contact brush at the end of the high-voltage cable so that the cable end does not
show at the side (risk of short circuit).
Important: The high-voltage contact brushes must be fitted so that the bare contact brushes are > 10 mm
from other live contacts in the car. Furthermore, the bare contact surfaces of the contact brushes must not
touch other car parts (risk of short circuit). Reason: Because shielding, plastics (e.g. hoses), which are
frequently used in cars are made of an electrically conductive plastic. These plastics would then short circuit
the high voltage of the contact brushes to earth.
In order to avoid “water bridges” between the contact strands, mount the brushes diagonally so that
possible splash water may flow off well.
Please stick the enclose
d yellow “Caution High Voltage” warning sticker on an easily visible point close to
the high-voltage brushes (e.g. on the air filter).
Commissioning:
Refit the fuse that was taken out of the fuse holder before installation. When everything is correctly
connected and the vehicle is parked, the high voltage builds up in the contact brushes, the ultrasonic sound
starts and two small LEDs on the module start to flash (around every 3
– 12 seconds, independent of each
other). On initial commissioning, it may take up to five minutes for the LEDs to flash after being switched on.
Troubleshooting:
1) Check: Is the operating voltage 12 V (direct current, car battery) between the +12 V and earth (-12 V)
connections? (The voltage must be between 11
– 13.4 V; other voltages will cause the marten scarer to
switch off).
2) Is the engine switched off and no other charger connected to the car battery? The marten scarer will only
switch itself on if the battery is not being charged (engine stopped!).
3) The contact brushes must be freely fitted and must not have any connection to other vehicle parts (risk of
short circuit).
4) Are all the contacts on the plug connection to the base device straight? Or has a pin been bent to the
side by being plugged in crookedly? Is the plug connector connected the right way round? (There is a latch
on the side of the plug connector).
5) Is the fuse in the fuse holder and intact?
6) Please be aware that all of the switching-on and switching-off functions have a few seconds delay!
7) If you have opened the engine bonnet, press the engine bonnet switch down by hand for several
minutes, because it causes the high voltage to short-circuit when the bonnet is open, and the high-voltage
control light on the marten scarer will not flash. When the switch is pressed down, the control LED should
flash. Please do not touch the high-voltage brushes in this state! The bonnet switch functions properly when
the high-voltage LED no longer flashes upon releasing the switch.


