


INSTALLATION INSTRUCTIONS
Accessories
1121256_2_A
6 of 7
Questions? Problems? For additional assistance, please contact Kallista’s Customer
Service Department at 1-888-4KALLISTA (1-888-452-5547) or FAX 1-888-272-3094.
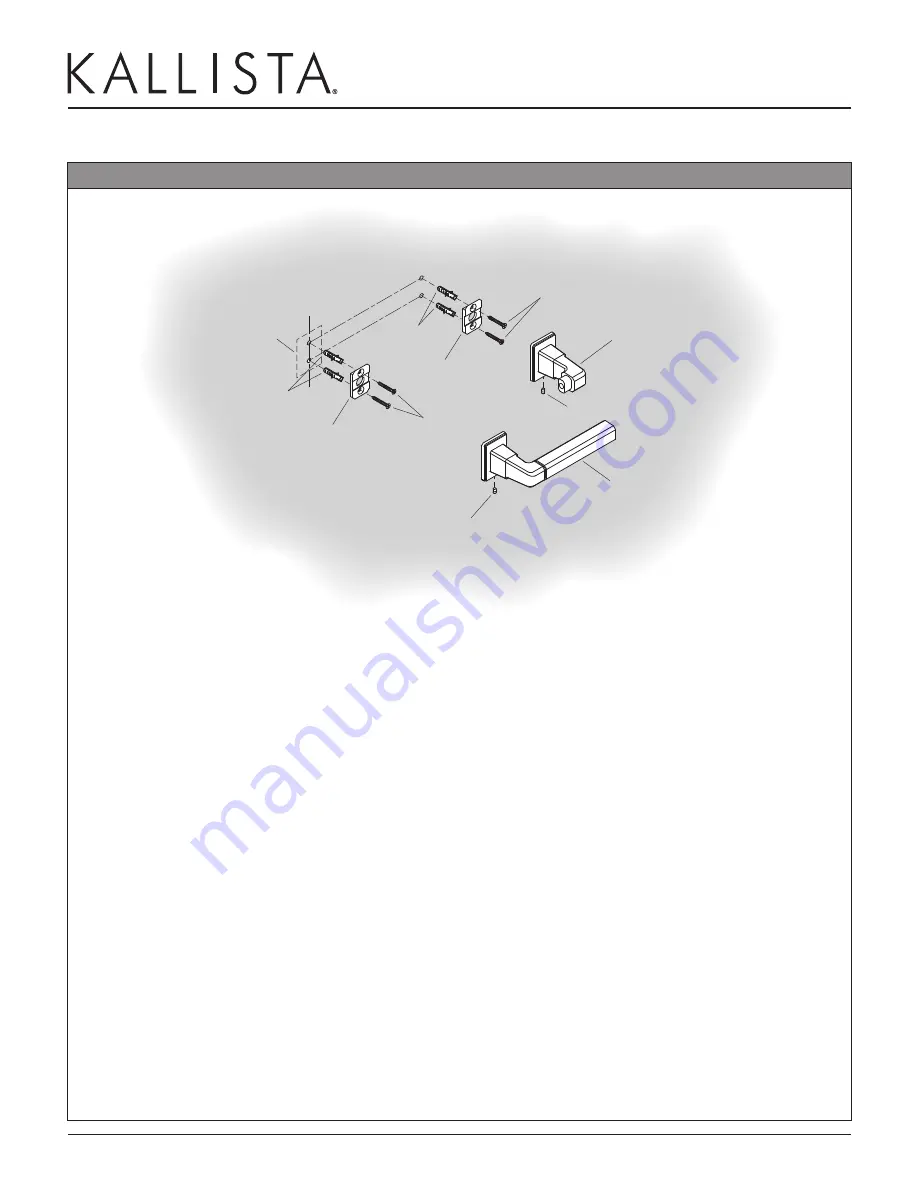
INSTALL The P34508 TISSUe hOLdeR
3.
Anchors
(if using)
Mounting Plate
Wood Screws
Anchors
(if using)
Mounting Plate
Wood Screws
Set Screw
Set Screw
Pivoting Tissue Holder
Arm Assembly
Fixed Tissue Holder
Arm Assembly
Location of Pivoting Tissue
Holder Arm Assembly
C L
Refer to the rough-in information to determine the location of the mounting plate for the fixed tissue holder
arm assembly.
Mark the location of the fixed tissue holder arm assembly mounting plate holes on the finished wall.
If drilling into a stud, drill pilot holes for the wood screws. If there is not a stud behind the mounting plate
location, drill holes to accommodate the anchors.
Install the anchors, if using. Attach the mounting plate to the finished wall with the wood screws.
Secure the fixed tissue holder arm assembly to the mounting plate with the set screw.
Place the pivoting tissue holder arm assembly on the wall so that it is supported by, and level to, the fixed
tissue holder arm assembly. Mark the location of the pivoting tissue holder arm assembly on the wall.
Set the pivoting tissue holder arm assembly aside and mark the centerline of the pivoting tissue holder arm
assembly on the wall.
Remove the fixed tissue holder arm assembly from its mounting plate. With a level, transfer the location of
the wood screw centers to the centerline of the pivoting tissue holder arm assembly.
If drilling into a stud, drill pilot holes for the wood screws. If there is not a stud behind the mounting plate
location, drill holes to accommodate the anchors.
Install the anchors, if using. Attach the mounting plate to the finished wall with the wood screws.
Re-secure the fixed tissue holder arm assembly to the mounting plate with the set screw.
Secure the pivoting tissue holder arm assembly to the mounting plate with the set screw.
Check the pivoting tissue holder arm assembly for proper operation. If necessary, loosen set screw and
adjust pivoting tissue holder arm assembly left or right, as needed.


