


4
CLOCK FUNCTION
The unit has two clock modes (12H/24H) for user to select.
The default time of the unit is
12:00.
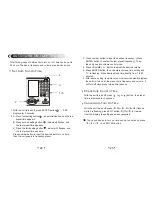
Set the clock to the current
time.
1. If the unit is turned on, press POWER button to turn it off.
2. Press ENTER button twice, indicator flashes for six
seconds.
3. While is flashing, press number button to set current time.
SET THE CLOCK
ENTER
20
button 0~9
6
ENTER
+
CLOCK FUNCTION
The unit will adjust the current speed automatically during
charging.
Use NiMH batteries, and do not charge them for more than
seven hours.
When using new rechargeable batteries or those which have
not been used for a long time, charge them fully, then use them
until they have completely run down. Repeat this cycle two
more times, then those batteries can be used normally.
Do not leave fully charged batteries unused for a long time.
CHECK CURRENT TIME
1. When the unit is off, current time indicates in the display.
2. When the unit is on, hold down EXIT button about 0.5 second
to display current time 3 seconds.
5
SELECT TIME MODE
9
Press button 1 or 2
1. Disconnect the AC adaptor, remove the batteries, till nothing
appears in the display.
2. About 30 seconds later, connect the AC adaptor or insert
batteries:
SET
appears in the display.
3. Quickly press ENTER button twice,
12-24
appears in the
display for 3 seconds.
Please see below
.
4. Press number button 1 or 2 to select 12H or 24H time mode.
1
/
2
ENTER
ENTER
+
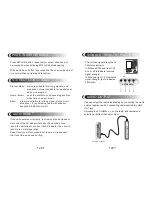
To meet your listening requirement in different countries, MW
step can be selected.
North and South America
10KHz
Other Countries
9KHz
MW STEP 9K/10K SELECTION
1. Disconnect the AC adaptor, remove the batteries, till nothing
appears in the display.
2. About 30 seconds later, connect the AC adaptor or insert
batteries,
SET
appears in the display.