15
16
Effect Settings
To enter the Effect Settings Menu, press
and hold the Record button for 2 seconds.
Now click the Power button to scroll
through the Effects settings and press
the Record button again to confirm your
chosen setting.
Zoom
Digital Zoom has following magnifications
x1, x2, x3, x4.
Filter
You can add a color filter effect to your
footage/photo.
Availble filters include: Black & White,
Sepia, Vivid, Natural, Negative, Warm,
Cool, Red, Green, Blue.
AE Meter
You have control over how the camera
meters (interprets) the light in a scene.
You can choose to measure the light by
Center, Average or Spot. The Default
Mode is Center.
EV
You can control the exposure value – that
is, the amount of light the camera records.
Interval range is: -2.0/-1.0/+0.0/+1.0/+2.0
White Balance
Manually control the White Balance
setting.
Interval range is: Auto, 3000K, 5500K,
6500K.
ISO
You can control the ISO (sensitivity) level
that the camera captures footage at.
The default option is Auto.
Interval options:
Auto/100/200/400/800/1600.
Upside Down
When checked, this setting will allow you
to invert the footage captured - Useful
for when the camera is positioned upside
down.
Time Stamp
This setting will embed the Time on the
corner of your photos and videos.
The default value is OFF.
Note: The higher the ISO number the
more noise/grain will appear in your
footage.
Photo Settings
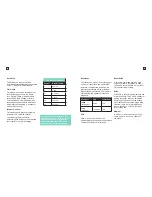
MP
Resolution
Aspect Ratio
8M
3264x2448
4:3
5M
2592x1944
4:3
3M
2048x1536
4:3
2M
1600x1200
4:3
Picture Quality
With this setting you select the quality of
the images.
S.Fine is the highest quality and therefore
the largest file size. As you move down
the options your file sizes will be smaller
and the quality will be lower.
Содержание X2
Страница 1: ...1 x2 Complete User Guide X2 Action Camera...
Страница 15: ...27 KBA12035 002 A02...


