Pg
1
User Manual
Pg
2
User Manual
Digital Photo Frame
Digital Photo Frame
Ultra Slim
L
E
D
Ultra Slim
L
E
D
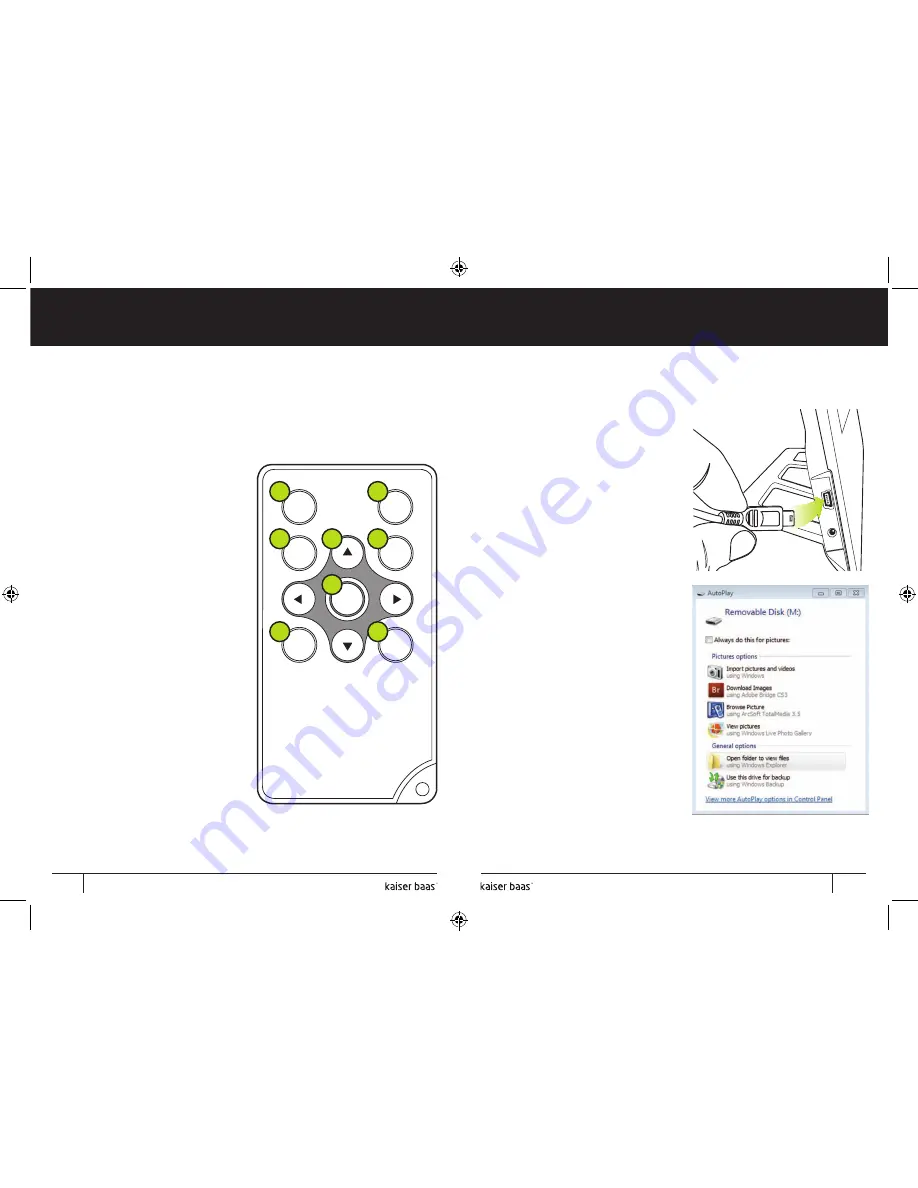
5. Remote control
The Digital Photo Frame includes a remote with the following
functions:
POWER
ROTATE
SLIDE
SHOW
EXIT
SETUP
ZOOM
OK
1.
POWER : Power On/Off
2.
SETUP: Go directly to Setup
mode
3.
ROTATE: When a slideshow is
paused, press ‘ROTATE’ to rotate
picture 90° clockwise
4.
Arrow keys: Use to navigate
between menus and through
slideshows
5.
ZOOM: When a slideshow is
paused, press ’ZOOM’ to
magnify picture display size
6.
OK: Press to confirm, play or
pause. During play mode, press
this button to pause, press
again to resume
7.
SLIDESHOW: Press to start or
pause a slideshow.
8.
EXIT: Press to return to upper
page or enter main menu
1
2
3
4
5
6
7
8
6. Loading to the on-board memory
The Digital Photo Frame has 2GB
on-board memory for storing
up to 1,000 photos.
The easiest way to load photos
onto the on-board memory is to
connect directly to the computer
using the supplied USB cable.
Make sure the power is connected
to the photo frame before
starting.
Connect the mini end of the USB
cable to the mini USB port on the
Digital Photo Frame. Connect the
other end to a USB port on your
computer.
A dialog box similar to the one on
the right should appear on your
computer.
Select
‘Open folder to view
files’
. Then, simply copy the
photos you would like to this
folder.
They will now be stored on the
photo frame’s on-board memory.
6
7
Содержание Ultra Slim LED
Страница 1: ...Digital Photo Frame User Manual Ultra Slim LED ...
Страница 11: ......


