84
EN
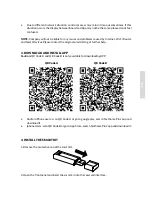
3. Attach the QR code packed with SMART KIT to the side panel of the machine, ensure it is con
-
venience to be scanned by the mobile phone. Alternatively, user can take picture of the QR Code
and save in into their own phone.
WARNING: This interface is only compatible with SMART KIT provided by the manufacturer
5. USER REGISTRATION
•
Please ensure your mobile device is connected to Wifi router. Also, the Wifi router has alrea
-
dy connected to Internet before doing user registration and network configuration.
•
It is better to log in your email box and active your registration account by clicking link in case
you forget the password.
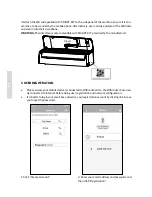
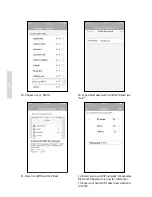
2. Enter your email address and password, and
then click “Registration”.
1. Click “Create Account”.
Inser
t
85
EN
6. NETWORK CONFIGURATION
Caution:
•
It is necessary to forget any other around network and make sure the Android or IOS device
just connect to the WIFI network you want to configure.
•
Make sure the Android or IOS device WIFI function works well and can be connected back to
your original WIFI network automatically.
Kindly reminder:
When AC enters into AP mode, the air-conditioning remote controller can’t control it. It is neces
-
sary to finish network configuration or power the AC again in order to control it. Alternatively, you
need to wait 8 minutes to let the AC quit AP mode automatically.
USING ANDROID DEVICE TO DO NETWORK CONFIGURATION
1. Make sure your mobile device has already been connected to the wifi network which you want
to use. Also, you need to forget other irrelative wifi network in case it influences your cofiguration
process.
2. Disconnect the power supply of AC.
3. Connect the power supply of AC, and seven times press the „ LED ” button in the remote control.
4. When the AC displays AP , it means that the AC WIFI has already entered into AP Mode.
Some type of AC do not need the
2
step to be in AP mode.
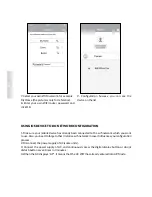
6. Scan QR Code which 9 is packed with smart
kit.
5. Press “+Add Device”.


