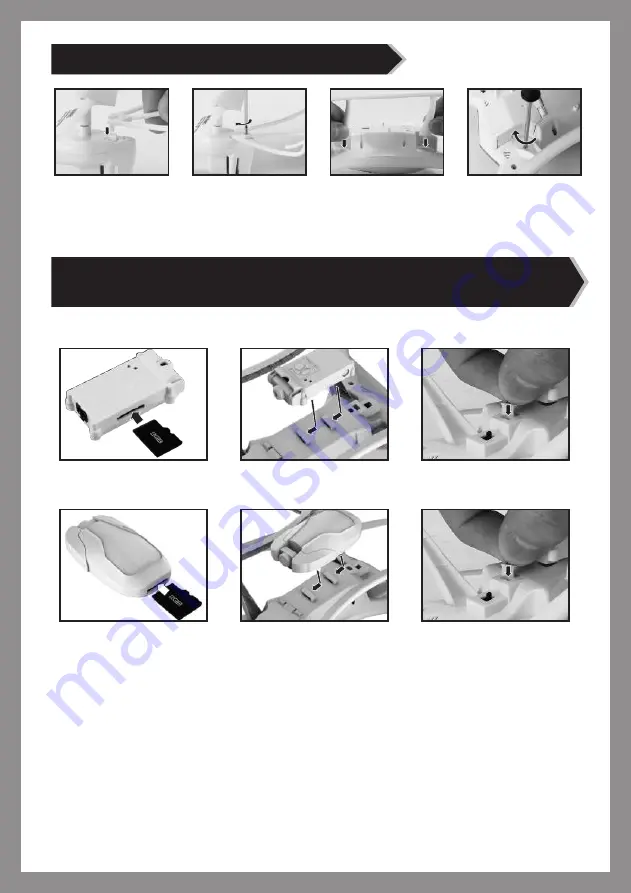
Instruction for video shooting /photographing
(0.3MP / 2MP camera suit should be purchased additionally)
Protect cover / Landing gear installation
1.Insert the SD card slightly into the webcam module’s card slot, then tighten the module to the
card slot at the bottom of the battery case ,and then open the upper cover and take out the
webcam’s plug and insert it to the slot at the bottom of the quadcopter.
2.By pressing the photography key, the red light of the quadcopter would flash once, indicating
that photos are being taken; by pressing the video key, the red light would flash two times,
meaning that the quadcopter is taking video; Press the video key again to stop the shooting
and the red light turns off , that means a video is finished .
(* Quadcopter with a 2MP camera could adjust the camera angle by the up/down button on
the remote control)
3.To take out the recorded data, press the SD card slightly to take it out, then insert the card
into the card reader and insert the reader into the USB slot of the computer. Its address is “my
computer”-“portable hard disk”
2
1.Insert the protect
cover firmly to the
slots on the quadcopter.
2.Screw clockwise to
tighten.
4.Screw clockwise to
tighten.
3.Insert the landing gear
firmly to the slots on the
quadcopter.
30W camera installation
2 MP camera installation


