Kadee RC Скачать руководство пользователя страница 21

21

This warranty does not cover: normal wear and tear, cosmetic or physical 
damage to the surface of the product, including cracks or scratches. Any 
damage due to improper installation, operation, maintenance, handling, 
accident, fire, water or liquids, power changes, abuse, alteration, modification, 
negligence, battery leak, damage caused by third parties, damage due to 
attempted repair by anyone other than Kadee, acts of God, devices purchased 
from anyone other than an authorized retailer or distributor or devices that have 
been previously registered.

This warranty is considered void if the product case has been opened or the 
protective wrap has been removed by anyone other than Kadee.

Any device needing to be returned to Kadee must have a return merchandise 
authorization (RMA) number. Any device received at Kadee without a valid 
RMA number will be returned to the sender at sender’s expense. RMA numbers 
are valid for (10) business days.

Kadee reserves the right to inspect any and all equipment involved in a warranty 
claim. Repair or replacement decisions are at the sole discretion of Kadee.

A technical representative will be able to determine if the device is defective 
and still under the limited warranty period. It also may be necessary for the 
device to be sent for evaluation to determine the validity of the warranty claim.

If the device is not deemed defective or is out of the limited warranty period, 
you may be given the option to repair the device for a fee or have the device 
returned as is at your expense.

DISCLAIMER:

REPAIR OR REPLACEMENT AS PROVIDED UNDER THIS WARRANTY 
IS YOUR EXCLUSIVE REMEDY. THIS WARRANTY IS IN LIEU OF ALL 
OTHER EXPRESS OR IMPLIED WARRANTIES. KADEE SHALL NOT 
BE RESPONSIBLE OR LIABLE FOR ANY SPECIAL, INCIDENTAL OR 
CONSEQUENTIAL DAMAGES FOR BREACH OF ANY EXPRESS OR 
IMPLIED WARRANTY ON THIS PRODUCT. EXCEPT TO THE EXTENT 
PROHIBITED BY LAW, ANY IMPLIED WARRANTY, INCLUDING THE 
WARRANTY OF MERCHANTABILITY OR THE WARRANTY OF FITNESS 
FOR A PARTICULAR PURPOSE ON THIS PRODUCT IS LIMITED IN 
DURATION TO THE TERM OF THIS WARRANTY. Some states/countries do 
not allow limitations of how long an implied warranty lasts or the exclusion or 
limitation of such damages, so these limitations and exclusions may not apply 
to you. This warranty gives the consumer specific legal rights and you may 
also have other rights which vary from location to location. If any portion of this 
warranty is held to be invalid or unenforceable for any reason, such finding will 
not invalidate any other provision.

Содержание RC

Страница 1: ...Transmitter User Guide...

Страница 2: ...9 2 4 3 Group Modes 9 3 Advanced Operation 10 3 1 Modes Overview 10 3 1 1 Standard Modes 10 3 1 2 List Modes 11 3 1 3 Group Modes 11 3 2 Using Standard Modes 12 3 2 1 Delay Mode 12 3 2 2 Tandem Mode...

Страница 3: ...2 Operating the Relay 18 4 2 1 Relay Overview 18 4 2 2 Connecting the Receiver Relay to a Circuit 18 4 2 3 Actuating the Relay 18 5 Reference 19 5 1 Trouble Shooting 19 5 1 1 Error Codes 19 5 1 2 Circ...

Страница 4: ...we believed that the expense was necessary to provide you with the highest quality product that Kadee can stand behind This User Guide provides you with instructions and recommendations to guide you...

Страница 5: ...provides an overview of the Kadee Remote Control and it s basic functions To discover more features including Relay Control Turnout Control Locomotive Control Motor Control and many more functions an...

Страница 6: ...rt Sec 1 3 will get you up and running in no time and Typical Applications Sec 4 will guide you in some of the more common uses Advanced Operations Sec 3 will go more in depth into customizing the Kad...

Страница 7: ...o turn the Display on 1 3 3 Binding Receiver to Transmitter 1 Hold the MODE Key for one second Display will show SEL then press and release the 6 Key Display will show bnd Note The next sequence must...

Страница 8: ...eceive commands it must be addressed Key in the Receiver s two digit address Example Key in 01 Receiver 01 will now accept commands Operate Servo by pressing the Key Operate the Receivers internal Rel...

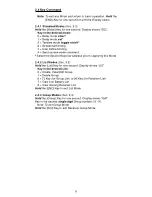
Страница 9: ...em wake command Select the desired Receiver address prior to applying this Mode 2 4 2 List Modes Sec 3 3 Hold the List Key for one second Display shows LIS Key in the desired List 0 Create View Edit G...

Страница 10: ...Receiver and set it back to its original position Example A switch yard locomotive is a perfect example for Delay Mode Opening the locomotives coupler s enables a car to be dropped and locomotive cont...

Страница 11: ...have low batteries Low Battery List Bound Receivers that have lost Communication with the Transmitter Missing List 3 1 3 Group Mode Group Mode enable you to operate a predefined List of Receivers as a...

Страница 12: ...y until the display shows SEL 3 Press the 0 Key Display flashes CLr Delay Mode is now cleared on the selected Receiver 3 2 2 Tandem Mode Servo and Relay operate simultaneously with a push of either th...

Страница 13: ...l SEL appears in Display 2 Press the 7 Key Display shows _ _ Transmitter waits for a two digit Address to Unbind 3 Key in the Address you wish to Unbind 4 Press the On Off Key to Unbind the selected a...

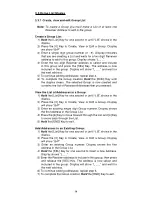
Страница 14: ...Receiver Addresses that you entered View the List of Addresses in a Group 1 Hold the List Key for one second or until LIS shows in the display 2 Press the 0 Key to Create View or Edit a Group Display...

Страница 15: ...ND Key to exit 3 3 2 Delete Group 1 Hold the List Key for one second or until LIS shows in the display 2 Press the 1 Key Display will show that you have entered Delete Group then show GrP 3 Select the...

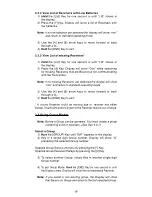
Страница 16: ...e 3 Use the 4 and 6 arrow keys to move forward or back through a list 4 Hold the END Key to exit A bound Receiver could be missing due to receiver has fallen asleep insufficient battery power or the R...

Страница 17: ...2 3 4 1 3 Set Servo Delay The servo can be set to delay for 30 seconds 1 Select Receivers address 2 Hold the Mode Key until SEL appears in the Display 3 Press the 1 Key The display will show S r 4 Pr...

Страница 18: ...250mA fuse in your circuit to protect the relay Fuses and fuse Holders are available for purchase from Kadee if you cannot find them locally 4 2 2 Connecting the Receiver Relay to a Circuit The Recei...

Страница 19: ...See section 4 2 Operating the Relay for proper wiring and circuit protection 5 1 3 Transmitter Problems If the Transmitter should act abnormal or lock up remove the batteries from the Transmitter for...

Страница 20: ...be compliant with the applicable regulations governing a radio transmitter in the 902GHz to 988GHz frequency range 5 5 Warranty LIMITED WARRANTY Kadee Quality Products will repair or replace at our s...

Страница 21: ...s defective and still under the limited warranty period It also may be necessary for the device to be sent for evaluation to determine the validity of the warranty claim If the device is not deemed de...

Страница 22: ...2 2 5 1 2 Code s see Errors Combine see List Commands 2 4 Connectors 4 1 1 4 2 2 Create 3 3 Customize 3 1 1 D Define see Bind Delay 3 2 1 4 1 3 Digit see Address Display 1 2 E Edit 3 1 2 3 3 1 End 2 4...

Страница 23: ...use see Delay Protection see Fuses R Receiver 1 3 3 2 2 3 Relay 4 2 S Select ed 3 2 Sequential see Bind Servo 4 1 Setup 1 3 1 Sleep 2 3 T Tandem 3 2 2 Toggle 3 2 2 U Unbind ing 3 2 4 User Defined see...

Страница 24: ...nge Remote Uncoupling Large Tactile Keypad Stand Alone Operation Multiple Operating Modes Simple Addressing Binding Operate up to 99 Remote Devices Receiver with On board 250mA Relay Monitor Receiver...

Отзывы: