


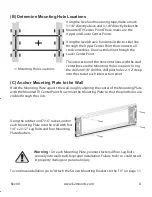


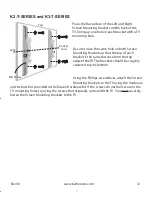


(B) Determine Mounting Hole Locations
Using the level and measuring ta
pe, make a mark
3-1/8” directly above and 3-1/8” directl
y below the
Mounted TV Center P
oint. These marks are the
Upper and Lower Center P
oints.
Using the le
vel, draw a horizontal (side-to-side) line
through the Upper Center Point that connects all
stud centerlines.
Draw a similar line through the
Lower Center P
oint.
The intersection of the horizontal lines with the stud
centerlines ar
e the Mounting Hole Locations. Using
the drill and 1/8” drill bit,
drill pilot holes 2-1/2” deep
into the stud at each intersection point.
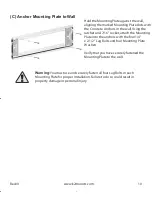
(C)
Anchor Mounting Plate to the Wall
Hold the Mounting Plate against the wall,
roughly aligning the center of the Mounting Plate
with the Mounted TV Center Point. Now move the Mounting Plate so that the pilot holes ar
e
visible thr
ough the slots.
Using the ratchet and 7/16” sock
et, anchor
each Mounting Plate into the wall with f
our
1/4" x 2/1/2" Lag Bolts and four Mounting
Plate W
ashers.
W arning: On each Mounting Plate, you must fasten all four Lag Bolts
securely into wall studs for proper installation. Failure to do so could result
in property damage or personal injury.
.
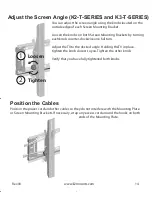
To continue installation, go to “Attach the Screen Mounting Brackets to the TV ” on page 11.
Mounting Hole Locations
6
Warning :
Rev00
8
www.k2mounts.com
Содержание K2-F-Series
Страница 1: ......
Страница 19: ...16 Rev00 K2 Mounts is a Product of TV Mounting Brackets Inc 18 www k2mounts com ...


