K-Team Koa-PicoITX Скачать руководство пользователя страница 22


Koa-PicoITX User Manual rev 1.0 


22   


6. 

       WARRANTY 


K-TEAM  warrants  that  this  product  is  free  from  defects  in  materials  and 

workmanship and in conformity with the respective specifications of the product for the 
minimal  legal  duration,  respectively  one  year  from  the  date  of  delivery,  under  normal 
use conditions. 

 
Upon  discovery  of  a  defect  in  materials,  workmanship  or  failure  to  meet  the 

specifications in the Product during the afore mentioned period, Customer must request 
help on K-Team Internet forum on 

http://www.k-team.com/kforum/

 by detailing: 


The type of the product used (package, version, & serial number). 


The extension modules. 


The programming environment of the robot (standard, version, OS). 


The standard use of Product before the appearance of the problem. 


The description of the problem. 


If no answer is received within two working days, Customer can contact K-TEAM 

support by phone or by electronic mail with the full reference as stated below 

 
If the defect is identified as a “warranty” related problem, K-TEAM shall then, at 

K-TEAM's  sole  discretion,  either  repair  such  Product  or  replace  it  with  the  equivalent 
product  without  charging  any  technical  labour  fee  and  repair  parts  cost  to  Customer, 
under  the  condition  that  Customer  brings  such  Product  to  K-TEAM  within  the  period 
mentioned  before.  Repair  or  replacement  under  warranty  does  not  entitle  to  original 
warranty team extension. 

 
This  limited  warranty  is  invalid  if  the  factory-applied  serial  number  has  been 

altered or removed from the Product. 

 
This  limited  warranty  covers  only  the  hardware  and  software  components 

contained in the Product. It does not cover technical assistance for hardware or software 
usage and it does not cover any software products contained in the Product.  

 
This limited warranty is non-transferable.  
 
It is likely that the contents of Customer's flash memory will be lost or reformatted 

in the course of the service and K-TEAM will not be responsible for any damage to or 
loss of any programs, data or other information stored on any media or any part of the 
Product  serviced  hereunder  or  damage  or  loss  arising  from  the  Product  not  being 
available for use before, during or after the period of service provided or any indirect or 
consequential damages resulting therefore. 

 
If  during  the  repair  of  the  product  the  contents  of  the  flash  memory  are  altered, 

deleted  or  in  any  way  modified,  K-Team  is  not  responsible  whatever.  Customer’s 
product  will  be  returned  to  customer  configured  as  originally  purchased  (subject  to 
availability of software). 

Содержание Koa-PicoITX

Страница 1: ...KOA KOA KOA KOA PICO PICO PICO PICOITX ITX ITX ITX User manual Version 1 0 april 2010 ...

Страница 2: ...il info k team com Url www k team com LEGAL NOTICE The contents of this manual are subject to change without notice All efforts have been made to ensure the accuracy of the content of this manual However should any error be detected please inform K Team The above notwithstanding K Team can assume no responsibility for any error in this manual ...

Страница 3: ...10 3 USAGE 11 3 1 ACCESS TO THE KOALA ROBOT 11 3 2 NETWORK CONFIGURATION 11 3 3 FILE TRANSFER 12 3 4 REMOTE CONNECTION 12 3 5 DIGITAL INPUT OUTPUT PORTS USAGE 12 3 6 MOTORS USAGE 13 3 7 PAN TILT CAMERA USAGE 14 4 PROGRAMMING 15 4 1 DIRECTLY ON THE ROBOT 15 4 1 1 Template program 15 4 1 2 Using examples 16 4 2 ON ANOTHER COMPUTER 18 5 SOFTWARE REINSTALLATION 19 5 1 UBUNTU INSTALLATION 19 5 2 LIBKOR...

Страница 4: ...sor 1 0GHz VIA C7 500MHz VIA EdenTM ULV Chipset VIA VX700 Unified Digital Media IGP chipset RAM 1GB Hard drive 80GB Maxtor MobileMax STM980215A System Memory DDR2 533 667 SODIMM socket effective speed to 533MHz VGA Integrated VIA UniChrome Pro II 3D 2D AGP graphics with MPEG 2 4 and WMV9 video decoding acceleration LAN Gigabit Ethernet port controlled by a VIA VT6122 Gigabit LAN controller Audio L...

Страница 5: ...d especially the Forum and the FAQs Unpacking and Inspection Koa PicoITX s package description and first start up Hardware installation explanation on how to mount the Koa PicoITX on a Koala and how to mount extension inside the case Usage description of the usage of the PicoITX and its devices Programming description of the programming methods of the Koa PicoITX Software reinstallation instructio...

Страница 6: ...h Koala turn it off It will save the battery life 1 5 Recycling Think about the end of life of your robot Parts of the robot can be recycled and it is important to do so It is for instance important to keep batteries out of the solid waste stream When you throw away a battery it eventually ends up in a landfill or municipal incinerator These batteries which contain Lithium Polymer can contribute t...

Страница 7: ...ING AND INSPECTION 2 1 Package Content Figure 2 1 Content of the Koa PicoITX extension Your package should contain the following items 1 Koa PicoITX box 2 Koa PicoITX Support CD 3 Power Supply cable 4 Serial cable DB9 DB15 5 4x fixation screws ...

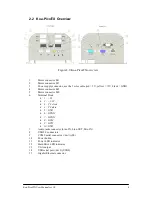
Страница 8: ...2V black GND 4 Motor connector M2 5 Motor connector M0 6 Terminal block 1 5V 2 3 3V 3 I2 C clock 4 I2 C data 5 GND 6 GPIO2 7 GPIO3 8 GPI4 9 GPI5 10 GND 7 Audio jacks connector Line IN Line OUT Mic IN 8 USB 2 0 connectors 9 COM0 serial connector dev ttyS0 10 Power button 11 Power LED indicator 12 Hard Drive LED indicator 13 VGA output 14 USB serial port dev ttyUSB0 15 Gigabit Ethernet connector ...

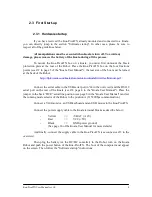
Страница 9: ... KoalaSilverUserManual pdf Connect the serial cable to the USB serial port n 14 in the overview and the RS232 serial port on the rear of the Koala see n 4 page 4 in the Koala User Manual Place the jumper in the back DCE serial line position see page 8 in the Koala User Manual and set the running mode selector of the Robot to the position A 115200bps communication Connect a VGA monitor an USB keybo...

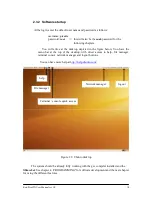
Страница 10: ...ou have the menu bar at the top of the desktop with direct access to help file manager terminal consol network manager and logout buttons You can have more help at http help ubuntu com Figure 2 3 Ubuntu desktop The system should be already fully working with the gcc compiler installed and the libkorebot See chapter 4 PROGRAMMING for software development and the next chapter for using the different...

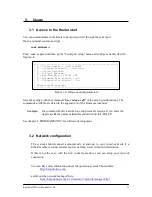
Страница 11: ...he uppercase B then press return this should return b 1 19 1 19 See chapter 4 PROGRAMMING for software development 3 2 Network configuration The system should connect autonomously at start up to your wired network if a Ethernet cable is connected and you have a dhcp server without identification If this is not the case with the icon in the figure above you can setup your network connection You can...

Страница 12: ...ddress PATH is the path to the file destination on the remote computer 3 4 Remote connection You can connect to the robot by different ways for transferring files with the scp command seen above using the RemoteDesktop feature configure the System Preferences Remote Desktop menu with the ssh protocol command ssh X picoitx ROBOT_IP from where you can launch the file manager nautilus any other graph...

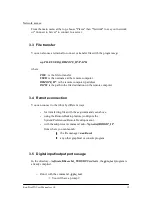
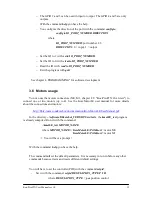
Страница 13: ...coITX Overview to connect one or two motors up to 4 See the KoreMotorLE user manual for more details about the connections and motors http ftp k team com korebot documentation KoreMotorLE UserManual pdf In the directory software libkorebot_VERSION src tests the kmotLE_test program is already compiled Run it with the command kmotLE_test MOTOR_NAME where MOTOR_NAME KoreMotorLE PriMotor1 motor M0 Kor...

Страница 14: ...NG for software development 3 7 Pan tilt camera usage You can connect up to two Pan tilt cameras using the motors connectors chapter 2 2 Koa PicoITX Overview M0 and M1 for the first one M2 and M3 and another KoreMotorLE needed See the Pan Tilt user manual for more details about the connections http ftp k team com koala pan tilt PanTiltCameraManual pdf In the directory software libkorebot_VERSION s...

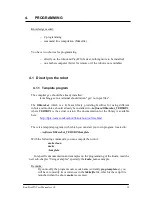
Страница 15: ...should already be installed in software libkorebot_VERSION where VERSION is the actual version The documentation for the library is available here http ftp k team com korebot libkorebot doc files html There is a template program with which you can start your own program located in software libkorebot_VERSION template With the following commands you can compile then run it make clean make template ...

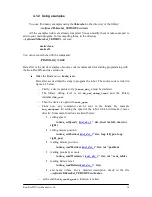
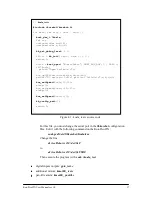
Страница 16: ...low Firstly a device pointer of type knet_dev_t must be declared The library debug level is set kb_set_debug_level and the library initialised kb_init Then the device is open with knet_open From now any command can be sent to the Koala By example koa_setSpeed for setting the speed of the robot which will make it move directly Some main functions are listed below setting speed int koa_setSpeed knet...

Страница 17: ...test digital inputs outputs gpio_test c additional motors kmotLE_test c pan tilt camera kmotLE_pantilt c koala_test c include korebot korebot h int main int argc char argv knet_dev_t koala int rc unsigned char buf 16 unsigned char a b c d kb_set_debug_level 2 if rc kb_init argc argv 0 return 1 koala knet_open Koala Robot KNET_BUS_ANY 0 NULL if koala printf Open failed r n koa_getOSVersion koala a ...

Страница 18: ...ation or install the VirtualBox virtual machine from Sun Microsystems with the Ubuntu OS installed into it http www virtualbox org Then you install the compiler and the libkorebot as described in the annexes You don t need to install the gpio and i2c drivers as they are working only on the PicoITX Finally you can compile your program as explained in chapter above 4 1 above Directly on the robot th...

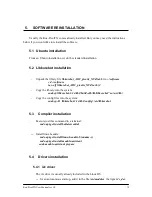
Страница 19: ...itx_XYZ tar bz2 Copy the library into the system sudo cp libkorebot 1 14 kb1 build x86 lib libkorebot so usr lib Copy the config files into the system sudo cp R libkorebot 1 14 kb1 config etc libkorebot 5 3 Compiler installation Execute just this command in a terminal sudo apt get install build essential Install linux headers sudo apt get install linux headers uname r sudo apt get install module a...

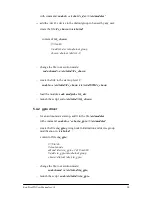
Страница 20: ... etc init d i2c_chown etc rc2 d S99i2c_chown load the module sudo modprobe i2c_dev launch the script sudo etc init d i2c_chown 5 4 2 gpio driver for an autonomous start up add it in the file etc modules with command sudo sh c echo via_gpio etc modules create the file via_gpio giving node initialization and device group modification in etc init d content of file via_gpio bin sh create node mknod de...

Страница 21: ... file gpio driver_XYZ tar bz2 mkdir software cd software tar xjf gpio driver_XYZ tar bz2 in the directory gpiodriver driver clean the old file recompile it unload the old module install the new one and load it with the commands make clean pay attention to not use sudo for this command else you will have to resintall the kernel headers files make sudo make install sudo make load ...

Страница 22: ...and repair parts cost to Customer under the condition that Customer brings such Product to K TEAM within the period mentioned before Repair or replacement under warranty does not entitle to original warranty team extension This limited warranty is invalid if the factory applied serial number has been altered or removed from the Product This limited warranty covers only the hardware and software co...

Страница 23: ...rom the use of the Product in conjunction with any accessories products or ancillary or peripheral equipment or where it is determined by K Team that there is no fault with the Product itself K Team expressly disclaims all other warranties than stated hereinbefore expressed or implied including without limitation implied warranties of merchantability and fitness for a particular purpose to the ful...

Страница 24: ...Koa PicoITX User Manual rev 1 0 24 K Team S A Rue Galilee 9 1400 Yverdon les bains Switzerland ...

Отзывы: