background image

6

Points For Attention

Warning:

To reduce the risk of fire or electric shock, do not expose this appliance to rain or moisture.

Dangerous high-voltage parts and Laser are present inside the enclosure. Do not open the cabinet.
Refer servicing to qualified personnel only.

Precautions on Use:

DVD players are high-end electric appliances, in which large-scale

integrated circuits and precise laser devices are incorporated. In order to prolong the lifespan of the
appliance, please don't turn on and turn off within a time interval of less than 10 seconds. For the sake
of safety, be sure to cut off the power supply of the appliance before conducting any connections.

Note:

The illustrations in this operation instruction may be different from real objects.

Notes on Maintenance

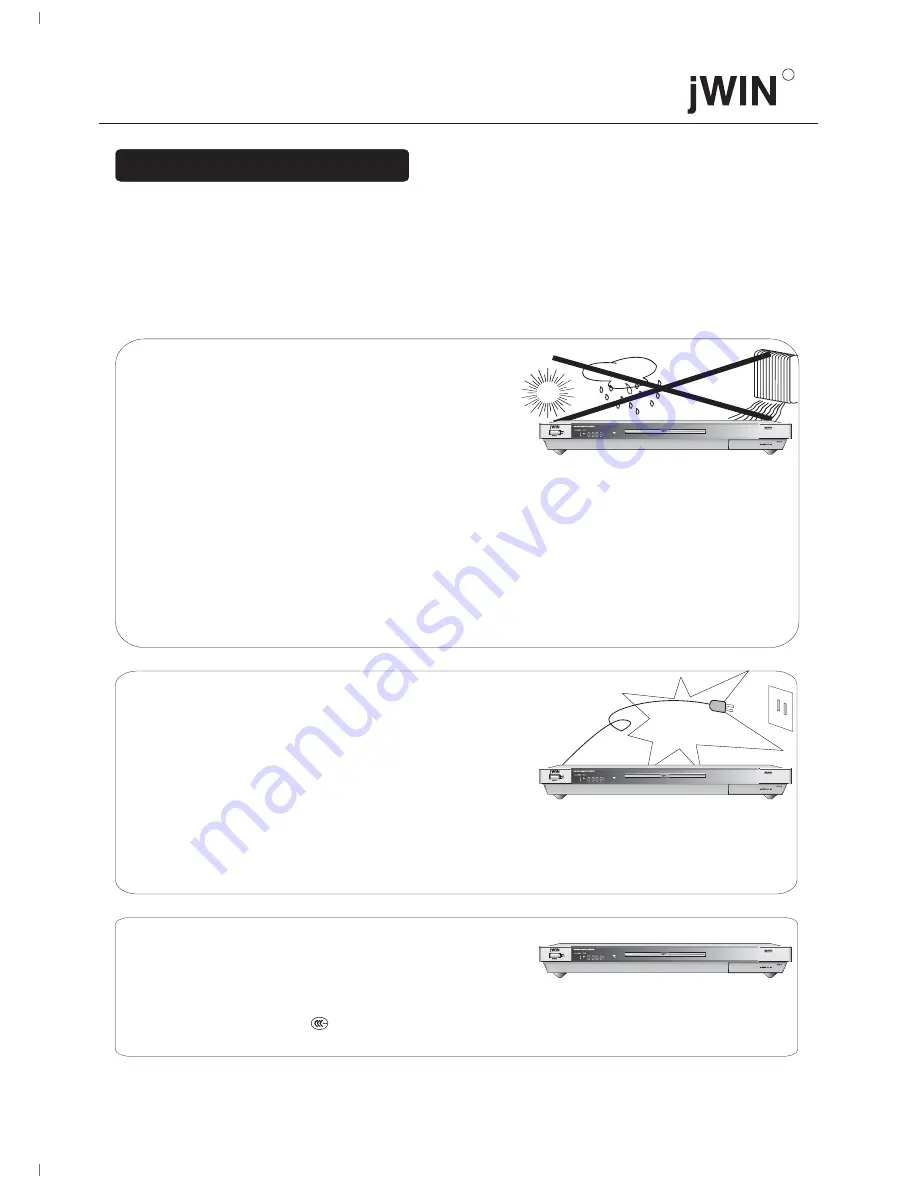
Don't put the appliance in the following places:

* Places exposed to direct sunlight or close to heat

radiating appliances (e.g. heater).

* The top of other heat radiating objects.
* Places with poor ventilation or full of dust.
* Places apt to vibration, rain, moisture, or where

The appliance can not be stably placed.

* Places close to large-powerful loudspeakers or on the same table with loudspeakers so as to avoid vibration,

which may cause malfunction.

* Do not move the appliance from a cold place to a warm one with a sharp temperature difference and the dew

may be condensed on the pick-up head, which is apt to result in the malfunction of the appliance. Take out
the disc and connect the power supply. The appliance will resume its normal working state in 1-2 hours.

* If using the appliance under poor external surroundings for a long time, dust may accumulate on the laser

head. Use a laser head cleaning disc to clean. Please refer to the specifications of the cleaning disc for detail.

* Use a soft cotton cloth with neutral detergent to wipe the appliance. Do not use materials such as sand paper,

alcohol or gasoline, etc.

* Do not use seriously distorted or worn discs in order not to damage disc loading function of the appliance.

~120V/60Hz

Notes on the power supply

* Use proper power supply voltage Voltages other

than the rated value are strictly prohibited.

* Hold the plug tightly when plugging into or pulling

out the AC plug, and do not pull the power cord.

* Please make sure that power cord and other lines

are properly connected before turning on power supply.

* Please turn down the volume of the power amplifier

to the minimum before turning on power supply
and adjust the volume according to the need when starting play in order not to damage the power
amplifier or loudspeaker.

* If you intend not to use the appliance for a long time, please remove the plug of power cord from

the outlet.

Notes on servicing

* Don't open the appliance to repair by yourself. If

there is a problem, please refer servicing to a local
maintenance department.

* Be sure to cut off power supply before removing

the cover to avoid possible electric shock.

* The components with the

mark must be replaced

with the ones of the same type and specification.

"

"

R

SR

SR

SR

Содержание JD-VD503

Страница 1: ...R JD VD503 JD VD503 SR...

Страница 2: ...ot enter into the operation of parental lock setting here we offer you the super secret code 1369 You may use this code to enter into the operation of parental setting To prevent the young children fr...

Страница 3: ...n an equilateral triangle is intended to alert the user to the presence of important operating and maintenance servicing instructions in the literature accompanying the appliance WARNING CAUTION TO RE...

Страница 4: ...f not installed and used in accordance with the instructions may cause harmful interference to radio communications However there is no guarantee that interference will not occur in a particular insta...

Страница 5: ...water 6 Clean only with dry cloth 7 Do not block any ventilation openings Install in accordance with the manufacturer s instructions 10 Protect the power cord from being walked on or pinched particul...

Страница 6: ...ing to qualified service personnel Servicing is required when the apparatus has been damaged in any way such as power supply cord or plug is damaged liquid has been spilled or objects have fallen into...

Страница 7: ...cal pick up lens and disc drive parts are dirty or worn down the picture quality becomes poor To obtain a clear picture we recommend regular inspection and maintenance cleaning or parts replacement ev...

Страница 8: ...n of the appliance Take out the disc and connect the power supply The appliance will resume its normal working state in 1 2 hours If using the appliance under poor external surroundings for a long tim...

Страница 9: ...General Setup Audio Setup Video Setup Password Setup Page Preference Setup Page How to Use Programming Function 32 Programmed Play for SVCD VCD and CD Discs Programmed Play for DVD Disc How to Use Se...

Страница 10: ...11 MIC Volume Control Knob 12 ECHO Control 13 MIC Jack1 14 MIC Jack2 15 MIC Cover 1 Disc Tray 2 OPEN CLOSE Button 3 PLAY Button 4 PAUSE Button 5 STOP Button 6 STANDBY Button 7 RETURN Button 8 AUDIO B...

Страница 11: ...4 PREV button 15 NEXT button 16 TITLE button 17 SLOW MOTION button 18 RETURN button 19 SUBTITLE button 20 button 21 SPECTRUM button 22 PROGRESSIVE button 23 CLEAR button 24 SEARCH button 25 3D 26 AUDI...

Страница 12: ...TED DISC FORMATS 1 Disc Format Display 2 Title Display 3 Chapter Track Display 4 Playing Display 5 Repeat Display 6 Pause Display 7 Hour Display 8 Minute Display 9 Second Display When playing discs VF...

Страница 13: ...ng the remote control On playing DVD discs On playing Super VCD discs On playing DVCD discs On playing MP3 discs On playing Picture CD discs On playing VCD discs On playing CD discs On playing WMA dis...

Страница 14: ...t with YUV Y Cb Cr Terminal Connect one end of YUV wire with the Y Pb Cb Pr Cr socket on the disc player and another with the corresponding Y Pb Cb Pr Cr socket of the TV And then connect audio wire w...

Страница 15: ...Connect with AV power amplifier 1 Normal Connection The connection method is illustrated in the picture 13 2 Connect with AV Amplifier with 5 1 Channel Surround Audio Input R...

Страница 16: ...eo terminal of the player with video interface of TV When using optical or coaxial output function of this player please refer to 7 2 Audio setting up for the detailed setup method Note Pictures are p...

Страница 17: ...er has been connected with the amplifier then turn the amplifier power on and switch input channel to DVD Note If no opening picture or no color shows when turning on the player please press NTSC PAL...

Страница 18: ...per corner of TV screen Note The disc tray shall be opened closed by pressing the OPEN CLOSE button after power on Do not push or pull the tray by force so as to avoid damage to the appliance 4 After...

Страница 19: ...ONTINUE STATE OF MEMORY STOP 2 STOP Press STOP once the player enters memory stop state press again the player will completely stop 4 NEXT Track or Page Note Some discs do not support the functions de...

Страница 20: ...can automatically switch to NTSC system At this time it is normal that the picture will be instantly flashed 6 RETURN RETURN RETURN Back N P 2 If the picture is not colorful the color is abnormal or...

Страница 21: ...ime setup function Refer to 9 How to use search function for details MUTE Press MUTE button on the remote control to turn off sound and press again to turn on the sound button is volume control button...

Страница 22: ...nnels as follows STEREO MONO LEFT MONO RIGHT mix MONO PARTNER LEFT PARTNER RIGHT SUBTITLE SUBTITLE 01 03 ENGLISH SUBTITLE 02 03 ENGLISH 6 1 STOP DVD player will be in the state of memory stop automati...

Страница 23: ...ode press the FF button on the remote control to play at X2 speed press it again to get X4 speed press it for the third time to get X8 speed press it for the fourth time to get X16 speed and press for...

Страница 24: ...marked A then press A B button at the point where repeat play is to be concluded marked B Then the player can automatically repeat the segment from A to B Press B again this will cancel the A B opera...

Страница 25: ...ectory is over the player will repeat it automatically MENU Back Play Mode Repeat One Track 6 8 RETURN When playing a DVD disc press RETURN to return to the main menu When playing VCD SVCD pressing th...

Страница 26: ...cable to the discs with this function 3D Press 3D button to activate the 3D surround sound the function Output sound will have 3D stereo effect Press the button again to stop the function If you succe...

Страница 27: ...play off 6 16 CLEAR When you input the numbers you can press the CLEAR button to cancel the numbers entered OSD TITLE ELAPSED TT 01 07 CH 02 08 1 21 43 SINGLE ELAPSED TRACK 01 09 01 43 SINGLE REMAIN T...

Страница 28: ...een will be Chinese Basic Operation Press the SETUP button on the remote control to enter the main page of the SETUP menu And the TV screen displays as shown in the picture on the right Press the arro...

Страница 29: ...Front Speaker If the connected speaker is of big model it can be set as big if the speaker is small it can be set as small 7 2 1 5 Subwoofer If set as ON the subwoofer has signal output If set as OFF...

Страница 30: ...ere may be no sound output 7 2 2 3 Back Select this item to return to the higher menu 7 2 3 Dolby Digital Setup 7 2 3 1 Dynamic Scope Compression Adjusting this item can gain different signal compress...

Страница 31: ...3 Super Bass Selecting ON the super bass will be turned on Selecting OFF the super bass will be turned off 7 2 4 4 Treble Boost Selecting ON the treble will be boosted Selecting OFF the treble boost e...

Страница 32: ...and Saturation Press arrow keys to select the desired setup item then press the arrow key to enter the adjusting interface and press or to adjust till you get the satisfactory video effect After the a...

Страница 33: ...PREFERENCE SETUP PAGE the TV screen display is as shown in the picture at right 7 5 2 Subtitle Disc support is required 7 5 4 Default If selecting RECALL in this setup each set function item will be r...

Страница 34: ...R to start a programmed play If you don t want a programmed play you can enter the programming menu move the highlighted bar to the STOP column confirm and select EXIT thus programmed play can be eras...

Страница 35: ...ce screen display is as shown in Picture 3 then press button to select Title Search column and directly press number keys to specify the title then input the time For example input number 1 0 6 0 8 an...

Страница 36: ...and track search throughout the entire disc 2 Track time searching search in current track Press SEARCH twice to enter the interface as shown on the right picture 2 Input the time by pressing numerica...

Страница 37: ...state of PBC ON you can t select tracks directly by pressing number keys but return to the menu then you can input numbers to select tracks directly 10 2 Start KARAOKE 1 Turn MIC VOL knob to adjust t...

Страница 38: ...11 1 THE STRUCTURE OF MP3 WMA DISCS An MP3 WMA disc has directories and a directory has tracks Note This function only applies to VCD and DVCD discs 11 HOW TO PLAY MP3 WMA DISCS 11 2 DIRECTORY STRUCTU...

Страница 39: ...sc Press arrow key to move the cursor to PREV DIR on the left of the screen press ENTER on the remote control to return to the total directory Press the arrow keys to move the cursor to select a diffe...

Страница 40: ...rmal Mode it is invalid when the inputted number is greater than the number of the total files of the directory If play state is in Document Mode it is invalid when the inputted number is greater than...

Страница 41: ...or directory s name is in Chinese will appear Note 2 Picture number is the serial number of picture in the current directory will play the pictures randomly To get key explanation press arrow keys to...

Страница 42: ...he picture display is up down mirror image and left right mirror image respectively Note Using Rotation Function and Zoom function will cancel the sequential play Please press PLAY to play forward aut...

Страница 43: ...4 3 Disc not playing Ensure that the disc is placed correctly The label side is facing up Ensure that the disc is clean Microphone has no sound Adjust the volume of the microphone to proper level Remo...

Страница 44: ...or more No more than no more than no more than 430 line 350 line 250 line Picture proportion Multiple kinds one kind one kind one kind Subtitle 32 kinds 16 kinds at most 4 kinds Language 8 kinds 4 kin...

Страница 45: ...ds and 32 kinds of language subtitles MULTIPLE SECTION FUNCTION Users can select any part of the story beginning development climax or drop scene to play MULTIPLE ANGLES FOR VIEWING Users can view the...

Страница 46: ...ort different functions Dolby digital AC 3 Picture proportion Parental lock CLOSE CAPTION subtitle Try not to scratch the disc It shall be kept in the box after using Wipe the disc with a dry soft clo...

Страница 47: ...THIS APPLIANCE CAN PLAY THE FOLLOWING DISCS 45 R...

Страница 48: ...ut Electric level output 1 2V Electric level output 0 5Vp p Electric level output 1Vp p resistance 75 Unbalanced negative Electric level output brightness Y 0 7Vp p chrominance C 0 88Vp p resistance 7...

Страница 49: ...tection technology must be authorized by Macrovision Corporation and is intended for home and other limited viewing uses only unless otherwise authorized by Macrovision Corporation Reverse engineering...

Отзывы: