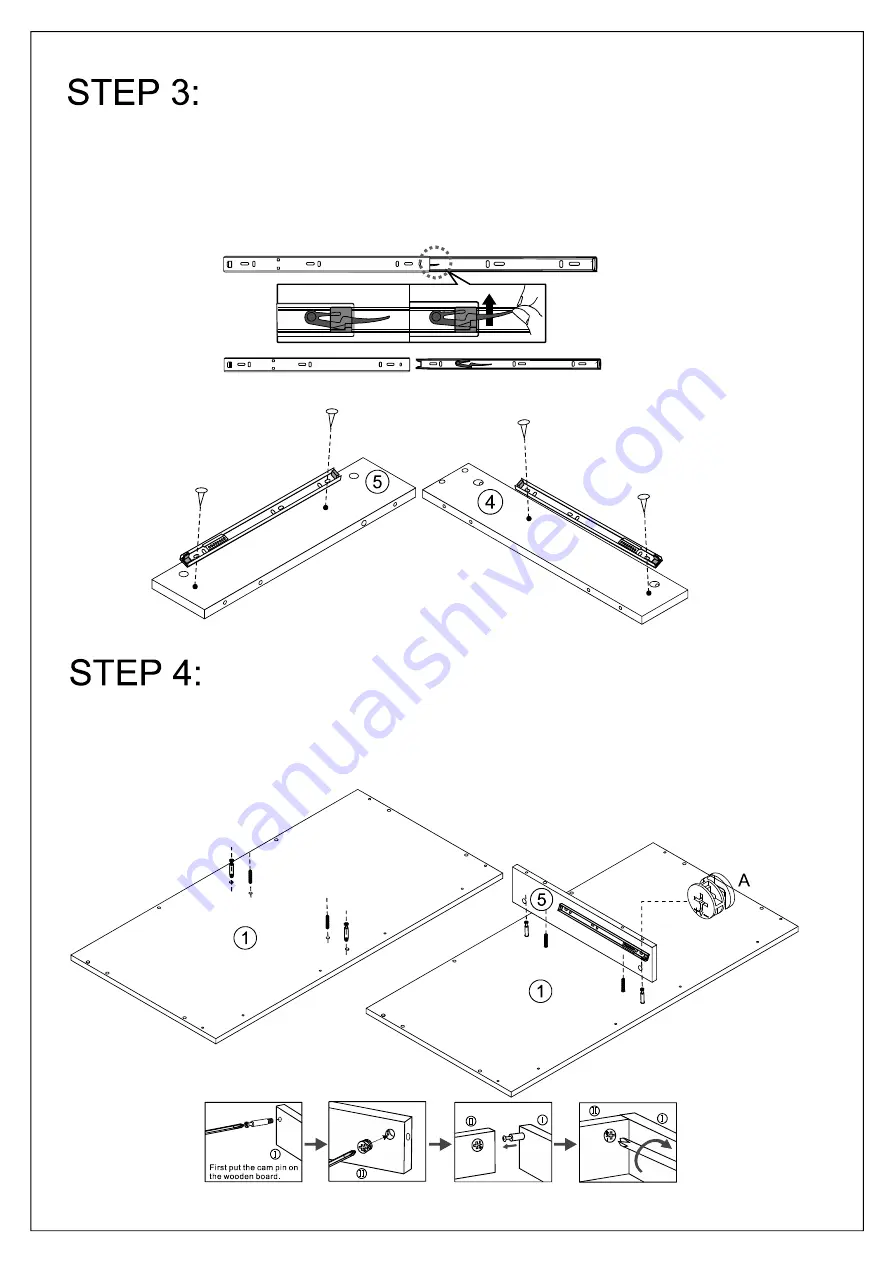
1. Insert parts A and F into panel 1.2. Attach panel 5 to panel 1 with parts A and F.
5
A
F
1. Separate parts E1 and E2 (runners) as shown below.2. Attach part E1 to panels 4 and 5 with part K.
E1
E2
K
Страница 1: ...NEAL Desk ITEM CODE 75141 Imported by JWA Furniture Pty Ltd Qld Brisbane Australia For any assistance with assembly or for missing parts please refer to your receipt...
Страница 2: ...Allow 30min...
Страница 3: ...M 3 2 1 5 4 6 P1 P2 P3 P4 P1 P2 P3 P4 P1 Top panel Bottom panel Left panel Right panel Middle panel Back panel Drawer front panel Drawer left panel Drawer right panel Drawer back panel Drawer bottom p...
Страница 4: ...1 Attach connection frames P2 and P3 to frame P1 with part B 1 Connect frame P4 with parts J and H 2 Attach frame P4 to frames P1 and P3 with part D 4 B B B B D J H D D D P1 P1 P1 P3 P1 P2 P3 P4...
Страница 5: ...ts A and F into panel 1 2 Attach panel 5 to panel 1 with parts A and F 5 A F A F 1 Separate parts E1 and E2 runners as shown below 2 Attach part E1 to panels 4 and 5 with part K E1 E2 E1 E2 E1 K E1 K...
Страница 6: ...and F into panel 1 2 Attach panels 3 4 and 6 to panel 1 with parts A and F 6 1 Insert part A into panels 3 and 4 2 Attach panels 3 and 4 to panel 6 with part A A A A A A A A A A F F F A A A A A A F F...
Страница 7: ...7 1 Attach panel 2 to panels 3 and 4 with part I I I I I I I I I F F F F F F 1 Insert part F into panels 3 4 and 5...
Страница 8: ...8 1 Attach panels 8 and 9 to panel 10 with part G 2 Slide panel 11 along slots of panels 8 and 9 G G G G 1 Attach frames P1 P2 and P3 to panel 2 with part C C C C C C C C C C C P1 P2 P3 P1...
Страница 9: ...9 STEP 7 STEP 8 A A A A 1 Attach part E2 to panels 8 and 9 with part K K K E2 8 9 A A A A 1 Insert part A into panel 7 2 Attach panel 7 to panels 8 and 9 with part A...
Страница 10: ...10 STEP 9 STEP 10 1 Install drawer 7 into the cabinet ensure runners are correctly aligned L M K L Install Tip Kit 1 Attach part L to panel 1 with part K 2 Attach part L to the wall with part M...
Страница 11: ...11 STEP 11 Assembly complete...
Страница 12: ...12...