background image

2

B

e

fo

re


o

p

e

ra

ti

o

n

XV-N33SL/GNT0024-014B/English

Before operation

About discs

Playable disc types

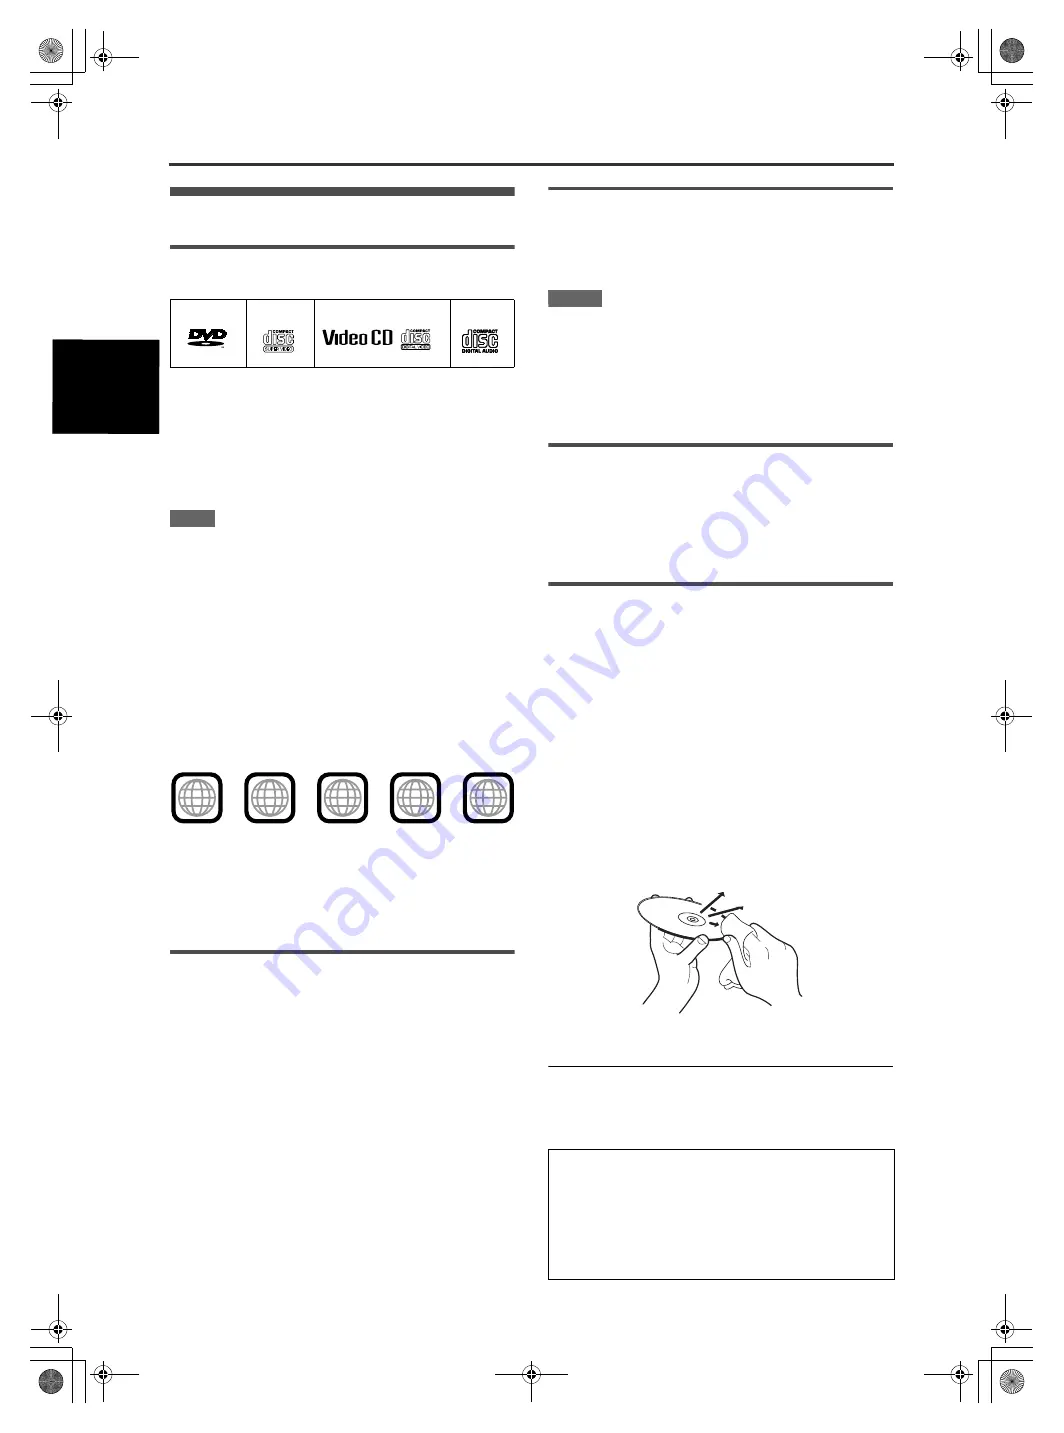
Discs with the following marks can be played back on the unit.

The DVD Logo is a trademark.
The unit can also play back the following discs:
• DVD-R, DVD-RW and +RW discs written in the DVD VIDEO 

format and finalized

• CD-R and CD-RW discs written in the SVCD, Video CD or 

Audio CD format and finalized

• CD-R and CD-RW discs written in MP3 in accordance with the 

“ISO 9660” format (See page 19 for details.)

NOTE

If a disc gets dirty, scratched or warped, or due to the disc 
characteristics or recording conditions, it may take considerable 
time for the unit to read the content, or the unit may not be able to 
play back such discs.

The unit can play back audio signals recorded in MIX-MODE  CD, 
CD-G, CD-EXTRA and CD TEXT.

Region code of DVD VIDEO

DVD VIDEO players and DVD VIDEO discs have their own 
Region Code numbers. This unit can playback DVD VIDEO discs 
whose Region Code numbers include the unit’s Region Code, 
which is indicated on the region code symbol on the rear panel.
Example of playable DVD discs when the unit’s Region Code is 
“2”:

Color system format

This unit is compatible with the PAL and NTSC systems, and can 
play back discs whose Region Code numbers include “2.” You 
can select “PAL” or “NTSC” while using the VIDEO SIGNAL 
SELECTOR on the rear panel (for details, see page 5).

Unplayable discs

The unit does not play back discs listed below. If you try to play 
back these discs, noise may generate causing damage to 
speakers.

• DVD-RW discs written in the VR format
• DVD-ROM, DVD-RAM, DVD AUDIO, CD-ROM, PHOTO CD, 

SACD

In addition, the unit does not play:
• Unfinalized discs
• Discs of irregular shape or discs with tape, seals or paste on 

either the label side or playback side. Playing back these discs 
may damage the unit.

Digital audio formats

The unit supports the following digital audio formats (see page 32 
“Glossary” for descriptions of each audio format):

Linear PCM, Dolby Digital, DTS (Digital Theater Systems)

NOTES

• Depending on the unit’s [DIGITAL AUDIO OUTPUT] setting, 

digital audio signals may not be output as they are recorded on 
the disc. See “DIGITAL AUDIO OUTPUT” on page 23 for 
details.

• To play back DTS-encoded DVD VIDEO or DTS-encoded Audio 

CD discs correctly, connect the unit to an amplifier with a built-in 
DTS decoder. If the unit is connected to an amplifier without a 
DTS decoder, playback sound will be distorted.

Notes on discs

• With some DVD VIDEO discs, the unit starts playback 

automatically after inserting the disc.

• The image may be sometimes poor or noisy due to defects in 

the disc itself.

• With some discs, operations described in this manual may not 

be possible.

Care and handling of discs

If a disc gets dirty, dusty, scratched or warped, playback sound 
and picture may be deteriorated. Take proper precautions when 
handling discs.

Handling

• Do not touch the surface of the disc.
• Do not damage, stick paper to, or use any adhesive on either 

the label side or playback side.

Storing discs

• Keep discs in their cases. If discs are piled on top of one 

another without their protective cases, they can be damaged.

• Do not put discs in a location where they may be exposed to 

direct sunlight, or where the humidity or temperature is high. 
Avoid leaving discs in a car!

Cleaning discs

• Wipe with a soft dry cloth, moving from the center outwards. If a 

disc is difficult to clean, wipe with a cloth moistened with water.

• Never use record cleaners, petrol, alcohol or any anti-static 

agents.

Notes on copyright

Check the copyright laws in your country before recording from 
DVD VIDEO, SVCD, Video CD, Audio CD and MP3 discs.
Recording of copyrighted material may infringe copyright laws.

DVD VIDEO

SVCD

Video CD


Audio CD

V I D E O

ALL

2

5

2

4

2

3

1

3

2

1

6

5

4

This product incorporates copyright protection technology that 
is protected by method claims of certain U.S. patents and other 
intellectual property rights owned by Macrovision Corporation 
and other rights owners. Use of this copyright protection 
technology must be authorized by Macrovision Corporation, 
and is intended for home and other limited viewing uses only 
unless otherwise authorized by Macrovision Corporation. 
Reverse engineering or disassembly is prohibited.

N33SL(USUBUGUXUWA).book  Page 2  Monday, February 24, 2003  7:26 PM

Содержание XV-N33SL

Страница 1: ...4 014B US UB UG UX UW A Before operation 2 Preparations 3 Basic operations 6 Advanced operations 11 MP3 disc playback 19 Changing the initial settings 21 Additional information 26 INSTRUCTIONS V I D E O N33SL USUBUGUXUWA book Page i Monday February 24 2003 7 26 PM ...

Страница 2: ...from the sides Top No obstructions in 5 cm from the top Back No obstructions in 15 cm from the back Bottom No obstructions place on the level surface IMPORTANT FOR LASER PRODUCTS 1 CLASS 1 LASER PRODUCT 2 CAUTION Do not open the top cover There are no user serviceable parts inside the Unit leave all servicing to qualified service personnel 3 CAUTION Visible and invisible laser radiation when open ...

Страница 3: ...e TV Do not install the unit in a place subject to vibrations To prevent malfunction of the unit There are no user serviceable parts inside If anything goes wrong unplug the power cord and consult your dealer Do not insert any metallic objects such as wires hairpins coins etc into the unit Do not block the vents Blocking the vents may damage the unit To clean the cabinet Use a soft cloth Follow th...

Страница 4: ...AUDIO OUTPUT setting digital audio signals may not be output as they are recorded on the disc See DIGITAL AUDIO OUTPUT on page 23 for details To play back DTS encoded DVD VIDEO or DTS encoded Audio CD discs correctly connect the unit to an amplifier with a built in DTS decoder If the unit is connected to an amplifier without a DTS decoder playback sound will be distorted Notes on discs With some D...

Страница 5: ... COMPONENT VIDEO OUT jacks on the unit to your TV NOTES Connect Y to Y PB to PB CB PR to PR CR correctly When using the COMPONENT VIDEO OUT jacks do not connect the S VIDEO output jack on the unit When the component video input jacks on the TV are of the BNC type use an adapter to convert a pin jack to a BNC jack not supplied In the following description TV may be substituted with monitor or proje...

Страница 6: ... the sounds DVD VIDEO SVCD Video CD or Audio CD played back on the unit record them through the analog jacks Depending on the disc no signal may be output from the DIGITAL OUT Make an analog connection in this case Set DIGITAL AUDIO OUTPUT in the AUDIO preference display correctly according to the connected digital audio equipment If setting made for DIGITAL AUDIO OUTPUT is incorrect loud noise ma...

Страница 7: ...electric shock or other accidents If the cord is damaged consult a dealer and have the power cord replaced with a new one Using the remote control unit To install batteries Open the compartment cover and place the two supplied R6P SUM 3 AA 15F batteries in the remote control unit according to the polarity markings and inside the compartment Then replace the cover The batteries will last about six ...

Страница 8: ...enu of the MONITOR TYPE is already open 4 Press 5 to select the desired monitor type For a normal conventional TV select 4 3 LB or 4 3 PS For a wide screen TV select 16 9 NORMAL or 16 9 AUTO see page 22 5 Press ENTER The third page is shown in which the pull down menu of the DIGITAL AUDIO OUTPUT is already open About invalid operation icon When you press a button and if the unit does not accept it...

Страница 9: ...3 to select a desired item 2 Press ENTER The unit starts playback of the selected item For SVCD Video CD Press the numeric buttons to select a desired item The unit starts playback of the selected item NOTES Do not insert an unplayable disc see page 2 When inserting a disc on the disc tray be sure to position the disc inside the recess Otherwise the disc may be damaged when the disc tray is closed...

Страница 10: ...n The TV screen shows RESUME STOP and the RESUME indicator lights up in the display window The memory of the interrupted position is not cleared if you turn off the unit When you turn off the unit after setting the resume function simply press 3 The unit is turned on and playback starts from the interrupted position If you turn on the unit by pressing STANDBY ON then press 3 playback starts from t...

Страница 11: ... where playback was interrupted Various speed playback x1 5 Quick Playback with sound During playback press QUICK PLAYBACK on the unit The lamp on the QUICK PLAYBACK button turns on and the disc is played back at about 1 5 times normal speed The sound is not muted and the subtitle does not go off To return to the normal playback Press QUICK PLAYBACK again The lamp on the button goes off NOTES x1 5...

Страница 12: ...ess the numeric buttons to specify the number To select 5 press 5 To select 23 press 10 10 then 3 To select 40 press 10 10 10 then 10 The unit starts playback from the beginning of the selection NOTES Depending on the disc type and the unit status what is specified differs During DVD VIDEO playback if a menu is shown on the TV screen the numeric buttons may be used for selecting an item in the men...

Страница 13: ...VCD Video CD with PBC Some SVCD Video CD discs support the PBC function PBC is an abbreviation of Playback Control Some SVCD Video CD discs recorded with PBC have their own menus such as a list of the songs of the disc You can locate a specific scene by using the PBC menu 1 In stop mode press 3 or TOP MENU A disc menu appears on the TV screen 2 Press the numeric buttons to select the desired item ...

Страница 14: ...t two digits in the example above To correct a mistake Press 2 repeatedly to move back to the digit where you entered a wrong number and reenter the correct one 4 Press ENTER The unit starts playback from the specified time To dismiss the menu bar Press ON SCREEN Hint 10 and 10 buttons are not used with this function NOTES Some DVD VIDEO discs do not contain time information and the time search fu...

Страница 15: ... 1 to 3 During SVCD Video CD playback you can check the program contents via the menu bar To stop program playback Press 7 To clear the program While stopped and the program table is shown press 7 To exit the program mode After clearing the program press ON SCREEN NOTE When the disc tray is opened or the unit is turned off the program is cleared To play back in random order Random play 1 In stop m...

Страница 16: ...peat mode To quit repeat playback Press REPEAT until the repeat mode indicator goes off in the display window Hint When the program playback mode is active with an SVCD Video CD or Audio CD the repeat mode changes in the same manner Note however that in the mode the unit repeats all the programmed tracks instead of all tracks on the disc To repeat a desired part A B repeat playback First make sure...

Страница 17: ...s are recorded appears on the TV screen except when the ON SCREEN GUIDE preference is set to OFF 1 During playback press AUDIO The audio selection window appears on the TV screen 2 Press 5 or AUDIO to select the desired audio Each time you press 5 or AUDIO the audio changes For DVD VIDEO example For SVCD For Video CD 3 Press ENTER You can hear the selected audio The audio selection window is dismi...

Страница 18: ...L for watching TV in a general room CINEMA for watching a movie software in a room with suppressed light USER 1 USER 2 you can adjust parameters that affect the picture character and store the settings as a user preset See the next step 3 To define a user setting press 5 to select a parameter to be edited from the following GAMMA Adjust this if the neutral color is bright or dark The brightness of...

Страница 19: ...tain the rear signal you can change the 3D PHONIC setting but you will not be able to achieve a correct 3D effect The 3D PHONIC function does not affect the Dolby Digital bitstream signal from the DIGITAL OUT jack When the 3D PHONIC function is active the ANALOG DOWN MIX setting in the AUDIO setting display is not available Menu bar functions To bring up the menu bar 1 When a disc is inserted pres...

Страница 20: ...begin playback with the selected subtitle Angle selection See also page 15 During playback selects a desired scene angle in a multi angle part 1 Open the pull down window 2 Press 5 to select a scene angle 3 Press ENTER to begin playback with the selected scene angle Menu bar functions for SVCD Video CD Audio CD Time mode selection Selects the time mode shown in the display window and in the status...

Страница 21: ...support packet writing UDF format discs The unit does not support the ID3 tag The unit supports discs recorded with multiple sessions Some discs may not play due to disc characteristics or recording conditions Programmed and random playback functions do not work with MP3 discs The unit only can play back tracks with the following file extensions MP3 Mp3 mp3 and mP3 Time required for reading the di...

Страница 22: ... also use 4 or 5 to specify a track instead of the numeric buttons Repeat playback During playback or while stopped press REPEAT Each time you press REPEAT the repeat mode changes as follows If you press REPEAT while stopped you need to press ENTER or 3 to start repeat playback To stop repeat playback Press 7 Note that the repeat mode remains active To quit repeat playback During playback press RE...

Страница 23: ...n is set For details about each setting see the following To dismiss a preference display Press CHOICE NOTES While an MP3 disc is inserted you cannot bring up any preference display When a preference display is shown on a wide TV screen the upper and lower parts of the preference display sometimes may be cut off If this happens adjust the picture size control of the TV ENTER CHOICE 5 2 3 SELECT EN...

Страница 24: ... Wide television screen select when you connect the unit to a wide screen 16 9 TV whose aspect ratio is fixed to 16 9 the unit automatically adjusts the screen width of the output signal correctly when playing back a 4 3 source If you play a 4 3 DVD VIDEO source using the 16 9 NORMAL mode the picture character changes slightly due to the process for converting the picture width 16 9 AUTO Wide tele...

Страница 25: ... unit s analog AUDIO OUT terminals connected to a surround decoder STEREO select when listening to conventional two channel stereo audio with the unit s AUDIO OUT terminals connected to a stereo amplifier receiver or television set or in case you want to record the audio from a DVD VIDEO disc to MiniDisc cassette etc D RANGE CONTROL This setting provides optimal audio quality from the analog AUDIO...

Страница 26: ...L 6 Press ENTER to bring up the pull down menu In the pull down menu NONE and levels 8 to 1 are available NONE does not restrict playback Level 1 is the strictest level Discs rated higher than the selected level are restricted 7 Press 5 to select a desired parental lock level then press ENTER moves to PASSWORD 8 Press the numeric buttons 0 to 9 to enter a 4 digit password 9 Press ENTER The parenta...

Страница 27: ... The password entered in this step becomes the new password If you want to keep the same password as before enter the same password 7 Press ENTER moves to EXIT Pressing ENTER again returns to the OTHERS menu of the preference display NOTE If you enter the wrong password more than 3 times in step 3 above moves to EXIT automatically and 5 do not work To temporarily release the Parental Lock If the p...

Страница 28: ... ON button 6 9 Remote sensor 5 0 Display window see the illustration below Disc tray 7 QUICK PLAYBACK button 9 Display window 1 Audio format indicators 2 Resume Program Random indicators 3 Group indicator 4 Title indicator 5 Track indicator 6 Chapter indicator 7 Repeat mode indicator 8 3 play 8 pause indicators 9 Multi information window 8 9 0 1 2 3 7 6 5 4 1 7 3 4 5 6 2 8 9 N33SL USUBUGUXUWA book...

Страница 29: ...utton 17 ANGLE button 15 SUBTITLE button 15 Infrared signal window 5 STANDBY ON button 6 CANCEL button 13 TITLE GROUP button 11 20 MENU button 11 ENTER button ON SCREEN button 8 12 17 _ NEXT button 9 10 19 8 button 8 19 SLOW button 9 REPEAT button 14 20 VFP button 16 ZOOM button 16 AUDIO button 15 DIMMER button 7 2 1 3 5 4 6 8 7 9 0 10 10 CANCEL TITLE GROUP RETURN VFP REPEAT ZOOM DIMMER AUDIO 3D P...

Страница 30: ...nit to a television and receiver via AV COMPU LINK set the unit s AV COMPU LINK setting to DVD1 IMPORTANT When you make video connection between the unit and another device such as a receiver and TV via the composite S video or component jacks as well as AV COMPU LINK connection see also the instruction manual of the other device Notes for connection If you connect the unit to a receiver via AV CO...

Страница 31: ...audio equipment with a built in DTS decoder to the unit Play back a source other than DTS encoded one MP3 No sound comes out MP3 disc is recorded with the packet writing UDF format It cannot be played Files tracks are not played in the recorded order This unit plays the files in the alphabetic order So the playback order can vary Specifications Specifications and appearance are subject to change w...

Страница 32: ...tts and Nevis KP Korea Democratic People s Republic of KR Korea Republic of KW Kuwait KY Cayman Islands KZ Kazakhstan LA Lao People s Democratic Republic LB Lebanon LC Saint Lucia LI Liechtenstein LK Sri Lanka LR Liberia LS Lesotho LT Lithuania LU Luxembourg LV Latvia LY Libyan Arab Jamahiriya MA Morocco MC Monaco MD Moldova Republic of MG Madagascar MH Marshall Islands ML Mali MM Myanmar MN Mongo...

Страница 33: ...Tatar BR Breton IA Interlingua MN Mongolian SH Serbo Croatian TW Twi CA Catalan IE Interlingue MO Moldavian SI Singhalese UK Ukrainian CO Corsican IK Inupiak MR Marathi SK Slovak UR Urdu CS Czech IN Indonesian MS Malay MAY SL Slovenian UZ Uzbek CY Welsh IS Icelandic MT Maltese SM Samoan VI Vietnamese DA Danish IW Hebrew MY Burmese SN Shona VO Volapuk DZ Bhutani JI Yiddish NA Nauru SO Somali WO Wol...

Страница 34: ...l circuits in decoder side processing increasing the level of specific channels and lowering the level of silent channels for greater spatial perspective and adds a center speaker used primarily for dialog The result is enhanced channel separation Down mix Internal stereo mix of multichannel surround audio by a DVD player The down mix signals are output from analog AUDIO OUT connectors DTS A Digit...

Страница 35: ...XV N33SL GNT0024 014B English VICTOR COMPANY OF JAPAN LIMITED EN J VC 0203KTYBICJSC 2003 VICTOR COMPANY OF JAPAN LIMITED N33SL USUBUGUXUWA book Page 33 Monday February 24 2003 7 26 PM ...

Отзывы: