background image

17

18

Play the Mp3 disc on the unit.

Plug your USB device into the port on the top panel of the unit.

Use the DOWN/UP/LEFT/RIGHT arrow buttons to move the cursor on 

the screen.

Press the COPY button to copy the highlighted playback file.

During the copying process,you can follow the copying progress on the screen.

It will display COPY FILE 1%-100%.

At the end of the copying process, the screen will display CLOSE FILE.

At this point, you can repeat the above operations to continue copying files.

Copying from an MP3 disc to a USB device

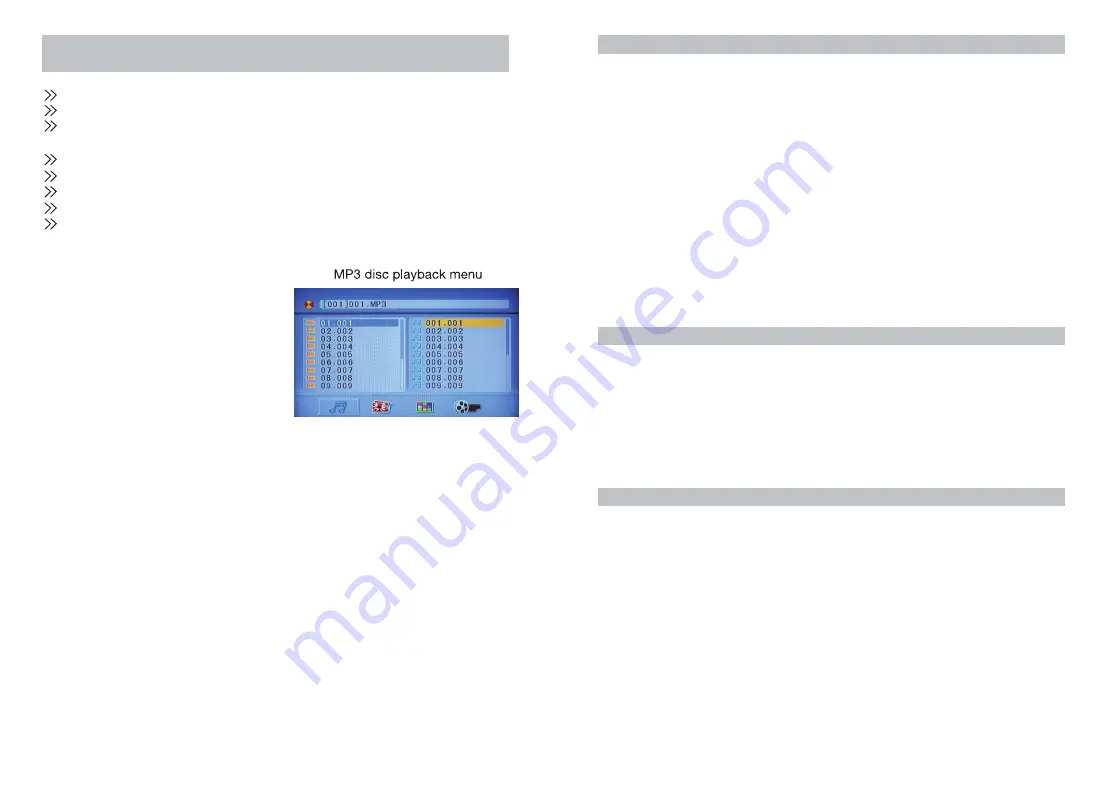
MP3 disc playback

When a disk with MP3 format is about 

to be played, the system will 

automatically display the navigation 

interface while the contents are being 

uploaded.

● In the navigation interface, use the 

   key Up/Down to make options. After

   selection, press Enter/Play to play 

   the file.

● In all the tracks, use the key Up/Down to make options. After selection, press

   Enter/Play to play the track.

● In the current interface, press the key Left to return to the previous menu, and

   press Previous/Next to enter the previous and next page.

JPEG(Picture CD) playback

When a disk with JPEG format is about to be played, the system will automati- 

cally display the navigation interface while the contents are being uploaded.

● In the navigation interface, use the key Up/Down to make options. After

   selection, press Enter/Play to play the file in a slide manner.

● Press Previous/Next to select the previous and next picture.

● Press Pause to allow the picture-playing pause so that you can view for a

   longer time. Press Enter/Play to return to the normal playing state.

When a disk with Kodak Picture format is about to be played, the system will 

automatically display the navigation interface while the contents are being 

uploaded.

● In the navigation interface, use the key Up/Down to make options. After

   selection, press Enter/Play to play the file.

● In all the tracks, use the key Up/Down to make options. After selection, press

   Enter/Play to play the track.

● Each picture of the Kodak Picture CD will be displayed as slide, whose size is

   automatically adjusted in accordance with the proportion of the TV.

● Press the key Main Interface to return to the main interface.

● Press Pause to allow the playing pause and the current picture will remain still.

● Press Previous/Next to view the previous and next picture.

● Press Enter/Play to return the slide mode. Note: The quality of the picture

   displayed is subject to the model of the device used for viewing.

Kodak Picture CD Disc Playback

1.The frequency the embedded radio receives in the system ranges from 

87.50MHz~ 108 MHz.

2.In playing mode of the DVD Player, press the key Signal Source to switch to 

FM mode. Then press the key SCAN on the remote control, and the system 

will search the channels and save 1-20 stations.

3.You can press Previous/Next to select the channel you like, and use Fast 

Forward or Fast Reverse to tune manually.

 Playing Radio functions

 Multimedia

1.The System supports USB device(Max 16GB) and is compatible with files 

with such formats as JPEG, MP3, AVI and WMA.

2.Play contents in USB device: Contents in USB device can be played only 

when there is no disk or card inside the player. If so, the player will play the 

contents automatically after properly connected.

Содержание XS-N5320PBA

Страница 1: ...User Manual DVD SPEAKER SYSTEM WITH BLUETOOTH XS N5320PBA ...

Страница 2: ...trol Function Keys 6 Overview of the Equipment 7 Basic Playback Controls 7 Advanced Functions 8 Menu Options 10 System Setup 11 CD ripping and Copy 16 Copying from an MP3 disc to a USB device 17 Kodak Picture CD Disc Playback 18 Playing Radio functions 18 Multimedia 18 AUX Input 19 Operating Instructions of Bluetooth 19 Troubleshooting 20 Specifications 21 ...

Страница 3: ...criptions on the label and use the power cord properly Keep all parts away from moisture Avoid direct sunshine and high temperature Do not stretch bend or pull on the power cord Grip the plug and not the power cord when unplugging Do not open the cover No user serviceable parts inside Also leaving the cover open may allow foreign objects to fall into the unit Remove the power cord from outlet if y...

Страница 4: ...this case you can plug the power cord and keep the machine running idle for about 2 3 hours The water should evaporate after a while Do not stick tape or paper onto the disk To clean a disk use a moist rag first then a dry rag To avoid damage to the device do not apply any soluble substances such as benzine and anti static spray with ethylene based substance to the disk Normally the digitalized vi...

Страница 5: ... x AAA batteries included Please ensure correct polarities when inserting batteries Important The Power Button on the remote control will work only when the On Off Switch on the rear of the unit is in the On position 1 2 3 4 5 6 7 8 9 10 11 12 13 14 15 16 17 18 19 20 21 22 23 1 2 1 DVD DOOR 2 Remote Control Receiver 1 VIDEO OUT 2 FM ANT 3 MASTER VOL Volume adjustment dial 4 LINE IN 5 USB PORT 6 MI...

Страница 6: ...trol to operate the features described throughout this manual 1 PLAY PAUSE 2 PREV NEXT 3 REV FWD 4 STOP Advanced functions OSD In DVD playback Press OSD on the remote control to display single elapsed time single remaining time total elapsed time total remaining time and other information about the disc IN VCD playback Press OSD on the remote control to display single elapsed time single remaining...

Страница 7: ...n enter the track numbers desired for example 2 4 6 and 8 you can press CLEAR to remove the numbers Use arrow keys to move the cursor to the PLAY icon Press ENTER to start playing press PROG again to exit SLOW Press SLOW repeatedly to choose a level of slow motion from the following options 1 2 1 3 1 4 1 6 1 7 or normal CLEAR When using the PROG or GOTO feature press CLEAR to clear the input numbe...

Страница 8: ...If this option is set to ON and the power is turned off the player will remember where it stopped and when the power is resumed it will continue to play from that point LANGUAGE SETUP Select a language to be used for on Screen Display OSD and set up menu AUDIO LANGUAGE Use this option to set the audio dubbing language TV SYSTEM AUTO PLAY HD OUTPUT ON OFF VIDEO TV TYPE PASSWORD RATING NEXT PAGE TV ...

Страница 9: ...ELAY REAR DELAY These settings are also for home theatre Digital set up OP MODE For nighttime playing select LINE OUT to set volume at lower level For daytime playing select RF REMOD to set volume at a higher level OSD LANGUAGE AUDIO LANG SUBTITLE LANG ENGLISH CHINESE JAPAN MENU LANG FRENCH PORTUGUESE GERMAN OFF SPANISH OSD LANGUAGE AUDIO LANG SUBTITLE LANG ENGLISH CHINESE JAPAN MENU LANG FRENCH P...

Страница 10: ...ton to enter the option submenu or confirm your choice 1 In the OPTIONS menu see Fig 1 you can select a different speed or bitrate or create or cancel a playlist 2 In the TRACKS menu you can view the length of the tracks Press the arrow buttons to select a track then press ENTER to confirm your selection To select or unselect all tracks move the highlight to the box on top of the track box see Fig...

Страница 11: ...ger time Press Enter Play to return to the normal playing state When a disk with Kodak Picture format is about to be played the system will automatically display the navigation interface while the contents are being uploaded In the navigation interface use the key Up Down to make options After selection press Enter Play to play the file In all the tracks use the key Up Down to make options After s...

Страница 12: ... ON OFF switch on the rear of the unit is set to the ON position Check whether the player is properly connected to the TV Check whether the TV works well Adjust the Video mode setting on the TV until image is displayed correctly Check whether the player is properly connected to other equipment Check if the audio cables have been connected properly and the correct mode has been chosen Check whether...

Страница 13: ... 20Hz 20KHz 3dB Audio S N 80dB Audio output analog Level output 1 0 2 0v Audio output digital Level output 0 5vp p Video output Level output 1 0vp p YUV output Level output 0 7vp p Tuner FM Frequency range 87 5 108MHz Microphone Output Power 15W 2 30W Bass 14dB 14dB Treble 14dB 14dB Frequency response range 20Hz 20KHz 3dB S N 80dB ...

Отзывы: