


12
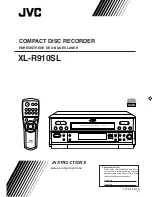
English
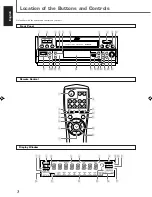
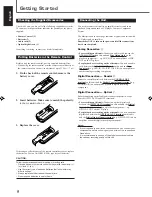
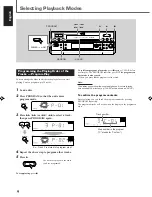
This manual mainly explains operations using the buttons and controls on the front panel. You can also use the buttons on the remote
control if they have the similar names (or marks) as those on the front panel.
1
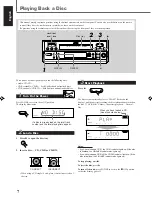
Load a Recordable Disc and Prepare
the Playback Source
1
Press POWER to set it to the
_
ON position.
2
Press
0
to open the disc tray, and load a disc.
3
Press
0
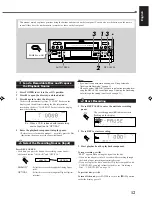
again to close the disc tray.
The disc tray automatically closes (“CLOSE” flashes on the
display), and the unit starts reading the disc information
recorded on the disc (“TOC READ” flashes), then the display
shows the following.
4
Enter the playback component into play pause.
• Refer also to its Instruction manual — normally, press the Play
(
3
) button, then soon press the Pause (
8
) button.
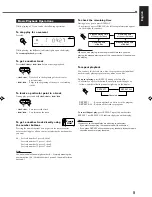
2
Select the Recording Source (Input)
Press REC SOURCE.
• Each time you press the button, the recording source (input)
alternates between “ANALOG” and “OPTICAL.”
ANALOG*
: Select this to record through the Analog Input
jacks.
OPTICAL
: Select this to record through the Digital Optical
terminal.
Notes:
•
If you want to use automatic tracking, see “Using Automatic
Tracking while Recording” on page 11.
*
When you select “ANALOG,” you have to adjust the recording level
using the REC LEVEL control (see page “Adjusting the Recording
Level through the Analog Input Jacks” on page 11).
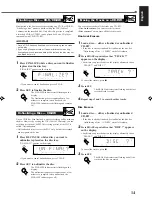
3
Start Recording
1
Press REC PAUSE to enter the unit into recording
pause
The recording pause (
8
) indicator starts
flashing on the display.
2
Press REC to start recording.
3
Start playback on the playback component.
To stop recording, press
7
.
“BUSY” appears when writing the signals on the disc.
• When no sound comes in for 8 seconds while recording through
the Analog Input, recording automatically stops.
• If you are to play the disc on another CD player compatible with
CD-R/CD-RW, you need to finalize the disc, see “Finalizing a
Disc — CD-R/CD-RW” on page 14.
To eject the disc, press
0
.
To turn off the unit, press POWER to set it in the
—
OFF position
so that the display goes off.
Ex.: When a CD-R is loaded with the recording
source (input) set to “OPTICAL”
COMPACT DISC RECORDER
PROGRAM
SET
CLEAR
REPEAT
_
ON/
—
OFF
POWER
RANDOM
AUTO
TRACK
DISPLAY
REC
PAUSE
REC
REC LEVEL
MIN
MAX
FINALIZE
ERASE
REC
SOURCE
DIGITAL
SYNCHRO
XL-R910
POWER
=
_
ON
_
ON/
—
OFF
POWER
1
3
3
2
7
AUTO TRACK
REC LEVEL
ANALOG
OPTICAL
REC
SOURCE
REC
REC
PAUSE
EN11-14.XL-R910[C]_f
01.3.13, 5:41 PM
12


