background image

MICRO COMPONENT SYSTEM

UX-V50V
UX-V50GN

INSTRUCTIONS

For Customer Use:

Enter below the Model No. and Serial No.
which are located either on the rear, bot-
tom or side of the cabinet. Retain this
information for future reference.

Model No.                                                         

Serial No.                                                          

GVT0034-003A

[U/UB/US/UX/UT]

AUTO REVERSE

AUTO TAPE  SELECTOR

DOWN

UP

MULTI CONTROL

TAPE

FM/AM

CD

STANDBY

PHONES

AUX

REC

REV.

MODE

AHB
PRO

TIMER

CLOCK

VERTICAL DISC

LOADING MECHANISM

VOLUME

CD

OPEN/CLOSE

REMOTE CONTROL RM-SUXV50E

CANCEL

TREBLE

FM/AM

FM 

MODE

DISPLAY

SLEEP

AUX

TAPE

CD

CD

BASS

AHB 
PRO

RANDOM

AUTO

PRESET

REPEAT

SELECT

SET

PROGRAM

VOLUME

TAPE

MICRO COMPONENT SYSTEM


UX-V50V

VIDEO CD VERSION 2.0

VIDEO CD VERSION 2.0

SELECT

PREV

RETURN

NEXT

VCD

NUMBER

VOCAL

MASKING

ON

SCREEN

ECHO

V. INTRO

VCD NUMBER

UP

VCD NUMBER

DOWN

PREV

NEXT

COVER.UX-V10[U]

6/12/00, 12:02

3

Содержание UX-V50GN

Страница 1: ...PE SELECTOR DOWN UP MULTI CONTROL TAPE FM AM CD STANDBY PHONES AUX REC REV MODE AHB PRO TIMER CLOCK VERTICAL DISC LOADING MECHANISM VOLUME CD OPEN CLOSE REMOTE CONTROL RM SUXV50E CANCEL TREBLE FM AM FM MODE DISPLAY SLEEP AUX TAPE CD CD BASS AHB PRO RANDOM AUTO PRESET REPEAT SELECT SET PROGRAM VOLUME T APE MICRO COMPONENT SYSTEM UX V50V VIDEO CD VERSION 2 0 VIDEO CD VERSION 2 0 SELECT PREV RETURN N...

Страница 2: ...he switch in any position does not disconnect the mains line The power can be remote controlled Warnings Cautions and Others CAUTION To reduce the risk of electrical shocks fire etc 1 Do not remove screws covers or cabinet 2 Do not expose this appliance to rain or moisture G 1 ...

Страница 3: ...in the areas shown by the dimensions below 3 Bottom Place on the level surface Maintain an adequate air path for ventilation by placing on a stand with a height of 10 cm or more 15 cm 1 cm 15 cm 15 cm 15 cm 15 cm 1 cm 10 cm UX V50V UX V50GN G 2 UX V50V UX V50GN TAPE FM AM CD VERTICAL DISC LOADING MECHANISM MICRO COMPONENT SYSTEM UX V50 VIDEO CD VERSION 2 0 VIDEO CD VERSION 2 0 SELECT PREV RETURN N...

Страница 4: ... no user serviceable parts inside the Unit leave all servicing to quali fied service personnel DANGER Invisible laser radiation when open and interlock failed or defeated AVOID DIRECT EXPOSURE TO BEAM e ADVARSEL Usynlig laser stråling ved åbning når sikkerhedsafbrydere er ude af funktion Undgå udsæt telse for stråling d VARNING Osynlig laser strålning när denna del är öppnad och spärren är urkoppl...

Страница 5: ...as it may only be used for playback How This Manual Is Organized Basic information that is the same for many different functions e g setting the volume is given in the section Common Operations and not repeated under each function The names of buttons controls and display messages are written in all capital letters e g TAPE NO DISC IMPORTANT PRECAUTIONS 1 Installation of the System Select a place ...

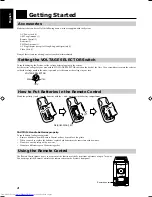
Страница 6: ...eries with the and markings in the battery compartment CAUTION Handle batteries properly To avoid battery leakage or explosion Remove batteries when the Remote Control will not be used for a long time When you need to replace the batteries replace both batteries at the same time with new ones Do not use an old battery with a new one Do not use different types of batteries together Using the Remote...

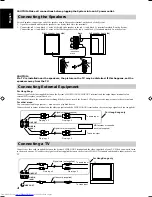
Страница 7: ...supplied A 75 Ω antenna with coaxial type connector IEC or DIN 45325 should be connected to the FM 75 Ω COAXIAL terminal If reception is poor connect the outdoor antenna Note Before attaching a 75 Ω coaxial lead the kind with a round wire going to an outdoor antenna disconnect the supplied FM Wire Antenna FM Wire Antenna supplied Coaxial cable FM outdoor antenna not supplied AM EXT AM LOOP FM 75Ω ...

Страница 8: ...isten to the external source through the System or record the System s CD player cassette tape or tuner to the external unit For other areas You can connect audio equipment used only as a playback device Connect the audio output terminals on the other equipment and the LINE IN AUX terminals on the rear using a signal cord not supplied Connecting a TV Connect the video cord supplied between the Sys...

Страница 9: ...e lets you control the most frequently used System functions with a single touch With One Touch Operation you can play a CD a tape turn on the radio or listen to an external equipment at a single press of the play button for that function One Touch Operation turns the power on for you then starts the function you have specified How One Touch Operation works in each case is explained in the section...

Страница 10: ...hen the power was last turned off For example if the last thing you were doing was listening to a CD you are now ready to listen to a CD again If you wish you can change to another source If you were listening to the Tuner last the Tuner comes on playing the station it was last set to Turning the System off Press the button again The STANDBY lamp lights up Some power is always consumed even though...

Страница 11: ... playback To get the effect press the AHB Active Hyper Bass PRO button The BASS indicator lights up on the display To cancel the effect press the button again The BASS indicator goes out Controlling the Tone Bass Treble You can control the tone by changing the bass and treble Adjusting the bass level You can adjust the bass level low frequency range level between 5 and 5 0 Flat 1 Press the BASS bu...

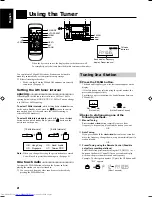
Страница 12: ...M and AM antennas are correctly connected See page 3 Setting the AM tuner interval spacing When shipped the AM tuner interval is set to 9 kHz or 10 kHz spacing Initial setting U UB US UT UX 9 kHz You can change it to 10 kHz or 9 kHz spacing To select 10kHz intervals while holding down the button on the unit in Standby mode press the button on the unit to turn on the power At the same time the 100k...

Страница 13: ...steps as above Presetting stations automatically In each band you can automatically preset 30 FM and 15 AM stations Preset numbers will be allocated as stations are found starting from the lowest frequency to the highest frequency 1 Select a band by pressing the FM AM button 2 Press the AUTO PRESET button on the Remote Control for more than 2 seconds 3 Repeat steps 1 and 2 for the other band If yo...

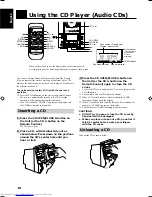
Страница 14: ...n the Unit or the CD 0 button on the Remote Control again to close the CD cover To close the CD cover and play the CD you can just press the CD 8 button You can place an 8 cm CD without an adaptor When a CD with 16 tracks or more is loaded the OVER indicator will light up on the display If the CD cannot be read correctly because it is scratched for example 00 0000 appears on the display You can in...

Страница 15: ...peat above steps 5 to 7 PROGRAM PROGRAM RANDOM Total playback time of the programed tracks Program order number Track number Playback time Total track number Basics of Using the CD Player Normal Play Playing a CD 1 Insert a CD 2 Press the CD 8 button The first track of the CD begins playing The track number that has already played disappears from the music calendar The CD Player automatically stop...

Страница 16: ...changes at each press of the button as shown below Repeats one track ALL In Normal Play mode repeats all the tracks In Program Play mode repeats all the tracks in the program In Random Play mode repeats all the tracks in random order To exit from Repeat mode press the REPEAT button until the Repeat indicator on the display goes out In Random Play cannot be selected Repeat mode remains in effect ev...

Страница 17: ...ound through your JVC Micro Component System Before playing video CDs and CD Gs Make sure that the connection between the System and your TV is correct If you wish you can listen to the music on your TV by connecting the LINE OUT signals to your TV See page 4 Setting the TV System To view a picture of video CDs or CD Gs it is required that you set your CD player s TV output mode according to your ...

Страница 18: ...mote Control 4 To move through the next menu press the following button On the Unit Press the NEXT or PREV button On the Remote Control Press the NEXT or PREV button 5 To select the item track in the menu and play it press the following buttons On the Unit 1 Press the REV MODE VCD NUMBER button SEL 1 will blink on the display 2 Press the 4 buttons to select the item SEL XX and press the SELECT but...

Страница 19: ...ture Moving Picture Still Picture Still Picture To next screen press RETURN 7 press RETURN 7 press RETURN 7 To previous screen On the Remote Control 1 Press the VCD NUMBER UP or DOWN button to select the item SEL XX you want to play 2 Press the SELECT button to play it back The next track will be automatically played after the current track is finished While a part of a movie is displayed on the T...

Страница 20: ...are always displayed on the TV screen When you play a video CD with PBC PBC will also be displayed on the TV screen 1 2 3 4 5 6 7 8 9 Viewing the Video Intro of Video CDs You can check the contents of a video CD watching the first 5 seconds of each track on the disc 1 Play the video CD with or without PBC Load the video CD with or without PBC Press the CD 8 button 2 Press the V INTRO button after ...

Страница 21: ...u want to listen to facing up If the cassette holder does not open turn off the Unit then turn it back on and press the TAPE 0 button again 3 Close the holder gently until it clicks 4 Press the TAPE button The tape is played in the direction shown by the Tape Direction indicator 5 If you need to change the playback direction press the TAPE button again The other Tape Direction indicator lights up ...

Страница 22: ...e II tapes can be used for recording Note At the start and end of cassette tapes there is leader tape which cannot be recorded onto Thus when recording CDs or radio broadcasts wind on the leader tape first to ensure that the recording will be made without any music part lost CAUTION If a recording you make has excessive noise or static the Unit may have been too close to a TV which was on during t...

Страница 23: ...tem begins recording When recording a CD onto tape with Reverse mode on If a song is recorded for more than 12 seconds which corresponds to the length of leader tape but not finished before the first side of tape comes to an end this song will automatically be recorded on the second side from its beginning to avoid being split on both sides If a song is recorded for less than 12 seconds before the...

Страница 24: ... from the external equipment refer to Standard Recording on page 18 DOWN UP MULTI CONTROL TAPE FM AM CD STANDBY PHONES AUX REC REV MODE AHB PRO TIMER CLOCK VOLUME CD OPEN CLOSE SELECT PREV RETURN NEXT VCD NUMBER AUX AUX Recording the System s Source to External Equipment For Hong Kong only You can record the System s sources to external equipment which is connected to the LINE OUT or OPTICAL DIGIT...

Страница 25: ...just the minute The timers let you control listening and recording functions automatically Setting the Clock When you plug the AC power cord into the wall outlet the CLOCK indicator flashes on the display You can set the clock whether the System is on or off Notes The clock must be correctly set for the timers to work The procedure must be completed within 2 minutes Otherwise the setting is cleare...

Страница 26: ...ystem is unplugged or a power failure occurs the timer will be canceled You will need to reset the clock first then the timer SLEEP Setting the Recording Timer With the Recording Timer you can make a tape of radio broadcast automatically How Recording Timer actually works The Unit automatically turns on tunes into the last received station and starts recording when the on time comes Then when the ...

Страница 27: ...el 1 Press the TIMER button on the Unit The current volume setting flashes on the display 2 Press the or 4 button to select the volume level The current volume level will be used 0 to 40 When the timer is turned on the volume will be automatically set to the selected level To turn off the volume while the Recording Timer is working set the volume level to 0 9 Press the TIMER button on the Unit The...

Страница 28: ...ween Vocal Masking ON and OFF NORMAL as shown below 4 Play a CD 5 Adjust the main volume and the MIC LEVEL control as you sing into the micro phone If you want to record on a tape carry out CD Direct Recording or One Track Recording See page 18 To cancel the Karaoke mode press the VOCAL MASKING button on the Remote Control until NORMAL appears on the display Notes After you have finished singing a...

Страница 29: ... Start the source CD Only Note Microphone mixing is not available for other sources such as Tape Tuner or Aux 4 Adjust the main volume and the MIC LEVEL control as you sing into the micro phone To apply echo press the ECHO button on the Remote Control until ECHO ON appears on the display To cancel the echo press the same button again ECHO OFF will appear on the display Selecting the Tuner or turni...

Страница 30: ...Unit and use a head demagnetizer available at electronics and record shops Care and Maintenance Handle your CDs carefully and they will last a long time Compact Discs Only CDs bearing these marks can be used with this System However continued use of irregular shape CDs heart shape octagonal etc can damage the System Remove the CD from its case by holding it at the edges while pressing the case s c...

Страница 31: ...lugged in During tape playing the power cord has been unplugged Cassette record protect tabs are removed The built in microprocessor has malfunctioned due to external electrical interference The path between the Remote Control and the sensor on the Unit is blocked The batteries have lost their charge VIDEO OUT selection does not match the TV set s colour system The Vocal Masking function is in use...

Страница 32: ...r FM Tuner Tuning Range 87 5 MHz 108 0 MHz AM Tuner Tuning Range 531 kHz 1 710 kHz except for Saudi Arabia 531 kHz 1 602 kHz for Saudi Arabia only at 9 kHz channel space 530 kHz 1 710 kHz except for Saudi Arabia 530 kHz 1 600 kHz for Saudi Arabia only at 10 kHz channel space Speaker Specifications each unit Speakers Woofer 9 cm x 1 Tweeter 4 cm x 1 Impedance 4 Ω Dimensions 140 mm x 230 mm x 226 mm...

Страница 33: ... 4Ω AC IN VOLTAGE SELECTOR 110V 127V 230V VOLTAGE SELECTOR 110V 127V 230V IMPORTANT for mains AC line BEFORE PLUGGING IN do check that your mains AC line voltage corresponds with the position of the voltage selector switch provided on the outside of this equipment and if different reset the voltage selector switch to prevent from damage or risk of fire electric shock ...

Отзывы: