background image

English

– 12 –

Playing Back CDs/VCDs/MP3-CDs

This unit can play back all digital audio CDs, video CDs
(VCDs), finalized digital audio CD-Recordable (CD-R) discs
and finalized digital audio CD-Rewritable (CD-RW) discs.

NOTES ON CD-R AND CD-RW DISCS

When playing back a CD-R or CD-RW disc on this unit,
it must be “finalized” so that it can be played back
correctly.

“Finalization” is a process to create a TOC (Table Of
Contents) section on a recorded disc. If you attempt to play
back a non-finalized disc, especially a non-finalized CD-
RW disc on this unit, malfunction may occur since no TOC
section exists on the disc.

• When a non-finalized CD-R or a CD-RW disc is loaded or

ejected, it may take a considerably long time to read the
disc, but it is not a malfunction.

• This unit does not support track skipping function. Even if

a CD-R disc or a CD-RW disc is designed to skip some
tracks during playback, this unit does not skip such tracks.

MP3-CD formats supported on this unit

– ISO 9660 format – 17 characters max.
– Number of tracks plus number of albums: 256 max.
– Number of directory nesting levels: 8 max.
– Number of albums: 99 max.
– Number of MP3 program tracks: 99 max.
– Length of each track: 255 minutes 59 seconds max.
– The player can play mixed mode disc:

a: MP3 + CD/DA can only play the MP3 tracks in

the first block

b: VCD + CD/DA

– VBR bit-rate
– Sampling frequencies for MP3 disc: 32 kHz, 44.1 kHz,

48 kHz

– Bit rates of MP3 disc : 32, 64, 96, 128, 192, 256 (kbps)

• MP3-CD formats not supported on this unit

– Files like *WMA, *AAC, *DLF, *M3U, *PLS
– Chinese filenames
– Non-session closed discs
– Discs recorded in UDF format
– Multi-session discs (can only play the first session if it is

in the supported format.)

Before playing back video CDs (VCDs)

The CD part of this unit also serves as a VCD player if you
connect it to your TV set.
Before viewing a VCD, ensure that the TV standard, NTSC
or PAL, on which your TV set is based has been selected on
this unit. This is not necessary when you use a multi-system
TV set.

Continued

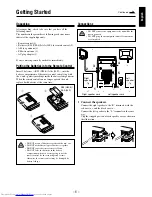
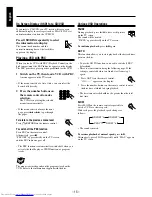
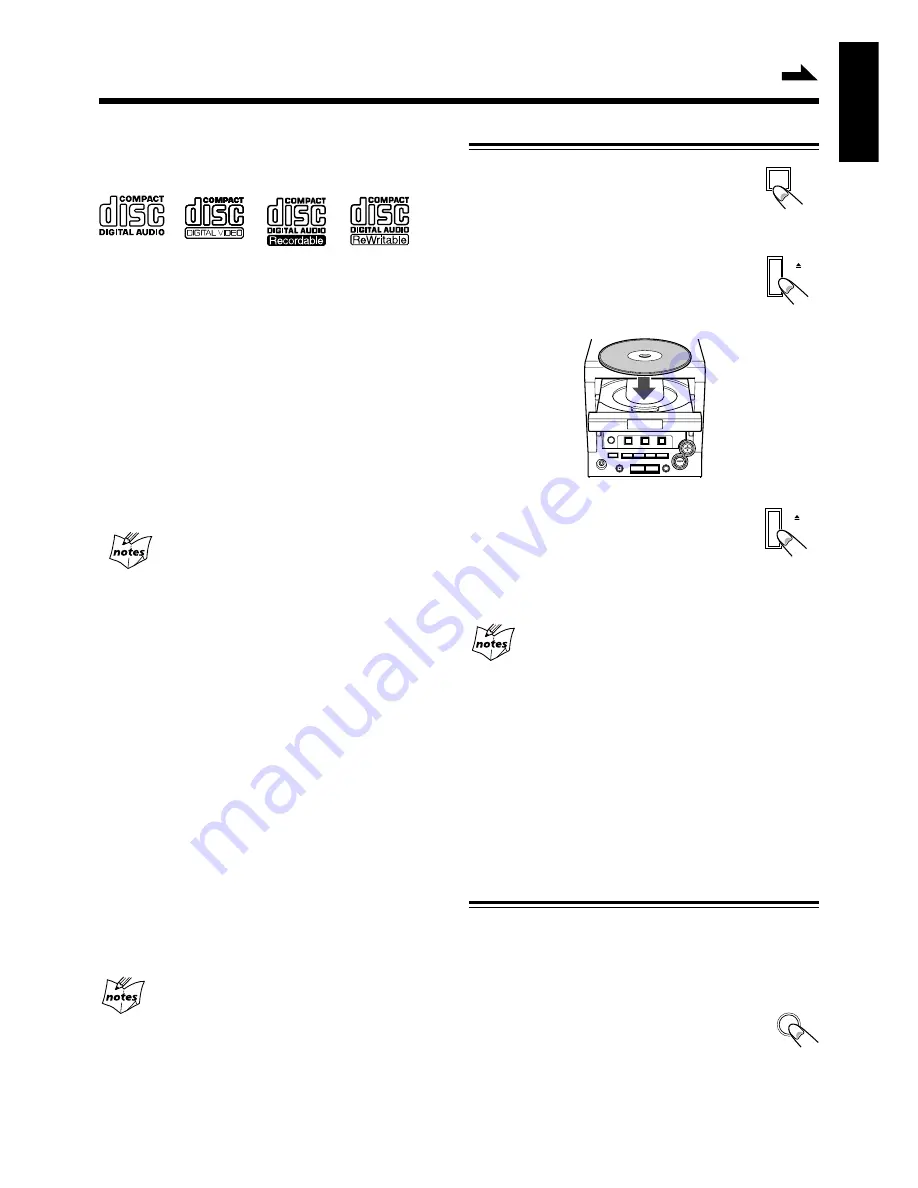
Loading a Disc

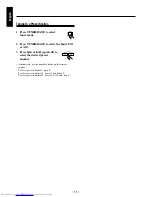
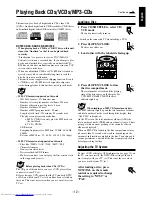
1 Press CD/SHUFFLE to select CD/

VCD mode.

The unit automatically turns on.

• Switch on the connected TV when loading a VCD.

2 Press 

0

 OPEN/CLOSE.

The disc tray slides out.

3 Load a disc with the label side facing up.

4 Press 

0

 OPEN/CLOSE to close

the disc compartment.

The total number of tracks and the playing
time of the disc appear on the display. For
VCD, MP3-CD and CD-RW, the disc
indicator lights up.

When loading an MP3-CD format music disc

The MP3 indicator lights up and the total number of albums
and total number of tracks scroll through the display, then
“A01 T001” is displayed.
On the TV screen, the total number of albums (ALB), the
total number of tracks (TRK), and an album list (up to 5 lines
per page) with an arrow pointing at the currently selected
album are displayed.
When an MP3-CD is loaded in the disc compartment, it may
take more than 30 seconds to be read in, depending on the
amount of information compiled in the disc. To ensure good
system performance, wait until the disc is completely read in
before proceeding further.

Adjusting the TV System

To view a VCD or display OSD information (see page 15) on
the TV screen correctly, the NTSC/PAL setting of the unit
must comply with your TV set. (This is not the case when
you use a multi-system TV set.)

After loading a disc, press
NTSC/PAL on the remote
control as required to change
the setting to “NTSC” or
“PAL”.

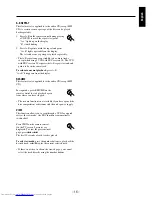
SHUFFLE

CD

OPEN

/CLOSE

OPEN

/CLOSE

NTSC/PAL

Содержание UX-M6V

Страница 1: ...PAUSE VOLUME STOP CLEAR DEMO SEARCH TUNING SHUFFLE CD TUNER TAPE BAND REV MODE M I C R O C O M P O N E N T S Y S T E M U X M 6 V AUTO REVERSE FULL LOGIC DECK FM MODE VOCAL EJECT OSD DIM PRESET PRE EQ BBS REPEAT TIMER ON OFF SET OPEN CLOSE STANDBY ON CD SHUFFLE TUNER BAND TAPE REV MODE OSD DIM PROGRAM REC DISPLAY 1 2 3 REPEAT DEMO FM MODE VOCAL 4 5 6 7 8 9 MIC ECHO 0 NTSC PAL 10 MUTING BEAT CUT KEY...

Страница 2: ...he ventilation openings or holes If the ventilation openings or holes are blocked by a newspaper or cloth etc the heat may not be able to get out Do not place any naked flame sources such as lighted candles on the apparatus When discarding batteries environmental problems must be considered and local rules or laws govern ing the disposal of these batteries must be followed strictly Do not use this...

Страница 3: ...xposure to beam 3 CAUTION Do not open the top cover There are no user serviceable parts inside the Unit leave all servicing to qualified service personnel CLASS LASER 1 PRODUCT DANGER Invisible laser radiation when open and interlock defeated AVOID DIRECT EXPOSURE TO BEAM VORSICHT Unsichtbare Laserstrahlung wenn Abdeckung geöffnet und Sicherheitsverriegelung überbrückt Nicht dem Straht aussetzen A...

Страница 4: ...ints you had better know Precautions Installation Install in a place which is level dry and neither too hot nor too cold between 5 C and 35 C Install the unit in a location with adequate ventilation to prevent internal heat built up in the unit Leave sufficient distance between the unit and the TV Keep the speakers away from the TV to avoid interference with TV DO NOT install the unit in a locatio...

Страница 5: ...tion 11 Playing Back CDs VCDs MP3 CDs 12 Loading a Disc 12 Adjusting the TV system 12 Playing Back a Disc 13 Program Play of a CD VCD 13 Progarm Play of a MP3 CD 14 Shuffle Play 14 Repeat Play 14 On Screen Display OSD for a CD VCD 15 Playing a VCD with PBC 15 Various VCD Operations 15 Playing Back Tapes 17 Loading a Tape 17 Tape Playback 17 Auto Reverse 17 Rewind Fast Forward 17 Recording 18 Recor...

Страница 6: ...TION PLAY PAUSE VOLUME STOP CLEAR DEMO SEARCH TUNING SHUFFLE TUNER TAPE BAND REV MODE M I C R O C O M P O N E N T S Y S T E M U X M 6 V AUTO REVERSE FULL LOGIC DECK FM MODE VOCAL EJECT OSD DIM PRESET PRE EQ BBS REPEAT TIMER ON OFF SET CD STANDBY ON OPEN CLOSE 9 p 2 1 3 4 5 6 7 8 2 3 4 5 1 6 p 7 8 9 q w y u i w e r t y u i o q t r e Display Window ...

Страница 7: ...s between stereo and monaural mode on FM band only t OSD DIM button 9 15 Switches on or off the on screen display on the TV screen Selects DIM HIGH DIM LOW or LED OFF y VOLUME buttons 8 Adjust the volume echo or key tone level u PRE EQ BBS button 9 Selects the desired sound mode Switches on or off the BBS system i 0 EJECT 17 Opens the tape deck door o SEARCH TUNING 4 buttons 8 10 13 17 20 MP3 CD s...

Страница 8: ...button Displays and sets the key tone level Eliminates beats during AM broadcast recording d MUTING button Interrupts and resumes sound reproduction f VOLUME buttons g PRE EQ BBS button h RETURN button Returns to the previous MENU level during playback of a VCD with PBC j VIEW button Scans through a VCD when PBC is off k RESUME button Resumes playback of a CD VCD when PBC is off Remote Control Whe...

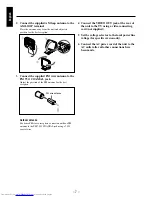
Страница 9: ...attery together with a new one DO NOT use different types of batteries together DO NOT expose batteries to heat or flame DO NOT leave the batteries in the battery compartment when you are not going to use the remote control for an extended period of time otherwise the remote control may be damaged by battery leakage Connections DO NOT connect any equipment to the unit while the unit is powered DO ...

Страница 10: ...or the best reception Outdoor antenna For better FM stereo reception connect an outdoor FM antenna to the FM 75 Ω COAXIAL jack using a 75 Ω coaxial wire 4 Connect the VIDEO OUT jack at the rear of the unit to the TV using a video connecting cord not supplied 5 Set the voltage selector to the local power line voltage for specific version only 6 Connect the AC power cord of the unit to the AC outlet...

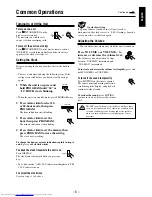
Страница 11: ...he clock time while the unit is on Press DISPLAY The clock time is displayed until you press any key In 12 hour mode AM 12 00 indicates midnight and PM 12 00 indicates noon To correct the clock time Carry out steps 1 to 4 above On clock resetting If a power failure occurred or the AC power cord is disconnected the clock is reset to 0 00 flashing In such a case you need to set the clock again Adjus...

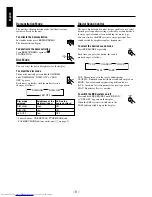
Страница 12: ...ings selectable as sound modes to enjoy special sound effects matching the music type You can also use the BBS system to enjoy powerful bass sound created by emphasizing low frequencies To select the desired sound mode Press PRE EQ BBS repeatedly Each time you press the button the sound mode changes as follows POP CLASSIC ROCK JAZZ FLAT POP More presence in the vocals and midrange CLASSIC Enriched...

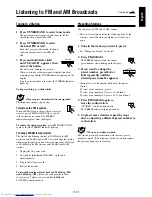
Страница 13: ...r cord 2 Press and hold 3 8 and VOLUME on the unit simultaneously 3 Plug in the AC power cord 4 Release the buttons To switch the tuning interval back to 50 kHz step FM and 9 kHz step AM follow the same procedure above except in step 2 where you press and hold 8 2 and VOLUME simultaneously Presetting Stations You can preset 20 FM and 10 AM stations There is a time limit in doing the following step...

Страница 14: ...e band FM or AM 3 Press 8 2 or 3 8 repeatedly to select the desired preset number Alternatively use the number buttons on the remote control To select preset number 5 press 5 To select preset number 12 press 10 and then 2 To select preset number 20 press 10 10 and then 0 TUNER BAND DIRECTION PLAY PAUSE PRESET ...

Страница 15: ...nly play the first session if it is in the supported format Before playing back video CDs VCDs The CD part of this unit also serves as a VCD player if you connect it to your TV set Before viewing a VCD ensure that the TV standard NTSC or PAL on which your TV set is based has been selected on this unit This is not necessary when you use a multi system TV set Continued Loading a Disc 1 Press CD SHUF...

Страница 16: ...e control to select a desired track from the current album The track name scrolls through the display briefly On the TV screen the arrow moves up down in the track list of the current album Press 3 8 to start playback If you use the number buttons to select a track playback will start immediately without your pressing 3 8 Program Play of a CD VCD You can arrange the order in which the tracks are p...

Страница 17: ...RED appears on the display and the PROG indicator goes off The stored program is cleared when the CD compartment is opened Shuffle Play You can play all the tracks in random order In play mode pause or stop mode press CD SHUFFLE The SHUFFLE indicator lights up To exit shuffle play mode press CD SHUFFLE again or 7 The SHUFFLE indicator goes off It is not possible to activate the shuffle play functi...

Страница 18: ...PBC indicator goes off The PBC function is automatically switched off when you activate the shuffle play or VIEW function or program tracks The menu structure depends on the program stored on the VCD Refer to the information supplied with the disc Various VCD Operations PAUSE During playback press 3 8 to have a still picture on the TV screen The sound will be muted PAUSE appears briefly on the TV ...

Страница 19: ... A B A B disappears from the display RESUME This feature is also applicable to the audio CD except MP3 CD In stop mode press RESUME on the remote control to start playback again from where you have stopped The resume function is not available if you have opened the disc compartment or disconnected the unit s power supply VIEW This function allows you to scan through a VCD for a quick review In vie...

Страница 20: ... 7 To interrupt playback Press the last selected 8 2 or 3 8 PAUSE appears on the display If you press the button opposite to the last selected direction playback starts in the reverse direction To resume playback press 8 2 or 3 8 again Auto Reverse Press TAPE REV MODE repeatedly to select the desired playback mode playback on one side of the tape only both sides are played once both sides are play...

Страница 21: ...g continues to the end of the tape until you press 7 even after playback of the CD has finished Using the beat cut function When recording an AM broadcast beats may occur If this happens press BEAT CUT KEY on the remote control to select the better beat cut position BEAT 01 or BEAT 02 IMPORTANT It may be unlawful to record or play back copyrighted material without the consent of the copyright owne...

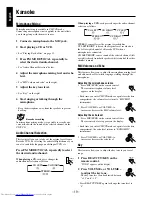
Страница 22: ...EFT VP RIGHT STEREO same effect as the original recorded disc VP LEFT RIGHT fades out the original vocal recorded on the left or right channel of a Karaoke VCD when a microphone is connected CH LEFT RIGHT source sound of the selected channel left or right is heard from both speakers while sound of the other channel is muted MIC Volume and Echo This feature allows you to adjust the microphone mixin...

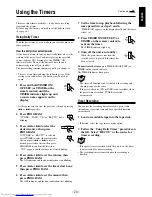
Страница 23: ...volume then press PROGRAM The ON indicator and the hour indication start blinking 5 Press 4 or to set the timer start hour then press PROGRAM 6 Press 4 or to set the minute then press PROGRAM The OFF indicator and the hour indication start blinking 7 Set the time to stop playback following the same procedure as steps 5 and 6 TIMER OK appears on the display briefly and the timer is now set 8 Press ...

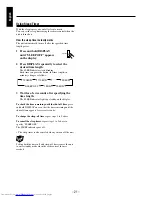
Страница 24: ... changes as follows 120 MIN 10 MIN SLEEP OFF 110 MIN 1 MIN 20 MIN 3 Wait for a few seconds after specifying the time length The SLEEP indicator lights up steadily on the display To check the time remaining until the shut off time press and hold DISPLAY once so that the time remaining until the shut off time appears for several seconds To change the sleep off time repeat steps 1 to 3 above To cance...

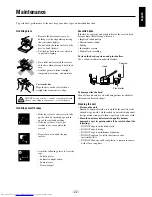
Страница 25: ...hinner of benzine DO NOT apply any volatile substance such as insecticides to it DO NOT allow any rubber of plastic to remain in contact with it for a long time Handling discs Remove the disc from its case by holding it at the edge while pressing the center hole lightly Do not touch the shiny surface of the disc or bend the disc Put the disc back in its case after use to prevent warping Be careful...

Страница 26: ... Connect the cable between the unit and TV set correctly Change the PAL NTSC setting of the unit Readjust the antenna See page 7 Clean the heads See page 22 Cover the holes with adhesive tape Set the built in clock correctly Remove the obstruction Replace the batteries Use a finalized MP3 CD Troubleshooting If you are having a problem with your unit check this list for a possible solution before c...

Страница 27: ...240V VOLTAGE SELECTOR IMPORTANT for mains AC line BEFORE PLUGGING IN do check that your mains AC line voltage corresponds with the position of the voltage selector switch provided on the outside of this equipment and if different reset the voltage selector switch to prevent from a damage or risk of fire electric shock ...

Отзывы: