3
Menu Details
MENU
FOCUS ADJUST
Select this to adjust the focus of the DC iris lens. When [FOCUS ADJUST..]
is selected, the focus adjustment screen opens. Adjusting the focus is easier
because the iris is completely open and the depth of field is shallower.
RETURN
Returns to the [MENU] screen.
WDR LEVEL
For setting the wide dynamic range (WDR) function. Set it according to
conditions in bright areas (back lighted) such as in sunlight. Increase the
value if there is an extreme difference in light and dark areas to make the
dark areas easier to see, reduce the value if the image is bright and there is
a small difference in light and dark areas.
Setting
: CUSTOM.., -10 to
NORMAL
to 10
• CUSTOM..: Manually adjust the wide dynamic range. Press the [SET/
MENU] button to open the [WDR CUSTOM SET] screen.
WDR CUSTOM SET
WDR PRIORITY
Select whether the wide dynamic range gives priority to light areas or dark
areas.
Setting
:
LIGHTS
, SHADOWS
• LIGHTS: Light areas are easier to see.
• SHADOWS: Dark areas are easier to see.
WDR BIAS
For setting the low to mid level brightness of the wide dynamic range.
If [WDR PRIORITY] is set to “LIGHTS”, increasing the value makes it
brighter, decreasing the value makes it darker. If [WDR PRIORITY] is set to
“SHADOWS”, the operation is the opposite of that for “LIGHTS”.
Setting
: -36 to
0
to 36
WDR LIMIT
For setting the maximum of the wide dynamic range. Increase the value
when shooting a subject with large variations in light and dark, reduce the
value when shooting a subject with low variations in light and dark.
Setting
: 0 to
30
to 36
EXP BIAS
For adjusting output characteristics in relation to the brightness level of the
subject. Increase the value to make dark subjects more clear, reduce the
value to make bright subjects more clear.
Setting
: -18 to
0
to 18
Hunting may occur if the setting is greater than 15. If this
happens, lower the setting.
RETURN
Returns to the [MENU] screen.
The setting in
bold
is the factory setting.
BRIGHTNESS
For setting the brightness of the entire image. Increase the value to make
the entire image brighter, reduce the value to make the entire image darker.
Setting
: -10 to
NORMAL
to 10
Noise may become apparent as the setting increases.
CONTRAST
For setting the contrast of the image. Increase the value to increase contrast
in dark areas, reduce the value to decrease contrast.
Setting
: -10 to
NORMAL
to 10
Increasing the contrast may improve the occurrence of noise in
the dark areas around bright areas.
EASY D/N
Set “AUTO” to continuously shoot subjects in brightness that varies from day
to night. When it is bright, images are in colour. When it is dark, images are
in black and white.
Setting:
OFF,
AUTO
You cannot use the “OFF” / “LOW” / “MID” setting for [AGC/
SHUTTER], if [EASY D/N] is set to “AUTO”.
VIDEO ADJUST
AGC/SHUTTER
Set whether AGC (Automatic Gain Control) automatically lengthens
exposure time, and increases sensitivity by several times, if a subject is
dark.
Setting:
OFF, LOW, MID,
HIGH
, ×2, ×4, ×8, ×16
Settings and gain
OFF
LOW
MID
HIGH
×
2
×
4
×
8
×
16
×2
×16
0dB
LOW
×4
×2
×2
×8
×2
×4
×8
×4
Setting
Gain
Lower
Higher
Sense up (slow shutter)
Example: Set to ×4
As a subject becomes darker, the gain increases and the screen becomes
brighter as digital sensitivity is increased ×2. As a subject becomes even
darker, the screen becomes brighter as digital sensitivity is increased ×4.
In this way, as a subject becomes even darker, the gain increases to the
maximum, and the screen becomes brighter.
* When digital sensitivity is increased, sensitivity increases but works
unnaturally.
• When increasing the gain, noise will appear in the screen for
dark areas.
• You cannot use the “OFF” / “LOW” / “MID” setting, if [EASY D/N]
is set to “AUTO”.
• In dark areas if [AGC/SHUTTER] is set to “×2” or higher,
-
The screen may temporarily lock up or noise and white spots
may become apparent.
-
The entire screen may temporarily change from dark to bright.
-
Particularly for dark areas, the Wide Dynamic Range (WDR)
function stops functioning.
Continued on back
WHITE BALANCE
You can set the white balance.
Setting:
ATW-W,
ATW
, ATW-I, AWB·SET, MANUAL..
• ATW-W:
Supports a wide range of colour temperatures (2500 K to
over 10000 K).
• ATW:
Supports colour temperature of lighting (colour temperatures
from 3000 K to 8000 K) and automatically adjusts white
balance.
• ATW-I:
Supports colour temperature of indoor lighting, mainly
fluorescent lights (3000 K to 5000 K) and automatically
adjusts white balance.
• AWB·SET: Press the [SET/MENU] button to automatically adjust and
preset the white balance.
• MANUAL..: Opens the [MANUAL W. BALANCE] screen.
MANUAL W. BALANCE
R-B
For adjusting R (red) and B (blue) hues. The further the
setting is to the R side the stronger the reds become, the
further to the B side the stronger the blues become.
Setting:
R to B
RETURN
Returns to the [VIDEO ADJUST] screen.
COLOUR LEVEL
For adjusting the colour levels in the image signal. Increase the value to
make colours darker, reduce the value to make colours more pale.
Setting
: -5 to
NORMAL
to 5
If a subject has very dark colours, some fuzzy noise may appear.
If this happens, lower the colour level setting.
ENHANCE LEVEL
For adjusting the edge enhancement to make the image sharper. Set it to
“HIGH” to make edges sharper, and set it to “LOW” to make edges softer.
Setting:
LOW,
MID
, HIGH
The “HIGH” enhancement level is optimized to be effective in low
light.
RESOLUTION
Select a resolution mode to suit the operating environment.
Setting: NORMAL
, HIGH, 16:9
• NORMAL: Aspect ratio 4:3
• HIGH: Aspect ratio 4:3/High resolution mode
• 16:9: Aspect ratio 16:9/High resolution mode
• Resolution will increase if “HIGH” or “16:9” is selected, but noise
may also become more apparent.
• Setting “HIGH” or “16:9” changes the angle of view, compared
to “NORMAL”.
DNR MODE
This mode reduces noise while shooting images. Setting this to “HIGH”
reduces image noise, but if the subject is moving, it may leave afterimages.
Setting: OFF
, LOW, MID, HIGH
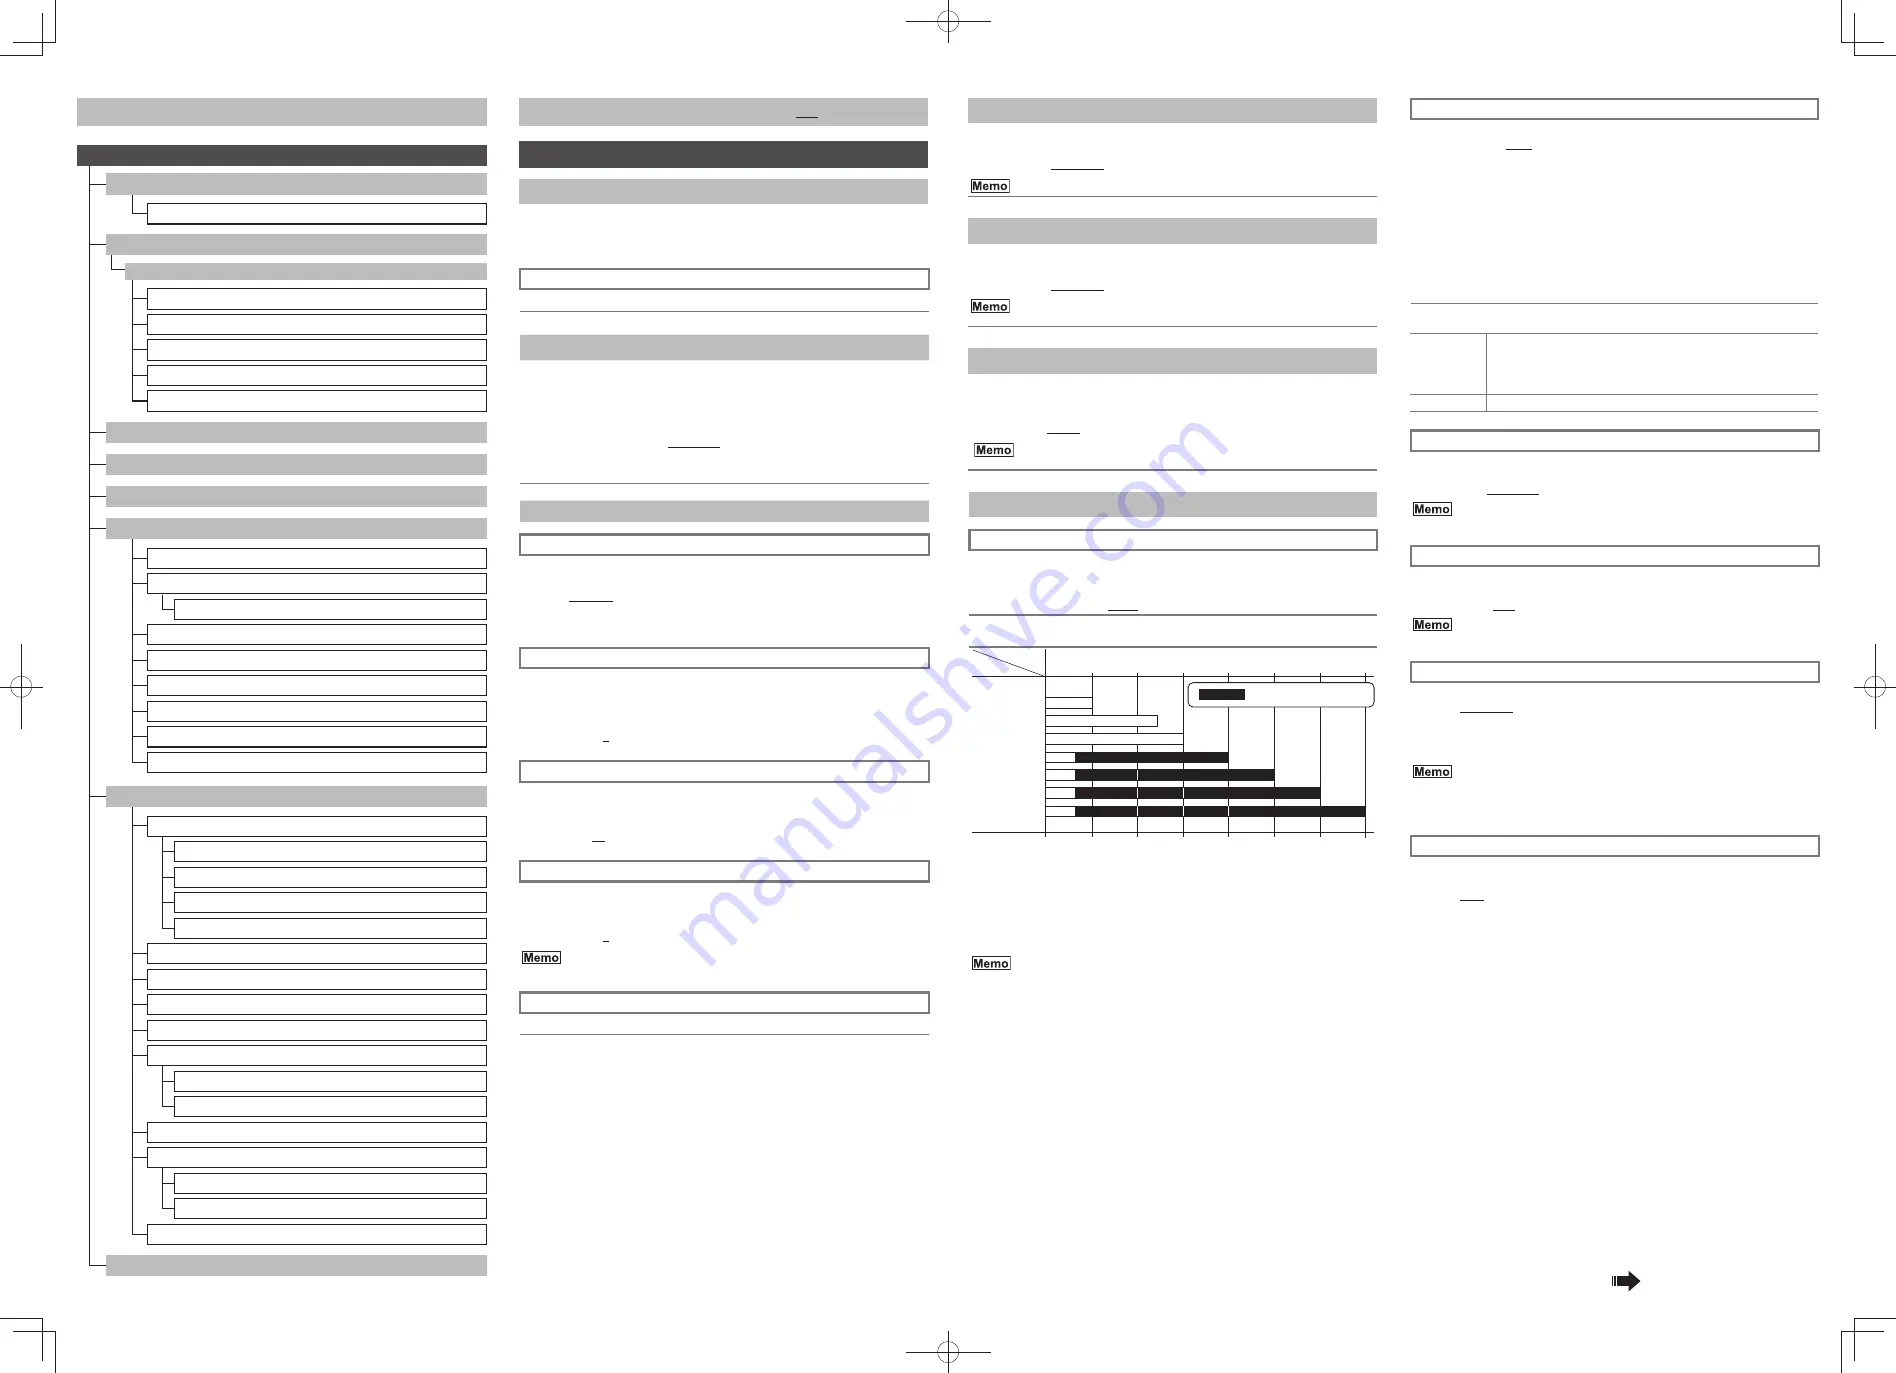
List of Menu Items
RETURN
MENU
FOCUS ADJUST..
WDR LEVEL
EASY D/N
VIDEO ADJUST..
AGC/SHUTTER
WHITE BALANCE
MANUAL..
COLOUR LEVEL
ENHANCE LEVEL
RESOLUTION
DNR MODE
WDR AREA SET
RETURN
LENS ADJUST..
DC OFFSET
CAM SETTINGS..
DC GAIN
WDR CUSTOM SET
WDR PRIORITY
WDR BIAS
WDR LIMIT
EXP BIAS
RETURN
PROGRESSIVE
CRR MODE
TITLE EDIT
PRIVACY MASK..
FLIP
RETURN
EXIT
CAMERA TITLE
FACTORY SETTING..
IRIS TH
BRIGHTNESS
CONTRAST
RETURN
MASK 1 to 4
RETURN
CANCEL
CLEAR


