background image

18

Once the timer has been set, it will be activated at the same time 
everyday until the timer is turned off. Recording timer works only 
one time.
• While the timer is being set, the timer indicator (

) lights up.

• While the timer has been set, the timer indicator (

) also lights 

up if the power is supplied through the AC outlet. 

• While the timer is working, the timer indicator (

) blinks.

1. Press

ON/STANDBY.

2. Press CLOCK/TIMER.

“TIMER ON?” appears.
• Press SET to activate the timer setting you have made before.
• Press CANCEL to cancel the timer. 
• Go to the next step to reset the timer (or set the timer first 

time).

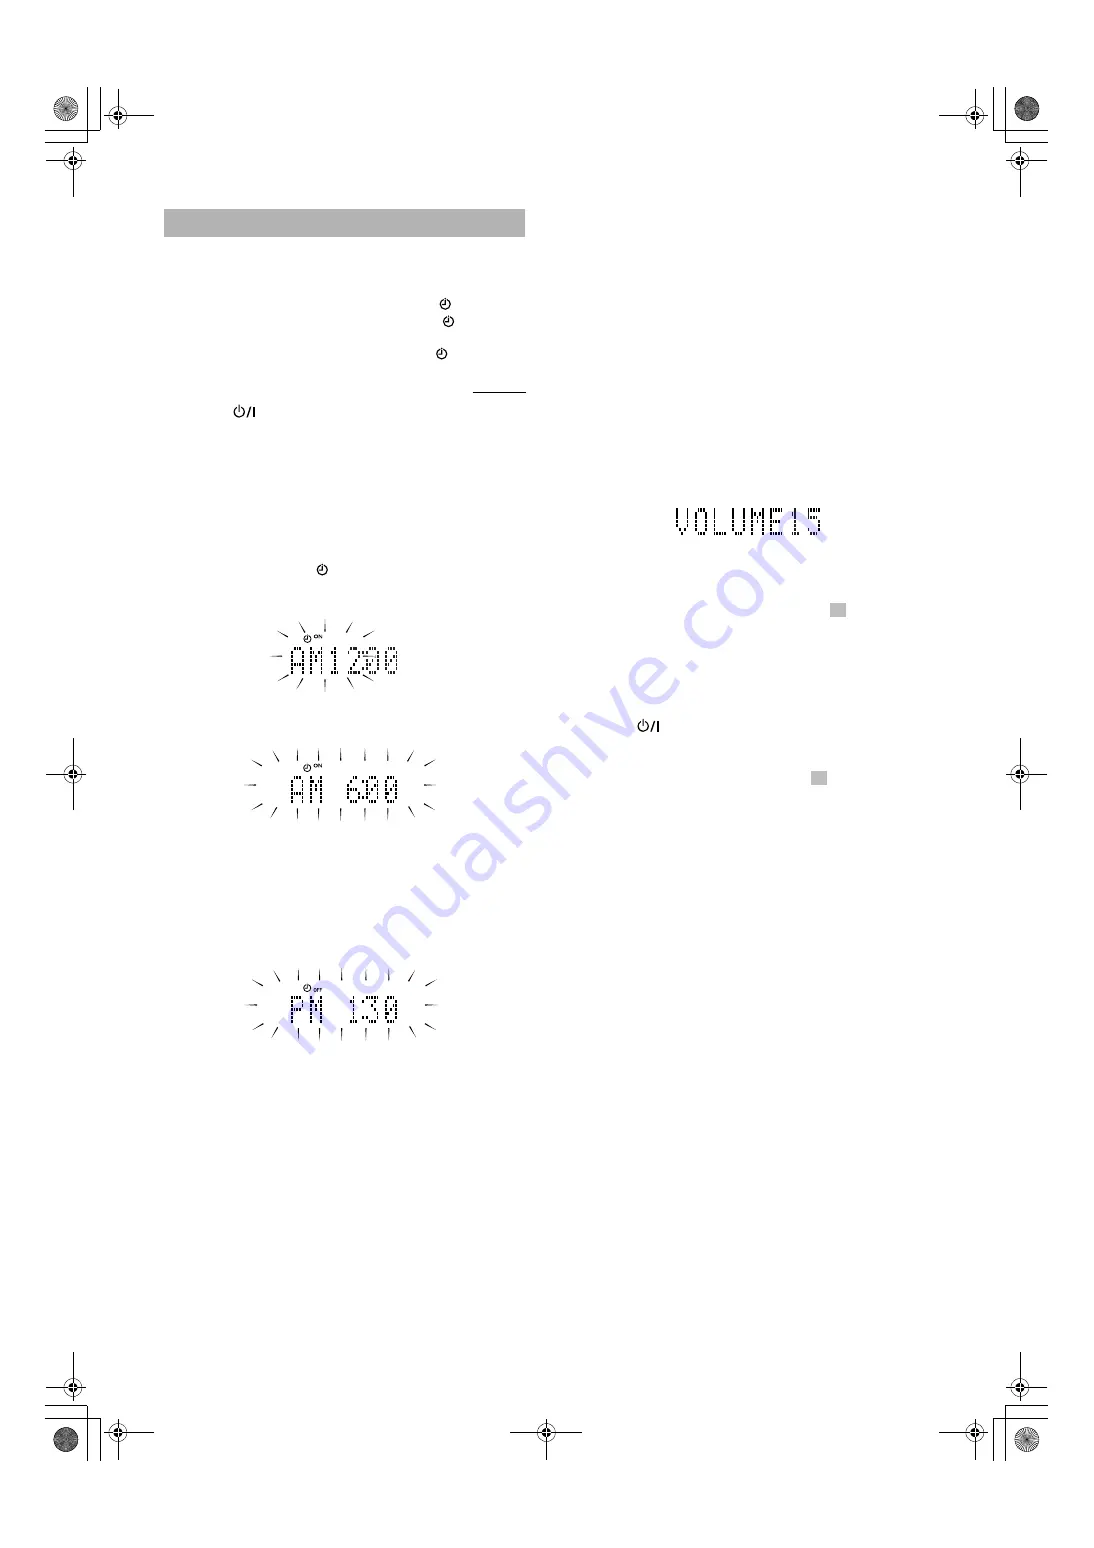
3. Press CLOCK/TIMER again, so that the 

timer indicator (

) and ON indicator light 

up.

The hour digit of the current ON time blinks on the display.

4. Set the on-time you want the system to 

turn on.

(1) Press 

¢

 or 

4

 to select the hour, then press SET.

(2) Press 

¢

 or 

4

 to select the minute, then press SET.

The OFF indicator lights up.
• Press and hold the button will change the time rapidly.
• If you want to change the time setting, press 

CANCEL.

5. Set the OFF time (example: PM1:30).

(1) Press 

¢

 or 

4

 to select the hour, then press SET.

(2) Press 

¢

 or 

4

 to select the minute, then press SET.

• Press and hold the button will change the time rapidly.
• If you want to change the time setting, press 

CANCEL.

6. Press 

¢

 or 

4

 to select the music source 

you want to listen to, then press SET.

Each time you press the button, the display changes as shown 
below:

TUNER


=


TU

\

TAPE


=


CD


=


TAPE


=

 (back to the 

beginning)
When you select the “TU

\

TAPE”; 

• The REC indicator appears on the display.
• The timer will be canceled after tuner recording has been 

finished.

7. Press 

¢

 or 

4

 to select the volume level, 

then press SET.

– –

: The current volume level will be used.

0 to 50 : When the timer is turned on, the volume will be 

automatically set to the selected level.

• The current timer setting appears for confirmation.

8. Before turning off the system, prepare the 

music source selected in step

.

TUNER

: Tune into the desired station.

TU

\

TAPE

: The last tuned station will be recorded. Insert a 

cassette tape for recording the station.

CD

: Set a disc.

TAPE

: Insert  a  tape.

9. Press

ON/STANDBY to turn off the 

system.

• When the timer turns on, the volume level gradually increases

from 0 (zero) to the preset level in step

.

However, if the volume has been set to “– –”, the volume 
level will be set to the last level directly.

To cancel the operation,

 press CLOCK/TIMER until the 

display returns to the original one.

To cancel the timer,

 press CLOCK/TIMER once, then press 

CANCEL. (“TIMEROFF” appears, only when power is on.)

To reactivate (or confirm) the canceled timer,

 press 

CLOCK/TIMER once, then press SET. (The current timer setting 
appears for confirmation.)

Notes:

• The timer cannot be set if on-time and off-time are the same.
• The timer does not work if the system is not in the standby mode 

(the system needs to be in standby mode at least one minute 
before the on-time).

CAUTION: If memory backup batteries are 
exhausted or not installed, and the AC power 
cord is disconnected or there is a power failure, 
time settings will be erased from memory. If this 
happens, set the current time (clock) and 
perform the timer setting again.

Setting the daily timer

Using the remote control only

6.

7.

RV-NB1[J]fff.book  Page 18  Monday, August 23, 2004  2:28 PM

Содержание RV-NB1

Страница 1: ...R CD SYSTEM RV NB1 For Customer Use Enter below the Model No and Serial No which are located on the rear bottom or side of the cabinet Retain this information for future reference Model No Serial No RV NB1 J fff book Page 1 Monday August 23 2004 2 28 PM ...

Страница 2: ...igned to provide reasonable protection against harmful interference in a residential installation This equipment generates uses and can radiate radio frequency energy and if not installed and used in accordance with the instructions may cause harmful interference to radio communications However there is no guarantee that interference will not occur in a particular installation If this equipment do...

Страница 3: ...enings or holes are blocked by a newspaper or cloth etc the heat may not be able to get out Do not place any naked flame sources such as lighted candles on the apparatus When discarding batteries environmental problems must be considered and local rules or laws governing the disposal of these batteries must be followed strictly Do not expose this apparatus to rain moisture dripping or splashing an...

Страница 4: ...ck timer functions timer on off with preset volume function and sleep timer 1 Where to place the system Select a place which is level dry and neither too hot nor too cold between 5 C and 35 C or 41 F and 95 F Leave sufficient distance between the system and a TV Do not use the system in a place subject to vibrations 2 Power cord Do not handle the power cord with wet hands Some power is always cons...

Страница 5: ...rce and play mode buttons 3 9 15 CD 6 TAPE 2 3 TUNER BAND Pressing one of these buttons also turns on the unit Display window o REC indicator 18 Timer indicators 18 timer ON OFF a SLEEP indicator 17 s CLOCK indicator 8 17 d reverse mode indicator 13 15 f 2 reverse tape direction indicator 13 15 g indicator 15 h 3 forward tape direction indicator 13 15 j FM mode indicators 9 STEREO MONO k MP3 indic...

Страница 6: ...R VOLUME buttons 8 With One Touch Operation you can play a disc a tape or turn on the radio with a single press of the play button for that function The system turns on and starts playing the source if it is ready The COMPU PLAY buttons are On the system and remote control CD 6 button TAPE 2 3 button TUNER BAND button AUX button Note The COMPU PLAY feature is not effective when the system is opera...

Страница 7: ...tery leakage or explosion Remove batteries when the remote control is not in use for an extended period of time When you need to replace the batteries replace both batteries at the same time with new ones Do not use different types of batteries together Point the remote control at the remote sensor on the system s control panel from a distance of up to 7 m 23 feet If you point the remote control f...

Страница 8: ...e to start the engine when you use the car adapter otherwise the car battery will be exhausted During transport stabilize the system in a box etc To prevent malfunctions do not leave the system in a car for a long time If the power is supplied through the car battery the display will be blank with the system turned off at standby Unplug the AC power cord from the system to supply the power through...

Страница 9: ...rating the system on batteries R20 D 13F size batteries not supplied To remove the batteries remove battery 10 first Notes When you operate the system on mains AC power or on car battery DC12V the power source automatically switches from batteries to AC or DC12V However you should remove the 10 batteries when operating on AC power or car battery DC12V When the batteries are exhausted the following...

Страница 10: ...0 Turn the VOLUME control clockwise to increase the volume or turn it counterclockwise to decrease the volume Press VOLUME to increase the volume or press VOLUME to decrease it When you press and hold VOLUME or the volume changes rapidly CAUTION DO NOT start playing any source without first setting the volume to minimum as a sudden blast of sound can damage your hearing speakers and or headphones ...

Страница 11: ...e type of music being played Press SOUND to select the sound mode Each time you press the button the sound mode changes as follows Sound mode selection BEAT Set to this position for music with a heavy beat such as rock and disco music POP Set to this position for light music including popular and vocal music CLEAR Set to this position for crisp and clear sounding music with transparent highs FLAT ...

Страница 12: ...e from frequency to frequency until you find the station you want OR Auto Tuning Press and hold 4 or for one second or more The frequency changes automatically until a station frequency is found OR Preset Tuning possible only after presetting stations Select the desired preset number displayed as P XX on the display using PRESET TUNING on the system or the number buttons on the remote control Afte...

Страница 13: ...y recognize files tracks with MP3 or mp3 as the extensions which can be in any combination of upper and lower case It is recommended that you record your material at a 44 1 kHz sampling rate using the 128 kbps data transfer rate You can play back the discs containing the tracks in music CD format or MP3 files in ISO 9660 format Some MP3 tracks or discs may not be played back because of their chara...

Страница 14: ...g if any are shown on the display To start playback press CD 6 Press and hold 4 or during playback will fast forward backwards the disc so you can quickly find a particular passage in the track you are listening to During search play you can hear the sound of approx one forth level Press the number buttons to directly play a track To directly play track 5 press 5 To directly play track 15 press 10...

Страница 15: ...RAM RANDOM back to the beginning Note For CDs If the total playback time of the programmed tracks exceeds 99 minutes 59 seconds will appear on the display The tracks will play in no special order when you use this mode 1 Set a disc 2 Press CD 6 3 Press 7 to stop the disc 4 Press PLAY MODE repeatedly to select RANDOM The RANDOM indicator lights up on the display 5 Press CD 6 The tracks are played i...

Страница 16: ...otes Do not turn the LOCK RELEASE knob during playback When no tape is loaded in the deck NO TAPE appears on the display Press or 4 to fast wind rewind the tape The cassette deck automatically stops when the tape reaches its end You can set a tape to play just one side both sides in succession or both sides continuously Press REVERSE MODE Each time you press the button reverse mode indicator chang...

Страница 17: ...the system may have been too close to a TV which was on during the recording Either turn off the TV or increase the distance between the TV and the system You can record any sound source to tape The sources are disc tuner auxiliary equipment microphone and guitar The microphone sound and guitar sound can be mixed with any source 1 Insert a blank or erasable cassette tape into the cassette deck Be ...

Страница 18: ...ses between tracks press CD 6 twice to enter pause mode only possible with CDs 7 Press ONE TOUCH REC on the system The indicator lights up and the cassette deck starts recording When the tape reaches its end at the middle of a song in the forward direction 3 the recording in the reverse direction 2 will start from the beginning of that track or previous track See diagram below Ex Case 1 Recording ...

Страница 19: ...the system is properly set When using a microphone make sure the knob is pressed in _ When using a guitar make sure the knob is released 2 Set the MIC GUITAR LEVEL control to MIN by turning it fully counterclockwise 3 Connect a microphone or a guitar into the MIC GUITAR INPUT jack on the rear of the system 4 Start a source disc tape tuner or other equipment 5 Adjust the VOLUME control and the MIC ...

Страница 20: ...to turn the system off after a certain number of minutes when it is playing By setting the sleep timer you can fall asleep to the music and know that your system will turn off by itself rather than playing all night You can set the sleep timer only when the system is turned on 1 Press SLEEP The SLEEP indicator lights up on the display 2 Set the length of time you want the source to play before shu...

Страница 21: ...e display The timer will be canceled after tuner recording has been finished 7 Press or 4 to select the volume level then press SET The current volume level will be used 0 to 50 When the timer is turned on the volume will be automatically set to the selected level The current timer setting appears for confirmation 8 Before turning off the system prepare the music source selected in step TUNER Tune...

Страница 22: ...ower available from a camera store to blow dust off the lens If there are fingerprints etc on the lens gently wipe clean with a cotton swab Moisture condensation Moisture may condense on the lens inside the system in the following cases After turning on heating in the room In a damp room If the system is brought directly from a cold to a warm place Should this occur the system may malfunction In t...

Страница 23: ...ion Power does not come on The power cord is not connected to an AC outlet Insert the plug into the socket No sound is heard Connections are incorrect or loose Headphones are connected MP3 disc is recorded with packet writing Check all connections and make corrections See page 5 Disconnect the headphones It cannot be played Replace the disc Poor FM reception The FM telescopic antenna is not proper...

Страница 24: ...0 537 5722 for your nearest authorized servicer or visit our website at www JVC com Remember to retain your Bill of Sale for Warranty Service Do not service the television yourself Caution To prevent electrical shock do not open the cabinet There are no user serviceable parts inside Please refer to qualified service personnel for repairs Accessories To purchase accessories for your JVC product ple...

Страница 25: ...ing your JVC Product please contact our Customer Relations Department WHAT IS NOT COVERED This limited warranty provided by JVC does not cover 1 Products which have been subject to abuse accident alteration modification tampering negligence misuse faulty installation lack of reasonable care or if repaired or serviced by anyone other than a service facility authorized by JVC to render such service ...

Страница 26: ...RV NB1 POWERED WOOFER CD SYSTEM 2004 Victor Company of Japan Limited 0804NSMMDWJEIN EN RV NB1 J fff book Page 1 Monday August 23 2004 2 28 PM ...

Отзывы: