background image

23

OPTIONS IMAGE

FRANÇAIS

PD-42V31BUE/BJE/BSE / LCT1440-001A-U / Français

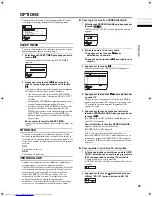
SYSTEME COULEUR

Le système couleurs est sélectionné automatiquement. 

Cependant, si l’image n’est pas nette ou si aucune couleur 

n’apparaît, vous devez sélectionner manuellement le 

système couleurs.

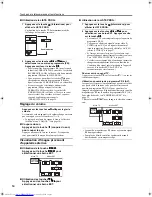
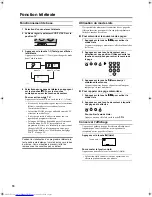
1 Sélectionnez SYSTEME COULEUR. Appuyez 

ensuite sur la touche 

a

a

a

a

Le menu secondaire de la fonction SYSTEME 

COULEUR apparaît.

2 Appuyez sur les touches 

5

5

5

5

 pour sélectionner 

PRINCIPALE ou SECONDAIRE
PRINCIPALE:

Permet de modifier le système couleurs de l’image 

principale.

SECONDAIRE:

Permet de modifier le système couleurs de l’image 

secondaire.

• Sélectionnez PRINCIPALE lorsqu’il n’y a pas 

d’image secondaire affichée.

3 Appuyez sur les touches 

6

6

6

6

 pour sélectionner 

le système couleurs approprié. Appuyez 

ensuite sur la touche 

a

a

a

a

PAL:

Système PAL

SECAM:

Système SECAM

NTSC 3.58:

Système NTSC 3.58 MHz

NTSC 4.43:

Système NTSC 4.43 MHz

AUTO:

Cette fonction permet de détecter un système couleurs à 

partir du signal entrant. Vous ne pouvez l’utiliser que 

lorsque vous regardez une image provenant d’un numéro 

de programme PR 0 (AV) ou d’une entrée EXT.

• La fonction AUTO peut ne pas fonctionner correctement 

si le signal est de mauvaise qualité. Si l’image obtenue à 

l’aide de la fonction AUTO est anormale, sélectionnez 

manuellement un autre système couleurs.

• Sous les numéros de programme PR 0 (AV) à PR 99, 

vous ne pouvez pas sélectionner NTSC 3.58 ou 

NTSC 4.43.

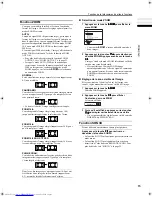
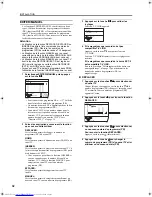
EFFET CINEMA

La fonction EFFET CINEMA permet d’afficher de manière plus 

douce et plus naturelle à l’écran les films au format cinéma.

AUTO:

Le téléviseur reconnaît automatiquement le type de signal et 

active ou désactive la fonction.

OUI:

La fonction est activée.

NON:

La fonction est désactivée.

• Le mouvement risque de paraître artificiel avec le 

système couleurs NTSC. Lorsque la fonction 

EFFET CINEMA est réglée sur AUTO ou sur OUI, le 

mouvement peut paraître artificiel avec le système 

couleurs NTSC.

• Cette fonction n’est pas utilisable en mode à deux 

images ou en mode d’image dans l’image.

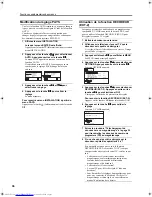
ZOOM AUTO 4:3

Vous pouvez sélectionner un des trois modes ZOOM, 

NORMAL, PANORAMIC ou ZOOM 14:9, comme mode 

ZOOM pour l’image normale (rapport zoom 4:3).

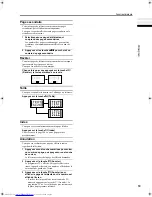
1 Sélectionnez ZOOM AUTO 4:3 puis appuyez sur 

la touche 

a

a

a

a


2 Appuyez sur les touches 

6

6

6

6

 pour sélectionner 

un mode ZOOM. Appuyez ensuite sur la touche 

a

a

a

a

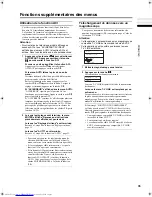
COLOUR MANAGEMENT

Ce téléviseur utilise la fonction COLOUR 

MANAGEMENT pour assurer une compensation des 
couleurs ternes afin de produire des tonalités naturelles.
La fonction COLOUR MANAGEMENT est activée par 

défaut.

OUI:

La fonction COLOUR MANAGEMENT est activée.

NON:

La fonction COLOUR MANAGEMENT est désactivée.

• Dans des conditions normales, réglez cette fonction sur 

OUI.

TV

OK

RETOUR

D0016-FR

PRINCIPALE

SECONDAIRE

PAL

AUTO

SYSTEME COULEUR

TV

OK

RETOUR

D0017-FR

ZOOM AUTO 4:3

PANORAMIC
NORMAL
ZOOM 14:9

PD-42V31BUE_Fra.book  Page 23  Friday, August 15, 2003  11:41 AM

Содержание PD-42V31BJE

Страница 1: ...NLEITUNG PDP TELEVISEUR COULEUR MANUEL D INSTRUCTIONS PDP COLOUR TELEVISION INSTRUCTIONS ENGLISH DEUTSCH FRANÇAIS PD 42V31BUE PD 42V31BJE PD 42V31BSE PDP FARBFERNSEHGERÄT BEDIENUNGSANLEITUNG PDP TELEVISEUR COULEUR MANUEL D INSTRUCTIONS ...

Страница 2: ...care must be taken to ensure optimal results and operational safety Before attempting to use this equipment read the operating instructions thoroughly Ensure that all electrical connections including the mains plug extension leads etc have been made in accordance with the manufacturer s instructions If ever in doubt about the installation operation or safety of this equipment consult your dealer H...

Страница 3: ...ord to fix the TV to rigid components such as walls and columns WARNING TO PREVENT FIRE OR SHOCK HAZARD DO NOT EXPOSE THIS APPLIANCE TO RAIN OR MOISTURE CAUTION Operate only from the power source specified AC 110 240 V 50 60 Hz on the unit Avoid damaging the AC plug and power cord When you are not using this unit for a long period of time it is recommended that you disconnect the power cord from t...

Страница 4: ...he life of the PDP See PICTURE MODE on page 21 Do not display static images or characters for long periods of time Reduce CONTRAST and BRIGHT on the PICTURE SETTING menu page 21 when viewing Do not view for long periods of time in the REGULAR mode page 15 Screen size is normally chosen to ensure that the picture is displayed on the entire screen After viewing in the REGULAR mode in which black ban...

Страница 5: ...e screen To quit the D I S T demonstration Press the yellow button b button P p buttons or any of the number buttons Pixel defects PDPs use collections of fine dots pixels to display images While there is no problem with more than 99 99 of these pixels please understand that a very small number of pixels may not light or may light all the time Do not install the TV near electronic equipment that i...

Страница 6: ...he MULTI PICTURE function 17 Operating a JVC brand VCR or DVD player 17 Teletext function 18 Basic operation 18 Using the List Mode 18 Hold 18 Sub page 19 Reveal 19 Size 19 Index 19 Cancel 19 Using the TV s menu 20 Basic operation 20 PICTURE SETTING 21 PICTURE MODE 21 Picture Adjustment 21 COLOUR TEMP 21 PICTURE FEATURES 22 DIGITAL VNR 22 Super DigiPure 22 COLOUR SYSTEM 23 MOVIE THEATRE 23 4 3 AUT...

Страница 7: ...ately if any components are missing Power cord One of the power cords below suitable for your area will be included with your TV Some models come with a stand or wall mounting fixtures TV System cable Hook 2 Remote control AA R6 size batteries used to check operation Receiver Ferrite core 4 Mounting screw 2 ...

Страница 8: ...l for the wall mounting unit before starting installation in order to prevent accidents We are not liable for any damage caused by faulty assembly faulty wall mounting insecure wall mounting misuse alterations or natural disasters Cautions for installation Do not tilt the TV towards the left or right or towards the back Install the TV in a corner on a wall or on the floor so as to keep cords out o...

Страница 9: ...Pb Y EXT 3 S EXT 1 EXT 2 S EXT 4 AC110 240V DISPLAY INPUT CONNECTTO SYSTEM CABLE AC INPUT 110 240V Connecting antenna and other equipment Refer to page 8 for connection details TV back Cable supplied with TV Refer to page 9 for connection details Cable supplied with receiver Refer to page 9 for connection details Receiver back Supplied system cable ...

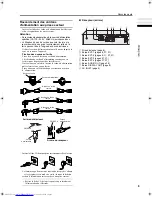
Страница 10: ...onnecting a VCR follow A A A A B B B B C C C C in the diagram opposite If you are not connecting a VCR follow 1 1 1 1 To use the T V LINK functions you must have a T V LINK compatible VCR connected by a SCART cable C to the EXT 2 terminal on the TV For details about T V LINK functions see T V LINK functions on page 11 You can watch a video using the VCR without doing C For details see your VCR ins...

Страница 11: ...core Attach a ferrite core to each end of the power cord Insert the AC plug into a correctly earthed outlet The receiver power lamp lights red and the receiver is in the standby mode when the AC plug on the power cord is connected to an AC outlet Remove the AC plug from the outlet to completely disconnect the TV from the power supply Receiver back 1 Aerial socket page 8 2 EXT 1 terminal pages 8 27...

Страница 12: ...ill then be in English The COUNTRY menu appears as a sub menu of the AUTO PROGRAM function There are two COUNTRY menus Pressing the yellow button changes the COUNTRY menu as follows 5 Press the 5 5 5 5 and 6 6 6 6 buttons to choose the country where you are For uses in the UK To receive SKY 1 you need a satellite tuner You must have the satellite tuner set to SKY 1 before starting the AUTO PROGRAM...

Страница 13: ...s see your VCR instruction manual Q LINK a trademark of Panasonic Corporation Data Logic a trademark of Metz Corporation Easy Link a trademark of Phillips Corporation Megalogic a trademark of Grundig Corporation SMARTLINK a trademark of Sony Corporation Pre set download The VCR will automatically download the registered data on the TV channels from the TV This means you do not need to set up the p...

Страница 14: ...that the AC plugs on the power cords from the TV and receiver are connected to correctly AC outlets Choose a TV channel Press the P p p p p buttons to choose a programme number PR or an EXT terminal Watch images from external devices Press the TV AV button to choose a TV AV terminal Adjust the volume Press the q q q q buttons The volume level indicator appears Using the headphone The headphone vol...

Страница 15: ... You cannot turn the TV on or off when the VCR TV DVD switch is set to the VCR or DVD position 2 Press the standby button to turn the TV on or off When the TV is turned on the power lamp changes from red to green The power can be turned on by pressing the b button p p buttons or Number buttons Check that the AC plugs on the power cords from the TV and receiver are connected to AC outlets Choose a ...

Страница 16: ...on button to display the PR LIST 2 Press the 5 5 5 5 and 6 6 6 6 buttons to choose an EXT terminal Then press the a a a a button The EXT terminals are registered after the programme number PR 99 You can choose a video input signal from the S VIDEO signal Y C signal and regular video signal composite signal For details see S IN S VIDEO input on page 27 If you do not have a clear picture or no colou...

Страница 17: ... full screen FULL This uniformly stretches the left and right sides of a normal picture 4 3 aspect ratio to fill the wide TV screen For 16 9 aspect ratio pictures that have been squeezed into a normal picture 4 3 aspect ratio use the FULL mode to restore the picture to its original shape Choose the ZOOM mode 1 Press the c c c c button to display the ZOOM menu The c button does not work in the twin...

Страница 18: ...TV The FREEZE function is cleared if no operation is performed for approximately one minute Using the PIP function You can view two pictures Main picture and sub picture Two different TV programmes can be watched at the same time or a TV programme and a video programme from an external device can be watched at the same time 1 Press the R R R R button Pressing the R R R R button changes the PIP mod...

Страница 19: ...ee The chosen picture changes to a moving picture 3 Press the a a a a button The multi pictures disappear and the chosen picture appears Cancelling the multi pictures Press the b button the number buttons or the a button Pictures from external devices cannot be displayed in the 12 pictures multi mode Operating a JVC brand VCR or DVD player These buttons will operate a JVC brand VCR or DVD player P...

Страница 20: ... towards either the top or bottom of the screen This is to prevent burn in and is not a malfunction Using the List Mode You can store the numbers of your favourite teletext pages in memory and call them up quickly using the colour buttons To store the page numbers 1 Press B B B B button to go into the List mode The page numbers you have stored are displayed at the bottom of the screen 2 Press a Co...

Страница 21: ...d Size You can double the height of the teletext display Press the F F F F Size button Index You can return to the index page instantly Press the G G G G Index button Returns to page 100 or a previously specified page Cancel You can search for a teletext page while watching TV 1 Press the number button to enter a page number or press a colour button The TV searches for a teletext page 2 Press the ...

Страница 22: ... the 5 5 5 5 buttons to choose the setting of that function If you want to operate a function which appears only with its name follow the descriptions of that function on the following pages The display appearing at the bottom of a menu shows you a button on the remote control that you can use when you operate a chosen function 5 Press the a a a a button to complete the setting The menu disappears...

Страница 23: ...r a signal from the EXT 4 terminal However you cannot do this when the PIP function main picture is set to EXT 4 To return to the default settings in each PICTURE MODE mode Press the blue button This returns the picture settings in the PICTURE MODE mode you have chosen to the default settings and stores them in the PICTURE MODE mode COLOUR TEMP You can select one of three COLOUR TEMP modes three t...

Страница 24: ...picture by eliminating unnecessary edges from high contrast and crisp images For images with low contrast edges are added to produce a sharper more detailed picture You can choose from the three DigiPure function settings of AUTO MIN and MAX If you set the DigiPure effect too high on a low quality picture that contains a lot of noise this may actually make the noise worse We recommend you use the ...

Страница 25: ... when the COUNTRY setting is UNITED KINGDOM MOVIE THEATRE The MOVIE THEATRE function displays a cinema film picture more smoothly and naturally on the screen AUTO The television automatically recognizes the type of signal and turns the function on and off ON This function is turned on OFF This function is turned off The motion may appear unnatural when viewing images with the NTSC colour system Wh...

Страница 26: ...an choose one of four positions for the sub picture 1 Press the 6 6 6 6 buttons to choose PIP Then press the a a a a button The PIP menu appears 2 Press the 5 5 5 5 buttons to choose the position Then press the a a a a button D0061 EN TV OK BACK PIP ...

Страница 27: ...ft speaker s volume level up 3 turn the right speaker s volume level up SPEAKER You can turn off the sound from the TV speakers but you should only do this if an audio system is connected to the TV as a substitute for the TV speakers ON The TV speakers issue sound OFF The TV speakers does not issue sound BBE You can use the BBE function to enjoy easy to listen sound that is faithful to the origina...

Страница 28: ...on or off ON The sound comes from the TV s speakers when using the headphones OFF The sound does not come from the TV s speakers when using the headphones OUTPUT You can choose the sound output to the headphones MAIN You can listen to the sound of the main picture with your headphones SUB You can listen to the sound of the sub picture with your headphones When the sub picture is a television progr...

Страница 29: ...S2 S3 or S5 when it receives an S VIDEO signal Even a device which can output an S VIDEO signal Y C signal may output a regular video signal composite signal depending on the device setting If a picture cannot appear because the S IN S VIDEO input setting has been made read the device instruction manual carefully again to check for the device settings ID LIST You can have a name corresponding to t...

Страница 30: ...om the EXT 2 terminal TV The picture and sound of the TV channel you are currently viewing are output from the EXT 2 terminal During dubbing you cannot turn off the TV Turning off the TV also turns off the output from the EXT 2 terminal When you choose an EXT terminal as an output you can view a TV programme or a picture from the other EXT terminal while dubbing the picture from a device connected...

Страница 31: ...el cannot be viewed Unless you enter a pre set ID number by a special operation the lock cannot be released and the child cannot view the TV channel To set the CHILD LOCK function 1 Choose CHILD LOCK then press the o o o o button SET ID NO ID number setting screen appears 2 Set the ID number to your liking 1 Press the 6 6 6 6 buttons to choose a number 2 Press the 5 5 5 5 buttons to move the curso...

Страница 32: ...e a decoder connected to a T V LINK compatible VCR which in turn is connected to the EXT 2 terminal To use this function see Using the DECODER EXT 2 function on page 36 Caution If you have not connected a decoder with a T V LINK compatible VCR to the EXT 2 terminal setting this function to ON by mistake causes the picture sound of a TV channel you are currently viewing to disappear REFRESH When bu...

Страница 33: ...rs in the AUTO PROGRAM menu You can use the ACI Automatic Channel Installation function to decode the ACI data and complete the registration of all the TV channels quickly For details of the ACI function and how to use it refer to Using the ACI function on page 35 If you don t want to use the ACI function press the 6 buttons to choose ACI SKIP and then press a 4 Press the a a a a button to display...

Страница 34: ...This function adds a new TV channel in the current programme numbers PR list by using the CH CC number You cannot use the INSERT function if you do not know a channel number of a TV channel Use the MANUAL function to register a TV channel in the programme number PR DELETE This function deletes a TV channel you do not want to list MANUAL This function manually stores a new TV channel in a programme...

Страница 35: ...t FRANCE follow the description Changing the COUNTRY setting on page 36 to change the COUNTRY setting to FRANCE then start the INSERT function 1 Press the 6 6 6 6 buttons to choose a programme number PR for which you will register a new TV channel 2 Press the green button and start the INSERT function To cancel the INSERT function Press the h information button 3 When the COUNTRY setting is UNITED...

Страница 36: ... Press the 3 3 3 3 button to choose the SYSTEM broadcasting system for a TV channel you want to register TV channel SECAM L system from a French station Set the SYSTEM to L If it is set to one other than L you cannot receive the TV channel of the SECAM L system Other TV channels If you do not know the correct broadcasting system set the SYSTEM to B G If B G is not correct it results in the fact th...

Страница 37: ...u were reading before and continue the operation When the Initial settings have been made Return to step 6 of Initial settings on page 11 When the AUTO PROGRAM has finished Return to step 4 of AUTO PROGRAM on page 31 If you have any questions about the items in the Broadcast Selection menu or how to operate the menu please contact your cable TV station When the cable TV broadcast reception is poor...

Страница 38: ...bled TV channel on the TV Even if the decoder is working a scrambled picture appears 3 Press the a a a a button to display the MENU The MENU main menu appears 4 Press the 6 buttons to choose FEATURES Then press the a a a a button The FEATURES menu appears 5 Press the 6 buttons to choose DECODER EXT 2 Then press the 5 buttons to choose ON An unscrambled picture appears To cancel the DECODER EXT 2 f...

Страница 39: ...necting equipment not listed in the following connection diagram see the table to choose the best EXT terminal Connecting cables are not supplied 1 VCR composite signal 2 VCR composite signal S VIDEO signal 3 T V LINK compatible VCR composite signal S VIDEO signal 4 Decoder 5 DVD player composite signal S VIDEO signal 6 DVD player composite signal RGB signal 7 DVD player component video signals Pr...

Страница 40: ...al from the EXT 2 terminal This is useful when you want to dub the video sound from another device onto the VCR connected to the EXT 2 terminal For details on how to do this see DUBBING on page 27 TV output from the EXT 1 terminal The video sound signal of a TV channel you are viewing is always output from the EXT 1 terminal Changing over a programme number PR also changes over the TV output from ...

Страница 41: ...9 CH 259 E59 R59 CH 60 CH 260 E60 R60 CH 61 CH 261 E61 R61 CH 62 CH 262 E62 R62 CH 63 CH 263 E63 R63 CH 64 CH 264 E64 R64 CH 65 CH 265 E65 R65 CH 66 CH 266 E66 R66 CH 67 CH 267 E67 R67 CH 68 CH 268 E68 R68 CH 69 CH 269 E69 R69 CC Channel CC 01 CC 201 S1 CC 02 CC 202 S2 CC 03 CC 203 S3 CC 04 CC 204 S4 CC 05 CC 205 S5 CC 06 CC 206 S6 CC 07 CC 207 S7 CC 08 CC 208 S8 CC 09 CC 209 S9 CC 10 CC 210 S10 C...

Страница 42: ...ointing in the right direction Is the aerial itself faulty If the TV or aerial suffers interference from other equipment stripes or noise may appear in the picture Move any equipment such as an amplifier personal computer or a hair drier that can cause interference away from your TV Or try moving the TV If the aerial suffers interference from a radio tower or high voltage wire please contact your ...

Страница 43: ...layed The TV may make a crackling sound due to a sudden change in temperature The picture or sound may be normal If you hear crackling sounds frequently while you are viewing the TV there may be other causes As a precaution ask your service technician to inspect it In the twin pictures mode the sub picture may disappear when the external device is operated If this happens press the R button and di...

Страница 44: ...4 W Screen size Viewable area 107 5 cm measured diagonally Audio output Rated Power output 18 W 18 W Speakers 3 cm 10 cm oval 2 6 5 cm 13 cm oval 2 EXT 1 terminal Euroconnector 21 pin SCART Video input Audio L R inputs and RGB inputs are available TV broadcast outputs Video and Audio L R are available EXT 2 terminal Euroconnector 21 pin SCART Video input S VIDEO Y C input Audio L R inputs and RGB ...

Страница 45: ...iche stabile Seile um das Gerät an festen Gegenständen wie Wänden und Säulen festzubinden ACHTUNG ZUR VERMEIDUNG VON FEUER ODER ELEKTRISCHEM SCHLAG SETZEN SIE DIESES GERÄT KEINEM REGEN ODER FEUCHTIGKEIT AUS VORSICHT Betreiben Sie das Gerät nur an einem Netz mit der am Gerät angegebenen Spannung 110 240 V Wechselspannung 50 60 Hz Vermeiden Sie Beschädigungen des Netzkabels oder des Netzsteckers Für...

Страница 46: ...ängert die Lebensdauer des PDP Siehe BILDEINST auf Seite 21 Lassen Sie keine Standbilder oder Textzeilen für längere Zeit anzeigen Reduzieren Sie beim Fernsehen KONTRAST und HELLIGKEIT im Menü BILD EINSTELLUNG Seite 21 Sehen Sie nicht zu lange im Modus NORMAL fern Seite 15 Normalerweise wird die Bildgröße so gewählt dass das Bild den ganzen Bildschirm ausfüllt Nachdem Sie im NORMAL Modus ferngeseh...

Страница 47: ...cken Sie die gelbe Taste die Tasten b P p oder eine der Zifferntasten Pixelfehler PDPs benutzen zur Darstellung der Bilder Gruppen von kleinen Pixeln Picture Elements Mehr als 99 99 all dieser Pixel funktionieren fehlerfrei aber haben Sie bitte dafür Verständnis dass eine kleine Zahl von Pixeln nicht oder nicht immer leuchten Stellen Sie den Fernseher nicht in der Nähe von elektronischen Geräten a...

Страница 48: ... Verwendung der MULTI BILD Funktion 17 Bedienung eines Videorekorders VCR oder DVD Spielers von JVC 17 Videotext Funktion 18 Allgemeine Bedienung 18 Verwendung des Listenmodus 18 Halten 18 Unter Seiten 19 Aufdecken 19 Größe 19 Inhalt 19 Abbrechen 19 Bedienung des Menüs des Fernsehers 20 Allgemeine Bedienung 20 BILD EINSTELLUNG 21 BILDEINST 21 Bildeinstellung 21 FARBTEMP 21 BILD VARIANTEN 22 DIGITA...

Страница 49: ...abel Eines der unten abgebildeten und für die Gegend in der Sie dieses Fernsehgerät gekauft haben geeignete Netzkabel wird mit dem Fernsehgerät mitgeliefert Manche Modelle werden mit Ständer oder Wandbefestigung geliefert Fernsehgerät Systemkabel Haken 2 Fernbedienung AA R6 Batterien nur zur Funktionsprüfung Empfänger Ferritkern 4 Befestigungsschraube 2 ...

Страница 50: ...n die Anleitung für die Wandbefestigungseinheit um Unfälle zu verhindern Wir übernehmen keinerlei Haftung für Schäden die durch eine fehlerhafte Montage fehlerhafte Anbringung an der Wand den unsachgemäßen Einsatz eine unsichere Anbringung an der Wand oder Naturkatastrophen verursacht werden Vorsichtsmaßnahmen vor der Aufstellung Kippen Sie das Gerät nicht nach links oder rechts oder nach hinten I...

Страница 51: ...EXT 2 S EXT 4 AC110 240V DISPLAY INPUT CONNECTTO SYSTEM CABLE AC INPUT 110 240V Anschließen der Antenne und anderer Geräte Lesen Sie auf Seite 8 für Näheres zu den Anschlüssen Fernsehgerät Rückseite Mit dem Gerät geliefertes Kabel Lesen Sie auf Seite 9 für Näheres zu den Anschlüssen Mit dem Empfänger geliefertes Kabel Lesen Sie auf Seite 9 für Näheres zu den Anschlüssen Empfänger Rückseite Mitgeli...

Страница 52: ...nn Sie keinen Videorekorder anschließen folgen Sie 1 1 1 1 Um die T V LINK Funktionen zu bedienen muss ein T V LINK kompatibler Videorekorder am EXT 2 Anschluss des Fernsehers angeschlossen werden Für Einzelheiten zu den T V LINK Funktionen lesen Sie den Abschnitt T V LINK FUNKTIONEN auf Seite 11 Sie können ein Video auf dem Videorekorder abspielen ohne C durchzuführen Näheres erfahren Sie in der ...

Страница 53: ...nd schließen Sie den Ferritkern Bringen Sie an jedem Ende des Netzkabels jeweils einen Ferritkern an Stecken Sie den Netzstecker in eine ordnungsgemäß geerdete Steckdose Die Netz LED des Empfängers leuchtet rot und der Empfänger ist in Betriebsbereitschaft sobald der Netzstecker an eine Netzsteckdose angeschlossen wird Ziehen Sie den Netzstecker aus der Steckdose um den Fernseher vollständig vom N...

Страница 54: ...a a Das Menü LANGUAGE erscheint 4 Drücken Sie die Tasten 5 5 5 5 und 6 6 6 6 um DEUTSCH zu wählen Drücken Sie dann die Taste a a a a Als Sprache für die Bildschirm Menüs ist Deutsch voreingestellt Das Menü LAND erscheint als Untermenü der Funktion AUTO Es gibt zwei LAND Menüs Durch Drücken der gelben Taste wird das LAND Menü wie folgt umgeschaltet 5 Drücken Sie die Tasten 5 5 5 5 und 6 6 6 6 um da...

Страница 55: ... ein Warenzeichen der Firma Grundig SMARTLINK ein Warenzeichen der Firma Sony Herunterladen Download der Voreinstellungen Hiermit können Sie die Daten der Programmnummern vom Fernsehgerät zum Videorekorder übertragen Diese Preset Download Funktion beginnt automatisch wenn die Grundeinstellungen abgeschlossen sind oder wenn die Funktionen AUTO oder SENDER ORDNEN MANUELL durchgeführt werden Diese Fu...

Страница 56: ...er der Netzkabel von Fernseher und Empfänger in zwei geeignete Netzsteckdosen eingesteckt sind Programmnummer wählen Drücken Sie die Tasten Pp p p p um eine Programmnummer PR oder einen EXT Eingang zu wählen Bildsignale von externen Geräten betrachten Drücken Sie die Taste TV AV um einen TV AV Anschluss zu wählen Lautstärke einstellen Drücken Sie die q q q q Tasten Es erscheint die Lautstärkeanzei...

Страница 57: ...ein oder ausschalten wenn der VCR TV DVD Schalter in Position VCR oder DVD steht 2 Drücken Sie die Taste Standby um den Fernseher ein oder auszuschalten Wenn das Gerät eingeschaltet ist wechselt die Farbe der Netz LED von rot zu grün Das Gerät kann durch Drücken der b Taste der p p Tasten oder mit den Zifferntasten eingeschaltet werden Prüfen Sie ob die Netzstecker der Netzkabel von Fernseher und ...

Страница 58: ...e die Taste h h h h Information zur Anzeige der PR LISTE 2 Drücken Sie die Tasten 5 5 5 5 und 6 6 6 6 um eine EXT Buchse zu wählen Drücken Sie dann die Taste a a a a Die EXT Buchsen finden Sie hinter der Programmnummer PR 99 Sie können ein Video Eingangssignal im Format S VIDEO Y C Signal oder dem normalen Videosignal Composite Signal wählen Für Einzelheiten lesen Sie bitte S IN S VIDEO Eingang au...

Страница 59: ...ß der ganze Bildschirm ausgefüllt wird VOLLBILD Dieser Modus erweitert die linken und rechten Ränder des Normalbildes 4 3 so daß der Bildschirm ausgefüllt wird Benutzen Sie dies um Bilder im 16 9 Verhältnis die auf ein Normalbild 4 3 komprimiert wurden auf deren Originalverhältnis zurückzubringen Wählen Sie den ZOOM Modus 1 Drücken Sie die Taste c c c c zur Anzeige des Menüs ZOOM Die Taste c funkt...

Страница 60: ...on arbeitet nicht wenn ein Bild im Bild angezeigt wird Das Standbild kann nicht ausgegeben werden Das STANDBILD Menü verschwindet wenn etwa eine Minute lang keine Funktion bedient wird Verwendung der PIP Funktion Sie können zwei Bildsignale gleichzeitig betrachten Hauptbild und Bild im Bild Ein TV Programm und ein Video von einem externen Gerät können gleichzeitig berachtet werden 1 Drücken Sie di...

Страница 61: ...e Taste a a a a Das Multibild verschwindet und das Signal des ausgewählten Senders erscheint Abbrechen der Multibild Funktion Drücken Sie die Taste b die Zifferntasten oder die Taste a Bilder von externen Geräten können im 12 Bild Multi Modus nicht dargestellt werden Bedienung eines Videorekorders VCR oder DVD Spielers von JVC Sie können einen Videorekorder oder DVD Spieler von JVC fernbedienen We...

Страница 62: ...nd in kleinen Schritten nach oben oder unten Dies ist keine Fehlfunktion sondern dadurch wird ein Einbrennen des Textes verhindert Verwendung des Listenmodus Sie können die Nummern Ihrer bevorzugten Videotext Seiten abspeichern und sie mit den Farbtasten abrufen Seitennummern speichern 1 Drücken Sie die Taste B B B B um den Listenmodus zu aktivieren Die gespeicherten Seitennummern erscheinen unten...

Страница 63: ...er Videotext Anzeige verdoppeln Drücken Sie die Taste F F F F Größe Inhalt Sie können immer zur Inhalts Seite wechseln Drücken Sie die Taste G G G G Inhalt Schaltet zurück auf Seite 100 oder eine zuvor angegebene Seite Abbrechen Sie können nach einer Videotext Seite suchen lassen während Sie fernsehen 1 Drücken Sie die Zifferntasten zur Eingabe der Seitennummer oder drücken Sie eine der Farbtasten...

Страница 64: ... den Menüs erfahren Sie auf den folgenden Seiten 4 Drücken Sie die Tasten 5 5 5 5 um die Parameter dieser Funktion zu erreichen Wenn Sie eine Funktion bedienen möchten bei der nur der Name erscheint befolgen Sie die Anweisungen auf den folgenden Seiten Diem Anzeige unten in jedem Menü stellt eine Taste auf der Fernbedienung dar die Sie zur Bedienung der ausgewählten Funktion benutzen können 5 Drüc...

Страница 65: ... 4 43 eingestellt ist oder wenn ein Signal vom Eingang EXT 4 empfangen wird Die Bedienung ist jedoch nicht möglich wenn das Hauptbild der PIP Funktion auf EXT 4 gestellt ist Aufrufen der Voreinstellungen jedes BILDEINST Drücken Sie die blaue Taste Die Bildeinstellungen des momentan gewählten BILDEINST Modus die Farbtemperatur werden auf die Standardwerte zurückgesetzt und im BILDEINST Modus wieder...

Страница 66: ...ilder entfernt bzw geglättet werden Bei Bildern mit niedrigem Kontrast werden Kanten hinzugefügt so dass das Bild schärfer und deutlicher wird Sie können zwischen drei verschiedenen Einstellungen für die Funktion DigiPure wählen nämlich AUTO MIN und MAX Wenn Sie den DigiPure Effekt bei einem Bild mit schlechter Qualität mit hohem Rauschanteil zu hoch einstellen kann der Rauschanteil dadurch noch e...

Страница 67: ...O EFFEKT Die Funktion KINO EFFEKT stellt einen Kinofilm weicher und natürlicher auf dem Bildschirm dar AUTO Das Fernsehgerät erkennt automatisch den Signaltyp und schaltet die Funktion ein oder aus EIN Diese Funktion ist eingeschaltet AUS Diese Funktion ist ausgeschaltet Bewegungen können unnatürlich aussehen wenn Sie Bilder im NTSC Farbsystem betrachten Wenn die Funktion KINO EFFEKT auf AUTO oder...

Страница 68: ...ionen für das Nebenbild wählen 1 Drücken Sie die Tasten 6 6 6 6 um PIP zu wählen Drücken Sie dann die Taste a a a a Das Menü PIP erscheint 2 Wählen Sie mit den Tasten 5 5 5 5 einen Position aus Drücken Sie dann die Taste a a a a D0061 GE TV OK ZURÜCK PIP ...

Страница 69: ...hers 3 Erhöht die Lautstärke des rechten Lautsprechers LAUTSPRECHER Sie können die Tonausgabe der TV Lautsprecher abschalten Dies ist beispielsweise sinnvoll wenn ein Audiosystem als Ersatz für die TV Lautsprecher angeschlossen ist EIN Die Lautsprecher des Fernsehers sind eingeschaltet AUS Die Lautsprecher des Fernsehers sind ausgeschaltet BBE Mit der Funktion BBE können Sie einen besonders origin...

Страница 70: ... Der Ton kommt weiterhin aus den Fernsehlautsprechern wenn Kopfhörer angeschlossen werden AUS Der Ton kommt nicht aus den Fernsehlautsprechern wenn Kopfhörer angeschlossen werden AUSGANG Sie können das für die Kopfhörer bestimmte Tonsignal auswählen HAUPTBILD Sie können den Ton des Hauptbildes im Kopfhörer hören NEBENBILD Sie können den Ton des Nebenbildes im Kopfhörer hören Wenn das Nebenbild ein...

Страница 71: ...ng umschalten schaltet der Anfangsbuchstabe von E auf S um E2 wird zum Beispiel zu S2 Auch ein Gerät das ein S VIDEO Signal Y C Signal senden kann gibt eventuell ein gewöhnliches Videosignal Composite aus je nachdem wie es eingestellt ist Wenn kein Bild erscheint da die Einstellung S IN S VIDEO Eingang gewählt wurde lesen Sie in der Anleitung des betreffenden Geräts wie Sie die Einstellung ändern ...

Страница 72: ...en TV Bild und Ton des momentan gewählten Fernsehkanals werden an der Buchse EXT 2 ausgegeben Während der Überspielung lässt sich das Gerät nicht ausschalten Wenn Sie das Gerät auf andere Weise ausschalten wird auch die Signalverbindung zur Buchse EXT 2 ausgeschaltet Wenn Sie eine EXT Buchse als Ausgang wählen können Sie eine Sendung oder ein Signal von einem EXT Eingang anschauen während Sie die ...

Страница 73: ...e voreingestellte ID Nummer eingegeben wird lässt sich die Sicherung nicht umgehen so dass Ihre Kinder das Programm nicht zu sehen bekommen Einstellen der Funktion KINDERSICHERUNG 1 Wählen Sie KINDERSICHERUNG und drücken Sie dann die Taste o o o o GEHEIM CODE ID Nummer einstellen erscheint 2 Geben Sie eine beliebige ID Nummer ein 1 Drücken Sie die Tasten 6 6 6 6 um eine Nummer auszuwählen 2 Bewege...

Страница 74: ...t können Sie diese Funktion benutzen Für die Bedienung dieser Funktion lesen Sie bitte Verwendung der DECODER EXT 2 Funktion auf Seite 36 Vorsicht Wenn Sie keinen Decoder mit einem T V LINK kompatiblen Videorekorder an der Buchse EXT 2 angeschlossen haben kann die versehentliche Einstellung dieser Funktion auf EIN dazu führen dass Bild und Ton des gewählten Senders nicht mehr ausgegeben werden REF...

Страница 75: ...ion ACI Automatische Programmierung verwenden um die ACI Daten zu dekodieren und die Registrierung aller Fernsehkanäle in kurzer Zeit zu beenden Einzelheiten über die ACI Funktion und ihre Verwendung siehe Verwendung der ACI Funktion auf Seite 35 Wenn Sie die ACI Funktion nicht verwenden möchten drücken Sie die Tasten 6 zum Wählen von ACI WEITER und drücken dann die Taste a 4 Drücken Sie die Taste...

Страница 76: ...Programmnummern PR anhand der CH CC Nummer einen neuen Fernsehkanal hinzu Die EINFÜGEN Funktion können Sie nicht benutzen wenn Sie die Kanalnummer eines Fernsehsenders nicht kennen Benutzen Sie die MANUELL Funktion um einen Fernsehkanal unter einer Programmnummer zu speichern PR LÖSCHEN Diese Funktion löscht einen nicht benötigten Sender MANUELL Mit dieser Funktion speichern Sie einen neuen Fernse...

Страница 77: ...en Senders hinzufügen achten Sie darauf dass LAND auf FRANCE Funktion steht Wenn LAND nicht auf FRANCE steht befolgen Sie die Erklärungen unter Ändern der LAND Einstellung auf Seite 36 zur Änderung der LAND Einstellung auf FRANCE und starten Sie dann die Funktion EINFÜGEN 1 Drücken Sie die Tasten 6 6 6 6 um eine Programmnummer PR zu wählen unter der Sie einen neuen Fernsehkanal speichern möchten 2...

Страница 78: ... SECAM L System eines französischen Senders Stellen Sie die Funktion SYSTEM auf L Wenn diese Funktion nicht auf L gestellt ist können Sie den Fernsehkanal des SECAM L Systems nicht empfangen Andere Fernsehkanäle Wenn Sie die Fernsehnorm eines Kanals nicht genau kennen stellen Sie SYSTEM auf B G ein Wenn B G nicht richtig ist führt dies zu falscher Tonwiedergabe wenn das Gerät einen Fernsehkanal er...

Страница 79: ...ück zu Schritt 6 von Grundeinstellungen auf Seite 11 Wenn die AUTO vorgenommen wurden Kehren Sie zurück zu Schritt 4 von AUTO auf Seite 31 Wenn Sie Fragen über Gegenstände im Senderwahlmenü oder zur Bedienung der Menüs haben wenden Sie sich an Ihren Kabelfernsehsender Wenn der Kabelempfang schlecht ist arbeitet die ACI Funktion nicht richtig Wenn die ACI Daten selbst fehlerhaft sind kannn der Fern...

Страница 80: ... verschlüsseltes Bild 3 Drücken Sie die Taste a a a a zur Anzeige des Menüs MENUE Das Menü MENUE Hauptmenü erscheint 4 Drücken Sie die Tasten 6 6 6 6 um FUNKTIONEN zu wählen Drücken Sie dann die Taste a a a a Das Menü FUNKTIONEN erscheint 5 Drücken Sie die Tasten 6 6 6 6 um DECODER EXT 2 zu wählen Drücken Sie dann die Tasten 5 5 5 5 um EIN zu wählen Das dekodierte Bild erscheint Für Abbruch der DE...

Страница 81: ...e ein Gerät anschließen das im folgenden Anschlussdiagramm nicht aufgeführt ist schauen Sie in der Tabelle nach um den am besten geeigneten EXT Anschluss zu ermitteln Beachten Sie dass die Anschlusskabel nicht mitgeliefert werden 1 Videorekorder Composite Signal 2 Videorekorder Composite S VIDEO Signal 3 T V LINK kompatibler Videorekorder Composite S VIDEO Signal 4 Decoder 5 DVD Spieler Composite ...

Страница 82: ...Buchse EXT 2 umschalten Dies ist sinnvoll wenn Sie das Video Audiosignal von einem anderen Gerät auf dem Videorekorder aufnehmen möchten der am Anschluss EXT 2 angeschlossen ist Näheres zur Bedienung erfahren Sie unter ÜBERSPIELEN auf Seite 27 Ausgabe des Fernsehsignals an der Buchse EXT 1 Bild und Ton des momentan gewählten Fernsehkanals werden ständig an der Buchse EXT 1 ausgegeben Wenn Sie die ...

Страница 83: ...8 R58 CH 59 CH 259 E59 R59 CH 60 CH 260 E60 R60 CH 61 CH 261 E61 R61 CH 62 CH 262 E62 R62 CH 63 CH 263 E63 R63 CH 64 CH 264 E64 R64 CH 65 CH 265 E65 R65 CH 66 CH 266 E66 R66 CH 67 CH 267 E67 R67 CH 68 CH 268 E68 R68 CH 69 CH 269 E69 R69 CC Kanal CC 01 CC 201 S1 CC 02 CC 202 S2 CC 03 CC 203 S3 CC 04 CC 204 S4 CC 05 CC 205 S5 CC 06 CC 206 S6 CC 07 CC 207 S7 CC 08 CC 208 S8 CC 09 CC 209 S9 CC 10 CC 2...

Страница 84: ...nander verbunden Wurde das Antennenkabel beschädigt Ist die Antenne richtig ausgerichtet Ist die Antenne selbst eventuell defekt Wenn der Fernseher bzw die Antenne Störungen von anderen Geräten empfängt können Streifen oder Bildrauschen im Fernsehbild auftreten Benutzen Sie Geräte wie Verstärker Computer Geräte mit Elektromotoren Föhn in größerem Abstand zu Ihrem Fernseher oder an anderen Aufstell...

Страница 85: ...erzeugt Wenn Bild und Ton nach einem lauten Knacken weiterhin normal sind ist dies kein Grund zur Beunruhigung Wenn Sie bei der Benutzung Ihres Fernsehers des öfteren Knackgeräusche hören können auch andere Gründe angenommen werden Als Vorsichtsmaßnahme sollten Sie sich an einen Techniker wenden der dieses Phänomen begutachtet Im Zwillingsbild Modus kann das Nebenbild verschwinden wenn das externe...

Страница 86: ...mgröße Sichtbarer Bereich 107 5 cm Bildschirmdiagonale Tonausgabe Nominelle Ausgangsleistung 18 W 18 W Lautsprecher 3 cm 10 cm oval 2 6 5 cm 13 cm oval 2 EXT 1 Anschluss Eurobuchse 21 Pol SCART Buchse Video Eingang Audioeingänge L R und RGB Eingänge sind vorhanden Ausgänge für das Fernsehsignal Video und Audio L R sind vorhanden EXT 2 Anschluss Eurobuchse 21 Pol SCART Buchse Video Eingang S VIDEO ...

Страница 87: ...support rigides tels que murs et colonnes AVERTISSEMENT POUR EVITER TOUT RISQUE D INCENDIE OU DE CHOC ELECTRIQUE N EXPOSEZ JAMAIS CET APPAREIL A LA PLUIE OU A L HUMIDITE ATTENTION Ne raccordez les appareils qu à la source d alimentation spécifiée CA 110 240 V 50 60 Hz sur chacun d eux Evitez d endommager la fiche secteur et le cordon d alimentation Si vous ne comptez pas utiliser l appareil pendan...

Страница 88: ...te la durée de vie de cet écran Voir MODE IMAGE à la page 21 N affichez pas d images ou de caractères statiques pour des périodes prolongées Réduisez le CONTRASTE et la LUMIERE dans le menu REGLAGE IMAGE menu page 21 pendant la visualisation N utilisez pas le mode NORMAL page 15 pour des périodes prolongées La taille de l écran se choisit normalement de manière à afficher l image sur la totalité d...

Страница 89: ...démonstration D I S T Appuyez sur la touche jaune sur la touche b sur les touches P p ou sur n importe quelle touche numérique Points défectueux Les écrans au plasma font appel à des ensembles de points pixels fins pour afficher les images Si plus de 99 99 de ces pixels ne présentent aucun problème il faut savoir qu il est possible qu un nombre infime de pixels puisse ne pas s allumer ou rester al...

Страница 90: ...la fonction PIP 16 Utilisation de la fonction IMAGES MULTIPLES 17 Utilisation d un VCR ou d un lecteur DVD de marque JVC 17 Fonction télétexte 18 Fonctionnement de base 18 Utilisation du mode Liste 18 Conserver l affichage 18 Page secondaire 19 Révéler 19 Taille 19 Index 19 Annulation 19 Utilisation du menu du téléviseur 20 Fonctionnement de base 20 REGLAGE IMAGE 21 MODE IMAGE 21 Réglage de l imag...

Страница 91: ...stributeur Cordon d alimentation Le cordon d alimentation le mieux adapté à votre région parmi ceux repris ci dessous est fourni avec votre téléviseur Certains modèles sont fournis avec des supports ou des dispositifs d installation murale Téléviseur Câble système Crochet 2 Télécommande Piles AA R6 utilisées pour le contrôle du fonctionnement Récepteur Noyau en ferrite 4 Vis de montage 2 ...

Страница 92: ...u dispositif d installation murale avant de commencer l installation afin d éviter tout risque d accident Nous n acceptons aucune responsabilité pour tout dommage causé par un assemblage incorrect une fixation murale incorrecte une fixation murale instable une utilisation incorrecte des modifications ou des désastres naturels Précautions pour l installation Ne basculez pas le téléviseur vers la dr...

Страница 93: ...ISPLAY INPUT CONNECTTO SYSTEM CABLE AC INPUT 110 240V Raccordement de l antenne et autres équipements Reportez vous à la page page 8 pour plus de détails sur le raccordement Téléviseur arrière Câble fourni avec le téléviseur Reportez vous à la page page 9 pour plus de détails sur le raccordement Câble fourni avec le récepteur Reportez vous à la page page 9 pour plus de détails sur le raccordement ...

Страница 94: ...e suivez l exemple 1 1 1 1 Pour l utilisation des fonctions T V LINK il faut qu un magnétoscope compatible T V LINK soit connecté à l entrée EXT 2 du téléviseur Pour plus de détails concernant ces fonctions T V LINK voir FONCTIONS T V LINK à la page 11 Vous pouvez regarder une cassette vidéo à partir du magnétoscope sans effectuer l opération C Pour plus de détails consultez le manuel d utilisatio...

Страница 95: ...n d alimentation puis refermez le noyau en ferrite Fixez un noyau en ferrite à chaque extrémité du cordon d alimentation Insérez la fiche CA dans une prise correctement reliée à la terre Le témoin rouge de mise sous tension du récepteur s allume et le récepteur est en mode de veille lorsque la fiche du cordon d alimentation est raccordée à une prise secteur Retirez la fiche CA de la prise pour cou...

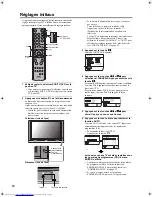
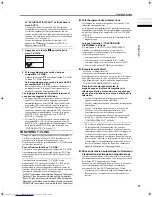
Страница 96: ... 5 5 5 5 et 6 6 6 6 pour sélectionner FRANÇAIS Appuyez ensuite sur la touche a a a a La langue d affichage des messages à l écran est définie Le menu PAYS apparaît en tant que sous menu de la fonction AUTO Il existe deux menus PAYS Si vous appuyez sur la touche jaune le menu PAYS change de la façon suivante 5 Appuyez sur les touches 5 5 5 5 et 6 6 6 6 pour choisir le pays où vous vous trouvez 6 Ap...

Страница 97: ...RTLINK une marque commerciale de Sony Corporation Téléchargement des présélections Téléchargez les données enregistrées des canaux TV du téléviseur au magnétoscope La fonction de téléchargement des présélections démarre automatiquement lorsque les réglages initiaux sont terminés ou que vous effectuez les opérations AUTO ou EDITER MANUEL Cette fonction peut être activée par l intermédiaire du magné...

Страница 98: ...d alimentation du téléviseur et du récepteur sont correctement raccordées aux prises secteur Sélection d un canal TV Appuyez sur les touches P p p p p pour sélectionner un numéro de programme PR ou une borne EXT Visualisation d images provenant d appareils externes Appuyez sur la touche TV AV pour sélectionner une entrée TV AV Réglage du volume Appuyez sur les touches q q q q Le témoin de niveau d...

Страница 99: ...ous tension si le sélecteur VCR TV DVD est réglé sur la position VCR ou DVD 2 Appuyez sur la touche veille pour mettre le téléviseur en ou hors service A la mise en service du téléviseur le témoin d alimentation passe du rouge au vert L appareil peut être mis sous tension à l aide de la touche b les touches p p ou des touches numériques Contrôlez que les fiches des cordons d alimentation du télévi...

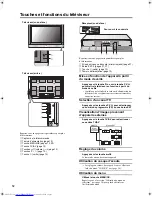
Страница 100: ...ne EXT Utilisation de la LISTE PROG 1 Appuyez sur la touche h h h h Informations pour afficher la LISTE PROG 2 Appuyez sur les touches 5 5 5 5 et 6 6 6 6 pour sélectionner une borne EXT Appuyez ensuite sur la touche a a a a Les entrées EXT sont enregistrées après le numéro de programme PR 99 Vous pouvez choisir un signal d entrée vidéo S VIDEO signal Y C ou un signal vidéo normal signal composite ...

Страница 101: ... uniformément les côtés gauche et droit d une image normale rapport zoom 4 3 pour qu elle remplisse l écran large du téléviseur Dans le cas des images avec un rapport zoom 16 9 qui ont été réduites à une image de taille normale rapport zoom 4 3 permet de rétablir les dimensions d origine Sélection du mode ZOOM 1 Appuyez sur la touche c c c c pour afficher le menu ZOOM Cette touche c n est pas util...

Страница 102: ...eur La fonction ARRET IMAGE s annule si aucune opération n est effectuée pendant environ une minute Utilisation de la fonction PIP Il est possible de visualiser deux images l image principale et une image secondaire Vous pouvez visualiser simultanément un programme TV et un programme vidéo à partir d un appareil externe 1 Appuyez sur la touche R R R R La touche R R R R permet de changer de mode PI...

Страница 103: ...a Les images multiples disparaissent et l image choisie s affiche Annulation des images multiples Appuyez sur la touche b sur les touches numériques ou sur les touches a Les images provenant d un appareil externe ne peuvent pas être animées en mode à 12 images Utilisation d un VCR ou d un lecteur DVD de marque JVC Vous pouvez utiliser un magnétoscope ou un lecteur DVD de marque JVC Les touches de ...

Страница 104: ...destiné à prévenir l effet de rémanence et ne constitue pas un défaut Utilisation du mode Liste Il est possible de mémoriser les numéros de vos pages de télétexte favorites pour pouvoir les rappeler rapidement à l aide des touches de couleur Pour mémoriser les numéros des pages 1 Appuyez sur la touche B B B B pour activer le mode Liste Les numéros de pages mémorisés s affichent dans le bas de l éc...

Страница 105: ...auteur de l affichage du télétexte Appuyez sur la touche F F F F Taille Index Vous pouvez revenir instantanément à la page d index Appuyez sur la touche G G G G Index Vous revenez à la page 100 ou à une page précisée précédemment Annulation Vous pouvez rechercher une page de télétexte tout en regardant la télévision 1 Appuyez sur une touche numérique pour entrer un numéro de page ou appuyez sur un...

Страница 106: ...on Pour plus de détails sur les fonctions des menus voir les pages suivantes 4 Appuyez sur les touches 5 5 5 5 pour sélectionner le paramétrage de cette fonction Pour activer une fonction dont seul le nom s affiche reportez vous à sa description dans les pages suivantes L affichage qui apparaît dans le bas d un menu indique la touche de la télécommande que vous pouvez utiliser pour effectuer la fo...

Страница 107: ...ystème couleurs est NTSC 3 58 NTSC 4 43 ou un signal provenant de l entrée EXT 4 Il n est cependant pas possible d effectuer l opération lorsque l image principale de la fonction PIP est réglée sur EXT 4 Pour revenir aux réglages par défaut dans chaque mode MODE IMAGE Appuyez sur la touche bleue Cette opération rappelle les réglages d image par défaut dans le mode MODE IMAGE sélectionné et les mém...

Страница 108: ...en éliminant les bords inutiles des images très contrastées et très nettes Pour les images peu contrastées des bords sont ajoutés pour créer une image plus nette et plus détaillée La fonction DigiPure propose trois réglages AUTO MINI et MAXI Si vous réglez l effet DigiPure sur une valeur trop élevée pour une image de mauvaise qualité qui contient de nombreuses interférences cet effet risque d acce...

Страница 109: ... numéros de programme PR 0 AV à PR 99 vous ne pouvez pas sélectionner NTSC 3 58 ou NTSC 4 43 EFFET CINEMA Lafonction EFFET CINEMApermetd afficherdemanièreplus douce et plus naturelle à l écran les films au format cinéma AUTO Le téléviseur reconnaît automatiquement le type de signal et active ou désactive la fonction OUI La fonction est activée NON La fonction est désactivée Le mouvement risque de ...

Страница 110: ... image secondaire 1 Appuyez sur les touches 6 6 6 6 pour sélectionner PIP Appuyez ensuite sur la touche a a a a Le menu PIP apparaît 2 Appuyez sur les touches 5 5 5 5 pour sélectionner la position Appuyez ensuite sur la touche a a a a D0061 FR TV OK RETOUR PIP ...

Страница 111: ...che et le haut parleur droit 2 augmente le volume du haut parleur gauche 3 augmente le volume du haut parleur droit HAUT PARLEUR Si un système audio est relié au téléviseur pour remplacer les haut parleurs du téléviseur vous pouvez couper le son de ces derniers OUI Les haut parleurs du téléviseur fonctionnent NON Les haut parleurs du téléviseur sont coupés BBE La fonction BBE permet d obtenir un s...

Страница 112: ...du téléviseur continuent à fonctionner lorsque le casque d écoute est utilisé NON Les haut parleurs du téléviseur sont coupés lorsque le casque d écoute est utilisé SORTIE IMAGE Permet de choisir la sortie audio qui doit être diffusée dans le casque d écoute PRINCIPALE Permet d écouter le son de l image principale avec le casque SECONDAIRE Permet d écouter le son de l image secondaire avec le casq...

Страница 113: ...O change le premier caractère de E en S Par exemple E2 devient S2 Même un appareil qui permet l émission d un signal S VIDEO signal Y C peut diffuser un signal vidéo normal signal composite en fonction des réglages définis Si une image ne peut pas s afficher parce qu un S IN entrée S VIDEO a été effectué relisez attentivement le manuel d utilisation pour vérifier les réglages de l appareil LISTE N...

Страница 114: ... TV L image et le son de la chaîne TV que vous regardez sont diffusés par la borne EXT 2 Pendant la copie vous ne pouvez pas éteindre le téléviseur La mise hors tension du téléviseur couperait également l émission de signaux diffusés par la borne EXT 2 Lorsque vous sélectionnez une borne EXT comme sortie vous pouvez regarder une émission TV ou l image envoyée par l autre borne EXT pendant la copie...

Страница 115: ...D prédéfini en effectuant une opération particulière il est impossible de désactiver le verrouillage et tout accès à ces canaux est impossible pour l enfant Pour régler la fonction VERROUILLAGE 1 Sélectionnez VERROUILLAGE puis appuyez sur la touche o o o o REGLAGE NO ID ID écran de réglage du numéro apparaît 2 Entrez le numéro ID de votre choix 1 Appuyez sur les touches 6 6 6 6 pour sélectionner u...

Страница 116: ...deur avec un magnétoscope compatible T V LINK à la borne EXT 2 Pour l utiliser reportez vous à la section Utilisation de la fonction DECODEUR EXT 2 à la page 36 Attention Si vous n avez pas raccordé un décodeur avec un magnétoscope compatible T V LINK connecté à la borne EXT 2 le réglage accidentel de cette fonction sur OUI provoque la suppression de l image et du son du canal TV que vous regardez...

Страница 117: ...CI Installation automatique des canaux pour décoder les données ACI et effectuer rapidement l enregistrement de tous les canaux de télévision Pour plus de détails concernant la fonction ACI et la façon de l utiliser voir Utilisation de la fonction ACI à la page 35 Si vous ne souhaitez pas utiliser la fonction ACI appuyez sur 6 pour sélectionner ACI SAUT et appuyez ensuite sur a 4 Appuyez sur la to...

Страница 118: ...liste courante des numéros de programmes PR par le biais du numéro CH CC Vous ne pouvez pas utiliser la fonction INSERER si vous ne connaissez pas le numéro de canal d un émetteur TV Utilisez la fonction MANUEL pour enregistrer un canal TV sous le numéro de programme PR EFFACER Cette fonction permet de supprimer tout canal TV inutile MANUEL Cette fonction permet d enregistrer manuellement un nouve...

Страница 119: ...e cas uniquement réglez toujours le paramètre PAYS sur FRANCE Si le paramètre PAYS n est pas FRANCE suivez les explications fournies à la section Modification du réglage PAYS à la page 36 pour configurer le paramètre PAYS sur FRANCE lancez ensuite la fonction INSERER 1 Appuyez sur les touches 6 6 6 6 pour sélectionner un numéro de programme PR sous lequel vous souhaitez mémoriser un nouveau canal ...

Страница 120: ...z mémoriser Pour les canaux TV français système SECAM L Configurez le paramètre SYSTEME sur L Si vous choisissez une autre valeur que L vous ne pourrez recevoir aucun canal du système SECAM L Autres canaux TV Si vous ne connaissez pas le système de radiodiffusion correct configurez le paramètre SYSTEME sur B G Si B G n est pas le choix correct vous n obtiendrez pas un son normal lorsque le télévis...

Страница 121: ...e la fonction Réglages initiaux page 11 Lorsque les AUTO sont terminés Revenez à l étape 4 de la fonction AUTO page 31 Pour toute question sur les rubriques du menu de sélection de diffusion ou sur la façon d utiliser le menu contactez votre station de télévision par câble Si la réception par câble est mauvaise c est que la fonction ACI n opère pas correctement Si les données ACI proprement dites ...

Страница 122: ...uyez sur la touche a a a a pour afficher le MENU Le MENU menu principal apparaît 4 Appuyez sur les touches 6 6 6 6 pour sélectionner OPTIONS Appuyez ensuite sur la touche a a a a Le menu OPTIONS apparaît 5 Appuyez sur les touches 6 6 6 6 pour sélectionner DECODEUR EXT 2 Appuyez ensuite sur les touches 5 5 5 5 pour sélectionner OUI L image qui s affiche doit à présent être décryptée Pour annuler la...

Страница 123: ...ifs aux entrées EXT Si vous voulez raccorder un appareil qui n est pas repris dans le schéma de raccordement suivant reportez vous au tableau pour sélectionner l entrée EXT la plus appropriée Les câbles de raccordement ne sont pas fournis 1 Magnétoscope signal composite 2 Magnétoscope signal composite signal S VIDEO 3 Magnétoscope compatible T V LINK signal composite signal S VIDEO 4 Décodeur 5 Le...

Страница 124: ...e EXT 2 Cette fonction s avère utile lors de la copie de données vidéo audio provenant d un autre appareil vers le magnétoscope raccordé à la borne EXT 2 Pour plus de détails concernant cette opération voir COPIE à la page 27 Sortie du signal TV par la borne EXT 1 L image et le son du canal TV que vous regardez sont toujours diffusés par la borne EXT 1 La modification d un numéro de programme PR m...

Страница 125: ...259 E59 R59 CH 60 CH 260 E60 R60 CH 61 CH 261 E61 R61 CH 62 CH 262 E62 R62 CH 63 CH 263 E63 R63 CH 64 CH 264 E64 R64 CH 65 CH 265 E65 R65 CH 66 CH 266 E66 R66 CH 67 CH 267 E67 R67 CH 68 CH 268 E68 R68 CH 69 CH 269 E69 R69 CC Canal CC 01 CC 201 S1 CC 02 CC 202 S2 CC 03 CC 203 S3 CC 04 CC 204 S4 CC 05 CC 205 S5 CC 06 CC 206 S6 CC 07 CC 207 S7 CC 08 CC 208 S8 CC 09 CC 209 S9 CC 10 CC 210 S10 CC 11 CC...

Страница 126: ...antenne elle même est elle défectueuse Si le téléviseur ou l antenne reçoivent des interférences d autres appareils des lignes ou des interférences peuvent apparaître dans l image Eloignez de votre téléviseur les appareils tels qu amplificateurs ordinateurs ou sèche cheveux qui peuvent causer des interférences ou déplacez le téléviseur Si une tour radio ou un câble à haute tension provoquent des i...

Страница 127: ...érature Cela n a pas d importance pour autant que l image ou le son ne présente aucune anomalie Si vous entendez régulièrement des craquements pendant que vous regardez la télévision d autres causes peuvent être invoquées Par mesure de précaution demandez à un technicien de venir inspecter le téléviseur En mode à deux images il arrive que l image secondaire disparaisse lors de l activation de l ap...

Страница 128: ...eur 30 W Mode de veille Standby 2 4 W Taille de l écran Zone visible de 107 5 cm mesurée en diagonale Sortie audio Puissance de sortie estimée 18 W 18 W Haut parleurs 3 cm 10 cm ovale 2 6 5 cm 13 cm ovale 2 Sortie EXT 1 Euroconnecteur 21 broches SCART Entrée vidéo entrées Audio G D et entrées RGB disponibles Sorties d émissions TV Vidéo et Audio G D disponibles Sortie EXT 2 Euroconnecteur 21 broch...

Страница 129: ...2 ...

Страница 130: ...3 ...

Страница 131: ......

Страница 132: ... 2003 VICTOR COMPANY OF JAPAN LIMITED 5 LCT1440 001A U 0803 MK CR JMUK ...

Страница 133: ...6 PD 42V31BUE PD 42V31BJE PD 42V31BSE ...

Отзывы: