


14
PD-42/35D30ES / LCT1375-001A-U / English (EK)
Initial settings
When the TV is first turned on, it goes into the initial setting
mode, and you will see the JVC logo. Follow the
instructions on the screen display to make the initial
settings.
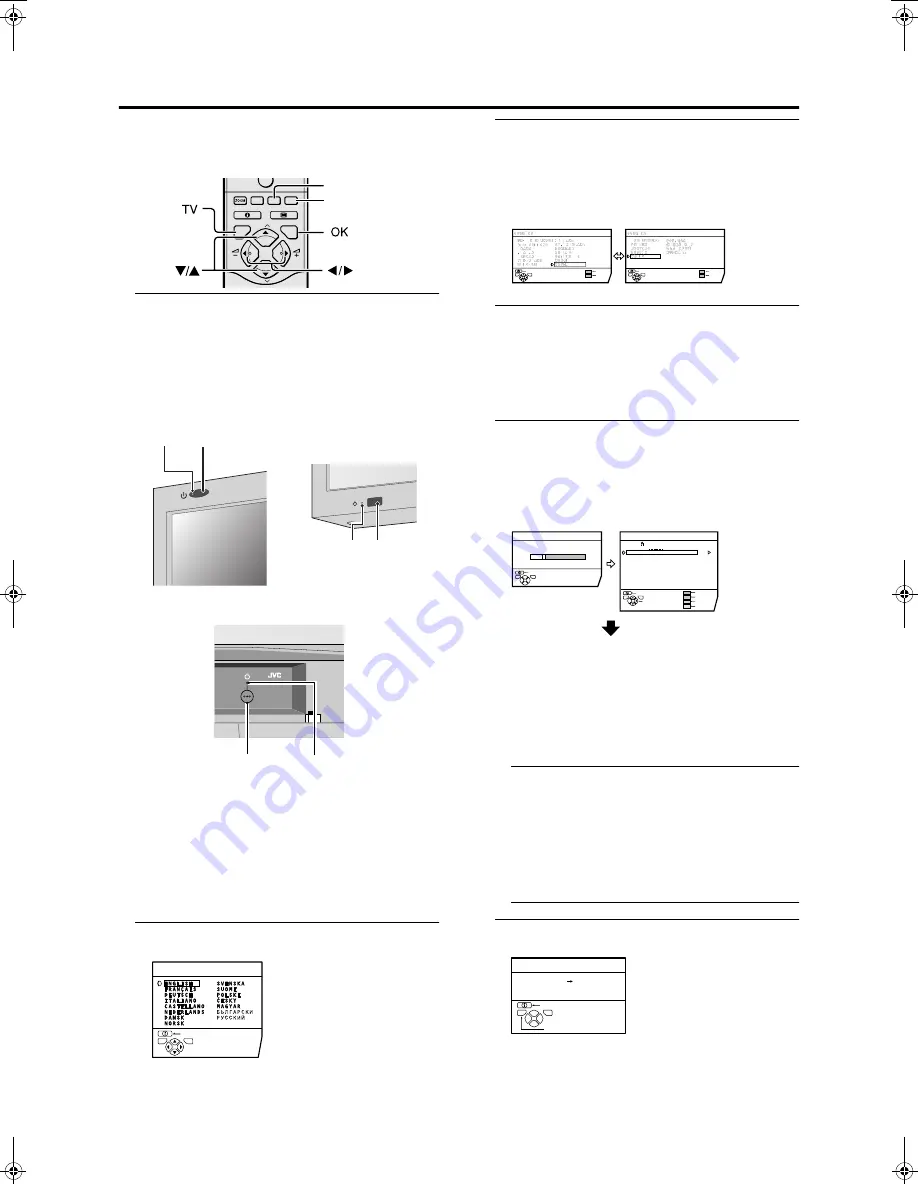
1 Press the
#
#
#
#
button on the remote control
The receiver power lamp changes from red to green.
After a short interval the TV power lamp lights green
and the JVC logo is displayed.
• Check that the AC plugs on the power cords from the
TV and receiver are connected to AC outlets.
• If the power lamp stays red and does not change to
green:
Your TV is in the standby mode. Press the
#
(Standby) button again to turn your TV on.
• If the JVC logo does not appear this is because your
TV has already been turned on for the first time:
use the “LANGUAGE” and “AUTO PROGRAM”
functions to make the initial settings. For details, see
“INSTALL” on page 35.
2 Press the
a
button
The LANGUAGE menu appears.
3 Press the
5
5
5
5
and
6
6
6
6
buttons to choose
ENGLISH. Then press the
a
a
a
a
button
The on-screen display will then be in English.
The COUNTRY menu appears as a sub-menu of the
AUTO PROGRAM function.
There are two COUNTRY menus. Pressing the yellow
button changes the COUNTRY menu as follows:
4 Press the
5
5
5
5
and
6
6
6
6
buttons to choose the
country where you are
•
For uses in the UK:
To receive SKY 1 you need a satellite tuner. You
must have the satellite tuner set to SKY 1 before
starting the AUTO PROGRAM function which
follows.
5 Press the blue button to start the AUTO
PROGRAM function
The AUTO PROGRAM menu appears and received TV
channels are automatically stored in the programme
numbers (PR).
• To cancel the AUTO PROGRAM function:
Press the
b
button.
After the TV channels have been registered in
the programme numbers (PR), the EDIT menu
appears
• If you want to, you can now edit the programme
numbers (PR) using the EDIT/MANUAL function.
For details, see “EDIT/MANUAL” on page 36.
• If you do not want to edit programme numbers (PR),
go to the next step.
If “ACI START/ACI SKIP” appears in the AUTO
PROGRAM menu:
You can use the ACI (Automatic Channel Installation)
function to decode the ACI data and complete the
registration of all the TV channels quickly. For details of
the ACI function and how to use it, see “Using the ACI
function” on page 39.
If you don’t want to use the ACI function, press the
6
buttons to choose ACI SKIP and then press
a
.
6 Press the
a
button to display the T-V LINK
menu
0
P
AV
TV
OK
MENU
P
PIP
3D
Yellow button
Blue button
Power lamp
Power lamp
A
button
Remote control sensor
Remote control
sensor
Power lamp
<PD-42D30ES>
<PD-35D30ES>
Display front
Receiver front
D0002(E)-EN
BACK
LANGUAGE
TV
OK
BACK
MORE
START
TV
OK
BACK
MORE
START
TV
OK
D0003-EN
BACK
TV
OK
EDIT
CH / CC
PR
ID
AV
01
02
03
04
05
06
07
08
09
CH
CH
BBC1
CH
CH
CH
CH
CC
CC
CC
21
23
22
26
25
24
01
02
03
ID
INSERT
DELETE
MANUAL
CH 10
AUTO PROGRAM
20%
D0004-EN
MOVE
BACK
TV
OK
D0005-EN
BACK
DOWNLOAD TV
VCR
T-V LINK
TV
OK
EXIT
PD-42&35D30ES(EK)_Eng.book Page 14 Thursday, January 30, 2003 10:21 AM