background image

10

English

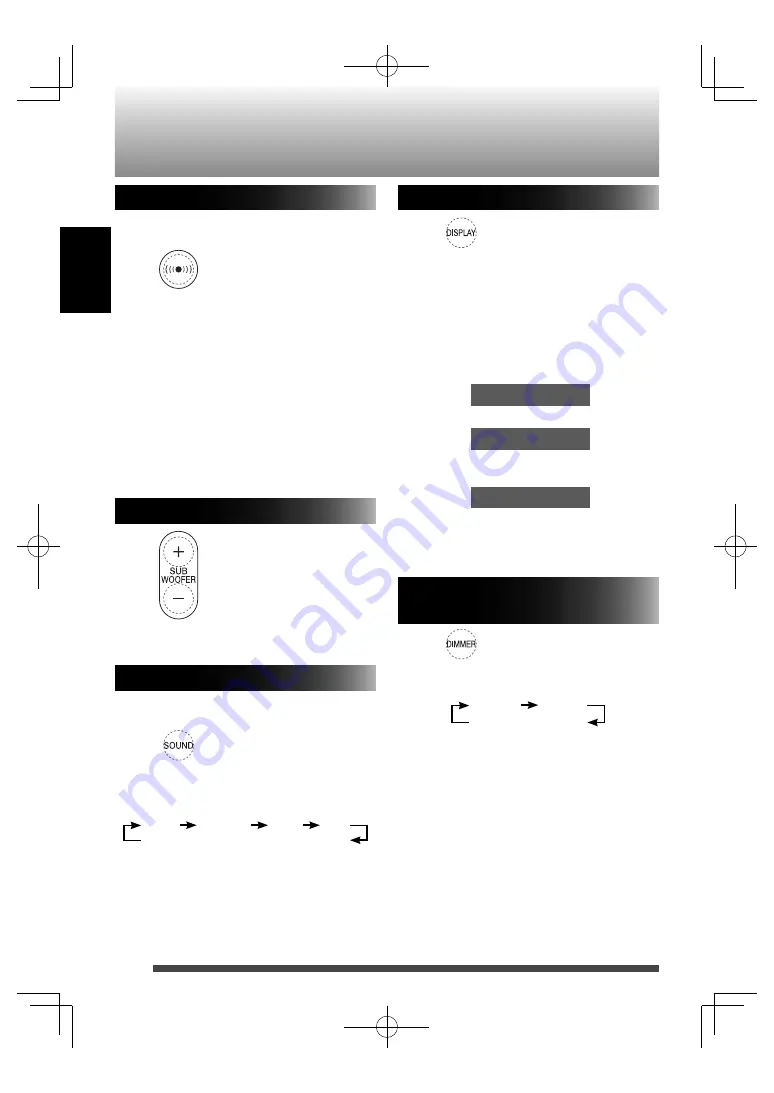
Adjusting the sound effect

You can enjoy dynamic and realistic sound 
effects.


Press the button once to display the 
current setting. Press it again to change 
the setting.

WOW HD:

  Suitable for listening in front of the 

System.

EH–1 

(Normal Enhance Mode)

:

Widens the sound field in front of 
the System.

EH–2 

(High Enhance Mode)

:

Further widens the sound field in 
front of the System.

OFF:


Cancels the sound effect.

Adjusting the subwoofer volume


 (Press 

repeatedly)

Adjustable range: 

1

 — 

5

Using the sound mode

To select the sound mode suitable for your 
favorite music.


Press the button once to display the 
current setting. Press it again to change 
the setting.

 ROCK 

 CLASSIC 

 JAZZ 

 POP 

 FLAT 

(Canceled) 

Changing the display information


Each time you press the button, the 
information shown changes from the clock 
to other information.

The information shown on the display differs 
depending on the source.
Tag information can be shown on the display 
while an MP3/WMA file is played back.

Ex.: Clock


P M     1 2.3 4

Ex.: When a USB device is played


  1 0     2.4 5

  Current track number 

Elapsed playing time

Ex.: When a USB device is stopped


G 1 2   T 7 9 8


Total group number 

Total track number

To display the clock while the System is on 
standby, 

 press 

7

.

Changing the brightness of the 
indications


Each time you press the button, the setting 
changes.

 DIM 1 

 DIM 2 


DIM OFF

 (Canceled) 

The setting is stored even if the power is 
turned off.

Basic operations

NX-SA1[J]̲11.indd   10

NX-SA1[J]̲11.indd   10

12.5.15   9:58:34 AM

12.5.15   9:58:34 AM

Содержание NX-SA1B

Страница 1: ... the Model No and Serial No which are located either on the rear bottom or side of the cabinet Retain this information for future reference Model No Serial No COMPACT COMPONENT SYSTEM SYSTEME DE COMPOSANTS COMPACT NX SA1B NX SA1 J 11 indd 1 NX SA1 J 11 indd 1 12 5 15 9 58 29 AM 12 5 15 9 58 29 AM ...

Страница 2: ...ertain situations for 30 minutes the System turns off automatically This function is on at the initial setting For details refer to page 11 In this manual The remote control buttons are used for explaining the operations unless mentioned otherwise However if the unit has buttons with the same or similar names they can also be used for the operations In this manual iPod means iPod iPod touch and iP...

Страница 3: ...er Save A P S 11 Connecting headphones 11 Listening to iPod 12 Connecting iPod 12 Playing back 12 Viewing video picture from iPod 13 Listening to a USB device 14 Connecting a USB device 14 Playing back 14 Programming the playing order Program Play 15 Playing at random Random Play 16 Playing repeatedly Repeat Play 16 Listening to FM 17 Searching for stations 17 Presetting stations 17 Listening to a...

Страница 4: ...ert the battery into the remote control by matching the polarities and correctly NOTE The included battery is for checking system operation Replace it with a new one as soon as possible CAUTION Danger of explosion if battery is incorrectly replaced Replace only with the same or equivalent type Store the battery in a place where children cannot reach If a child accidentally swallows the battery con...

Страница 5: ...onnecting the power cord Connect the supplied AC adaptor to the DC IN jack on the System Then connect the supplied AC power cord to the AC adaptor and plug it into a wall outlet CAUTION Disconnect the power cord before cleaning or moving the System To avoid the risk of fire and to prevent damage Do not use any AC adaptors other than the one supplied Do not use the supplied AC adaptor for other equ...

Страница 6: ... 6 DIMMER button 7 Sound Effect button 8 4 button 9 button 0 7 button DISPLAY button VOLUME buttons Remote control sensor Display STANDBY lamp Illumination lamp TIMER lamp Dock for iPod Subwoofer 1 2 3 4 5 9 8 7 6 0 Unit Top Front NX SA1 J 11 indd 6 NX SA1 J 11 indd 6 12 5 15 9 58 32 AM 12 5 15 9 58 32 AM ...

Страница 7: ...English PHONES jack AUDIO IN jack USB MEMORY connector FM 75Ω COAXIAL terminal _ DC IN jack VIDEO OUT terminal _ Unit Side Rear NX SA1 J 11 indd 7 NX SA1 J 11 indd 7 12 5 15 9 58 32 AM 12 5 15 9 58 32 AM ...

Страница 8: ...LEEP CLOCK TIMER A P S REPEAT TUNER MODE SET PLAY MODE CANCEL fi SOUND Sound Effect fl DISPLAY STANDBY ON TUNER 1 7 UP MENU 4 _ DOWN MUTING SUB WOOFER VOLUME fl _ Ÿ fi Remote control NX SA1 J 11 indd 8 NX SA1 J 11 indd 8 12 5 15 9 58 32 AM 12 5 15 9 58 32 AM ...

Страница 9: ...You can return to the previous step NOTE The clock may gain or lose 1 to 2 minutes per month You may need to readjust the clock periodically If there is a power failure the clock loses its settings You need to set the clock again Basic operations Getting started 1 Turn on the power The STANDBY lamp goes off 2 Select a source 3 Adjust the volume Adjustable range MIN 1 39 MAX To turn off the System ...

Страница 10: ...he setting ROCK CLASSIC JAZZ POP FLAT Canceled Changing the display information Each time you press the button the information shown changes from the clock to other information The information shown on the display differs depending on the source Tag information can be shown on the display while an MP3 WMA file is played back Ex Clock PM 12 34 Ex When a USB device is played 10 2 45 Current track nu...

Страница 11: ...lay every minute Approximately 30 seconds before the power is turned off APS starts to blink The 30 minute countdown restarts when you perform button operations or connect disconnect a device This function has priority over the Daily Timer and Sleep Timer This function is on at the initial setting Connecting headphones Be sure to turn down the volume before connecting or putting on the headphones ...

Страница 12: ... case of iPod off before connecting Keep iPod in a straight position while connecting disconnecting it Connect iPod firmly Do not carry the System with iPod connected Doing so might cause damage to the dock or you might drop iPod Do not touch or hit the terminal pins of iPod or connector pins in the dock for iPod directly Doing so might cause damage to the connector pins Playing back iPod is turne...

Страница 13: ...gh recording levels If distortion occurs it is recommended to turn off the equalizer of iPod Viewing video picture from iPod You can view video picture from iPod on an external monitor Before connecting a monitor display turn off the power of this System 1 Connect a monitor display 2 Set the video output of iPod While the System is turned off Hold Main unit Press and hold the button once to displa...

Страница 14: ... playback of the device In this case disconnect the USB device then reset this System and the USB device Playing back To stop playback If you press USB 6 again after stopping the track which was being played is played from the beginning Resume Play Press 7 again while stopped to cancel Resume Play To pause To cancel pause press the button again To select a track Press repeatedly To fast forward re...

Страница 15: ...ct NORMAL in Step 2 Program Play is canceled in the following cases When the System is turned off When the source is changed When a USB device is disconnected To confirm the programmed tracks While stopped during or after program playback Press repeatedly The tracks in the program will successively appears on the display in the programmed order To add a track to the end of the program Select the t...

Страница 16: ...epeat Play You can play a track or tracks repeatedly 1 Select the repeat mode Press the button once to display the current setting Press it again to change the setting RPT 1 Repeats the current track RPT GR Repeats all tracks in the current group RPT ALL Repeats all tracks RPT OFF Cancels Repeat Play 2 While stopped start playback To exit from Repeat Play select RPT OFF in Step 1 Repeat Play is ca...

Страница 17: ...s the button once to display the current setting Press it again to change the setting AUTO Stereo mode MONO Monaural mode NOTE When the monaural mode is activated the reception is improved However the stereo effect is lost Listening to FM Presetting stations You can preset up to 40 FM stations manually 1 Tune in to a station you want to preset 2 Display the preset number P 01 01 Finish the followi...

Страница 18: ... Adjust the volume To adjust the audio input level If the sound from the device connected to the AUDIO IN jack is too quiet you can change the audio input level through the AUDIO IN jack without changing the volume level Each time you press the button the setting changes LEVEL1 Ordinary input level LEVEL2 Increases the input level LEVEL3 Increases the input level more than LEVEL2 External device n...

Страница 19: ...ute for the on time ON Hour and minute for the off time OFF Playback source When you select USB as the source select a track number When you select FM as the source select a preset station number Volume Once you have set the volume PLAY SET will be displayed and the setting contents will be displayed in order 4 Turn off the System The TIMER lamp lights up While the Daily Timer is working the TIMER...

Страница 20: ... the following sampling frequencies and bitrates Sampling frequency 32 44 1 48 kHz Bitrate MP3 32 kbps 320 kbps WMA 32 kbps 320 kbps This System can recognize up to 300 folders and 999 files on a USB device DRM Digital Rights Management files cannot be played back This System cannot play back a file larger than 2 Gigabytes Some MP3 WMA files may not be played back and will be skipped This results ...

Страница 21: ...n water diluted neutral detergent and wrung well then wipe clean with a dry cloth Since the System may deteriorate in quality become damaged or get its paint peeled off be careful about the following DO NOT wipe it hard DO NOT wipe it with thinner or benzine DO NOT apply any volatile substances such as insecticides to it DO NOT allow any rubber or plastic to remain in contact for a long time Trade...

Страница 22: ...sound is discontinuous MP3 WMA files have not been properly copied onto the USB device Noise and static electricity may stop the sound In this case disconnect and connect the USB device again after turning off the System FM radio operations Hard to listen to broadcasts because of noise Antenna connection is incorrect or loose The FM antenna is not properly extended and positioned Electrostatic dis...

Страница 23: ...ible system FAT16 FAT32 Playable files MP3 WMA AUDIO IN Stereo mini ø 3 5 mm x 1 LEVEL 1 500 mV 47 kΩ LEVEL 2 250 mV 47 kΩ LEVEL 3 125 mV 47 kΩ PHONES Stereo mini ø 3 5 mm x 1 VIDEO OUT Composite General Power supply AC adaptor AA R2002 Input AC 100 V 240 V 50 Hz 60 Hz 1 500 mA Output DC 20 V 2 600 mA Power consumption 0 50 W or less on standby Dimensions approx W x H x D 162 mm x 329 mm x 162 mm ...

Страница 24: ...réalisé dans certaines situations pendant 30 minutes l appareil est mis hors tension automatiquement La fonction est en service comme réglage initial Pour plus de détails référez vous à la page 11 Dans ce manuel Sauf mention contraire les touches de la télécommande sont utilisées pour expliquer les opérations Toutefois si l appareil comporte des touches avec des noms identiques ou similaires ils p...

Страница 25: ... d un casque d écoute 11 Écoute de iPod 12 Connexion de iPod 12 Lecture 12 Affichage d une séquence vidéo image à partir de l iPod 13 Écoute d un périphérique USB 14 Connexion d un périphérique USB 14 Lecture 14 Programmation de l ordre de lecture Lecture programmée 15 Lecture dans un ordre aléatoire Lecture aléatoire 16 Répétition de la lecture Lecture répétée 16 Écoute des stations FM 17 Recherc...

Страница 26: ...ant les polarités et REMARQUE La pile fournie est pour la vérification du fonctionnement de l appareil Remplacez la par une neuve dés que possible ATTENTION Danger d explosion si la pile est remplacée de façon incorrecte Remplacez la uniquement avec le même type de pile ou un type équivalent Rangez la pile dans un endroit hors d atteinte des enfants Si un enfant avale accidentellement la pile cons...

Страница 27: ...ation Connectez l adaptateur secteur fourni à la prise DC IN de l appareil Puis connectez le cordon d alimentation secteur fourni à l adaptateur secteur et branchez le sur une prise murale ATTENTION Débranchez le cordon d alimentation si vous avez à nettoyer ou à déplacer l appareil Pour éviter tout risque d incendie et pour prévenir tout dommage N utilisez aucun autre adaptateur secteur que l ada...

Страница 28: ...7 Touche effet sonore 8 Touche 4 9 Touche 0 Touche 7 Touche DISPLAY Touches VOLUME Capteur de télécommande Affichage Témoin STANDBY Témoin d illumination Témoin TIMER Dock pour iPod Caisson de grave 1 2 3 4 5 9 8 7 6 0 Dessus avant de l appareil FR_NX SA1 J _3 indd 6 FR_NX SA1 J _3 indd 6 5 18 12 6 06 56 PM 5 18 12 6 06 56 PM ...

Страница 29: ... Prise PHONES Prise AUDIO IN Connecteur USB MEMORY Prise FM 75Ω COAXIAL _ Prise DC IN Prise VIDEO OUT _ Coté arrière de l appareil FR_NX SA1 J _3 indd 7 FR_NX SA1 J _3 indd 7 5 18 12 6 06 56 PM 5 18 12 6 06 56 PM ...

Страница 30: ...SLEEP CLOCK TIMER A P S REPEAT TUNER MODE SET PLAY MODE CANCEL fi SOUND effet sonore fl DISPLAY STANDBY ON TUNER 1 7 UP MENU 4 _ DOWN MUTING SUB WOOFER VOLUME fl _ Ÿ fi Télécommande FR_NX SA1 J _3 indd 8 FR_NX SA1 J _3 indd 8 5 18 12 6 06 56 PM 5 18 12 6 06 56 PM ...

Страница 31: ...etourner à l étape précédente REMARQUE L horloge peut avancer ou retarder d une ou deux minutes par mois Vous aurez peut être besoin de réajuster l horloge périodiquement En cas de panne de courant les réglages de l horloge sont perdus Vous devez régler l horloge à nouveau Opérations de base Pour commencer 1 Mettez l appareil sous tension Le témoin STANDBY s éteint 2 Choisissez une source 3 Ajuste...

Страница 32: ... JAZZ POP FLAT Annulé Changement des informations sur l affichage Chaque fois que vous appuyez sur la touche l information affichée passe de l horloge à une autre information Les informations qui apparaissent sur l affichage diffèrent en fonction de la source Les informations de la balise peuvent être affichées sur l affichage pendant la lecture d une fichier MP3 WMA Ex Horloge PM 12 34 Ex Quand u...

Страница 33: ...fichage chaque minute Environ 30 secondes avant la mise hors tension APS se met à clignoter Le compte à rebours de 30 minutes reprend si vous touchez une touche ou connectez déconnectez un périphérique Cette fonction a la priorité sur la minuterie quotidienne et la minuterie d arrêt La fonction est en service comme réglage initial Connexion d un casque d écoute Assurez vous de réduire le volume av...

Страница 34: ... iPod bien droit quand vous le connectez déconnectez Connectez l iPod solidement Ne transportez pas l appareil avec iPod connecté Si vous essayez cela pourrait endommager le dock ou causer la chute de l iPod Ne touchez pas et ne heurtez pas les broches de la prise de l iPod ni celles du connecteur dans le dock pour iPod Cela pourrait endommager les broches du connecteur Lecture iPod est sous tensi...

Страница 35: ...eaux élevés Si une déformation se produit il est recommande de mettre hors service l égaliseur de iPod Affichage d une séquence vidéo image à partir de l iPod Vous pouvez voir une séquence vidéo image de l iPod sur un moniteur extérieur Avant de connecter un moniteur mettez cet appareil hors tension 1 Connectez un moniteur 2 Réglez la sortie vidéo de l iPod Pendant que l appareil est hors tension ...

Страница 36: ...Dans ce cas déconnectez le périphérique USB puis réinitialiser cet appareil et le périphérique USB Lecture Pour arrêter la lecture Si vous appuyez de nouveau sur USB 6 après l arrêt la plage qui était en cours de lecture est lue à partir du début Reprise de la lecture Appuyez de nouveau sur 7 pendant l arrêt pour annuler la reprise de la lecture Pour faire une pause Pour annuler la pause appuyez d...

Страница 37: ...programmée choisissez NORMAL à l étape 2 La lecture programmée est annulée dans les cas suivants Quand l appareil est mis hors tension Quand la source est changée Quand un périphérique USB est débranché Pour confirmer les plages programmées Quand l appareil est à l arrêt pendant et après une lecture programmée Appuyez répétitivement Les plages du programme s afficheront successivement sur l écran ...

Страница 38: ...répétée Vous pouvez reproduire une plage ou plusieurs plages répétitivement 1 Choisissez le mode de répétition Appuyez une fois sur la touche pour afficher le réglage actuel Appuyez la de nouveau pour changer le réglage RPT 1 Répète la plage actuelle RPT GR Répète toutes les plages du groupe actuel RPT ALL Répète toutes les plages RPT OFF Annule la lecture répétée 2 Pendant l arrêt démarre la lect...

Страница 39: ...e pour afficher le réglage actuel Appuyez la de nouveau pour changer le réglage AUTO Mode stéréo MONO Mode monaural REMARQUE Quand le mode monaural est en service la réception est améliorée Cependant l effet stéréo est perdu Écoute des stations FM Préréglage des stations Vous pouvez prérégler un maximum de 40 stations FM manuellement 1 Accordez la station que vous souhaitez prérégler 2 Affichez le...

Страница 40: ...tez le volume Pour ajuster le niveau d entrée audio Si le son de l appareil connecté à la prise AUDIO IN est trop faible vous pouvez changer le niveau d entrée audio de la prise AUDIO IN sans changer le niveau du volume Chaque fois que vous appuyez sur la touche le réglage change LEVEL1 Niveau d entrée normal LEVEL2 Augmente le niveau d entrée LEVEL3 Augmente le niveau d entrée encore plus que LEV...

Страница 41: ...utes pour l heure de fin de la minuterie OFF Source de lecture Quand vous choisissez USB comme source choisissez un numéro de plage Quand vous choisissez FM comme source choisissez un numéro de station préréglée Volume Une fois que vous avez réglé le volume PLAY SET est affiché et le contenu du réglage est affiché dans l ordre 4 Mettez l appareil hors tension Le témoin TIMER s allume Quand la minu...

Страница 42: ...nage et les débits binaires suivants Fréquence d échantillonnage 32 44 1 48 kHz Débit binaire MP3 32 kbps 320 kbps WMA 32 kbps 320 kbps Cet appareil peut reconnaître un maximum de 300 dossiers et 999 fichiers sur un périphérique USB Les fichiers DRM Digital Rights Management ne peuvent pas être reproduits Cet appareil ne peut pas reproduire un fichier plus gros que 2 Gigaoctets Certains fichiers M...

Страница 43: ...chiffon sec Faites attention au points suivants sinon la qualité de l appareil pourrait être détériorée l appareil pourrait être endommagée ou sa peinture pourrait peler Veillez à NE PAS l essuyer en appuyant trop fort NE FROTTEZ PAS avec un diluant ou de la benzine Veillez à NE PAS appliquer de substance volatile comme des insecticides NE LAISSEZ PAS un objet en caoutchouc ou en plastique en cont...

Страница 44: ...rs MP3 WMA n ont pas été copiés correctement sur le périphérique USB Des bruits et de l électricité statique peuvent perturber les sons Dans ce cas déconnectez puis reconnectez le périphérique USB après avoir mis l appareil hors tension Radio FM Trop de bruit pendant les émissions de radio La connexion de l antenne est incorrecte ou lâche L antenne FM n est pas correctement étendue et positionnée ...

Страница 45: ...ité Système compatible FAT16 FAT32 Fichiers reproductibles MP3 WMA AUDIO IN Mini stéréo ø 3 5 mm x 1 LEVEL 1 500 mV 47 kΩ LEVEL 2 250 mV 47 kΩ LEVEL 3 125 mV 47 kΩ PHONES Mini stéréo ø 3 5 mm x 1 VIDEO OUT Composite Général Alimentation Adaptateur secteur AA R2002 Entrée 100 V 240 V CA 50 Hz 60 Hz 1 500 mA Sortie 20 V CC 2 600 mA Consommation 0 50 W ou moins en mode d attente Dimensions approx L x...

Страница 46: ... 2012 JVC KENWOOD Corporation 0512KMYMDWBET EN FR COMPACT COMPONENT SYSTEM NX SA1 NX SA1 J 11 indd 24 NX SA1 J 11 indd 24 12 5 15 9 58 40 AM 12 5 15 9 58 40 AM ...

Отзывы: