background image

– 18 –

English

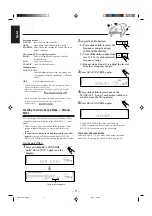
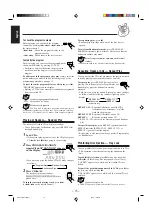
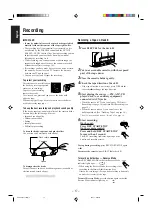
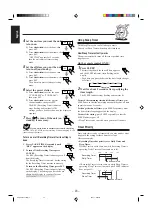
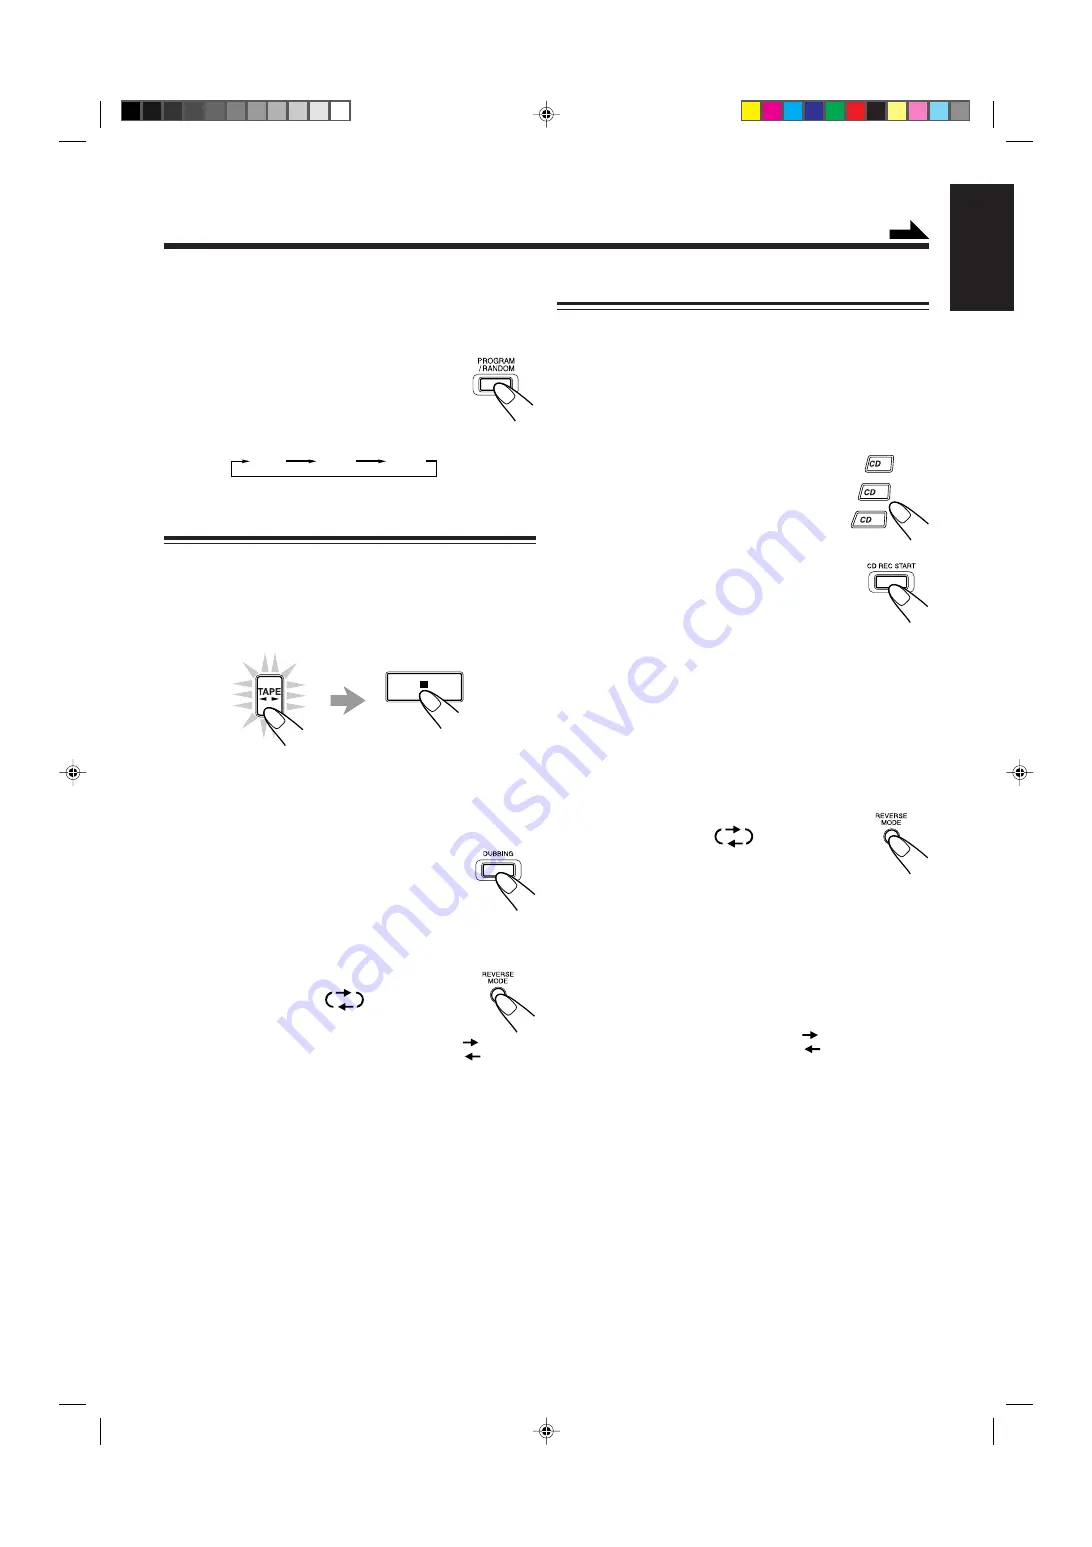
CD Direct Recording

Everything on the CD goes onto the tape in the order it is on
the CD, or according to the order you have made for Program
play.

1

Put a recordable cassette into deck B.

2

Place a disc correctly on the circle of the disc
tray, with its label side up.

3

Press one of the disc number
buttons (CD1 to CD3) to select the
disc, then 

7

.

4

Press CD REC START.

“CD REC” appears, and the REC (recording)
indicator lights up on the display.
Deck B starts recording and the CD player
starts playing.
When the recording is done, “CD REC FINISHED”
appears on the display, and the CD player and deck B
stop.

To stop during CD Direct Recording, press 

7

 or REC

START/STOP.

To record on both sides — Reverse Mode

Press REVERSE MODE so that the Reverse Mode
indicator lights up as —

• When using the Reverse Mode for CD Direct

Recording, start recording in the forward (

3

)

direction first. When the tape reaches its end while
recording a song in the forward direction (

3

), the last song

will be recorded at the beginning of the reverse side (

2

).

If you start recording on the reverse side (

2

), recording

will stop when recording is done only on one side (reverse)
of the tape.

To cancel Reverse Mode, press the button again so that the
Reverse Mode indicator lights up as —

To record an AM station — Beat Cut

While recording an AM broadcast, beats may be heard
(which are never heard when listening to the broadcast
without recording it).
If this occurs, press PROGRAM/RANDOM
repeatedly, while recording, until the beats are
reduced.
• Each time you press the button, the display

changes to show the following:

Dubbing Tapes

It is preferable that the tape type (type I or II) you record
from be the same as the tape type you record onto when
dubbing tapes.

1

Press TAPE 

2


3

, then 

7

.

2

Put the source cassette in deck A, and a
recordable cassette into deck B.

• Put the cassettes in both decks so that the tapes will run

in the forward (

3

) direction.

3

Press DUBBING.

Dubbing starts.

To stop during dubbing, press 

7

.

To record on both sides — Reverse Mode

Press REVERSE MODE so that the Reverse Mode
indicator lights up as —

To cancel Reverse Mode, press the button again so
that the Reverse Mode indicator lights up as —

CUT1

CUT2

CUT3

Continued

1

2

3

EN17-26.MX-J500[U]/f

00.2.17, 6:08 PM

18

www.DataSheet4U.com

www.DataSheet4U.com

Содержание MX-J700

Страница 1: ...mposé du CA MXJ700 et SP MXJ700 Consists of CA MXJ506 and SP MXJ506 Composé du CA MXJ506 et SP MXJ506 Consists of CA MXJ500 and SP MXJ550 Composé du CA MXJ500 et SP MXJ550 SP MXJ550 SP MXJ550 CA MXJ500 SP MXJ506 SP MXJ506 CA MXJ506 TAPE A B FADE MUTING FM MODE RM SMXJ700J REMOTE CONTROL SLEEP SOUND MODE REC START STOP TAPE A B FADE MUTING FM MODE RM SMXJ500J REMOTE CONTROL SLEEP ACTIVE BASS EX SOU...

Страница 2: ...ccompanying the appliance CAUTION For U S A This equipment has been tested and found to comply with the limits for a Class B digital device pursuant to part 15 of the FCC Rules These limits are designed to provide reasonable protection against harmful interference in a residential installation This equipment generates uses and can radiate radio frequency energy and if not installed and used in acc...

Страница 3: ...and interlock failed or defeated Avoid direct exposure to beam 3 CAUTION Do not open the top cover There are no user serviceable parts inside the Unit leave all servicing to qualified service personnel 1 PRODUIT LASER CLASSE 1 2 ATTENTION Radiation laser invisible quand l appareil est ouvert ou que le verrouillage est en panne ou désactivé Eviter une exposition directe au rayon 3 ATTENTION Ne pas ...

Страница 4: ...the unit and the TV Keep the speakers away from the TV to avoid interference with TV DO NOT install the unit in a location near heat sources or in a place subject to direct sunlight excessive dust or vibration We would like to thank you for purchasing one of our JVC products Before operating this unit read this manual carefully and thoroughly to obtain the best possible performance from your unit ...

Страница 5: ...Tuning in a Preset Station 12 Playing Back CDs 13 Loading CDs 13 Playing Back the Entire Discs Continuous Play 13 Basic CD Operations 13 Programming the Playing Order of the Tracks Program Play 14 Playing at Random Random Play 15 Repeating Tracks or CDs Repeat Play 15 Prohibiting Disc Ejection Tray Lock 15 Playing Back Tapes 16 Playing Back a Tape 16 Locating the Beginning of a Song Music Scan 16 ...

Страница 6: ...ation of the Buttons and Controls Become familiar with the buttons and controls on your unit Front Panel Powered Rolling Panel Press PANEL OPEN CLOSE to open the panel To close the panel press the button again Front Panel EN01 12 MX J500 506 700 C 1 00 1 8 7 55 PM 3 www DataSheet4U com www DataSheet4U com ...

Страница 7: ...e search forward search buttons 9 11 14 19 22 REVERSE MODE button 16 19 a REC START STOP button 17 19 s DUBBING button 18 Continued d CD REC START button 18 19 f TAPE A B button 16 g CLOCK TIMER button 9 20 22 h SET button 9 12 20 22 j 7 stop button 13 19 k TUNING buttons 12 1 fast left fast right buttons 11 14 16 l SEA CONTROL button 11 PROGRAM RANDOM button 14 15 18 z EDIT button 19 x REPEAT but...

Страница 8: ...Pressing this button also turns on the unit 8 FADE MUTING button 10 9 AUX button 9 Pressing this button also turns on the unit p POWER button 9 q SLEEP button 22 w Number buttons 12 14 e FM MODE button 12 r forward search fast right button 14 16 t CD 8 button 9 13 Pressing this button also turns on the unit y 7 stop button 13 19 u FM AM button 9 12 Pressing this button also turns on the unit i VOL...

Страница 9: ...ame DO NOT leave the batteries in the battery compartment when you are not going to use the remote control for an extended period of time Otherwise it will be damaged from battery leakage R6 SUM 3 AA 15F Continued 2 Connecting Antennas FM antenna 1 Attach the FM antenna to the FM 75 Ω COAXIAL terminal 2 Extend the FM antenna 3 Fasten it up in the position which gives you the best reception then fi...

Страница 10: ...ouch any other terminals and connecting cords Keep the antennas away from metallic parts of the unit connecting cords and the AC power cord AM antenna Vinyl covered wire not supplied AM loop antenna supplied Connecting Speakers Blue Speaker cord blue black 1 2 3 COAXIAL ANTENNA AM LOOP FM 75 AM EXT 2 3 1 To right speaker To left speaker Black Black Red Speaker cord red black Speaker cord blue blac...

Страница 11: ...he other equipment remove the protective plug from the terminal Audio equipment with an optical digital input Protective plug Audio video equipment 1 Press and hold the clamp of the speaker terminal on the rear of the unit 2 Insert the end of the speaker cord into the terminal For MX J700 Match the polarity colors of the speaker terminals Blue to blue and black to black Red to red and black to bla...

Страница 12: ...ANCEL The hour digits start flashing again DAILY Canceled ON TIME ON TIME Clock setting The hour digits start flashing REC 4 Press 4 or to adjust the minute then press SET To check the clock time Press DISPLAY while playing any source Each time you press the button the source indication and the clock time alternate on the display To adjust the clock again If you have adjusted the clock before you ...

Страница 13: ...justed in 32 steps MIN VOL 1 VOL 30 and MAX When using the remote control press VOLUME to increase the volume or press VOLUME to decrease it For private listening Connect a pair of headphones to the PHONES jack No sound comes out of the speakers Be sure to turn down the volume before connecting or putting on headphones DO NOT turn off on standby the unit with the volume set to an extremely high le...

Страница 14: ...odes There is a time limit in doing the following steps If the setting is canceled before you finish start from step 1 again If you want to add the surround elements in your SEA pattern select one of the surround modes D CLUB HALL or STADIUM before starting the procedure below On the unit ONLY 1 Press and hold SEA CONTROL until SEA CONT appears on the display 2 Adjust the SEA pattern 1 Press 4 or ...

Страница 15: ... already memorized for the tuner since the factory examined the tuner preset function before shipment This is not a malfunction You can preset the stations you want into memory by following the presetting method There is a time limit in doing the following steps If the setting is canceled before you finish start from step 1 again On the unit ONLY 1 Tune in the station you want to preset See Tuning...

Страница 16: ...sly 1 Load CDs 2 Press one of the disc number buttons CD1 CD2 and CD3 for the disc you want to play CD play starts from the first track of the selected disc Pressing CD 8 instead of the disc number buttons starts playing back if a CD is on the trays To stop during play press 7 To remove the disc press 0 for the corresponding disc tray CD playback sequence When 3 CDs are loaded on the disc trays th...

Страница 17: ... the CD player press CD 8 then 7 before going to the next step 2 Press PROGRAM RANDOM repeatedly until PROGRAM appears on the display If a program has been stored in memory the program is called up Each time you press the button CD play mode changes as follows 3 Press one of the disc number buttons CD1 CD2 and CD3 to select the disc number you want to play 4 Select a track from the CD selected in ...

Страница 18: ...ed CDs are unlocked If you try to eject CDs LOCKED appears to inform you that the Tray Lock is in use To check the program contents Before playing you can check the program contents by pressing 1 4 or on the remote control Shows the programed tracks in the programed order 1 4 Shows them in the reverse order To modify the program Before playing you can erase the programed tracks shown on the displa...

Страница 19: ... lights up like To cancel Reverse Mode press the button again so that the Reverse Mode indicator on the display lights up like When Reverse Mode is on with cassettes in both decks A and B After the reverse 2 side of the tape finishes playing the tape in the other deck starts playing Locating the Beginning of a Song Music Scan You can use Music Scan to locate the beginning of a song Music Scan sear...

Страница 20: ...onsent of the owner of copyright in the sound or video recording broadcast or cable programme and in any literary dramatic musical or artistic embodied therein The recording level is automatically set correctly so it is not affected by the VOLUME control and the SUBWOOFER VOLUME control for MX J700 ACTIVE BASS EX LEVEL control for MX J500 Thus during recording you can adjust the sound you are actu...

Страница 21: ... recording on the reverse side 2 recording will stop when recording is done only on one side reverse of the tape To cancel Reverse Mode press the button again so that the Reverse Mode indicator lights up as To record an AM station Beat Cut While recording an AM broadcast beats may be heard which are never heard when listening to the broadcast without recording it If this occurs press PROGRAM RANDO...

Страница 22: ...ble cassette of appropriate length into deck B 6 Press REVERSE MODE so that the Reverse Mode indicator lights up as Without turning on the Reverse Mode recording will stop when the front side of the tape is recorded 7 Press CD REC START The REC recording indicator lights up on the display Deck B starts recording then about 10 seconds later the CD player starts playing When the recording is done CD...

Страница 23: ...at the tape direction is correct When using the external component as the source to play set the timer equipped with the external component at the same time On the unit ONLY 1 Press CLOCK TIMER until DAILY appears on the display The DAILY Daily Timer indicator also starts flashing on the display Each time you press the button the timer setting modes change as follows DAILY Canceled ON TIME ON TIME...

Страница 24: ...hts up on the display The settings you have done are shown on the display in sequence for your confirmation If the unit is turned on when the timer on time comes Daily Timer does not work Using Recording Timer With Recording Timer you can make a tape of a radio broadcast automatically How Recording Timer actually works The unit automatically turns on tunes into the specified station sets the volum...

Страница 25: ... Timer is operating Sleep Timer will not work the SLEEP indicator does not go off 4 Set the on time you want the unit to turn on 1 Press 4 or to set the hour then press SET 2 Press 4 or to set the minute then press SET OFF TIME appears for 2 seconds then the unit enters off time setting mode 5 Set the off time you want the unit to turn off on standby 1 Press 4 or to set the hour then press SET 2 P...

Страница 26: ...service Troubleshooting Symptom No sound is heard Hard to listen to broadcasts because of noise The disc sound is discontinuous The disc tray does not open or close The disc does not play The cassette holders cannot be opened Impossible to record Operations are disabled Unable to operate the unit from the remote control Cause Connections are incorrect or loose Antennas are disconnected The AM loop...

Страница 27: ...eaker 70 Hz 29 000 Hz Sound pressure level Subwoofer 75 dB W m Main speaker 88 dB W m Dimensions approx 286 mm x 335 mm x 365 mm W H D 115 16 in x 131 4 in x 143 8 in Mass approx 6 3 kg 13 9 lbs each Design and specifications are subject to change without notice MX J506 MX J500 Amplifier section CA MXJ506 CA MXJ500 Output Power 120 W per channel min RMS driven into 6 Ω at 1 kHz with no more than 1...

Страница 28: ...J700 and SP MXJ700 MX J500 Consists of CA MXJ500 and SP MXJ550 COMPACT DIGITAL AUDIO COMPACT COMPONENT SYSTEM SP MXJ700 SP MXJ700 CA MXJ700 TAPE A B FADE MUTING FM MODE RM SMXJ700J REMOTE CONTROL SLEEP SOUND MODE REC START STOP TAPE A B FADE MUTING FM MODE RM SMXJ500J REMOTE CONTROL SLEEP ACTIVE BASS EX SOUND MODE REC START STOP SP MXJ550 CA MXJ500 SP MXJ550 MX J500 700 J COVER f 99 12 19 1 48 PM ...

Страница 29: ...er to the presence of important operating and maintenance servicing instructions in the literature accompanying the appliance CAUTION For U S A This equipment has been tested and found to comply with the limits for a Class B digital device pursuant to part 15 of the FCC Rules These limits are designed to provide reasonable protection against harmful interference in a residential installation This ...

Страница 30: ...aying particular attention to cords at plugs convenience receptacles and the point where they exit from the appliance 9 Cleaning The appliance should be cleaned only as recommended by the manufacturer 10 Power Lines An outdoor antenna should be located away from power lines 11 Outdoor Antenna Grounding If this appliance is provided with means to connect the outdoor antenna and outside antenna is c...

Страница 31: ... unit and the TV Keep the speakers away from the TV to avoid interference with TV DO NOT install the unit in a location near heat sources or in a place subject to direct sunlight excessive dust or vibration We would like to thank you for purchasing one of our JVC products Before operating this unit read this manual carefully and thoroughly to obtain the best possible performance from your unit and...

Страница 32: ...ing in a Preset Station 12 Playing Back CDs 13 Loading CDs 13 Playing Back the Entire Discs Continuous Play 13 Basic CD Operations 13 Programming the Playing Order of the Tracks Program Play 14 Playing at Random Random Play 15 Repeating Tracks or CDs Repeat Play 15 Prohibiting Disc Ejection Tray Lock 15 Playing Back Tapes 16 Playing Back a Tape 16 Locating the Beginning of a Song Music Scan 16 Rec...

Страница 33: ...f the Buttons and Controls Become familiar with the buttons and controls on your unit Front Panel Powered Rolling Panel Press PANEL OPEN CLOSE to open the panel To close the panel press the button again Front Panel EN01 12 MX J500 700 J f 99 12 19 1 51 PM 3 www DataSheet4U com www DataSheet4U com ...

Страница 34: ...earch forward search buttons 9 11 14 19 22 REVERSE MODE button 16 19 a REC START STOP button 17 19 s DUBBING button 18 Continued d CD REC START button 18 19 f TAPE A B button 16 g CLOCK TIMER button 9 20 22 h SET button 9 12 20 22 j 7 stop button 13 19 k TUNING buttons 12 1 fast left fast right buttons 11 14 16 l SEA CONTROL button 11 PROGRAM RANDOM button 14 15 18 z EDIT button 19 x REPEAT button...

Страница 35: ...ssing this button also turns on the unit 8 FADE MUTING button 10 9 AUX button 9 Pressing this button also turns on the unit p POWER button 9 q SLEEP button 22 w Number buttons 12 14 e FM MODE button 12 r forward search fast right button 14 16 t CD 8 button 9 13 Pressing this button also turns on the unit y 7 stop button 13 19 u FM AM button 9 12 Pressing this button also turns on the unit i VOLUME...

Страница 36: ... DO NOT leave the batteries in the battery compartment when you are not going to use the remote control for an extended period of time Otherwise it will be damaged from battery leakage R6 SUM 3 AA 15F Continued 2 Connecting Antennas FM antenna 1 Attach the FM antenna to the FM 75 Ω COAXIAL terminal 2 Extend the FM antenna 3 Fasten it up in the position which gives you the best reception then fix i...

Страница 37: ...touch any other terminals and connecting cords Keep the antennas away from metallic parts of the unit connecting cords and the AC power cord AM antenna Vinyl covered wire not supplied AM loop antenna supplied Connecting Speakers Blue Speaker cord blue black 1 2 3 COAXIAL ANTENNA AM LOOP FM 75 AM EXT 2 3 1 To right speaker To left speaker Black Black Red Speaker cord red black Speaker cord blue bla...

Страница 38: ...other equipment remove the protective plug from the terminal Audio equipment with an optical digital input Protective plug Audio video equipment 1 Press and hold the clamp of the speaker terminal on the rear of the unit 2 Insert the end of the speaker cord into the terminal For MX J700 Match the polarity colors of the speaker terminals Blue to blue and black to black Red to red and black to black ...

Страница 39: ...EL The hour digits start flashing again DAILY Canceled ON TIME ON TIME Clock setting The hour digits start flashing REC 4 Press 4 or to adjust the minute then press SET To check the clock time Press DISPLAY while playing any source Each time you press the button the source indication and the clock time alternate on the display To adjust the clock again If you have adjusted the clock before you nee...

Страница 40: ...in 32 steps MIN VOL 1 VOL 30 and MAX When using the remote control press VOLUME to increase the volume or press VOLUME to decrease it For private listening Connect a pair of headphones to the PHONES jack No sound comes out of the speakers Be sure to turn down the volume before connecting or putting on headphones DO NOT turn off on standby the unit with the volume set to an extremely high level oth...

Страница 41: ...s There is a time limit in doing the following steps If the setting is canceled before you finish start from step 1 again If you want to add the surround elements in your SEA pattern select one of the surround modes D CLUB HALL or STADIUM before starting the procedure below On the unit ONLY 1 Press and hold SEA CONTROL until SEA CONT appears on the display 2 Adjust the SEA pattern 1 Press 4 or to ...

Страница 42: ...ready memorized for the tuner since the factory examined the tuner preset function before shipment This is not a malfunction You can preset the stations you want into memory by following the presetting method There is a time limit in doing the following steps If the setting is canceled before you finish start from step 1 again On the unit ONLY 1 Tune in the station you want to preset See Tuning in...

Страница 43: ...y 1 Load CDs 2 Press one of the disc number buttons CD1 CD2 and CD3 for the disc you want to play CD play starts from the first track of the selected disc Pressing CD 8 instead of the disc number buttons starts playing back if a CD is on the trays To stop during play press 7 To remove the disc press 0 for the corresponding disc tray CD playback sequence When 3 CDs are loaded on the disc trays they...

Страница 44: ...e CD player press CD 8 then 7 before going to the next step 2 Press PROGRAM RANDOM repeatedly until PROGRAM appears on the display If a program has been stored in memory the program is called up Each time you press the button CD play mode changes as follows 3 Press one of the disc number buttons CD1 CD2 and CD3 to select the disc number you want to play 4 Select a track from the CD selected in the...

Страница 45: ...CDs are unlocked If you try to eject CDs LOCKED appears to inform you that the Tray Lock is in use To check the program contents Before playing you can check the program contents by pressing 1 4 or on the remote control Shows the programed tracks in the programed order 1 4 Shows them in the reverse order To modify the program Before playing you can erase the programed tracks shown on the display b...

Страница 46: ...ghts up like To cancel Reverse Mode press the button again so that the Reverse Mode indicator on the display lights up like When Reverse Mode is on with cassettes in both decks A and B After the reverse 2 side of the tape finishes playing the tape in the other deck starts playing Locating the Beginning of a Song Music Scan You can use Music Scan to locate the beginning of a song Music Scan searche...

Страница 47: ...ent of the owner of copyright in the sound or video recording broadcast or cable programme and in any literary dramatic musical or artistic embodied therein The recording level is automatically set correctly so it is not affected by the VOLUME control and the SUBWOOFER VOLUME control for MX J700 ACTIVE BASS EX LEVEL control for MX J500 Thus during recording you can adjust the sound you are actuall...

Страница 48: ...cording on the reverse side 2 recording will stop when recording is done only on one side reverse of the tape To cancel Reverse Mode press the button again so that the Reverse Mode indicator lights up as To record an AM station Beat Cut While recording an AM broadcast beats may be heard which are never heard when listening to the broadcast without recording it If this occurs press PROGRAM RANDOM r...

Страница 49: ... cassette of appropriate length into deck B 6 Press REVERSE MODE so that the Reverse Mode indicator lights up as Without turning on the Reverse Mode recording will stop when the front side of the tape is recorded 7 Press CD REC START The REC recording indicator lights up on the display Deck B starts recording then about 10 seconds later the CD player starts playing When the recording is done CD RE...

Страница 50: ...the tape direction is correct When using the external component as the source to play set the timer equipped with the external component at the same time On the unit ONLY 1 Press CLOCK TIMER until DAILY appears on the display The DAILY Daily Timer indicator also starts flashing on the display Each time you press the button the timer setting modes change as follows DAILY Canceled ON TIME ON TIME Cl...

Страница 51: ... up on the display The settings you have done are shown on the display in sequence for your confirmation If the unit is turned on when the timer on time comes Daily Timer does not work Using Recording Timer With Recording Timer you can make a tape of a radio broadcast automatically How Recording Timer actually works The unit automatically turns on tunes into the specified station sets the volume l...

Страница 52: ...mer is operating Sleep Timer will not work the SLEEP indicator does not go off 4 Set the on time you want the unit to turn on 1 Press 4 or to set the hour then press SET 2 Press 4 or to set the minute then press SET OFF TIME appears for 2 seconds then the unit enters off time setting mode 5 Set the off time you want the unit to turn off on standby 1 Press 4 or to set the hour then press SET 2 Pres...

Страница 53: ...vice Troubleshooting Symptom No sound is heard Hard to listen to broadcasts because of noise The disc sound is discontinuous The disc tray does not open or close The disc does not play The cassette holders cannot be opened Impossible to record Operations are disabled Unable to operate the unit from the remote control Cause Connections are incorrect or loose Antennas are disconnected The AM loop an...

Страница 54: ... Hz Main speaker 70 Hz 29 000 Hz Sound pressure level Subwoofer 75 dB W m Main speaker 88 dB W m Dimensions approx 286 mm x 335 mm x 365 mm W H D 115 16 in x 131 4 in x 143 8 in Mass approx 6 3 kg 13 9 lbs each Design and specifications are subject to change without notice MX J500 Amplifier section CA MXJ500 Output Power 120 W per channel min RMS driven into 6 Ω at 1 kHz with no more than 10 total...

Страница 55: ...e Brook NJ 07058 9641 973 396 1000 5665 Corporate Avenue Cypress CA 90630 0024 714 229 8011 13 Cummings Park Woburn MA 01801 781 376 9100 705 Enterprise Street Aurora IL 60504 8149 630 851 7855 10700 Hammerly Suite 110 Houston TX 77043 713 935 9331 890 Dubuque Avenue South San Francisco CA 94080 1804 650 871 2666 1500 Lakes Parkway Lawrenceville GA 30243 5857 770 339 2582 2969 Mapunapuna Place Hon...

Страница 56: ... or if the model number or serial number has been altered tampered with defaced or removed 2 Initial installation and installation and removal for repair 3 Operational adjustments covered in the Owner s Manual normal maintenance video and audio head cleaning 4 Damage that occurs in shipment due to act of God and cosmetic damage 5 Signal reception problems and failures due to line power surge 6 Vid...

Страница 57: ...VICTOR COMPANY OF JAPAN LIMITED 1299MWMMDWJEM EN J VC MX J500 700 J COVER f 99 12 19 1 48 PM 2 www DataSheet4U com www DataSheet4U com ...

Страница 58: ...VICTOR COMPANY OF JAPAN LIMITED 0200MWMMDWJEM EN FR J VC MX J500 506 700 C COVER 1 00 1 8 8 16 PM 2 www DataSheet4U com www DataSheet4U com ...

Страница 59: ... either on the rear bottom or side of the cabinet Retain this information for future reference Model No Serial No GVT0029 003A U US UT UX INSTRUCTIONS MANUAL DE INSTRUCCIONES INSTRUÇÕES COMPACT DIGITAL AUDIO SP MXJ550 CA MXJ500 SP MXJ550 CA MXJ500 SP MXJ550 CA MXJ500 SP MXJ550 TAPE A B FADE MUTING FM MODE RM SMXJ500U REMOTE CONTROL SLEEP ECHO SOUND MODE VOCAL MASKING REC START STOP ACTIVE BASS EX ...

Страница 60: ...ruptor la alimentación no es cortada completamente La alimentación puede ser controlada remotamente Precaução Interruptor Desconectar o cabo de alimentação para desligar a alimentação por completo Qualquer que seja a posição de ajuste do interruptor a alimentação não é completamente cortada A alimentação pode ser controlada remotamente Warnings Cautions and Others Avisos precauciones y otras notas...

Страница 61: ...choques eléctricos incendio etc 1 No extraiga los tornillos los cubiertas ni la caja 2 No exponga este aparato a la lluvia o a la humedad PRECAUÇÃO Para reduzir riscos de choques elétricos incêndio etc 1 Não remova parafusos e tampas ou desmonte a caixa 2 Não exponha este aparelho à chuva nem à umidade G 2 MX J500 U SAFETY f 99 12 23 7 11 PM 2 www DataSheet4U com www DataSheet4U com ...

Страница 62: ...debería colocar nada en las áreas y las distancias que se detallan a continuación 3 Parte inferior Coloque el aparato sobre una superficie recta Debe haber buena circulación de aire para ello coloque el aparato sobre una base a una altura mínima de 10 cm Precaução Ventilação adequada Para evitar riscos de choques elétricos e incêndios e prevenir avarias instale o aparelho como segue 1 Parte fronta...

Страница 63: ...le Evite el contacto directo con el haz 3 PRECAUCIÓN No abra la tapa superior En el interior de la unidad no existen piezas reparables por el usuario deje todo servicio técnico en manos de personal calificado 1 PRODUTO LASER CLASSE 1 2 PERIGO Olaseremiteumarediaçãoinvisívelqueéperigosa caso o aparelho esteja aberto e a trava inoperante ou danificada Evite exposição direta ao feixe dos raios 3 CUID...

Страница 64: ...een the unit and the TV Keep the speakers away from the TV to avoid interference with TV DO NOT install the unit in a location near heat sources or in a place subject to direct sunlight excessive dust or vibration We would like to thank you for purchasing one of our JVC products Before operating this unit read this manual carefully and thoroughly to obtain the best possible performance from your u...

Страница 65: ...etting Stations 12 Tuning in a Preset Station 12 Playing Back CDs 13 Loading CDs 13 Playing Back the Entire Discs Continuous Play 13 Basic CD Operations 13 Programming the Playing Order of the Tracks Program Play 14 Playing at Random Random Play 15 Repeating Tracks or CDs Repeat Play 15 Prohibiting Disc Ejection Tray Lock 15 Playing Back Tapes 16 Playing Back a Tape 16 Locating the Beginning of a ...

Страница 66: ...f the Buttons and Controls Become familiar with the buttons and controls on your unit Front Panel Powered Rolling Panel Press PANEL OPEN CLOSE to open the panel To close the panel press the button again Front Panel EN01 12 MX J500 U f 00 2 17 6 02 PM 3 www DataSheet4U com www DataSheet4U com ...

Страница 67: ... buttons 12 4 reverse search forward search buttons 9 11 14 19 21 23 s REVERSE MODE button 16 19 d REC START STOP button 17 19 f DUBBING button 18 Continued g CD REC START button 18 19 h TAPE A B button 16 j CLOCK TIMER button 9 21 23 k SET button 9 12 21 23 l 7 stop button 13 19 TUNING buttons 12 1 fast left fast right buttons 11 14 16 z SEA CONTROL button 11 x PROGRAM RANDOM button 14 15 18 c ED...

Страница 68: ...turns on the unit 9 FADE MUTING button 10 p AUX button 9 Pressing this button also turns on the unit q Standby On button 9 w SLEEP button 23 e ECHO button 20 r Number buttons 12 14 t FM MODE button 12 y forward search fast right button 14 16 u CD 8 button 9 13 Pressing this button also turns on the unit i 7 stop button 13 19 o FM AM button 9 12 Pressing this button also turns on the unit VOLUME bu...

Страница 69: ...batteries to heat or flame DO NOT leave the batteries in the battery compartment when you are not going to use the remote control for an extended period of time Otherwise it will be damaged from battery leakage R6 SUM 3 AA 15F Continued 2 Connecting Antennas FM antenna 1 Attach the FM antenna to the FM 75 Ω COAXIAL terminal 2 Extend the FM antenna 3 Fasten it up in the position which gives you the...

Страница 70: ...arts of the unit connecting cords and the AC power cord AM antenna Vinyl covered wire not supplied AM loop antenna supplied Connecting Speakers To right speaker To left speaker Black Red 1 Press and hold the clamp of the speaker terminal on the rear of the unit 2 Insert the end of the speaker cord into the terminal Match the polarity color of the speaker terminals ª to ª and to 3 Release the finge...

Страница 71: ...rds are color coded White plugs and jacks are for left audio signals and red ones for right audio signals NOW you can plug in the unit and other connected equipment FINALLY When connecting the AC power cord into a wall outlet the unit automatically starts display demonstration If the wall outlet does not match the AC plug use the supplied AC plug adaptor except for Argentina To stop the display de...

Страница 72: ... the button the source indication and the clock time alternate on the display To adjust the clock again If you have adjusted the clock before you need to press CLOCK TIMER repeatedly until the clock setting mode is selected Each time you press the button the clock timer setting modes change as follows If there is a power failure The clock loses the setting and is reset to 0 00 You need to set the ...

Страница 73: ...LEVEL control provided for this unit can maintain the richness and fullness of the bass sound while listening to any source at low volume This function only affects the playback sound but does not affect your recording Turn the ACTIVE BASS EX LEVEL control clockwise to increase the bass sound or counterclockwise to decrease it The bass sound level can be adjusted in 4 steps BASS 1 BASS 3 and MAX W...

Страница 74: ...es There is a time limit in doing the following steps If the setting is canceled before you finish start from step 1 again If you want to add the surround elements in your SEA pattern select one of the surround modes D CLUB HALL or STADIUM before starting the procedure below On the unit ONLY 1 Press and hold SEA CONTROL until SEA CONT appears on the display 2 Adjust the SEA pattern 1 Press 4 or to...

Страница 75: ...ve been already memorized for the tuner since the factory examined the tuner preset function before shipment This is not a malfunction You can preset the stations you want into memory by following the presetting method There is a time limit in doing the following steps If the setting is canceled before you finish start from step 1 again On the unit ONLY 1 Tune in the station you want to preset See...

Страница 76: ...nuously 1 Load CDs 2 Press one of the disc number buttons CD1 CD2 and CD3 for the disc you want to play CD play starts from the first track of the selected disc Pressing CD 8 instead of the disc number buttons starts playing back if a CD is on the trays To stop during play press 7 To remove the disc press 0 for the corresponding disc tray CD playback sequence When 3 CDs are loaded on the disc tray...

Страница 77: ...not the CD player press CD 8 then 7 before going to the next step 2 Press PROGRAM RANDOM repeatedly until PROGRAM appears on the display If a program has been stored in memory the program is called up Each time you press the button CD play mode changes as follows 3 Press one of the disc number buttons CD1 CD2 and CD3 to select the disc number you want to play 4 Select a track from the CD selected ...

Страница 78: ...loaded CDs are unlocked If you try to eject CDs LOCKED appears to inform you that the Tray Lock is in use To check the program contents Before playing you can check the program contents by pressing 1 4 or on the remote control Shows the programed tracks in the programed order 1 4 Shows them in the reverse order To modify the program Before playing you can erase the programed tracks shown on the di...

Страница 79: ...lay lights up like To cancel Reverse Mode press the button again so that the Reverse Mode indicator on the display lights up like When Reverse Mode is on with cassettes in both decks A and B After the reverse 2 side of the tape finishes playing the tape in the other deck starts playing Locating the Beginning of a Song Music Scan You can use Music Scan to locate the beginning of a song Music Scan s...

Страница 80: ...T It may be unlawful to record or play back copyrighted material without the consent of the copyright owner The recording level is automatically set correctly so it is not affected by the VOLUME control and the ACTIVE BASS EX LEVEL control Thus during recording you can adjust the sound you are actually listening to without affecting the recording level While recording you can hear sound modes thro...

Страница 81: ...art recording on the reverse side 2 recording will stop when recording is done only on one side reverse of the tape To cancel Reverse Mode press the button again so that the Reverse Mode indicator lights up as To record an AM station Beat Cut While recording an AM broadcast beats may be heard which are never heard when listening to the broadcast without recording it If this occurs press PROGRAM RA...

Страница 82: ...ordable cassette of appropriate length into deck B 6 Press REVERSE MODE so that the Reverse Mode indicator lights up as Without turning on the Reverse Mode recording will stop when the front side of the tape is recorded 7 Press CD REC START The REC recording indicator lights up on the display Deck B starts recording then about 10 seconds later the CD player starts playing When the recording is don...

Страница 83: ...pointing the microphone s towards the speakers When two microphones are connected turn off the On Off switch on the unused microphone If you use the following sources as the playing source for Vocal Masking you cannot get the satisfactory results Radio programs a radio signal is not as reliable as the signals coming from a tape or CD Monaural sources Poorly dubbed tapes Sources recorded with duets...

Страница 84: ...e sure that the tape direction is correct When using the external component as the source to play set the timer equipped with the external component at the same time On the unit ONLY 1 Press CLOCK TIMER until DAILY appears on the display The DAILY Daily Timer indicator also starts flashing on the display Each time you press the button the timer setting modes change as follows DAILY Canceled ON TIM...

Страница 85: ...up on the display The settings you have done are shown on the display in sequence for your confirmation If the unit is turned on when the timer on time comes Daily Timer does not work Using Recording Timer With Recording Timer you can make a tape of a radio broadcast automatically How Recording Timer actually works The unit automatically turns on tunes into the specified station sets the volume le...

Страница 86: ...on time you want the unit to turn on 1 Press 4 or to set the hour then press SET 2 Press 4 or to set the minute then press SET OFF TIME appears for 2 seconds then the unit enters off time setting mode 5 Set the off time you want the unit to turn off on standby 1 Press 4 or to set the hour then press SET 2 Press 4 or to set the minute then press SET The unit enters preset station selecting mode 6 S...

Страница 87: ...r a magnet Handling discs Remove the disc from its case by holding it at the edge while pressing the center hole lightly Do not touch the shiny surface of the disc or bend the disc Put the disc back in its case after use to prevent warping Be careful not to scratch the surface of the disc when placing it back in its case Avoid exposure to direct sunlight temperature extremes and moisture To clean ...

Страница 88: ...cord is not plugged in Trays are locked The disc is placed upside down Power supply from the AC power cord has been cut off while the tape was running Small tabs on the back of the cassette are removed Vocal Masking is activated The built in microprocessor may malfunction due to external electrical interference The path between the remote control and the remote sensor on the unit is blocked The ba...

Страница 89: ...al type IV 50 Hz 14 000 Hz only for playback Wow and flutter 0 15 WRMS General Power requirement AC 110 V AC 127 V AC 220 V AC 230 V AC 240 V adjustable with the voltage selector 50 Hz 60 Hz Power consumption 95 W at operation 14 W on standby Maximum power consumption for Taiwan only 360 W Dimensions approx 265 mm x 335 mm x 368 mm W H D 107 16 in x 131 4 in x 141 2 in Mass approx 9 8 kg 21 6 lbs ...

Страница 90: ...switch provided on the outside of this equipment and if different reset the voltage selector switch to prevent from damage or risk of fire electric shock IMPORTANTE para la línea de la red CA ANTES DE ENCHUFAR EL EQUIPO compruebe si la tensión de la línea de la red CA corresponde con la posición del selector de tensión situado en la parte exterior del equipo y si es diferente reajuste el selector ...

Отзывы: