background image

19

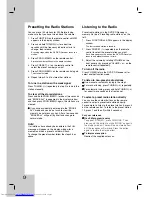
Presetting the Radio Stations

You can preset 50 stations for FM. Before tuning,
make sure that you have turned down the volume.

1. Press FUNCTION on the remote control until FM

appears in the display window.

2. Press and hold TUNING.(-/+) for about two

seconds until the frequency indication starts to
change, then release.

Scanning stops when the DVD/CD Receiver tunes in a 
station.

3. Press PROG./MEMO. on the remote control.

A preset number will flash in the display window.

4. Press PRESET (-/+) on the remote control to

select the preset number you want.

5. Press PROG./MEMO. on the remote control again.

The station is stored. 

6. Repeat steps 3 to 6 to store other stations.

To tune in a station with a weak signal 

Press TUNING.(-/+) repeatedly in step 2 to tune in the
station manually.

To clear all the stored stations 

Press and hold PROG./MEMO. for about two seconds
and “ERASE ALL” is appeared in the display window
and then press PROG./MEMO. again, the stations are
cleared.

If you have accidentally entered into the "ERASE
ALL" mode and you do not wish to clear the
memory, do not press any key. After a few seconds,
"ERASE ALL" will go off by itself and change to
normal mode.

Note:

If all stations have already been entered, the FULL
message will appear in the display window for a
moment and then a preset number will flash. 
To change the preset number, follow the steps 4-5 as
above.

Listening to the Radio

Preset radio stations in the DVD/CD Receiver’s
memory first (see “Presetting radio stations” on the
left).

1. Press FUNCTION until FM appears in the display

window.

The last received station is tuned in.

2. Press PRESET (-/+) repeatedly on the remote

control to select the preset station you want.

Each time you press the button, the DVD/CD Receiver
tunes in one preset station at a time.

3. Adjust the volume by rotating VOLUME on the

front panel or by pressing or - on the
remote control repeatedly.

To turn off the radio 

Press POWER to turn the DVD/CD Receiver off or
select another function mode.

To listen to non-preset radio stations 

Use manual or automatic tuning in the step 2.

For manual tuning, press TUNING.(-/+) repeatedly.

For automatic tuning, press and hold TUNING.(-/+)
for about two seconds on the front panel.

To select a preset radio station directly

You can use the number buttons on the remote
control to select a preset radio station directly.
For example, to listen to the preset station 4, press 4
on the remote control. To listen to the preset station
19, press 1 and then 9 (within 3 seconds). 

For your reference

If an FM program is noisy

To appear “STEREO”, press FM MODE.. Then
press again this button to make “MONO” appear in
the display window. There will be no stereo effect,
but the reception will improve. Press the button
again to restore the stereo effect.

To improve reception

Reorient the supplied antennas.

Содержание LVT2051-002A

Страница 1: ...SP THG50W DVD DIGITAL THEATER SYSTEM INSTRUCTIONS For Customer Use Enter below the Model No and Serial No which are located on the rear of cabinet Retain this information for future reference Model No Serial No LVT2051 001A J HT994SJ A0_BUSAJJK TUNING TUNING ...

Страница 2: ...t to Part 15 of the FCC Rules These limits are designed to provide reasonable protection against harmful interference in a residential installation This equipment generates uses and can radiate radio frequency energy and if not installed and used in accordance with the instructions may cause harmful interference to radio communications However there is no guarantee that interference will not occur...

Страница 3: ...plug has two blades and a third grounding prong The wide blade or the third prong are provided for your safety If the provided plug does not fit into your outlet consult an electrician for replacement of the obsolete outlet 10 Protect the power cord from being walked on or pinched particularly at plugs convenience receptacles and the point where they exit from the apparatus 11 Only use attachments...

Страница 4: ...11 AUDIO 12 Dynamic Range Control DRC 12 Vocal 12 HD AV Sync 12 5 1 SPEAKER SETUP 12 13 LOCK PARENTAL CONTROL 13 Initial Setting the Area Code 13 Rating 13 Password 13 Area Code 13 OTHERS 13 Operations 14 20 General Features 14 Additional Features 15 Playing an Audio CD or MP3 WMA file 16 Programmed Playback 17 Repeat Programmed Tracks 17 Erasing a Track from Program List 17 Erasing the Complete P...

Страница 5: ...nd finalized DVD R RW Audio CDs MP3 files WMA files JPEG files Screen Saver The screen saver activates when there is no operation made for approximately 5 minutes since a still picture was last displayed To cancel the screen saver push any key Notes on Discs Handling Discs Do not touch the playback side of the disc Hold the disc by the edges so that fingerprints do not get on the surface Never sti...

Страница 6: ...early visible on the cover This number must match your unit s regional code or the disc cannot play If you try to play a DVD with a different regional code from your player the message Check Regional Code appears on the TV screen Notes on Copyrights It is forbidden by law to copy broadcast show broadcast via cable play in public or rent copyrighted material without permission This product features...

Страница 7: ...hen press repeatedly to select other function g X X PAUSE Pause playback FM MODE This will change the tuner from stereo to mono and usually improve the reception h SKIP Returns to the beginning of current chapter or track or go to the previous chapter or track SCAN During playback press and hold this button repeatedly to select the required scan speed TUNING Tunes in the desired radio station i SK...

Страница 8: ... the front panel during in power on status RETURN Press to move back wards in the menu TOP MENU If the current DVD title has a menu the title menu appears on the screen Otherwise the disc menu may appear MENU Accesses the menu on a DVD disc SET UP Accesses or removes setup menu DISPLAY Accesses On Screen display b B v V left right up down Selects an option in the menu ENTER Acknowledges the menu s...

Страница 9: ...IDEO IN jack on the TV using the video cable V Component Video connection Connect the COMPONENT VIDEO OUT jacks from the DVD CD Receiver to the corresponding jacks on the TV using an Y PB PR cable C If your television is a high definition or digital ready television you may take advantage of the DVD CD Receiver s progressive scan output for the highest video resolution If your TV does not accept y...

Страница 10: ...ical output of DVD Player or Digital Device etc to the OPTICAL IN connector AUDIO IN connection D Connect a output of portable device MP3 or PMP etc to the AUDIO input connector OPTICAL OUT VIDEO OUT IN AUDIO L AUDIO R Rear of DVD CD Receiver O A Auxiliary device DVD Player or Digital Device etc D Portable device To AUDIO OUT To AUDIO IN not supplied not supplied ...

Страница 11: ...e the problem turn off the unit and then turn it on again When you connect a HDMI or DVI compatible device make sure of the following Try switching off the HDMI DVI device and this unit Next switch on the HDMI DVI device and leave it for around 30 seconds then switch on this unit The connected device s video input is set correctly for this unit The connected device is compatible with 720X576i 480i...

Страница 12: ... on the speakers Caution The left and right speakers can be installed on a wall When installing the speakers on a wall be sure to have the speakers installed by qualified personnel DO NOT install the speakers on the wall by yourself to avoid unexpected damage from them falling off the wall due to incorrect installation or weakness in wall structure Care must be taken in selecting a location for sp...

Страница 13: ... set a language for the subtitles and the Setup menu among other things For details on each Setup menu item see pages 10 to 13 OSD Initial language settings When the POWER is turned on for the first time the unit need to set the menu language Follow the descriptions below after the display connections After OSD Initial language setting to set Area code see page 13 1 Press POWER to turn the unit on...

Страница 14: ... the audio track disc audio subtitles and the disc menu Original Refers to the original language in which the disc was recorded Other To select another language press numeric buttons and then ENTER to enter the corresponding 4 digit number according to the language code list on the page 21 If you enter the wrong language code press CLEAR DISPLAY TV Aspect 4 3 Select when a standard 4 3 TV is conne...

Страница 15: ...time to audio signal for simultaneous AV signal transmission Delay time could be set up with 10msec unit 0 300ms Delay time is different according to each TV Brand So you need to adjust optimal delay time complying with your TV 5 1 Speaker Setup Make the following settings for the built in 5 1 channel surround decoder 1 Press ENTER and the 5 1 Speaker Setup menu appears 2 Use b B to select the des...

Страница 16: ... and rating eight 8 is the least restrictive Unlock If you select unlock parental control is not active and the disc plays in full 4 Press ENTER to confirm your rating selection then press SETUP to exit the menu Password You can enter or change password 1 Select Password on the LOCK menu and then press B 2 Follow the step 2 as shown above Rating To change the password press ENTER when the Change o...

Страница 17: ...VD bb bbb bbbb bbbbb or BB BBB BBBB BBBBB WMA MP3 Audio CD m X2 X4 X8 or M X2 X4 X8 REPEAT During playback press REPEAT repeatedly to select a desired repeat mode DVD Video discs Chapter Title Off Audio CD MP3 WMA discs Track All Off TOP MENU If the current DVD title has a menu the title menu appears on the screen Otherwise the disc menu may appears MENU The disc menu appears on the screen SUBTITL...

Страница 18: ...lay at 1 5 times speed BX1 5 appears on the screen 2 Press PLAY B again to exit Screen Saver The screen saver appears when you leave the unit in Stop mode for about five minutes To cancel the Screen Saver press any button and then operate the unit Last Scene Memory This receiver memorizes the last scene from the last disc that is viewed The last scene remains in the memory even if you remove the d...

Страница 19: ...ecord MP3 WMA files using software that cannot create a file system eg Direct CD it is impossible to playback MP3 WMA files We recommend that you use Easy CD Creator which creates an ISO 9660 file system File names should have a maximum of 8 letters and must incorporate an mp3 or wma extension They should not contain special letters such as l etc The total number of files on the disc should be les...

Страница 20: ...ss ENTER to start programmed playback Repeat Programmed Tracks 1 Press REPEAT when playing a disc The repeat icon appears 2 Press REPEAT to select a desired repeat mode Track repeats the current track All repeats all the tracks on programmed list Off No display does not play repeatedly Erasing a Track from Program List 1 Use v V to select the track that you wish to erase from the Program list 2 Pr...

Страница 21: ...cture 1 Press PAUSE X X during the slide show The DVD CD Receiver will now go into the PAUSE mode 2 To return to the slide show press PLAY or press PAUSE X X again Moving to another File Press SKIP or once during viewing a picture to advance to the next or previous file Rotating the picture Press v V during showing a picture to rotate the picture clockwise or counter clockwise Listening to music d...

Страница 22: ...flash To change the preset number follow the steps 4 5 as above Listening to the Radio Preset radio stations in the DVD CD Receiver s memory first see Presetting radio stations on the left 1 Press FUNCTION until FM appears in the display window The last received station is tuned in 2 Press PRESET repeatedly on the remote control to select the preset station you want Each time you press the button ...

Страница 23: ...5 seconds If you attempt to open the disc tray by pressing OPEN CLOSE key the disc tray does not open and LOCKED appears in the display window To cancel the disc ejection lock hold down the STOP key at the front panel for 5 seconds again when the main unit is turned off UNLOCKED is displayed in the display window Note Before the main unit is turned off DVD CD function should be selected Enjoying a...

Страница 24: ...elorussian 6669 Cambodian 7577 Catalan 6765 Chinese 9072 Corsican 6779 Croatian 7282 Czech 6783 Danish 6865 Dutch 7876 English 6978 Esperanto 6979 Estonian 6984 Faroese 7079 Language Code Fiji 7074 Finnish 7073 French 7082 Frisian 7089 Galician 7176 Georgian 7565 German 6869 Greek 6976 Greenlandic 7576 Guarani 7178 Gujarati 7185 Hausa 7265 Hebrew 7387 Hindi 7273 Hungarian 7285 Icelandic 7383 Indon...

Страница 25: ... level is set The disc is dirty The speakers and components are connected poorly The DVD CD Receiver is located too close to the TV Correction Plug the power cord securely into the wall outlet Insert a disc Check that the DVD or audio CD indicator in the DVD display is lit Select the appropriate video input mode on the TV so the picture from the DVD CD Receiver appears on the TV screen Connect the...

Страница 26: ...r of the DVD CD Receiver The remote control is too far from the DVD CD Receiver There is an obstacle in the path of the remote control and the DVD CD Receiver The batteries in the remote control are flat Nothing is displayed on the front panel display Correction Connect the antenna securely Adjust the antennas and connect an external antenna if necessary Tune in the station manually Preset the sta...

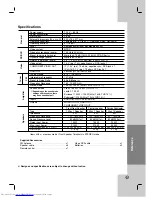
Страница 27: ...e 87 5 108 0 MHz Intermediate Frequency 10 7 MHz Signal to Noise Ratio 60 dB Mono Frequency Response 140 10 000 Hz Stereo mode 155 W 155 W 4Ω at 1 kHz THD 10 Surround mode Front 155 W 155 W THD 10 center 155 W Surround 155 W 155 W 4Ω at 1 kHz THD 10 Subwoofer 225 W 3Ω at 70 Hz THD 10 Inputs AUDIO IN OPTICAL IN AUX IN Outputs MONITOR OUT HDMI OUT COMPONENT VIDEO OUT Front Rear Speaker Center speake...

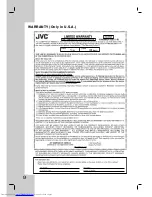
Страница 28: ...25 W WARRANTY ARRANTY Only in U S A Only in U S A ...

Страница 29: ...0409SKMLGEEGL TH G31J ...

Отзывы: