47
Saving, Deleting, and Accessing EDL Files
You can save captured EDL files to a USB drive,
delete files from the switcher to make room for more
data capture, and access EDL files stored internally
on the switcher via an FTP connection.
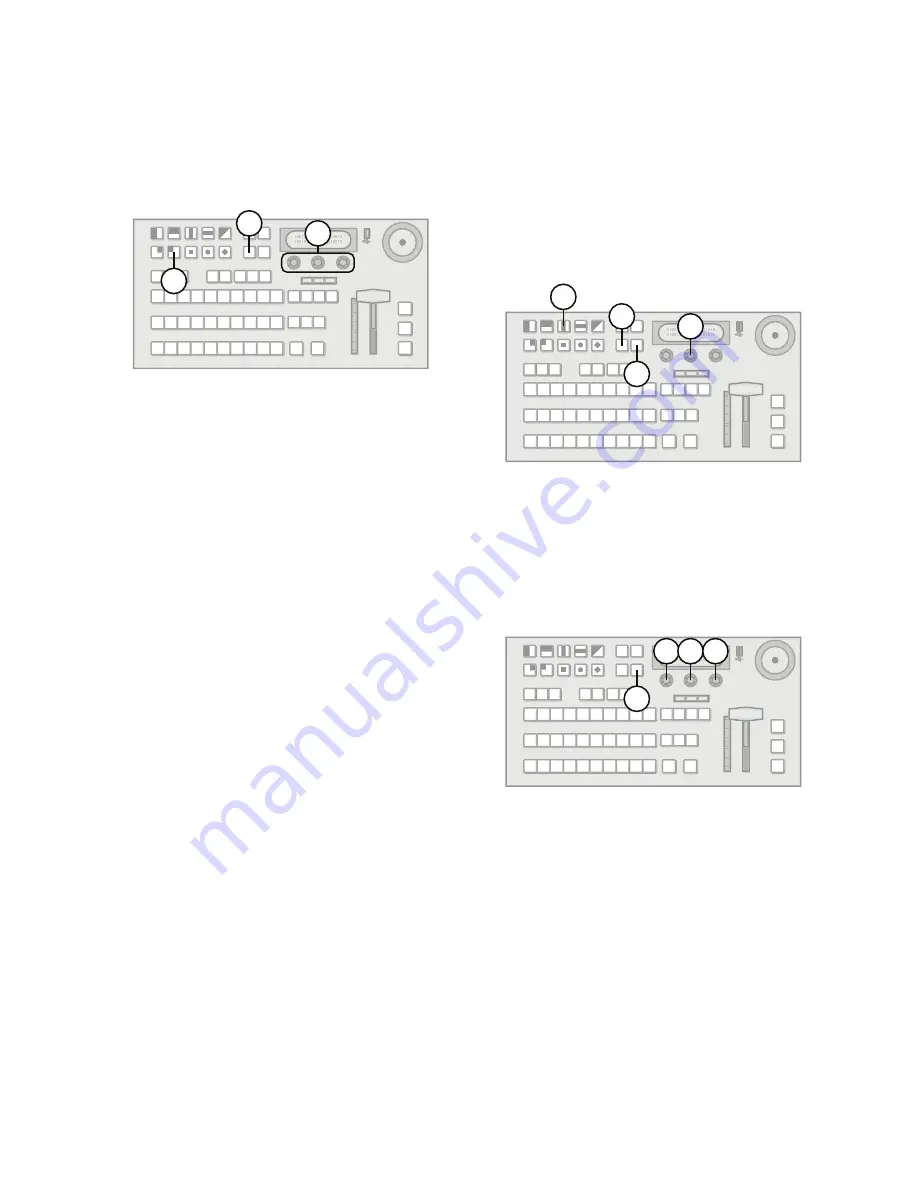
To save or delete a captured EDL file
1.
Insert a USB drive into the USB port if you are
saving EDL files.
2.
Press
MENU
.
3.
Press the
USER
Wipe Pattern button.
4.
Press the
LiveEDL
knob to display the
LiveEDL
menu.
5.
Use the left knob to select the EDL file you wish
to save or delete.
6.
Save or delete the EDL file by performing one of
the following:
• Press the
Save
knob to save the EDL file to a
USB drive connected to your switcher.
• Press the
Delete
knob to delete the EDL file.
7.
Press the
Confrm
knob to perform the save or
delete. Press the
Cancel
knob to cancel the save
or delete.
Note:
• Wait 5 seconds after inserting a USB drive into the
USB port before using it.
• If you select a file that has no captured EDL data,
the save and delete options are not available.
To Access EDL files via an FTP connection
1.
Create an FTP connection from a computer to
your switcher using the following user account:
• name:
liveedl
• password:
password
2.
Copy EDL files from the switcher to your
computer for use in your NLE suite.
3.
Close the FTP connection.
For More Information on...
• creating an FTP connection, refer to the section
“Creating an FTP Connection” on page 44.
Using Internal Timecode with EDL Files
If you are not using a Ross Video GearLite TSC-9902
LTC to Serial Converter to provide timecode
information, you may use an internally generated
base timecode that begins at 0 when EDL capture
begins.
You may specify an offset that is applied to the base
timecode to meet individual requirements.
To apply an offset to internally generated base
timecode:
1.
Ensure that the switcher Editor setting is not set
to
LTC
.
2.
Press
MENU
.
3.
Press the
SYSTEM
Wipe Pattern button.
4.
Press
NEXT
until
LivEDL Config
is displayed.
5.
Press the
LiveEDL Config
knob to display the
EDL Configuration menu.
6.
Press
NEXT
until
Hour Minute Second
is
displayed.
7.
Use the
Hour
knob to select the required hours
offset.
8.
Use the
Minute
knob to select the required
minutes offset
9.
Use the
Second
knob to select the required
seconds offset.
For More Information on...
• configuring the switcher Editor setting, refer to the
section “Editor Control” on page 19.
4-6
3
2
5
3
4
2
7
8
9
6


