EN
19
On-Screen
Displays
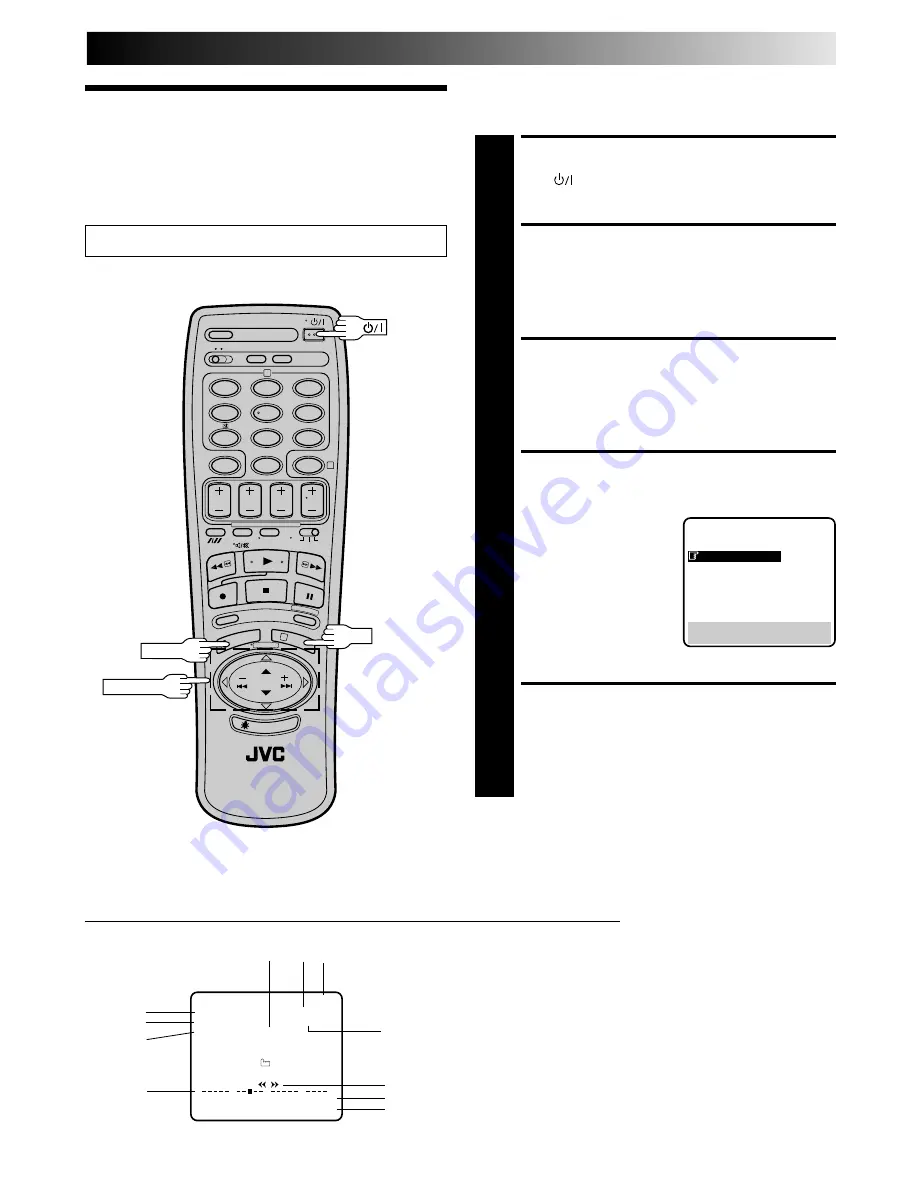
You can choose whether or not to have various operational
indicators appear on screen, by setting this function ON or OFF.
Messages appear in the selected language (
Z
pg. 6 or 7).
Turn on the TV and select the VIDEO channel (or AV mode).
TURN ON THE RECORDER
1
Press
.
ACCESS MAIN MENU
SCREEN
2
Press MENU twice.
ACCESS MODE SET
SCREEN
3
Move the highlight bar (pointer) to "MODE SET" by
pressing PUSH JOG
%fi
, then press OK.
ENABLE/DISABLE
ON-SCREEN DISPLAY
4
The default setting is
“ON”, so if you want on-
screen displays, leave the
setting as it is and go to
step 5. If you don’t want
the displays to appear,
press PUSH JOG
%fi
to
move the highlight bar
(pointer) to "O.S.D." and
press PUSH JOG to
set
“O.S.D.” to “OFF”.
RETURN TO NORMAL
SCREEN
5
Press MENU.
NOTES:
●
When you use this recorder as the player for editing, be sure
to set "O.S.D." to "OFF." before starting.
●
During playback, the operation mode indicators may be
disturbed depending on the type of tape being used.
5
MODE SET
AUTO TIMER : OFF
O. S. D.
: ON
B. E. S. T.
: ON
AV2 SELECT
: AV2
[
5∞
]
=
[ ] : ON/OFF
[MENU] : EXIT
1
2
4
5
3
6
8
0
7
9
2
4
1
3
PUSH JOG
OK
%
MENU
The superimposed indication on the TV screen tells you what the recorder is doing.
1– Operation mode indicators
2– Channel position number and station name/Aux. indicator
(AUX1, AUX2 or F-AUX)
3– Cassette loaded mark
4– Clock display
5– Current day/month/year
6– Tape direction
7– Tape position indicator (
Z
pg. 16)
8– Counter display (including Counter Memory indicator)
9– Tape remaining time indicator (
Z
pg. 22)
10– Timer warning display (
Z
pg. 29)
11– NTSC/MESECAM display (
Z
pg. 15)
q6
PR. 12 ABCD
]
21 : 00 NTSC
24. 12. 97 – WARNING–
TIMER RECORDING
TO START SOON
[CANCEL]
M –1 : 23 : 45
REMAIN 1 : 00
0
+
+
+
+
1
3
11
2
4
5
8
9
6
10
7
Содержание HR-E249E
Страница 50: ...MEMO ...
Страница 51: ...MEMO ...


