background image

21

ESP

AÑOL

6

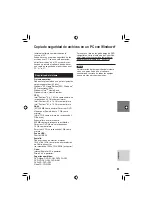
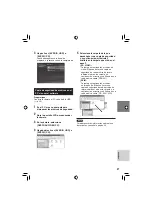
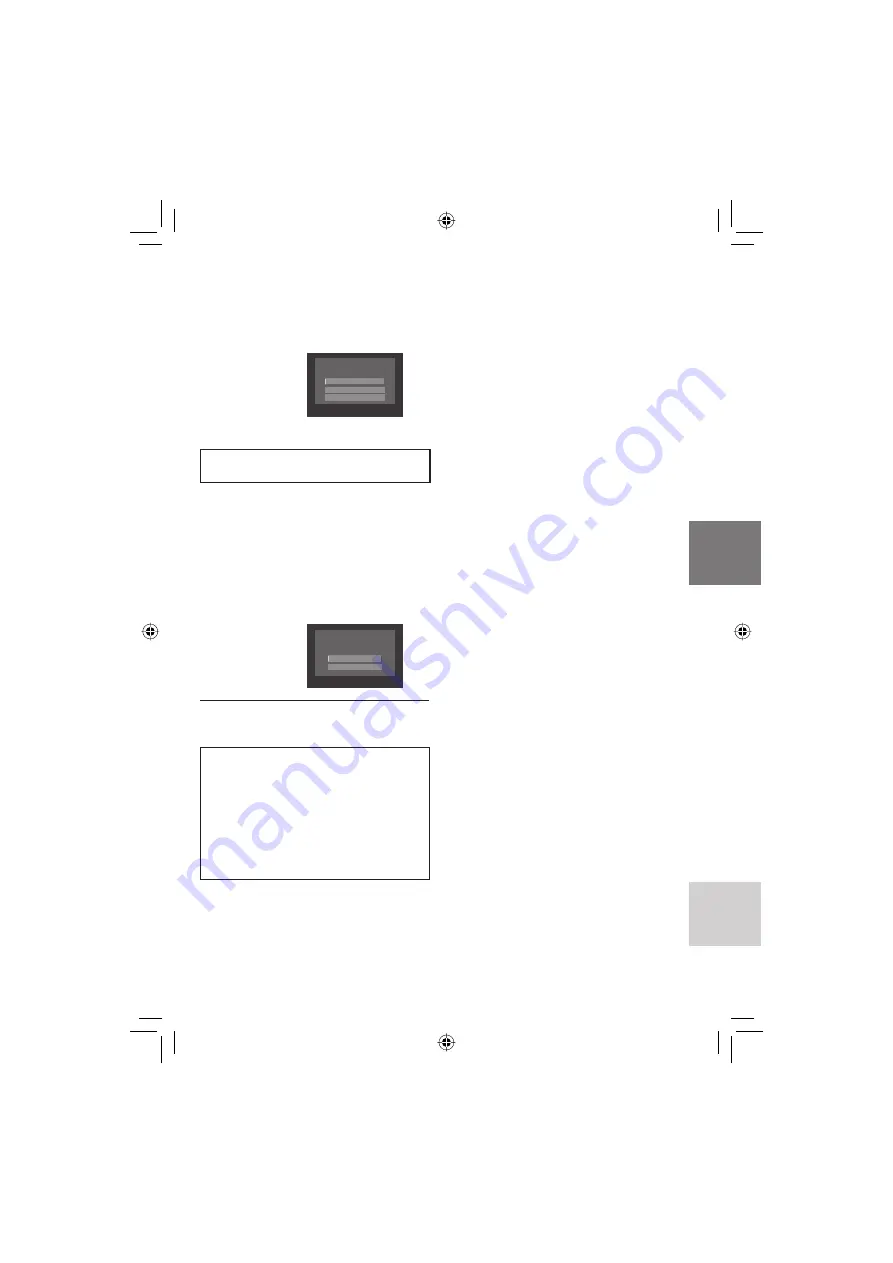
Seleccione [EJECUTAR Y  SALIR] 
(al ejecutar [ELIMINAR]) o [SÍ] (al 
ejecutar [PROTEGER]).

¿ELIMINAR? 

EJECUTAR Y SALIR 

SALIR

VOLVER 

Eliminación/protección de todos los 
archivos

Después de realizar los pasos 

1

-

2


(

 p. 20)

3

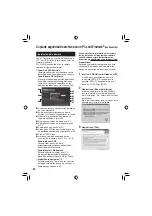
Seleccione [ELIMINAR TODO] o 
[PROT. TODO].

4

Cuando aparezca [¿ELIMINAR 
TODO?] o [¿PROTEGER TODO?], 
seleccione [SÍ].

¿ELIMINAR TODO?

(EXCEPTO ARCHIVOS PROTEGIDOS)

NO

L

 Para salir de la pantalla

Seleccione [SAL.].

L

 Para anular la protección

Seleccione el archivo protegido en el 
paso 

4

 (“Eliminación/protección de 

archivos” 

 p. 20).

L

 Para anular la protección de todos 

los archivos

1)  En el paso 

3

, seleccione [CANC.

TODO].

2)  Seleccione [SÍ].

Содержание GZ MG330 - Everio 30GB Hard Drive HDD 35x Optical Zoom Digital Camcorder BigVALUEInc

Страница 1: ...amera below Model No Serial No INSTRUCTIONS MANUAL DE INSTRUCCIONES GZ MG365 GZ MG335 GZ MG330 U U U Apreciado cliente Muchas gracias por haber adquirido esta cámara con disco duro integrado Antes de usarla lea la información de seguridad y las precauciones contenidas en las páginas 2 y 3 para garantizar un uso seguro de este producto Para futuras consultas Escriba a continuación el número de mode...

Страница 2: ...te When the equipment is installed in a cabinet or on a shelf make sure that it has sufficient space on all sides to allow for ventilation 10 cm 3 15 16 or more on both sides on top and at the rear Do not block the ventilation holes If the ventilation holes are blocked by a newspaper or cloth etc the heat may not be able to get out No naked flame sources such as lighted candles should be placed on...

Страница 3: ...nnel Servicing is required when the apparatus has been damaged in any way such as power supply cord or plug is damaged liquid has been spilled or objects have fallen into the apparatus the apparatus has been exposed to rain or moisture does not operate normally or has been dropped Remember that this camera is intended for private consumer use only Any commercial use without proper permission is pr...

Страница 4: ...R Open the lens cover S Open the LCD monitor The camera turns on automatically Video recording 2 Q Select video mode R Select recording REC mode BATT PLAY REC SELECT 5 h 5 6 m PLAY REC SELECT Playing back 3 Q Select video mode R Select playback PLAY mode to display thumbnails on the screen ...

Страница 5: ... OK button to start playback To stop playback Select L CAUTION Touch the sensors with your finger The sensors do not function if you touch them with your finger nail or with gloves on T When SET DATE TIME appears select YES within 10 seconds U Set the date and time pg 14 SET DATE TIME YES NO DATE TIME JAN 31 11 AM 07 2007 pg 6 ...

Страница 6: ... English is used for the guidance below LSelecting an item from the menu list on the menu screen MENU IMAGE SIZE GAIN UP IMAGE QUALITY BASIC SETTINGS Q R Q Slide your finger up and down on the sensor R Touch the OK button LUsing on screen buttons e g during playback pg 18 A B A To select an on screen button appearing on the left side touch the portion of the sensor next to the on screen button B T...

Страница 7: ...t again If a malfunction occurs stop using the camera immediately and consult your local JVC dealer If a problem occurs when using the microSD card take the card together with the camera for repair If one of them is not included the cause of the malfunction cannot be diagnosed and the camera cannot be repaired Recorded data may be erased while the camera is being repaired or inspected Back up all ...

Страница 8: ...n 24 Connecting the Camera to the PC 25 File Backup on the PC 26 File Backup on the PC without Using Software 27 Other Windows PC Operations 28 Getting More Use of the Software 28 Folder Structure and Extensions 29 File Backup on a Macintosh 30 System Requirements 30 Connecting the Camera to the Macintosh 30 File Backup on the Macintosh 31 Customer Support Information 32 FURTHER INFORMATION Troubl...

Страница 9: ... Use the Everio Dock You can connect cables to the connectors of the Everio dock The connection is completed when you place the camera on the dock NOTE For the connection using the S Video jack and DV jack an optional S Video cable and DV cable are needed Consult the JVC Service Center described on the sheet included in the package for details on its availability Make sure to connect the end with ...

Страница 10: ... NOTES The LCD monitor can rotate 270 Power linked operation You can also turn the camera on off by opening closing the LCD monitor during the recording mode Be careful not to cover 4 5 7 and 9 during shooting ...

Страница 11: ...mage Shooting Button SNAPSHOT pg 17 Zoom Lever W 7 T Speaker Volume Control VOL pg 18 0 Mode Switch 1 DC Jack DC pg 14 2 Audio Video Jack AV 3 USB Universal Serial Bus Jack 2 pg 22 25 and 30 4 LED Light 5 Camera Sensor Remote Sensor pg 15 6 Lens Cover 7 Lens 8 Lens Cover Switch 9 Stereo Microphone microSD Card Slot Stud Hole Tripod Mounting Socket Battery Release Button BATT pg 14 Battery Pack Mou...

Страница 12: ... 3 Iris Lock Indicator 4 Exposure Adjustment Indicator Metering Area Control Indicator 5 Shutter Speed This does not apply to the GZ MG330 model Indications on LCD Monitor During Video Recording Only 0 0 4 0 1 5 h 5 6 m Mode Indicator Counter Picture Quality B ULTRA FINE C FINE D NORMAL E ECONOMY Remaining Time pg 16 37 MREC Appears during recording pg 16 MQ Appears during record standby mode Digi...

Страница 13: ...dicator Appears when DROP DETECTION is set to OFF Volume Level Indicator Battery Indicator pg 35 Date Time pg 14 During Still Image Playback 1 0 1 0 0 9 8 JAN 20 2007 4 55PM Mode Indicator pg 18 Effect Mode Indicator Folder File Number Slide Show Playback Indicator pg 18 Selected Medium Indicator Drop Detection Indicator Appears when DROP DETECTION is set to OFF Battery Indicator pg 35 Date Time p...

Страница 14: ...g battery power See page 15 NOTES You can also use the camera with just the AC adapter Please do not pull or bend the AC adapter plug and cable This may damage the AC adapter Date Time Setting 1 Open the LCD monitor to turn on the camera 2 When SET DATE TIME appears select YES within 10 seconds SET DATE TIME YES NO If you do not select within 10 seconds the screen disappears In such case press and...

Страница 15: ...ult your nearest JVC dealer The recordable time display should only be used as a guide It is displayed in 10 minute units Preparing the Remote Control A battery is included inside the remote control at the time of purchase Remove the insulation sheet before use Beam Effective Area NOTE The transmitted beam may not be effective or may cause incorrect operation when the remote sensor is directly exp...

Страница 16: ...LTo change the picture quality Change the settings in VIDEO QUALITY from the MENU LTo change the aspect ratio of the image 16 9 4 3 Change the settings in SELECT ASPECT RATIO from the MENU Slide the mode switch to select video mode NOTES Video files are given the names MOV001 MOD to MOV009 MOD MOV00A MOD to MOV00F MOD and MOV010 MOD in order of recording After recording video for 12 consecutive ho...

Страница 17: ...halfway FINE 640 The indicator becomes green when the captured image is focused Press the SNAPSHOT button fully to take the photo picture 9 9 9 9 FINE 40 LTo view the image you just recorded Select A after shooting During the preview you can delete the image by selecting LTo change the picture quality Change the settings in IMAGE QUALITY from the MENU LTo record still images continuously Set to CO...

Страница 18: ...ene of the file O Go to the first scene of the next file L Return to the index screen J Reverse search during playback E Frame by frame playback in reverse direction during pause F Playback Q Pause K Forward search during playback G Frame by frame playback in forward direction during pause Slow playback starts when you keep touching the sensor button under E G for a while LOperations during Still ...

Страница 19: ...sed with NTSC type color television signals It cannot be used with a television of a different standard GZ MG330 model does not include the Everio dock 1 Turn on the camera and the TV 2 Set the TV to its VIDEO mode 3 Only when connecting the camera to the VCR DVD recorder Turn on the VCR DVD recorder and set it to its AUX input mode 4 Start playback on the camera pg 18 16 9 TV 4 3 TV LIf the aspec...

Страница 20: ...creen illustrations are examples when performing DELETE 1 Touch the MENU button You can skip directly to the delete menu by selecting 2 Select DELETE or PROTECT CANCEL DELETE PROTECT CANCEL PLAYBACK MPG FILE PLAYBACK PLAYLIST DELETE RECORDED FILES Deleting Protecting the Currently Displayed File After performing steps 1 2 3 Select CURRENT QUIT DELETE FILE SELECT DELETE ALL SELECT FILES ONE BY ONE ...

Страница 21: ...fter performing steps 1 2 pg 20 3 Select DELETE ALL or PROTECT ALL 4 When DELETE ALL or PROTECT ALL appears select YES DELETE ALL EXCEPT PROTECTED FILE YES NO LTo quit the screen Select QUIT LTo release protection Select the protected file in step 4 Deleting Protecting Files pg 20 LTo release protection of all files 1 In step 3 select CANCEL ALL 2 Select YES ...

Страница 22: ... copying The disc is automatically finalized so that it can be played on other devices After finalizing the disc is a play only disc so no more files can be added NOTE When using the optional DVD Burner read its instructions Connection with a DVD Burner Preparation Close the LCD monitor to turn off the camera NOTE Use the USB cable that came with the DVD burner Copying Video Files that Have Never ...

Страница 23: ...PowerCinema 1 GB or more Vista At least 1 GB 2 GB or more recommended Free hard disk space At least 550 MB for installation For creating DVD Video at least 10 GB recommended For creating VCD at least 1 GB recommended USB port USB 2 0 port Display Must be capable of displaying at least 1024 x 768 XGA in high color 16 bit or higher 1280 x 1024 SXGA or higher is recommended Miscellaneous Internet Exp...

Страница 24: ... PC onto a DVD X Creates a DVD Video Y Backs up camera files onto the PC pg 26 PowerProducer 3 NE Allows you to create discs Automatically starts from an operation in PowerCinema NE for Everio PowerDirector 5 NE Express Allows you to edit files on your PC Automatically starts from an operation in PowerCinema NE for Everio Digital Photo Navigator 1 5 Allows you to change the format of still image f...

Страница 25: ...recording medium or deleting files or folders from a recording medium can cause problems with the operation of the camera When it is necessary to delete a file from a recording medium delete it through the camera Also do not move or rename folders and files in the medium on PC AC Adapter DC Jack USB Jack To AC Outlet USB Cable USB Port 4 Select the desired language and click OK 5 Click Yes The sof...

Страница 26: ...he procedures below when disconnecting the camera or turning off the power of the camera PC Failing to do so may cause damage to the camera and PC 1 Confirm that the access charge lamp on the camera does not light or blink If the access charge lamp lights or blinks wait until it is turned off before proceeding 2 Double click the Safely Remove Hardware or Unplug or Eject Hardware icon in the status...

Страница 27: ...a select PLAYBACK ON PC 4 Double click EVERIO_HDD or EVERIO_SD icon 5 Select the folder you want to back up and drag drop it into the folder you created in step 1 SD_VIDEO Folder that contains video files If you want to back up files individually open this folder and drag drop files such as PRG001 one by one DCIM Folder that contains still image files If you want to back up files individually open...

Страница 28: ...Director 5 NE Express 1 Click Start go to All Programs select Cyber Link PowerDirector Express 2 Click PowerDirector Express User s Guide or Readme Digital Photo Navigator 1 5 The User s Guide is included on the CD ROM in PDF format 1 Load the provided CD ROM into the PC 2 Right click the CD ROM icon in MY Computer then click Open 3 Double click the DOCS folder 4 Open the Start pdf file and click ...

Страница 29: ...or Windows the file extension may not appear depending on the FOLDER option setting Recording medium X number Management information Contains the video file folders Contains the still image folders Management information for the media as a whole Video file Management information for the video files Demo video file Contains management information files of event and or DVD creation information for t...

Страница 30: ... medium on the camera do not include any other files than those recorded with the camera Do not delete move or rename the files and folders in the camera from the computer LWhen you have finished operation Always follow the procedures below when disconnecting the camera or turning the power of the camera computer off Failing to do so may cause damage to the camera and computer 1 Drag drop the reco...

Страница 31: ...the camera to the computer with the USB cable pg 30 1 On the computer create a folder to back up files into 2 Open the LCD monitor to turn on the camera 3 On the camera select PLAYBACK ON PC 4 Double click EVERIO_HDD or EVERIO_SD icon 5 Select the folder you want to back up and drag drop it into the folder you created in step 1 SD_VIDEO Folder that contains video files If you want to back up files...

Страница 32: ...c operation of your PC or questions regarding specifications or performance of the OS other applications or drivers CyberLink Telephone fax support Location Language Office hours Mon to Fri Phone Fax Germany English German French Spanish Italian 9 00 am to 5 00 pm 49 700 462 92375 49 241 70525 25 Taiwan Mandarin 9 00 am to 6 00 pm 886 2 8667 1298 ext 333 886 2 8667 1300 Japan Japanese 10 00 am to ...

Страница 33: ... battery operation time is extremely short even after the battery is fully charged Make sure to use the camera under appropriate operating temperatures The battery is worn out and needs to be replaced Please purchase a new one 36 The access charge lamp on the camera does not light during charging Charging may stop in places subject to extremely high low temperatures to protect the battery It is re...

Страница 34: ... TV set the TV s input mode or channel that is appropriate for video playback 19 During video playback the Findicator flashes The temperature of the camera is increasing If the camera continues to heat up playback may be stopped to protect the recording medium In this case turn off the power and then wait until the camera cools down Other problems Files cannot be deleted Remove protection from the...

Страница 35: ...fied to operate correctly It is also recommended to run check disc regularly on the PC providing that there is no data on the hard disk of the camera VIDEO MANAGEMENT FILE IS BROKEN TO RECORD PLAYBACK VIDEO RECOVERY IS REQUIRED RECOVER The video management file is broken Recovery is required to record or play back video files Select YES then touch the OK button to recover the video management file...

Страница 36: ... ft recommended shooting distance Language English French Spanish Portuguese Japanese Korean Traditional Chinese LFor video Audio Format SD VIDEO Recording Playback format Video MPEG 2 Audio Dolby Digital 2 ch Signal format NTSC standard Recording mode video ULTRA FINE 720 x 480 pixels 8 5 Mbps VBR FINE 720 x 480 pixels 5 5 Mbps VBR NORMAL 720 x 480 pixels 4 2 Mbps VBR ECONOMY 352 x 240 pixels 1 5...

Страница 37: ...4440 8865 9999 9999 1 GZ MG335 330 2 GZ MG365 Remote Control Power supply DC 3 V Battery life Approx 1 year depending on the frequency of use Operating distance Within 5 m 16 4 ft Operating temperature 0 C to 40 C 32 F to 104 F Dimensions W x H x D 42 mm x 14 5 mm x 91 mm 1 11 16 x 5 8 x 3 5 8 Weight Approx 30 g 0 07 lbs incl battery Design and specifications subject to change without notice Requi...

Страница 38: ...he battery every 6 months when storing the battery pack over a long period time remove from charger or powered unit when not in use as some machines use current even when switched off ATTENTION The product you have purchased is powered by a rechargeable battery that is recyclable Please call 1 800 8 BATTERY for information on how to recycle this battery Recording Medium Be sure to follow the guide...

Страница 39: ...urely and fasten the grip belt securely When using the camera with a tripod attach the camera to the tripod securely If the camera drops you may be injured and the camera may be damaged When a child uses the unit there must be parental guidance Declaration of Conformity Model Number GZ MG365U GZ MG335U GZ MG330U Trade Name JVC Responsible party JVC AMERICAS CORP Address 1700 Valley Road Wayne N J ...

Страница 40: ...les 20 DVD Burner 22 E Everio Dock 9 H Hard Disk 38 I Image Rotation 18 L LCD Monitor 10 12 38 M Macintosh 30 P Power Linked Operation 10 Protecting Files 20 R Recordable Time Number of Images 37 Recording Medium 38 Remote Control 10 15 Resetting the Camera 33 S Slide Show 18 Speaker Volume 18 Still Image 17 T TV 19 V Video 16 W Windows PC 23 ...

Страница 41: ...MEMO ...

Страница 42: ...Si los orificios de ventilación están bloqueados por un periódico o paño etc el calor no podrá salir No deberá ser colocada en el aparato ninguna fuente de llama sin protección tales como velas encendidas Cuando descarte las pilas deberá considerar los problemas ambientales y respetar estrictamente las normas locales o leyes vigentes para la eliminación de estas pilas La unidad no deberá ser expue...

Страница 43: ...e este aparato cerca del agua 6 Limpie sólo con paño seco 7 No bloquee ninguna abertura de ventilación Instale de acuerdo con las instrucciones del fabricante 8 No lo instale cerca de ninguna fuente de calor tales como radiadores calefactores cocinas u otros aparatos incluyendo amplificadores que produzcan calor 9 Sólo utilice dispositivos accesorios especificados por el fabricante 10 Utilice sólo...

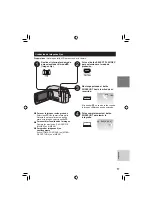
Страница 44: ...n REC Reproducción 3 Q Seleccione el modo vídeo R Seleccione el modo de reproducción PLAY para visualizar las miniaturas en la pantalla BATT Q Instale la batería Cargue la batería p 14 R Abra la cubierta del objetivo S Abra la pantalla LCD La cámara se enciende automáticamente PLAY REC SELECT 5 h 5 6 m PLAY REC SELECT ...

Страница 45: ... OK para iniciar la reproducción Para detener la reproducción Seleccione L T Cuando aparezca AJUSTE FECHA HORA seleccione SÍ antes de 10 segundos U Ajuste la fecha y la hora p 14 PRECAUCIÓNE Toque los sensores con el dedo Los sensores no funcionan si los toca con la uña o con guantes puestos AJUSTE FECHA HORA SÍ NO FECHA HORA JAN 31 11 AM 07 2007 p 6 ...

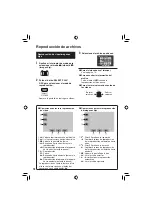
Страница 46: ...guía LSelección de un elemento de la lista de menús en la pantalla de menú MENU IMAGE SIZE GAIN UP IMAGE QUALITY BASIC SETTINGS Q R Q Deslice el dedo en el sensor arriba y abajo R Toque el botón OK LUso de los botones en pantalla ej durante la reproducción p 18 A B A Para seleccionar un botón en pantalla que aparezca en el lado izquierdo toque la parte del sensor que hay junto al botón en pantalla...

Страница 47: ...namiento deje de usar inmediatamente la cámara y consulte con su distribuidor local de JVC Si se produce un problema al utilizar la tarjeta microSD lleve la tarjeta junto con la cámara al servicio técnico Si falta alguno de los dos no se podrá diagnosticar la causa del fallo y la cámara no se podrá reparar Durante la reparación o la revisión de la cámara es posible que se borren datos grabados Ant...

Страница 48: ...ón de la cámara al PC 25 Copia de seguridad de archivos en el PC 26 Copia de seguridad de archivos en el PC sin usar el software 27 Otras operaciones de PC con Windows 28 Uso adicional del software 28 Estructura de carpetas y extensiones 29 Copia de seguridad de archivos en un Macintosh 30 Requisitos del sistema 30 Conexión de la cámara al Macintosh 30 Copia de seguridad de archivos en un Macintos...

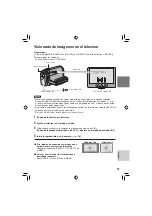
Страница 49: ...ión NOTA Para realizar una conexión con el conector S Video y el conector DV se necesita un cable S Video y un cable DV opcionales Para obtener información sobre su disponibilidad póngase en contacto con el centro de servicios JVC indicado en la hoja incluida en el embalaje Asegúrese de conectar el extremo a la cámara con un filtro de núcleo El filtro de núcleo reduce las interferencias El cable S...

Страница 50: ...talla LCD puede girar 270 Funcionamiento siempre listo para grabar La cámara también se puede encender y apagar abriendo y cerrando la pantalla LCD durante el modo de grabación Procure no tapar 4 5 7 y 9 durante la filmación ...

Страница 51: ... Palanca del zoom W 7 T Control de volumen del altavoz VOL p 18 0 Interruptor de modo 1 Conector de CC DC p 14 2 Conector de audio vídeo AV 3 Conector USB Bus serie universal 2 p 22 25 y 30 4 Luz LED 5 Sensor de la cámara Sensor remoto p 15 6 Cubierta del objetivo 7 Objetivo 8 Interruptor de la cubierta del objetivo 9 Micrófono estéreo Ranura para tarjeta microSD Orificio para perno Zócalo de fija...

Страница 52: ...bloqueo del diafragma 4 Indicador de ajuste de exposición Indicador de control del área de medición 5 Velocidad de obturación No es aplicable al modelo GZ MG330 Sólo durante la grabación de vídeo 0 0 4 0 1 5 h 5 6 m Indicador de modo Contador Calidad de imagen B ULTRAFINA C FINA D NORMAL E ECONÓMICA Tiempo restante p 16 37 MREC Aparece durante la grabación p 16 M Q Aparece durante el modo de esper...

Страница 53: ...tección de caída Aparece si SENSOR DE GRAVEDAD está ajustado en OFF Indicador de nivel de volumen Indicador de batería p 35 Fecha hora p 14 Durante la reproducción de imágenes fijas 1 0 1 0 0 9 8 JAN 20 2007 4 55PM Indicador de modo p 18 Indicador de modo de efectos especiales Número de carpeta o archivo Indicador de reproducción automática de las imágenes p 18 Indicador de soporte seleccionado In...

Страница 54: ...bién se puede usar con sólo el adaptador de CA No estire ni doble el enchufe o el cable del adaptador de CA Se podría dañar el adaptador de CA Ajuste de la fecha hora 1 Abra la pantalla LCD para encender la cámara 2 Cuando aparezca AJUSTE FECHA HORA seleccione SÍ antes de 10 segundos AJUSTE FECHA HORA SÍ NO Si no efectúa la selección antes de 10 segundos la pantalla desaparece En tal caso mantenga...

Страница 55: ...ue exista algún problema en la batería En tal caso póngase en contacto con su distribuidor JVC más cercano El tiempo de grabación restante sólo debe utilizarse a modo orientativo Se muestra en unidades de 10 minutos Preparación del mando a distancia El mando a distancia se suministra con una pila instalada Antes de su uso retire el plástico de aislamiento Área efectiva del haz de infrarrojos NOTA ...

Страница 56: ...o LPara cambiar la calidad de la imagen Cambie los ajustes en CALIDAD DE VÍDEO en el MENU LPara cambiar la relación de aspecto de la imagen 16 9 4 3 Cambie los ajustes en SELECC REL ASPECTO en el MENU Deslice el interruptor de modo para seleccionar el modo vídeo NOTAS Los archivos de vídeo reciben los nombres MOV001 MOD a MOV009 MOD MOV00A MOD a MOV00F MOD y MOV010 MOD en el orden de grabación La ...

Страница 57: ... de su recorrido FINE 640 El indicador se vuelve verde cuando la imagen capturada queda enfocada Pulse completamente el botón SNAPSHOT para tomar la fotografía 9 9 9 9 FINE 40 LPara ver la imagen recién grabada Seleccione A tras tomar la fotografía Durante la vista preliminar se puede eliminar la imagen seleccionando LPara cambiar la calidad de la imagen Cambie los ajustes en CALIDAD DE IMAGEN en ...

Страница 58: ... O Ir a la primera escena del siguiente archivo L Volver a la pantalla de índice J Búsqueda hacia atrás durante la reproducción E Reproducción fotograma a fotograma hacia atrás durante la pausa F Reproducción Q Pausa K Búsqueda hacia adelante durante la reproducción G Reproducción fotograma a fotograma hacia adelante durante la pausa La reproducción en cámara lenta se inicia al tocar de forma cont...

Страница 59: ...de usar con un televisor de otra norma El modelo GZ MG330 no incluye la base de conexión Everio 1 Encienda la cámara y el televisor 2 Ajuste el televisor en el modo de vídeo 3 Sólo cuando se conecta la cámara a la grabadora de vídeo o de DVD Encienda la grabadora de vídeo o de DVD y ajústela en el modo de entrada AUX 4 Inicie la reproducción en la cámara p 18 Televisor 16 9 Televisor 4 3 LSi la re...

Страница 60: ... ejecuta ELIMINAR 1 Toque el botón MENU Se puede acceder directamente al menú de eliminación seleccionando 2 Seleccione ELIMINAR o PROTEGER CANCELAR ELIMINAR PROTEGER CANCELAR REPR ARCHIVO MPG REPR LISTA REPROD ELIMINAR ARCHIVOS GRABADOS Eliminación protección del archivo visualizado Después de realizar los pasos 1 2 3 Seleccione ACTUAL SAL ELIMINAR SELECCIÓN ARCHIVOS ELIMINAR TODO ARCHIVOS INDIVI...

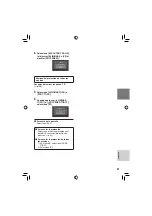
Страница 61: ...p 20 3 Seleccione ELIMINAR TODO o PROT TODO 4 Cuando aparezca ELIMINAR TODO o PROTEGER TODO seleccione SÍ ELIMINAR TODO EXCEPTO ARCHIVOS PROTEGIDOS SÍ NO LPara salir de la pantalla Seleccione SAL LPara anular la protección Seleccione el archivo protegido en el paso 4 Eliminación protección de archivos p 20 LPara anular la protección de todos los archivos 1 En el paso 3 seleccione CANC TODO 2 Selec...

Страница 62: ...ectables La cámara Se pueden copiar imágenes fijas de la unidad de disco duro a la tarjeta microSD o a la inversa en la propia cámara Grabadora de DVD CU VD3 Se pueden copiar en discos DVD archivos de vídeo fija grabados en esta cámara columna derecha PC Se pueden copiar en el PC archivos de vídeo o de imagen fija de esta cámara p 23 a 32 Uso de una grabadora de DVD para copiar archivos de la cáma...

Страница 63: ... 1 GB como mínimo se recomienda 2 GB o más Espacio libre en el disco duro 550 MB como mínimo para la instalación Para crear DVD Video se recomiendan 10 GB como mínimo Para crear VCD se recomienda 1 GB como mínimo Puerto USB Puerto USB 2 0 Pantalla Debe ser capaz de mostrar al menos 1024 x 768 XGA en color de alta resolución de 16 bits o superior se recomienda 1280 x 1024 SXGA o superior Otros Inte...

Страница 64: ... un DVD Video Y Hace una copia de seguridad de los archivos de la cámara en el PC p 26 PowerProducer 3 NE Permite crear discos Se inicia automáticamente desde una operación de PowerCinema NE for Everio PowerDirector 5 NE Express Permite editar los archivos en el PC Se inicia automáticamente desde una operación de PowerCinema NE for Everio Digital Photo Navigator 1 5 Permite cambiar el formato de l...

Страница 65: ...de acceso carga esté encendida o parpadee No apague la cámara cuando el cable USB esté conectado para evitar averías en el PC Conecte la cámara directamente al conector USB del PC no a través de un concentrador No utilice un cable alargador para cable USB Si se guardan tipos equivocados de archivos en un soporte de grabación o se eliminan archivos o carpetas de un soporte de grabación pueden produ...

Страница 66: ...entos descritos a continuación para desconectar la cámara o apagar la alimentación de la cámara y el PC De lo contrario podría dañar la cámara y el PC 1 Compruebe que la luz de acceso carga de la cámara no esté encendida ni parpadee Si la luz de acceso carga se enciende o parpadea espere a que se apague antes de seguir adelante 2 Haga doble clic en el icono Desconectar hardware con seguridad o Des...

Страница 67: ...ione la carpeta de la que desea hacer una copia de seguridad y a continuación arrástrela y suéltela en la carpeta que creó en el paso 1 SD_VIDEO Carpeta que contiene los archivos de vídeo Si desea hacer una copia de seguridad de cada archivo de forma individual abra esta carpeta y a continuación arrastre y suelte uno a uno cada archivo como PRG001 DCIM Carpeta que contiene los archivos de imagen f...

Страница 68: ...vaya a Todos los programas y seleccione CyberLink PowerDirectorExpress 2 Haga clic en PowerDirector Express Guía del usuario o Léame Digital Photo Navigator 1 5 La Guía del usuario está incluida en el CD ROM en formato PDF 1 Inserte el CD ROM suministrado en el PC 2 Haga clic con el botón secundario del ratón en el icono CD ROM de Mi PC y a continuación haga clic en Abrir 3 Haga doble clic en la c...

Страница 69: ...ón de la opción CARPETA Soporte de grabación X número Estructura de carpetas y extensiones Información de gestión Contiene las carpetas de archivos de vídeo Contiene las carpetas de imágenes fijas Información de gestión del soporte en conjunto Archivo de vídeo Información de gestión de los archivos de vídeo El archivo de vídeo con información de gestión está dañado Archivo de vídeo de demostración...

Страница 70: ...uz de acceso carga se enciende o parpadea espere a que se apague antes de seguir adelante 3 Desconecte el cable USB 4 Apague la cámara y el equipo Puede hacer una copia de seguridad de los archivos de la cámara en el equipo Requisitos del sistema Hardware Macintosh debe llevar incorporado de serie un conector USB 2 0 Sistema operativo Mac OS X v10 3 9 v10 4 2 a v10 4 10 Conexión de la cámara al Ma...

Страница 71: ...dad y a continuación arrástrela y suéltela en la carpeta que creó en el paso 1 SD_VIDEO Carpeta que contiene los archivos de vídeo Si desea hacer una copia de seguridad de cada archivo de forma individual abra esta carpeta y a continuación arrastre y suelte uno a uno cada archivo como PRG001 DCIM Carpeta que contiene los archivos de imagen fija Si desea hacer una copia de seguridad de cada archivo...

Страница 72: ...funcionamiento básico de su PC ni a preguntas relacionadas con las especificaciones o prestaciones del sistema operativo otras aplicaciones o controladores CyberLink Asistencia técnica por teléfono fax Ubicación Idioma Horario de oficina de lunes a viernes N º de teléfono N º de fax Alemania Inglés alemán francés español Italiano De 9 00 a m a 5 00 p m 49 700 462 92375 49 241 70525 25 Taiwán Manda...

Страница 73: ... 14 La cámara no se enciende o el tiempo de funcionamiento de la batería es extremadamente corto incluso después de haberla cargado por completo Procure utilizar la cámara a una temperatura de funcionamiento adecuada La batería está gastada y debe reemplazarse Deberá comprar una batería nueva 36 La luz de acceso carga de la cámara no se enciende durante la carga La carga se detendrá en lugares suj...

Страница 74: ...grabación Copie en otros dispositivos los archivos guardados y elimínelos del soporte de grabación 20 La tarjeta microSD no se puede extraer de la cámara Presione varias veces más sobre la tarjeta microSD La pantalla CREAR DVD aparece en la pantalla LCD y no se puede realizar ninguna otra operación Se está intentando realizar otra operación mientras hay conectada una grabadora de DVD que está ence...

Страница 75: ...zado También se recomienda ejecutar periódicamente la comprobación de disco en el PC siempre y cuando el disco duro de la cámara no contenga datos ARCHIVO GESTIÓN VÍDEO DAÑADO SE DEBE RECUPERAR PARA GRABAR REPRODUCIR VÍDEO RECUPERAR El archivo de gestión de vídeo está dañado Debe realizar una operación de recuperación para poder grabar o reproducir archivos de vídeo Seleccione SÍ y toque el botón ...

Страница 76: ...a de filmación recomendada Idioma Inglés francés español portugués japonés coreano chino tradicional LPara vídeo audio Formato SD VIDEO Formato de grabación reproducción Vídeo MPEG 2 Audio Dolby Digital 2 canales Formato de señal NTSC estándar Modo de grabación vídeo ULTRAFINA 720 x 480 píxeles 8 5 Mbps VBR FINA 720 x 480 píxeles 5 5 Mbps VBR NORMAL 720 x 480 píxeles 4 2 Mbps VBR ECONÓMICA 352 x 2...

Страница 77: ...1 60 GB 2 4 GB ULTRAFINA 430 860 57 FINA 640 1280 85 NORMAL 850 1700 113 ECONÓMICA 2250 4500 298 1 GZ MG335 330 2 GZ MG365 Número aproximado de imágenes almacenables para imágenes fijas Soporte de grabación Tamaño de imagen Calidad HDD Tarjeta microSD 30 GB 1 60 GB 2 256 MB 512 MB 1 GB 2 GB 4 GB 640 x 480 FINA 9999 9999 1035 2060 4135 7680 9999 640 x 480 ESTÁNDAR 9999 9999 2225 4440 8865 9999 9999...

Страница 78: ...til se debe cargar totalmente y luego descargar totalmente la batería cada seis meses cuando se guarde durante un periodo de tiempo prolongado cuando no se utilice se debe retirar del cargador o dispositivo eléctrico ya que algunas máquinas utilizan corriente incluso estando apagadas ATENCIÓN La batería que ha adquirido es reciclable Por favor comunicarse al 1 800 8 BATTERY para información sobre ...

Страница 79: ...ente cuando utilice la correa de mano balancear demasiado la bolsa de la cámara con la cámara dentro Para evitar que la unidad se caiga Fije bien la correa para hombro y ajuste bien la correa de mano Si utiliza la cámara con un trípode fije bien la cámara en el trípode Si se le cae la cámara puede herirse usted y dañarse la cámara Si un niño utiliza la unidad un adulto deberá guiarle Declaración d...

Страница 80: ...D Disco duro 38 E Eliminación de archivos 20 F Funcionamiento siempre listo para grabar 10 G Giro de las imágenes 18 Grabadora de DVD 22 I Imagen fija 17 M Macintosh 30 Mando a distancia 10 15 P Pantalla LCD 10 12 38 PC con Windows 23 Protección de archivos 20 R Reproducción automática 18 Restablecimiento de la cámara 33 S Soporte de grabación 38 T Televisor 19 Tiempo de grabación número de imágen...

Отзывы: