


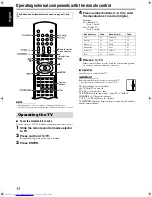

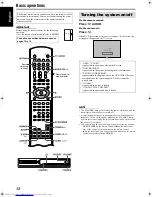

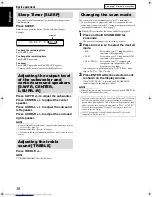

G-2
IMPORTANT FOR LASER PRODUCTS
1. CLASS 1 LASER PRODUCT
2.
CAUTION
: Do not open the top cover. There are no user
serviceable parts inside the unit; leave all servicing to
qualified service personnel.
3.
CAUTION
: Visible and invisible laser radiation when open
and interlock failed or defeated. Avoid direct exposure to
beam.
4. REPRODUCTION OF LABEL: CAUTION LABEL,
PLACED INSIDE THE UNIT.
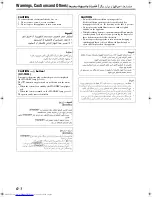
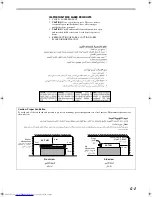
Caution: Proper Ventilation
To avoid risk of electric shock and fire and to protect from damage, place the apparatus on a level surface. The minimal clearances are
shown below:
Front view
Side view
8 cm
Wall or
obstructions
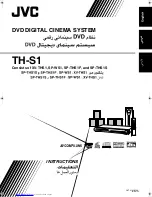
XV-THS1
3 cm
3 cm
15 cm
XV-THS1
10 cm
Front
No
obstructions
Wall or obstructions
TH-S1[UGUX]SafetyCover-f.book Page 2 Friday, August 20, 2004 1:16 PM


