background image

17

INSTRUCTIONS

1

R

4

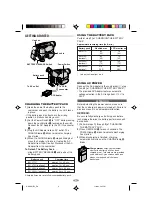
2

B

2
E

4

5

5

R

0

C

4

M

.
I

M

I

C

1

G

I

S

N

O

2

H

N
P

T

N

.

T

W

S

G

0

I

R

2

L

V
P

A

A

I

H
A

T

G

S
U

U

H

S

L

S

T

R
E

A

E

T

E

C

I

1

T

O

1

N

:

6

1

S
4

T

+

M

/

5

3

0

W

2

:

0

2
B

S

1 8

+

$

#

%

&

) q w

e r

*

(

^

Q

u

t

1 X

P

s

d

f

g

j

k

h

a

A

;

l

I

U

Y

R T

W

E

O

b

S

D

a

T

V

B

O

C

LUME

S

E

T

1

6

:

S

2

P

3

:

4

4

A

5
T

+

G


:

J

F

H


L

K


z

y

t

1 2

9

!

0

@

6
7

8

5

3 4

i

180

°

180

°

90

°

90

°

o

p

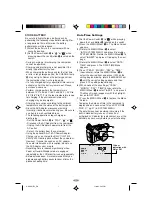
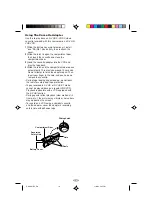
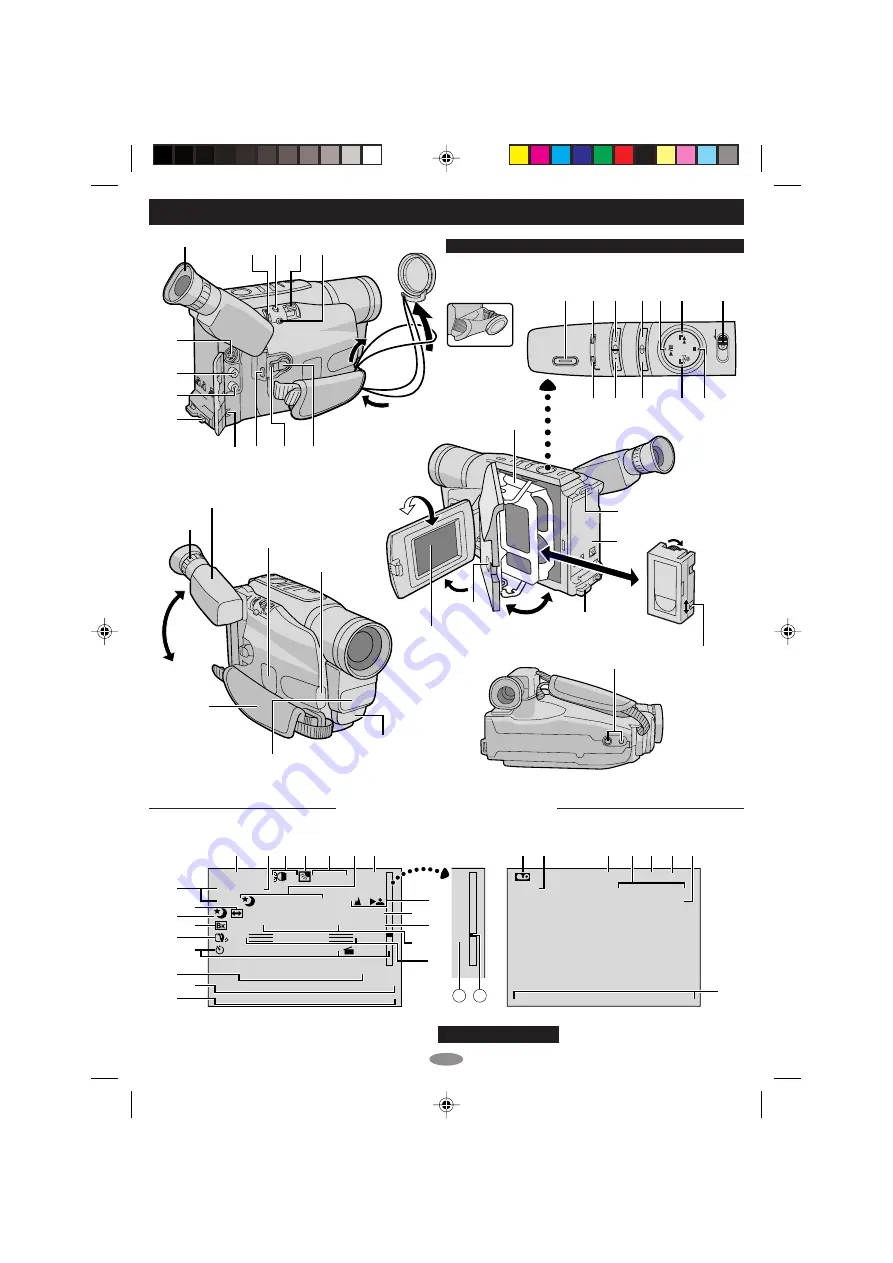
Eyepiece

During

shooting

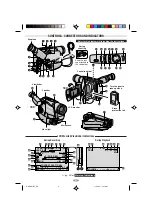
Refer to this diagram while reading the instructions.

Keep the lens
cap attached to
the camcorder.

Cassette holder

Turn the gear to
take up slack.

Erase
protection tab

LCD monitor

During Recording

During Playback

Viewfinder

Speaker


pg. 25 for


Warning Indications


 .

LCD Monitor/Viewfinder Indications

Video light

Microphone

 GR-SXM755_EN

11/15/02, 11:43 AM

17

Содержание GR-SXM755

Страница 1: ...enu so you will not have to go through the main Menu Screen Rotate the MENU Wheel 1 to select OFF and press it NOTES When a tape whose Erase Protection tab is in the position that allows recording is loaded in the camcorder demonstration is not available If you do not detach the Lens Cap you cannot see the actual changes of the Automatic Demonstration activated on the LCD monitor or viewfinder Dea...

Страница 2: ...vided cables may be equipped with one or more core filter If a cable has only one core filter the end that is closest to the filter should be connected to the camcorder AC Adapter AP V13U or AP V11U AA R6 Battery for Cassette Adapter Shoulder Strap Lens Cap Cassette Adapter C P7U GR SXM755_EN 11 8 02 3 05 PM 2 ...

Страница 3: ...LCD monitor viewfinder playback are possible any where Use the JVC BN V11U V12U V20U V400U battery packs and to recharge them or to supply power to the camcorder from an AC outlet use the provided multi voltage AC Adapter An appropriate conversion adapter may be necessary to accommodate different designs of AC outlets in different countries NOTES The rating plate serial number plate and safety cau...

Страница 4: ...ripping or splashing Do not use this equipment in a bathroom or places with water Also do not place any containers filled with water or liquids such as cosmetics or medicines flower vases potted plants cups etc on top of this unit If water or liquid is allowed to enter this equipment fire or electric shock may be caused IMPORTANT SAFETY INSTRUCTIONS 1 Read these instructions 2 Keep these instructi...

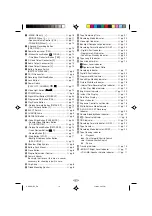
Страница 5: ... 17 Load A Tape pg 8 M Manual Focus pg 12 Menu Screen pg 18 22 Monotone Effect pg 24 Mosaic Effect pg 24 N ND Effect Mode pg 23 Nega Posi Mode pg 24 P Picture Stabilizer pg 18 Playback pg 11 Programme AE with Special Effects pg 23 Provided Accessories pg 2 Q Quick Review pg 13 R Recording Advanced Features pg 23 24 Recording Start Stop pg 11 Recording Format S VHS S VHS ET pg 20 Recording Mode pg ...

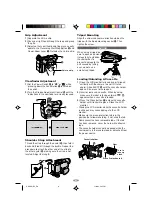
Страница 6: ...ttery pack USING THE BATTERY PACK Perform step 1 of CHARGING THE BATTERY PACK Approximate recording time unit min when the video light is on Battery pack BN V11U BN V12U optional BN V20U optional BN V400U optional Viewfinder on 80 45 80 45 135 75 315 165 LCD monitor on 75 40 75 40 120 70 285 180 USING AC POWER Connect the AC Adapter to the camcorder step 2 and 3 of CHARGING THE BATTERY PACK The pr...

Страница 7: ...pack without the camcorder However it cannot be used as an AC adapter To avoid interference with reception do not use the AC Adapter near a radio Recording time is reduced significantly when Zoom or Record Standby mode is engaged repeatedly or the LCD monitor is used repeatedly Before extended use it is recommended that you prepare enough battery packs to cover 3 times the planned shooting time Da...

Страница 8: ... removable tabs If the tab has been removed cover the hole with adhesive tape The cassette holder cannot be opened while the camcorder is in the record mode or detached from the power source Tripod Mounting Align the screw and camera direction stud on the tripod with the tripod mounting socket Q Then tighten the screw CAUTION When using a tripod be sure to open and extend its legs fully to stabili...

Страница 9: ...4 A 5 T G J F H L K z y t 1 2 9 0 6 7 8 5 3 4 i 180 180 90 90 o p CONTROLS CONNECTORS AND INDICATORS Eyepiece During shooting Refer to this diagram while reading the instructions Keep the lens cap attached to the camcorder Cassette holder Turn the gear to take up slack Erase protection tab LCD monitor During Recording During Playback Viewfinder Speaker pg 25 for Warning Indications LCD Monitor Vie...

Страница 10: ... a sensor necessary for shooting is built in here p Grip Strap pg 8 Q Tripod Mounting Socket pg 8 W Tape Remaining Time pg 21 E Recording Mode Indicator pg 20 R Video Light Indicator pg 13 T Backlight Compensation Indicator pg 12 Y Recording Format Indicator S S ET pg 20 U Digital Effect Indicator pg 24 Programme AE Indicator pg 23 Fade Wipe Standby Indicator pg 23 I Tape Length Indicator pg 21 O ...

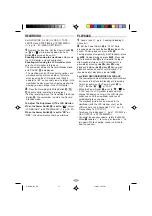
Страница 11: ...formed PLAYBACK 1 Load a tape pg 8 Loading Unloading A Cassette 2 Set the Power Switch to PLAY while pressing down the Lock Button located on the switch To start playback press 4 6 To stop playback temporarily Still Playback press 4 6 To stop playback press 5 r Press 2 e to rewind or 3 to fast forward the tape High speed picture search Shuttle Search is possible by pressing 2 e or 3 during playbac...

Страница 12: ... subject is brightened 2 To cancel Backlight Compensation press BACK LIGHT r again disappears and the brightness returns to the previous level Backlight Compensation functions in both recording modes or Using BACK LIGHT r may make the subject too bright resulting in a washed out or white image BACK LIGHT r cannot be used when the manual Exposure Control mode pg 18 is engaged Auto Manual Focus If c...

Страница 13: ...al focus pg 12 Auto Manual Focus then zoom in or out in Record mode The zoom level indicator O moves during zoom Once the zoom level indiator O reaches the top all magnification from that point is through digital processing When using Digital Zoom the quality of image may suffer To deactivate Digital Zoom set D ZOOM pg 20 to OFF in SYSTEM MENU Quick Review To check the end of the last recording 1 ...

Страница 14: ...dicator G turns green grey with a camcorder equipped with a black white viewfinder while TBC is working and white while TBC is not operative TBC does not work during Still Playback and Shuttle Search pg 11 It may take a few seconds before TBC actually starts working The picture may be distorted if the TBC mode is activated or deactivated at the edit in out points or when normal playback resumes af...

Страница 15: ...Service Center described on the sheet included in the package for details on its availability Make sure to connect the end with a core filter to the camcorder The core filter reduces interference Tape Dubbing 1 Connect the camcorder and the VCR Connections To A TV VCR Set the Power Switch to PLAY while pressing down the Lock Button located on the switch turn on the VCR s power and insert the appro...

Страница 16: ...t attempt to force the adapter open Then insert your finger in the hole and push up and remove the cassette During tape loading and unloading do not touch the reels for safety and tape protection Tapes recorded in S VHS or S VHS ET mode cannot be played back on a regular VHS VCR Playback is possible with a VCR equipped with the S VHS function During special effect playback slow motion still frame ...

Страница 17: ...UME S E T 1 6 S 2 P 3 4 4 A 5 T G J F H L K z y t 1 2 9 0 6 7 8 5 3 4 i 180 180 90 90 o p Eyepiece During shooting Refer to this diagram while reading the instructions Keep the lens cap attached to the camcorder Cassette holder Turn the gear to take up slack Erase protection tab LCD monitor During Recording During Playback Viewfinder Speaker pg 25 for Warning Indications LCD Monitor Viewfinder Ind...

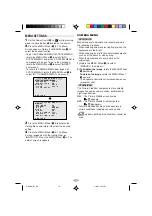
Страница 18: ...o bright When shooting on a reflective natural background such as at the beach or when skiing When the background is overly dark or the subject light 1 Rotate the MENU Wheel 1 to select MANUAL then press it 2 To brighten the image rotate the MENU Wheel 1 downward To darken the image rotate the MENU Wheel 1 upward The exposure control level increases decreases maximum 06 STABILIZER The Picture Stab...

Страница 19: ... turned off or the battery removed White balance cannot be used when the SEPIA or MONOTONE mode pg 24 Digital Effects is activated TITLE Allows you to superimpose one of eight preset titles j shows the selected title which remains until OFF is selected TITLE SETUP Adjust the settings for TITLE SIZE When LARGE is selected the title is twice enlarged vertically more than selected NORMAL Even if LARG...

Страница 20: ...ords in S VHS With a VHS cassette S ET appears and the camcorder records with S VHS picture quality which is called Super VHS ET Expansion Technology S VHS REC appears during recording OFF Records in VHS on a VHS or S VHS cassette JVC EHG Extra High Grade tapes are recommended for superior results Use S VHS tape for storing recordings for an extended period or for recording important scenes as it ...

Страница 21: ...TIME You can shoot a series of pictures each slightly different of the same object for a brief selected period of time Animation REC MODE should be set to SP Select the desired recording time and press the Recording Start Stop Button 0 after focusing on the subject Fade or wipe in out cannot be performed This function is cancelled when the power is shut off or when the cassette is ejected To use t...

Страница 22: ...ars and adjustment is completed DEMO MODE Demonstrates certain functions automatically Available when the Power Switch is set to or and DEMO MODE is set to ON factory preset Performing any operation during the demonstration stops the demonstration temporarily Set to OFF to stop completely When a tape whose erase protection tab is in the position that allows recording is loaded in the camcorder dem...

Страница 23: ...right to the lower left corner revealing the scene or wipes out from lower left to upper right leaving a black screen WINDOW Wipe Wipes in on a black screen from the centre of the screen towards the corners revealing the scene or wipe out from the corners to the centre leaving a black screen Programme AE With Special Effects 1 Set the Power Switch to while pressing down the Lock Button located on ...

Страница 24: ...h WIDE in SYSTEM MENU for a classic look MONOTONE Like black and white films your footage is shot in B W Combine this with WIDE in SYSTEM MENU for a classic look B FILTER Recorded scenes have a bluish tint R FILTER Recorded scenes have a reddish tint SOLARI The picture is recorded with an effect similar to a painting NEGA POSI The colours of a picture are reversed MOSAIC Turns recorded scenes into...

Страница 25: ...amcorder s power off before disconnecting the power source The tape will not eject The battery pack is running low If the LCD monitor is not open over 60 degrees the EJECT switch does not function Warning Indications high exhausted Displays the battery remaining power level As the battery power comes close to nil the battery indicator blinks battery power warning When the battery power is exhauste...

Страница 26: ...ts to enter the unit remove the battery pack or disconnect the power supply while the power is on leave the battery pack attached when the camcorder is not in use CAUTIONS When using the AC Adapter in areas other than the USA The provided AC Adapter features automatic voltage selection in the AC range from 110 V to 240 V USING HOUSEHOLD AC PLUG ADAPTER In case of connecting the unit s AC Adapter t...

Страница 27: ...y or apply any shocks place the camcorder with the LCD monitor on the bottom 2 To prolong service life avoid rubbing it with coarse cloth 3 Be aware of the following phenomena for LCD monitor use These are not malfunctions While using the camcorder the surface around the LCD monitor and or the back of the LCD monitor may heat up If you leave power on for a long time the surface around the LCD moni...

Страница 28: ...iris and macro control filter diameter 40 5 mm Viewfinder Electronic viewfinder with 0 5 black white CRT White balance adjustment Auto Manual adjustment LCD monitor 3 5 diagonally measured LCD panel TFT active matrix system Speaker Monaural Specifications shown are for SP mode unless otherwise indicated E O E Design and specifications subject to change without notice Connectors Video 1 V p p 75 Ω ...

Страница 29: ... 40 75 40 120 70 285 180 Batería BN V11U BN V12U opcional BN V20U opcional BN V400U opcional Tiempo de carga aprox 1 h 40 min aprox 1 h 40 min aprox 2 h 40 min aprox 5 h 10 min Los tiempos de carga son para una batería completamente descargada USO DE LA ALIMENTACIÓN DE CA Conecte el adaptador de CA en la cámara de video 墌 pasos 2 y 3 de CARGA DE LA BATERÍA El adaptador de CA suministrado presenta ...

Страница 30: ...a efectuar la carga es de 20 C a 25 C Si el ambiente es muy frío la carga puede resultar incompleta El tiempo de carga varía de acuerdo con la temperatura ambiente y el estado de la batería Ya que el adaptador de CA procesa electricidad internamente el mismo se calentará durante el uso Asegúrese de utilizarlo sólo en áreas bien ventiladas La siguiente operación interrumpirá la carga o la descarga ...

Страница 31: ...ente de alimentación Compartimiento de cassette Lengüeta de protección contra borrado Rueda dentada Girar para eliminar la distensión 0 GRABACIÓN 1 Retire el cubreobjetivo Ajuste el conmutador de alimentación en o mientras presiona el botón de bloqueo localizado en el conmutador Filmación utilizando el visor Asegúrese que el monitor LCD esté cerrado y bloqueado Filmación utilizando el monitor LCD ...

Страница 32: ...sactiva automáticamente después de 5 minutos en el modo de espera de grabación o modo de parada Para activarla otra vez ajuste el conmutador de alimentación en OFF luego en o PLAY Cuando el conmutador de alimentación esté ajustado en o PLAY y el monitor LCD está abierto en un ángulo de 60 grados o más el monitor LCD se enciende y el visor se apaga automáticamente para ahorrar energía La imagen rep...

Отзывы: