16
EN
GETTING STARTED
(cont.)
TY
QUAL I
REC SELECT
F I NE
28
1
X9
0
0
6
I MAGE S I ZE
–
–
–
N
RETUR
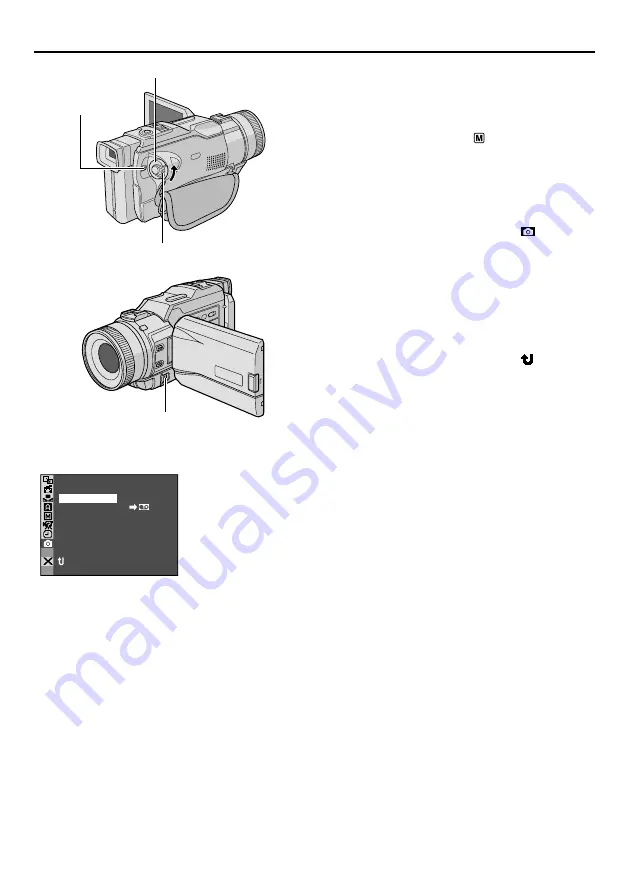
Display
Menu Screen
MENU Wheel
Power Switch
Lock Button
Power Lamp
Picture Quality/Image Size Setting
The Picture Quality/Image Size can be selected to
best match your needs. Refer to the chart on page 17
for your selection.
1
Set the Power Switch to “
” while pressing down
the Lock Button located on the switch, and open the
LCD monitor fully or pull out the viewfinder fully. The
power lamp lights and the camcorder turns on.
2
Press the MENU wheel in. The Menu Screen
appears.
3
Rotate the MENU wheel to select “
DSC” and
press it. The DSC Menu appears.
4
Rotate the MENU wheel to select “QUALITY” and
press it. The Sub Menu appears. Rotate the MENU
wheel to select the desired mode and press it.
5
Rotate the MENU wheel to select “IMAGE SIZE”
and press it. The Sub Menu appears. Rotate the
MENU wheel to select the desired mode and press it.
6
Rotate the MENU wheel to select “
RETURN”,
and press it twice. The Menu Screen closes.
NOTES:
●
With images shot in the 1600 X 1200 mode, the shutter
speed is applicable only up to 1/500 in the “SPORTS”
mode (
墌
pg. 39).
●
Changing the Image Size can only be made if the
VIDEO/MEMORY switch is in the MEMORY position.


