background image

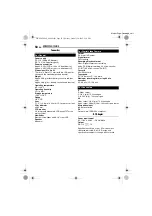
FEATURES FOR RECORDING

36 

EN

MasterPage: Left

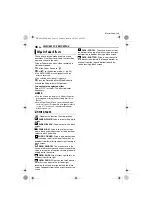
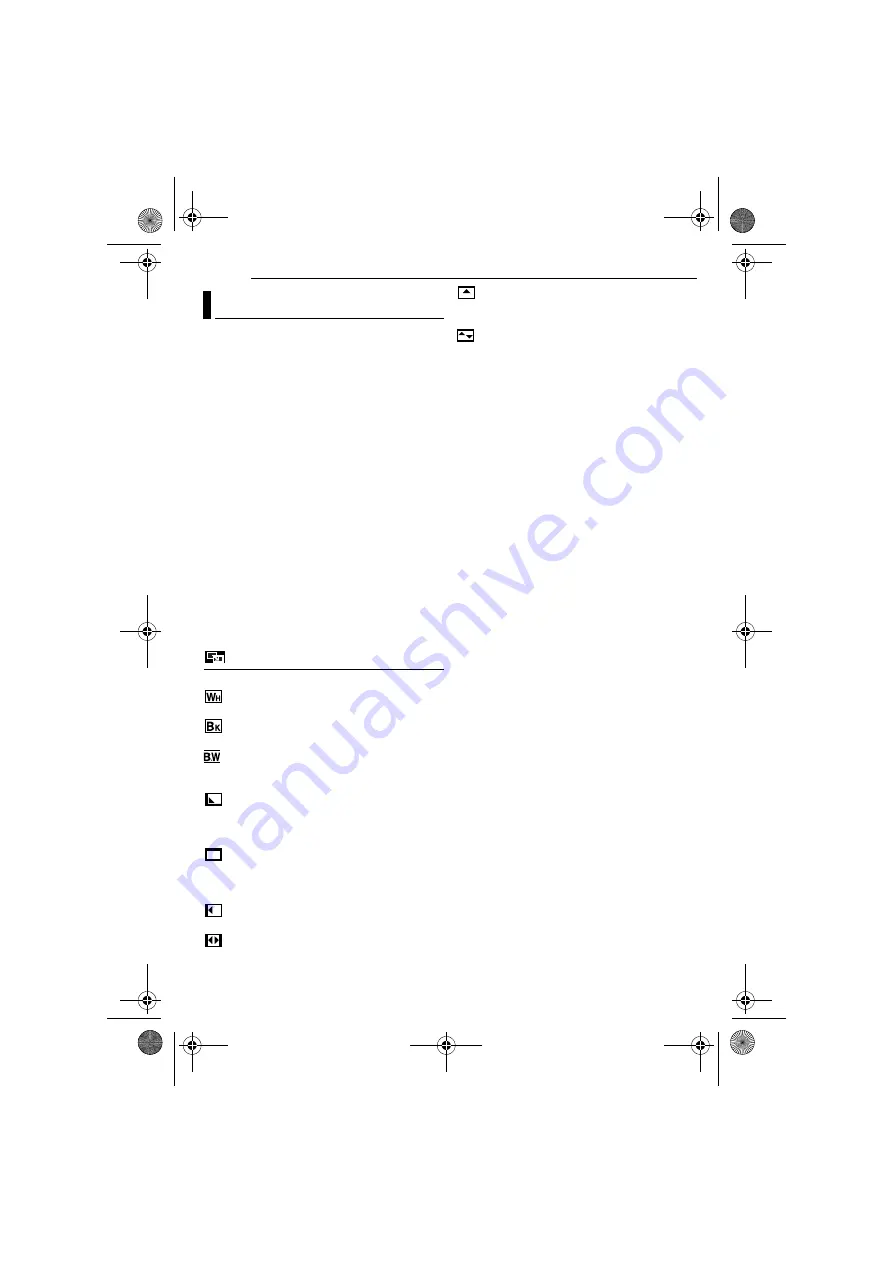
These effects let you make pro-style scene 
transitions. Use them to spice up the transition 
from one scene to the next.

Wipe or Fader works when video recording is 
started or stopped.

1

Set the Power Switch to “

M

”.

2

Set “

v

” to the desired mode. (

pg. 25)

The WIPE/FADER menu disappears and the 
effect is reserved.

The selected effect indicator appears.

3

Press the Recording Start/Stop Button to 

activate the Fade-in/out or Wipe-in/out.

To deactivate the selected effect

Select “OFF” in step 

2

. The effect indicator 

disappears.

NOTES:

You can extend the length of a Wipe or Fader by 
pressing and holding the Recording Start/Stop 
Button.

Some Wipe/Fader Effects cannot be used with 
certain modes of Program AE with special effects. 
(

pg. 37) In this case, the selected indicator 

blinks or goes out.

WIPE/FADER

OFF

: Disables the function. (Factory-preset)


FADER–WHITE

: Fade in or out with a white 

screen.


FADER–BLACK

: Fade in or out with a black 

screen.


FADER–B.W

: Fade in to a colour screen 

from a black and white screen, or fade out from 
colour to black and white.


WIPE–CORNER

: Wipe in on a black screen 

from the upper right to the lower left corner, or 
wipe out from lower left to upper right, leaving a 
black screen.


WIPE–WINDOW

: The scene starts in the 

centre of a black screen and wipes in toward the 
corners, or comes in from the corners, gradually 
wiping out to the centre.


WIPE–SLIDE

: Wipe in from right to left, or 

wipe out from left to right.


WIPE–DOOR

: Wipe in as the two halves of 

a black screen open to the left and right, 
revealing the scene, or wipe out and the black 
screen reappears from left and right to cover the 
scene.


WIPE–SCROLL

: The scene wipes in from 

the bottom to the top of a black screen, or wipes 
out from top to bottom, leaving a black screen.


WIPE–SHUTTER

: Wipe in from the centre 

of a black screen toward the top and bottom, or 
wipe out from the top and bottom toward the 
centre leaving a black screen. 

Wipe Or Fader Effects

GR-DF420PAL.book  Page 36  Tuesday, January 18, 2005  8:52 PM

Содержание GR-DF420

Страница 1: ... this product Please visit our Homepage on the World Wide Web for Digital Video Camera For Accessories http www jvc co jp english cyber http www jvc co jp english accessory INSTRUCTIONS DIGITAL VIDEO CAMERA GETTING STARTED 6 VIDEO RECORDING PLAYBACK 17 ADVANCED FEATURES 25 REFERENCES 42 TERMS To deactivate the demonstration set DEMO MODE to OFF 墌 pg 25 28 51 GR DF420PAL book Page 1 Tuesday January...

Страница 2: ... Compensation Simply pressing the BACK LIGHT button brightens the image darkened by backlight 墌 pg 34 You can also select a spot metering area so that more precise exposure compensation is available 墌 pg 34 Spot Exposure Control Data Battery You can check the battery status by simply pressing the BATT DATA button 墌 pg 13 Major Features of this Camcorder Fade in Fade out MAX TIME LCD min min FINDER...

Страница 3: ...that you disconnect the power cord from AC outlet Blue to N Neutral or Black Brown to L Live or Red CAUTION To avoid electric shock or damage to the unit first firmly insert the small end of the power cord into the AC Adapter until it is no longer wobbly and then plug the larger end of the power cord into an AC outlet CAUTIONS This camcorder is designed to be used with PAL type colour television s...

Страница 4: ...d to rain or moisture ABOVE ALL NEVER let anyone especially children push anything into holes slots or any other opening in the case this could result in a fatal electrical shock NEVER guess or take chances with electrical equipment of any kind it is better to be safe than sorry When the equipment is installed in a cabinet or on a shelf make sure that it has sufficient space on all sides to allow ...

Страница 5: ...Search 21 Connections To A TV Or VCR 21 Playback Using The Remote Control 22 ADVANCED FEATURES 25 MENUS FOR DETAILED ADJUSTMENT 25 Changing The Menu Settings 25 Recording Menus 26 Playback Menus 29 FEATURES FOR RECORDING 31 5 Second Recording 31 Night Scope 31 Snapshot For Video Recording 32 Manual Focus 32 Exposure Control 33 Iris Lock 33 Backlight Compensation 34 Spot Exposure Control 34 White B...

Страница 6: ...6 EN MasterPage Left GETTING STARTED Index 8 7 O S R Q L M N V U e d T W X Y Z a K P g f 9 0 c b 6 2 1 3 5 4 GR DF420PAL book Page 6 Tuesday January 18 2005 8 52 PM ...

Страница 7: ...M Power Switch A M PLAY OFF 墌 pg 14 N Lock Button 墌 pg 14 Connectors The connectors are located beneath the covers O S Video Input Output Connector S 墌 pg 21 38 P Microphone connector MIC 墌 pg 29 Q Digital Video Connector DV OUT i Link 墌 pg 39 40 R Audio Video Output Connector AV 墌 pg 21 38 S DC Input Connector DC 墌 pg 12 i Link refers to the IEEE1394 1995 industry specification and extensions the...

Страница 8: ... pg 26 P Tape Remaining Time 墌 pg 17 Q REC Appears during recording 墌 pg 17 PAUSE Appears during Record Standby mode 墌 pg 17 O Appears when taking Snapshot 墌 pg 32 R 5S Anim Displays the 5 Second Recording mode or Animation recording mode 墌 pg 27 S Wind Cut Indicator 墌 pg 27 T Battery Remaining Power Indicator 墌 pg 44 U Date Time 墌 pg 14 V Brightness Control Indicator LCD monitor Viewfinder 墌 pg 1...

Страница 9: ...ed your camcorder for a while the heads may be dirty We recommend periodically cleaning the video heads with a cleaning cassette optional Be sure to store your cassette tapes and camcorder in the proper environment Video heads can become dirty more easily if your cassette tapes and camcorder are stored in a dusty area Cassette tapes should be removed from the camcorder and stored in cassette cases...

Страница 10: ...f the camcorder provided cables may be equipped with one or more core filter If a cable has only one core filter the end that is closest to the filter should be connected to the camcorder Make sure to use the provided cables for connections Do not use any other cables How To Attach The Lens Cap To protect the lens attach the provided lens cap to the camcorder as shown in the illustration NOTE To c...

Страница 11: ...r reduces interference 1 Release the stoppers on both ends of the core filter 2 Run the cable through the core filter leaving approx 3 cm of cable between the cable plug and the core filter Wind the cable once around the outside of the core filter as shown in the illustration 3 Close the core filter until it clicks shut NOTES Take care not to damage the cable When connecting a cable attach the end...

Страница 12: ...ctive cap is attached to the battery pack remove it first During charging the camcorder cannot be operated Charging is not possible if the wrong type of battery is used When charging the battery pack for the first time or after a long storage period the POWER CHARGE lamp may not light In this case remove the battery pack from the camcorder then try charging again If the battery operation time rema...

Страница 13: ...if the button is pressed and hold for several seconds If COMMUNICATION ERROR appears instead of the battery status even though you tried to press BATT DATA several times there may be a problem on the battery In such a case consult your nearest JVC dealer Using AC Power Perform steps 4 5 in Charging The Battery Pack NOTE The provided AC Adapter features automatic voltage selection in the AC range f...

Страница 14: ...he tape at all times but its display can be turned on or off during playback 墌 pg 25 30 1 Perform steps 1 4 in Language Settings 墌 pg 14 2 Press or to select CLOCK ADJ and press SET The parameter for Day is highlighted 3 Press or to input the day and press SET Repeat to input the month year hour and minute 4 Press or to select BRETURN and press SET twice The Menu Screen closes Operation Mode Power...

Страница 15: ...ON When retracting the viewfinder take care not to pinch your fingers 1 Set the Power Switch to M or PLAY while pressing down the Lock Button located on the switch 2 Open the LCD monitor fully 墌 pg 18 To adjust the brightness of the viewfinder pull out the viewfinder fully and set PRIORITY to FINDER 墌 pg 25 28 3 Press MENU The Menu Screen appears 4 Press or to select n and press SET The CAMERA DIS...

Страница 16: ... you may not be able to close the cassette holder cover Do not apply force Replace the battery pack with a fully charged one or use AC power before continuing 3 Close the cassette holder cover firmly until it locks into place To protect valuable recordings Slide the erase protection tab on the back of the tape in the direction of SAVE This prevents the tape from being recorded over To record on th...

Страница 17: ...matically To turn the camcorder on again push back and pull out the viewfinder again or close and re open the LCD monitor When a blank portion is left between recorded scenes on the tape the time code is interrupted and errors may occur when editing the tape To avoid this refer to Recording From The Middle Of A Tape 墌 pg 19 To turn the beep sounds off 墌 pg 25 28 Tape Remaining Time Approximate tap...

Страница 18: ... Zoom Lever the quicker the zoom action NOTES Focusing may become unstable during Zooming In this case set the zoom while in Record Standby lock the focus by using the manual focus 墌 pg 32 then zoom in or out in Record mode Zooming is possible to a maximum of 700X or it can be switched to 15X magnification using the optical zoom 墌 pg 26 Zoom magnification of over 15X is done through Digital image ...

Страница 19: ...nt this perform Recording From The Middle Of A Tape See the right column in the following cases When shooting again after playing back a recorded tape When power shuts off during shooting When a tape is removed and re inserted during shooting When shooting using a partially recorded tape When shooting on a blank portion located partway through the tape When shooting again after shooting a scene th...

Страница 20: ...is not heard from the speaker Still Playback Pauses during video playback 1 Press 4 9 during playback 2 To resume normal playback press 4 9 again If still playback continues for more than about 3 minutes the camcorder s Stop mode is automatically engaged Shuttle Search Allows high speed search in either direction during video playback 1 During playback press 5 for forward search or 3 for reverse s...

Страница 21: ...tion If the current position is at a recorded portion the camcorder searches in the forward direction If the beginning or end of the tape is reached during Blank Search the camcorder stops automatically A blank portion which is shorter than 5 seconds of tape may not be detected The detected blank portion may be located between recorded scenes Before you start recording make sure there is no record...

Страница 22: ...tions other than date time and time code Set ON SCREEN to OFF LCD or LCD TV 墌 pg 25 30 NOTES It is recommended to use the AC Adapter as the power supply instead of the battery pack 墌 pg 13 To monitor the picture and sound from the camcorder without inserting a tape set the camcorder s Power Switch to A or M then set your TV to the appropriate input mode Make sure you adjust the TV sound volume to ...

Страница 23: ...TOP Button Functions the same as the Recording Start Stop Button on the camcorder q S SHOT Button Functions the same as SNAPSHOT on the camcorder Also available with the Power Switch set to PLAY Slow Motion Playback During normal video playback press SLOW YI or IU more than approx 2 seconds After approx 10 minutes normal playback resumes To pause Slow Motion playback press PAUSE 9 To stop Slow Mot...

Страница 24: ...ack Due to digital image processing the quality of the image may suffer Playback Special Effects Allows you to add creative effects to the video playback image CLASSIC FILM Gives recorded scenes a strobe effect MONOTONE Like classic black and white films your footage is shot in B W Used together with the Cinema mode it enhances the classic film effect SEPIA Recorded scenes have a brownish tint lik...

Страница 25: ...AY 墌 pg 29 t VIDEO 墌 pg 29 n VIDEO DISPLAY 墌 pg 30 1 Press or to select the desired function and press SET The Sub Menu appears Example m CAMERA Menu 2 Press or to select the desired parameter 3 Press SET Selection is complete Repeat the procedure if you wish to set other function menus 4 Press SET The Menu Screen returns Repeat the procedure if you wish to set other function menus 5 Press SET The...

Страница 26: ... zoom the zoom magnification will reset to 15X since digital zoom will be disengaged 60X Allows you to use the Digital Zoom By digitally processing and magnifying images zooming is possible from 15X the optical zoom limit to a maximum of 60X digital magnification 700X Allows you to use the Digital Zoom By digitally processing and magnifying images zooming is possible from 15X the optical zoom limi...

Страница 27: ...pending on the zoom position the lens may go out of focus OFF Records with no change in the screen ratio For playback on a TV with a normal screen ratio CINEMA Inserts black bands at the top and bottom of the screen The indicator appears During playback on wide screen TVs the black bands at the top and bottom of the screen are cut and the screen ratio becomes 16 9 When using this mode refer to you...

Страница 28: ...s in the following cases When the Menu Screen is closed after DEMO MODE is turned ON With DEMO MODE set to ON if there is no operation for about 3 minutes after the Power Switch is set to A or M Performing any operation during the demonstration stops the demonstration temporarily If no operation is performed for more than 3 minutes after that the demonstration will resume NOTES If a cassette is in...

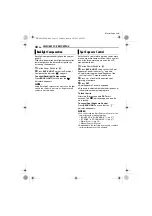
Страница 29: ... connected 墌 pg 8 墌 pg 14 Date Time Settings VIDEO Factory preset SOUND MODE and NARRATION During tape playback the camcorder detects the sound mode in which the recording was made and plays the sound back Select the type of sound to accompany your playback picture According to the menu access explanation on page 25 select SOUND MODE or NARRATION from the Menu Screen and set it to the desired para...

Страница 30: ... Of The Display When set to OFF the camcorder s display disappears When set to AUTO the date time are displayed in the following cases When playback starts The camcorder displays the date time when scenes are recorded When the date is changed during playback 墌 pg 19 Time Code ENGLISH ESPAÑOL РУССКИЙ The language setting can be changed 墌 pg 14 墌 pg 29 AUDIO LEV BRIGHT ON SCREEN OFF LCD LCD TV DATE ...

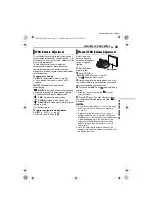
Страница 31: ...nim the 5 Second Recording mode is not available Animation recording of a few frames only is taken instead Makes dark subjects or areas even brighter than they would be under good natural lighting Although the recorded image is not grainy it may look as if it is strobing due to the slow shutter speed 1 Set the Power Switch to M 2 Set r to NIGHTSCOPE 墌 pg 37 The Night Scope indicator appears The sh...

Страница 32: ...However correct focus may not be obtained depending on the shooting condition In this case use the manual focus mode 1 Set the Power Switch to M 2 Press FOCUS The manual focus indicator appears 3 Press or to focus on a subject When the focus level cannot be adjusted any further or closer or will blink 4 Press SET Focus adjustment is complete To reset to Auto Focus Press FOCUS twice or set the Powe...

Страница 33: ...he iris contracts in well lit environments to keep too much light from entering and dilates in dim environments to allow in more light Use this function in the following situations When shooting a moving subject When the distance to the subject changes so its size in the LCD monitor or the viewfinder changes such as when the subject is backing away When shooting on a reflective natural background ...

Страница 34: ...Press BACK LIGHT twice so that the Spot Exposure Control indicator appears A spot metering area frame appears at the centre of the LCD monitor viewfinder 3 Press or to select the desired spot metering area frame 4 Press SET Spot Exposure Control is engaged Exposure is adjusted to make the brightness of the selected area most appropriate To lock the iris After step 3 press and hold SET over 2 secon...

Страница 35: ... manually when shooting under various types of lighting 1 Set the Power Switch to M 2 Select MWB in u W BALANCE menu 墌 pg 25 The indication blinks slowly 3 Hold a sheet of plain white paper in front of the subject Adjust zoom or position yourself so that the white paper fills the screen 4 Press and hold SET until begins blinking rapidly When the setting is completed resumes normal blinking 5 Press...

Страница 36: ...th a white screen FADER BLACK Fade in or out with a black screen FADER B W Fade in to a colour screen from a black and white screen or fade out from colour to black and white WIPE CORNER Wipe in on a black screen from the upper right to the lower left corner or wipe out from lower left to upper right leaving a black screen WIPE WINDOW The scene starts in the centre of a black screen and wipes in t...

Страница 37: ...peed variables Use these settings when an automatic adjustment does not work well using SPORTS mode The faster the shutter speed the darker the picture becomes Use the shutter function under good lighting conditions SPORTS Variable Shutter Speed 1 250 1 4000 This setting allows fast moving images to be captured one frame at a time for vivid stable slow motion playback The faster the shutter speed ...

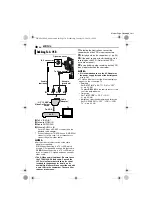
Страница 38: ... filter reduces interference 1 Following the illustrations connect the camcorder and the VCR s input connectors 2 Start playback on the camcorder 墌 pg 20 3 At the point you want to start dubbing start recording on the VCR Refer to the VCR s instruction manual 4 To stop dubbing stop recording on the VCR then stop playback on the camcorder NOTES It is recommended to use the AC Adapter as the power s...

Страница 39: ...l 5 To stop dubbing stop recording on the video unit then stop playback on this camcorder NOTES It is recommended to use the AC Adapter as the power supply instead of the battery pack 墌 pg 13 If a blank portion or disturbed image is played back on the player during dubbing the dubbing may stop so that an unusual image is not dubbed Even though the DV cable is connected correctly sometimes the imag...

Страница 40: ...ins on the PC The date time information cannot be captured into the PC Refer to the instruction manuals of the PC and Software The still images can also be transferred to a PC with a DV connector equipped capture board The system may not work properly depending on the PC or capture board you are using Connection To A Personal Computer When connecting the camcorder to a PC using a DV cable make sur...

Страница 41: ...w soundtracks are recorded separately If you dub onto a blank space on the tape the sound may be disrupted Make sure you only edit recorded areas If feedback or howling occurs during TV playback move the camcorder s microphone away from the TV or turn down the TV s volume If you change from 12 BIT to 16 BIT in mid recording and then use the tape for Audio Dubbing it is not effective from the point...

Страница 42: ...is open HClose the cassette holder cover 墌 pg 16 HClean the video heads with an optional cleaning cassette 墌 pg 48 Advanced features Focus is set to the Manual mode HSet Focus to the Auto mode 墌 pg 32 The lens is dirty or covered with condensation HClean the lens and check the focus again 墌 pg 46 The 5 Second mode is set to Anim in MANUAL Menu HSet 5S to 5S in MANUAL Menu 墌 pg 25 31 The Squeeze mo...

Страница 43: ... 25 27 this can be avoided The DV cable was plugged unplugged with power turned on HTurn the camcorder s power off and on again then operate it In places subject to low temperature images become dark due to the characteristics of the LCD monitor This is not a malfunction HAdjust the brightness and angle of the LCD monitor 墌 pg 15 18 When the LCD monitor s fluorescent light reaches the end of its s...

Страница 44: ...ower turns off automatically Appears when no tape is loaded 墌 pg 16 Appears when the erase protection tab is set to SAVE while the Power Switch is set to A or M 墌 pg 14 Appears if dirt is detected on the heads during recording Use an optional cleaning cassette 墌 pg 48 Appears if condensation occurs When this indication is displayed wait more than 1 hour until condensation disappears Appears if a t...

Страница 45: ...s occurred When an error indication appears the camcorder turns off automatically Remove the power supply battery etc and wait a few minutes for the indication to clear When it does you can resume using the camcorder If the indication remains consult your nearest JVC dealer The error indications 03 or 04 show what type of malfunction has occurred When an error indication appears the camcorder turn...

Страница 46: ...the monitor Close the LCD monitor To clean the lens Blow it with a blower brush then wipe gently with lens cleaning paper NOTES Avoid using strong cleaning agents such as benzine or alcohol Cleaning should be done only after the battery pack has been removed or other power units have been disconnected Mould may form if the lens is left dirty When using a cleaner or chemically treated cloth refer t...

Страница 47: ...pack to be warm after charging or after use Temperature Range Specifications Charging 10 C to 35 C Operation 0 C to 40 C Storage 20 C to 50 C The lower the temperature the longer recharging takes Charging times are for a fully discharged battery pack Cassettes To properly use and store your cassettes be sure to read the following cautions During use make sure the cassette bears the Mini DV mark be...

Страница 48: ...e humidity is extremely low below 35 or extremely high above 80 in direct sunlight in a closed car in summer near a heater To protect the unit DO NOT allow it to become wet drop the unit or strike it against hard objects subject it to shock or excessive vibration during transportation keep the lens directed at extremely bright objects for long periods expose the lens and viewfinder s lens to direc...

Страница 49: ...o the cool air from an air conditioner Moisture on the head drum can cause severe damage to the video tape and can lead to internal damage to the camcorder itself If malfunctioning occurs stop using the unit immediately and consult your local JVC dealer The camcorder is a microcomputer controlled device External noise and interference from a TV a radio etc might prevent it from functioning properl...

Страница 50: ...ic viewfinder with 0 16 colour LCD Speaker Monaural Format DV format SD mode Signal format PAL standard Recording Playback format Video Digital component recording Audio PCM digital recording 32 kHz 4 channel 12 BIT 48 kHz 2 channel 16 BIT Cassette Mini DV cassette Tape speed SP 18 8 mm s LP 12 5 mm s Maximum recording time using 80 min cassette SP 80 min LP 120 min S S Video output Y 1 0 V p p 75...

Страница 51: ...8 Loading A Cassette 16 M Manual Focus 32 Motor Drive Mode 32 N Night Scope 31 P Playback Sound 29 Playback Special Effects 24 Power Linked Operation 14 Program AE With Special Effects 37 Q Quick Review 19 R Recording Capacity Tape 17 Remote Control 22 S Self Recording 19 Slow Motion Playback 23 Snapshot Mode 26 Sound Mode 26 29 Speaker Volume 20 Specifications 50 Spot Exposure Control 34 T Tape S...

Страница 52: ...MasterPage BackCover EN GR DF420 Printed in Malaysia 0105FOH ID VM 2005 Victor Company of Japan Limited EK GR DF420PAL_10Cover4 fm Page 52 Tuesday January 18 2005 10 38 PM ...

Отзывы: