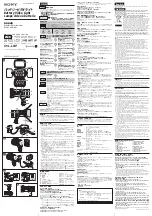
Inserting an SD Card
Insert a commercially available SD card before recording.
0
Turn off the power of this unit
before inserting or removing
an SD card.
0
To remove the SD card
Push the SD card inward once,
then pull it out straight.
NOTE
Operations are confirmed on the following SD cards.
Manufacturer
Panasonic, TOSHIBA, SanDisk
Video
A
Class 4 or higher compatible SD card (2 GB)/
Class 4 or higher compatible SDHC card (4 GB to 32 GB)/
Class 4 or higher compatible SDXC card (48 GB to 128 GB)
0
To select [MOV 1080p LPCM], [MP4 1080p] or [iFrame
720p] in [VIDEO QUALITY], use a Class 6 or higher
compliant SDHC/SDXC card.
0
To select [50p] in [SYSTEM SELECT], use a Class 6 or
higher compliant SDHC/SDXC card.
Still Image
B
SD card (256 MB to 2 GB) / SDHC card (4 GB to 32 GB) /
SDXC card (48 GB to 128 GB)
0
Using SD cards (including SDHC/SDXC cards) other than those specified
above may result in recording failure or data loss.
0
This unit is not guaranteed to operate with all SD cards, even when using the ones
specified above. Some SD cards may not work due to specification changes, etc.
0
To protect the data, do not touch the terminals of the SD card.
0
When using an SDXC card, check its compatibility with the OS of your computer
by referring to the Detailed User Guide.
Clock Setting
Label
Insert an SD card.
Open the battery
cover after
opening the LCD
monitor.
1
Turn on the power.
2
Tap [YES] when [SET DATE/TIME!]
is displayed.
3
Set the date and time.
.
2013
12
10
00
24
SET
TIME
DATE
CLOCK SETTING
0
3
and
2
are displayed when items in
[DATE] and [TIME] are tapped.
0
Set [DATE] and [TIME] by tapping
3
or
2
.
0
Repeat this step to enter [DATE] and
[TIME].
4
After setting the date and time, tap [SET].
5
Select the region where you live and
tap [SAVE].
0
Time difference between the selected
city and the GMT (Greenwich Mean
Time) is displayed.
0
Tap
0
or
1
to select the city name.
7
Содержание GC-PX100BE
Страница 109: ... ПАМЯТКА 13 ...
Страница 123: ... меморандум 13 ...