background image

SERVICE MANUAL

COPYRIGHT © 2004 Victor Company of Japan, Limited

No.MB229

2004/5

COMPACT COMPONENT SYSTEM

MB229

2004

5

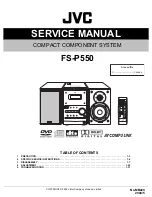
FS-P550

TABLE OF CONTENTS

1

PRECAUTION. . . . . . . . . . . . . . . . . . . . . . . . . . . . . . . . . . . . . . . . . . . . . . . . . . . . . . . . . . . . . . . . . . . . . . . . .  1-3

2

SPECIFIC SERVICE INSTRUCTIONS . . . . . . . . . . . . . . . . . . . . . . . . . . . . . . . . . . . . . . . . . . . . . . . . . . . . . .  1-6

3

DISASSEMBLY  . . . . . . . . . . . . . . . . . . . . . . . . . . . . . . . . . . . . . . . . . . . . . . . . . . . . . . . . . . . . . . . . . . . . . . .  1-7

4

ADJUSTMENT . . . . . . . . . . . . . . . . . . . . . . . . . . . . . . . . . . . . . . . . . . . . . . . . . . . . . . . . . . . . . . . . . . . . . . .  1-25

5

TROUBLESHOOTING . . . . . . . . . . . . . . . . . . . . . . . . . . . . . . . . . . . . . . . . . . . . . . . . . . . . . . . . . . . . . . . . .  1-31

Area suffix

C ------------------------- Canada

Содержание FS-P550

Страница 1: ... Company of Japan Limited No MB229 2004 5 COMPACT COMPONENT SYSTEM MB229 2004 5 FS P550 TABLE OF CONTENTS 1 PRECAUTION 1 3 2 SPECIFIC SERVICE INSTRUCTIONS 1 6 3 DISASSEMBLY 1 7 4 ADJUSTMENT 1 25 5 TROUBLESHOOTING 1 31 Area suffix C Canada ...

Страница 2: ...ce 4Ω 16Ω Tuner section FM tuning range 87 5 MHz 108 0 MHz AM MW tuning range 530 kHz 1 710 kHz Disc player section Playable disc DVD Video DVD Audio CD VCD SVCD CD R CD RW CD SVCD VCD MP3 WMA JPEG format DVD R DVD RW Video format Dynamic range 90 dB Horizontal resolution 500 lines Wow and flutter Immeasurable Speakers Speaker units HIGH 4 cm 1 5 8 in cone 1 LOW 10 cm 3 15 16 in cone 1 Impedance H...

Страница 3: ...ack control shafts etc to be sure the product is safe to operate without danger of electrical shock Do not use a line isolation transformer during this check Plug the AC line cord directly into the AC outlet Using a Leakage Current Tester measure the leakage current from each exposed metal parts of the cabinet particular ly any exposed metal part having a return path to the chassis to a known good...

Страница 4: ...n the optical pickup The tester s internal power source can easily destroy the laser diode 1 6 Handling the traverse unit optical pickup 1 Do not subject the traverse unit optical pickup to strong shocks as it is a sensitive complex unit 2 Cut off the shorted part of the flexible cable using nippers etc after replacing the optical pickup For specific details refer to the replacement procedure in t...

Страница 5: ... V for F1005 and F1006 This symbol specifies the type of fast operating fuse Precaution Pour la protection continue contre les risques d incendie remplacer uniquement par le meme type fusible 2 5 A 125 V pour les F1001 et F1003 1 25 A 125 V pour le F1004 et 6 3 A 125 V pour les F1005 et F1006 Ce symbole specifie le type de fusible a action rapide 2 5A 125V F1001 1 25A 125V F1004 2 5A 125V F1003 6 ...

Страница 6: ...1 6 No MB229 SECTION 2 SPECIFIC SERVICE INSTRUCTIONS This service manual does not describe SPECIFIC SERVICE INSTRUCTIONS ...

Страница 7: ...dy remove the two screws B attaching the side panels L R to the bottom chas sis See Fig 2 3 From the both sides of the main body release the engage ment sections a b of the side panels L R from the top panel in the direction of the arrow See Figs 3 and 4 4 Remove the side panels L R toward this side Fig 1 Fig 2 Fig 3 Fig 4 Side panel R Side panel L Rear panel A A Side panel L B B Bottom chassis Si...

Страница 8: ...s C attaching the front panel assembly See Figs 6 and 7 4 Release the two claws c and claws d to draw out the front panel assembly in the direction of the arrow See Figs 6 and 7 5 From the right side of the main body disconnect the card wire from the connector CN730 on the main board See Fig 8 6 Disconnect the wire from the connector CN270 on the main board See Fig 8 7 Remove the front panel assem...

Страница 9: ...o performing the following procedures remove the side panels L R and front panel assembly 1 From the back side of the main body remove the screw D attaching the top panel to the rear panel 2 Take out the top panel from the main body Fig 9 Top panel D Rear panel ...

Страница 10: ...the following procedures remove the side panel L 1 From the back side of the main body remove the two screws E attaching the tuner to the rear panel See Fig 10 2 Disconnect the card wire from the connector CN1 on the tuner See Fig 11 Fig 10 Fig 11 E Rear panel Card wire CN1 Tuner ...

Страница 11: ...ar panel 2 Release the engagement sections e and remove the rear panel Fig 12 3 1 6 Removing the video board See Fig 13 Prior to performing the following procedures remove the side panels L R and rear panel 1 From the forward side of the video board disconnect the card wires from connector CN300 2 Disconnect the wire to the connector CN301 on the video board Fig 13 Rear panel F e e F Video board C...

Страница 12: ...he screws H attach the wire holders with them Fig 14 3 1 8 Removing the main board See Fig 15 Prior to performing the following procedures remove the side panels L R front panel assembly top panel tuner rear panel and video board 1 From the right side of the main body remove the two screws J attaching the main board 2 Remove the main board toward this side and disconnect the connector CN200 on the...

Страница 13: ...ottom chassis be fore attaching the screw K Fig 16 3 1 10 Removing the power amplifier board See Fig 17 Prior to performing the following procedures remove the side panels L R front panel assembly top panel tuner rear panel video board and main board 1 From the top side of the main body remove the four screws L attaching the power amplifier board 2 From the forward side of the power amplifier boar...

Страница 14: ... remove the two screws M attaching the heat sink on the power amplifier board See Fig 18 2 From the side of the power amplifier board remove the two screws N attaching the heat sink See Fig 18 3 From the front side of the main body remove the three screws P attaching the heat sink B See Fig 19 Reference Remove the tuner and video board as required See Figs 10 11 and 13 Fig 18 Fig 19 Heat sink Powe...

Страница 15: ...the shield case to the bottom chassis See Fig 20 Reference When attaching the shield case on the bottom chassis align the projections i j k m of the bottom chassis in the holes of the shield case See Fig 20 2 Take out the shield case with the power amplifier board from the bottom chassis See Fig 20 3 Remove the three screws R attaching the DVD mechanism assembly to the bottom chassis See Fig 21 Fi...

Страница 16: ...rward side of the power supply board discon nect the wires from the connectors CN102 CN103 See Fig 22 Reference Remove the tuner video board and the power supply board as required See Figs 10 11 13 and 16 2 From the top side of the main body remove the four screws S attaching the power transformer to the bottom chassis See Fig 23 Fig 22 Fig 23 CN102 CN103 Power supply board S S S Power transformer...

Страница 17: ... front panel assembly remove the four screws T attaching the FL board 2 Take out the FL board from the front panel assembly and disconnect the card wire from the connector CN751 on the FL board Reference When attaching the FL board align the projections n of the front panel assembly in the holes of the FL board Fig 24 CN751 Card wire FL board n T T T T n Front panel assembly ...

Страница 18: ...g 25 2 From the inside of the front panel assembly remove the ten screws U attaching the switch board See Fig 26 3 Take out the switch board from the front panel assembly and disconnect the card wire from the connector CN760 on the switch board See Fig 26 Reference When attaching the switch board align the projections p of the front panel assembly in the holes of the switch board See Fig 26 Fig 25...

Страница 19: ...rocedure remove the side panels L R and front panel assembly 1 From the inside of the front panel assembly remove the screw V attaching the headphone jack board Reference After attaching the headphone jack board fix the wire with the spacer Fig 27 Spacer Headphone jack board V Front panel assembly Wire ...

Страница 20: ...1 2 From the top side of the DVD mechanism assembly re move the two screws A attaching the leaf spring to the bushing and remove the leaf spring See Fig 2 3 Remove the bushing of the tray assembly from the projec tion a on the DVD mechanism assembly and move the tray assembly in the direction of the arrow See Fig 3 4 Remove the claw b of the tray assembly from the DVD mechanism assembly and take o...

Страница 21: ...ions c on the pickup before disconnecting the card wire from the connector CN101 on the DVD servo board If the card wire is disconnect ed without attaching solder the pickup may be de stroyed by static electricity See Figs 5 and 6 When attaching the DVD servo board be sure to re move solders from the short land sections c after con necting the card wire to the connector CN101 on the DVD servo boar...

Страница 22: ...fter connecting the card wire to the connector on the pickup See Figs 5 and 7 3 Remove the screw D attaching the plate and thrust spring See Fig 7 4 Remove the engagement section g attaching the plate to the feed holder and remove the plate with the thrust spring See Fig 7 5 Remove the shaft of the pickup from the section h on the traverse mechanism assembly and remove the shaft from the section i...

Страница 23: ...rming the following procedures remove the traverse mechanism assembly 1 From the top side of the traverse mechanism assembly re move the screw D attaching the plate and thrust spring See Fig 7 2 Remove the engagement section g attaching the plate to the feed holder and remove the plate with the thrust spring See Fig 7 3 Remove the wires from the soldered section k on the spin dle motor board See F...

Страница 24: ...the section r after attaching the switch board to the DVD mechanism assembly Fix the claw p on the DVD mechanism assembly with bonds after attaching the switch board 3 2 9 Removing the motor See Figs 14 and 15 Prior to performing the following procedures remove the tray assembly 1 From the bottom side of the DVD mechanism assembly re move the wires from the soldered section n on the switch board S...

Страница 25: ... on start by NTSC unrelated NTSEL SW Send command to module Mode is clear at POWER OFF Press the STANDBY ON ENTER and 10 keys on the remote controller at standby FL indication COLD Cold start is completed Tray lock is completed Press the EJECT key while pressing the STOP key on the main unit at standby FL indication LOCKED Tray lock is canceled Press the EJECT key while pressing the STOP key on th...

Страница 26: ...TUNER AM switch to 10kHz step only U version AM frequency change to 10kHz at U version Insert the power cord in an outlet while pressing the DVD CD and RHYTHM AX keys on the main unit simultaneously A main unit entered in the DVD test mode Press the 3D PHONIC key on the main unit during the DVD test mode DVD initialization is completed Press the POWER and B SKIP keys on the main unit simultaneousl...

Страница 27: ...ialization Press the F SKIP key on the main unit or remote controller more than 2 seconds Insert the power cord in an outlet while pressing the DVD CD and RHYTHM AX keys on the main unit simultaneously FL indication T xxy vw Press the 3D PHONIC key on the main unit EEPROM FULL initialization Press the MENU key on the remote controller FL indication For Example DK 4EC1 DEVICE KEY CHECKSUM DISPLAY 4...

Страница 28: ...ting laser current display FL indication CHECK Press the 3 key on the remote controller Performing of SEARCH TNO 1 2 3 FL indication PLAYBACK FL indication FL indication CHECK FL indication FL indication WOBBLE FL indication cccc j j j j 2 seconds Performing of SEARCH TNO 1 FL indication cccc j j j j 2 seconds COLD LSR FL indication cccc j j j j 2 seconds DVDLDLSR Press the 6 key on the remote con...

Страница 29: ...EARCH DVD_DL PARALLEL DISC DESIGNATED POSITION and JITTER MEASUREMENT FL indication FL indication cccc j j j j 2 seconds EEP BWD Confirming the EEPROM MECHA content in 1 address step FL indication FL indication cccc j j j j 2 seconds EEP FWD FL indication FL indication cccc j j j j 2 seconds TEMP FL indication FL indication cccc j j j j 2 seconds DVD DL Performing of monitor output FL indication F...

Страница 30: ...D TEST MODE Press the MENU key on the remote controller FL indication T xxy v Press the STANDBY key on the main unit or remote controller FL indication cccc j j j j 4 5 FL indication FL indication cccc j j j j 2 seconds LSR JIT Press the PLAY key on the remote controller Confirming LASER CURRENT and JITTER value ...

Страница 31: ... No MB229 1 31 SECTION 5 TROUBLESHOOTING This service manual does not describe TROUBLESHOOTING ...

Страница 32: ... No MB229 AV MULTIMEDIA COMPANY AUDIO VIDEO SYSTEMS CATEGORY 10 1 1chome Ohwatari machi Maebashi city 371 8543 Japan Victor Company of Japan Limited WPC Printed in Japan ...

Отзывы:

Похожие инструкции для FS-P550