Manual Recording
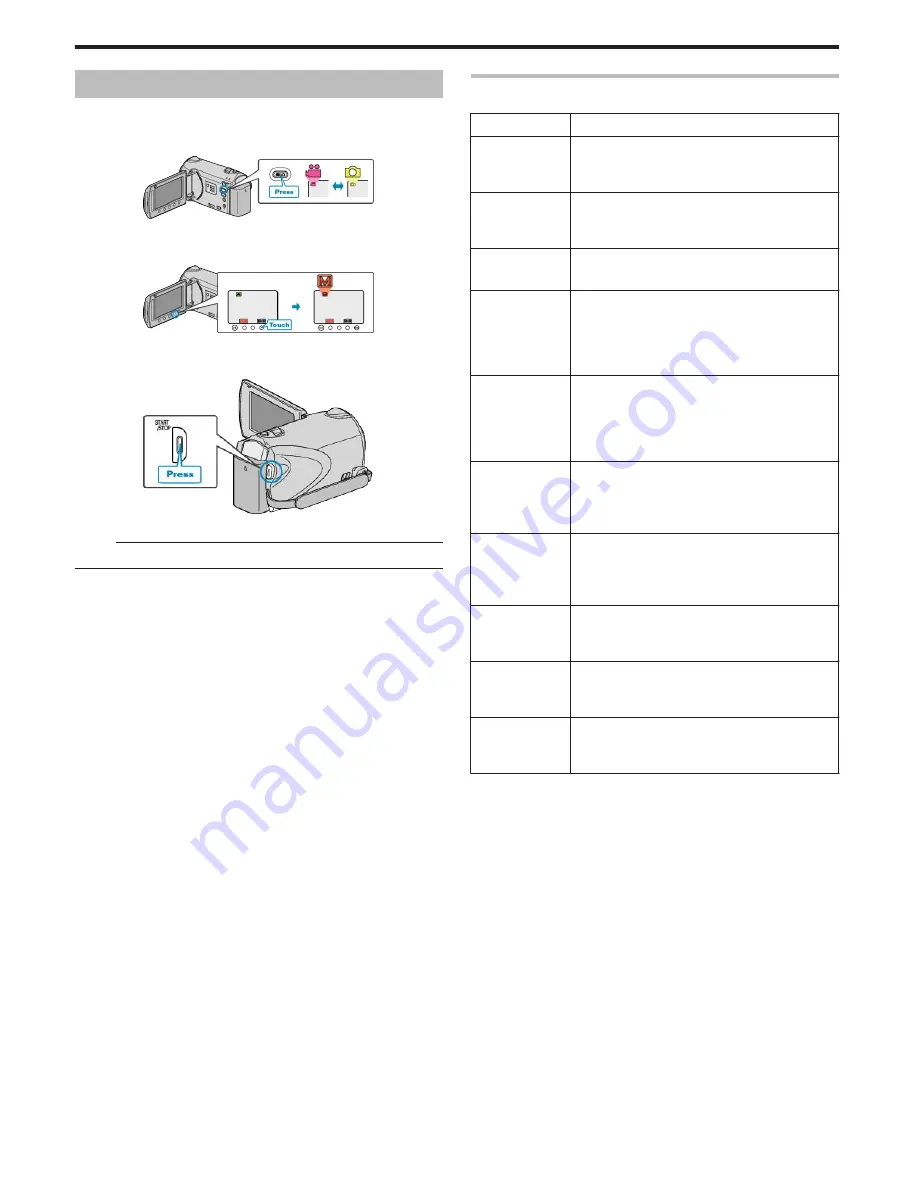
You can adjust settings, such as brightness, by using the manual mode.
Manual recording can be set for both video and still image modes.
1
Select video or still image mode.
.
●
The video or still image mode icon appears.
2
Select the Manual recording mode.
.
●
The mode changes between Auto and Manual with every touch.
3
Start recording.
.
●
Press again to stop.
Memo:
●
The manual settings are displayed only in the manual mode.
Manual Recording Menu
The following items can be set.
Name
Description
a
SCENE SE-
LECT
●
Recordings that suit the shooting conditions can
be performed easily.
"Scene Selection"
(
A
P.27
)
h
FOCUS
●
Use manual focus if the subject is not focused
automatically.
"Adjusting Focus Manually"
(
A
P.28
)
o
FOCUS AS-
SIST
●
Use this for adjusting the focus more precisely.
"Using Focus Assist"
(
A
P.28
)
i
BRIGHT-
NESS ADJUST
●
Overall brightness on the screen can be adjus-
ted.
●
Use this when recording in a dark or bright loca-
tion.
"Adjusting Brightness"
(
A
P.29
)
j
SHUTTER
SPEED (GZ-
HM350/GZ-
HM330)
●
Shutter speed can be adjusted.
●
Use this when shooting a fast-moving subject or
to emphasize the subject's movement.
"Setting Shutter Speed (GZ-HM350/GZ-HM330)"
(
A
P.29
)
k
WHITE BAL-
ANCE
●
Overall color on the screen can be adjusted.
●
Use this when the color on the screen appears
differently from the actual color.
"Setting White Balance"
(
A
P.30
)
l
BACKLIGHT
COMP.
●
Corrects the image when the subject appears
dark due to backlight.
●
Use this when shooting against the light.
"Setting Backlight Compensation"
(
A
P.30
)
m
METERING
AREA/ TYPE
●
Brightness of a specified area can be set as the
standard.
"Setting Metering Area"
(
A
P.31
)
n
EFFECT
●
Images that look like old photographs or black-
and-white movies can be taken.
"Recording with Effects"
(
A
P.31
)
o
TELE MAC-
RO
●
Use this to take close-up (macro) shots of the
subject.
"Taking Close-up Shots"
(
A
P.32
)
Recording
26


