background image

5

C

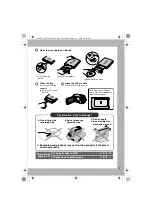
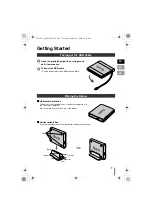
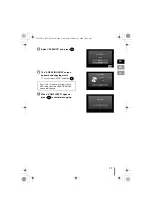
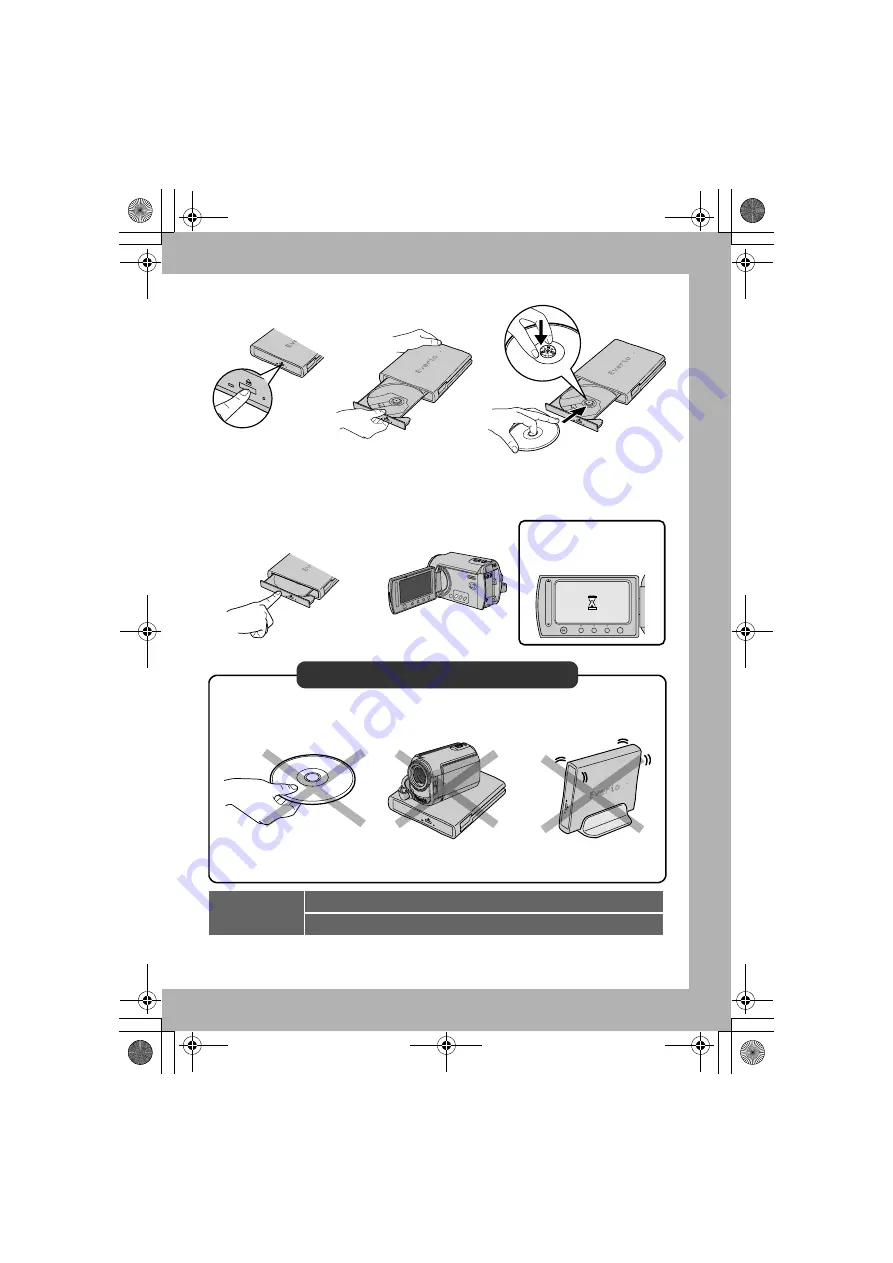
Open the tray and insert the disc

D

Close the tray

Push in until the tray 

snaps in

.

z

Do not push on the 
top cover.

E

Open the LCD monitor

The Everio camera turns on.

Preparations 

completed!

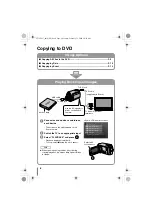
To copy images to DVD

A

P. 8

f

13

To play back copied images

A

P. 8

1) Press the eject 

button.

2) Pull out completely.

3) Insert firmly into place.

Turn the Everio off and on 
again if the following display 
remains unchanged.

Pay attention to the followings!

z

Do not touch the 
recording side

z

Do not place any 
objects on top

¹

Recording and playback may not function properly if the disc is 
scratched or dirty.

z

Do not topple

z

Do not subject to 
mechanical shock

CU-VD3U_001D_EN.book  Page 5  Monday, February 11, 2008  10:45 AM

Содержание CU-VD3 - Everio Share Station

Страница 1: ...NUEL D UTILISATION Grabador de DVD MANUAL DE INSTRUCCIONES For Customer Use Enter the Model No and Serial No located on the bottom of the burner below Retain this information for future reference Model No Serial No CU VD3U_001D_EN book Page 1 Monday February 11 2008 10 45 AM ...

Страница 2: ...IG LASERSTRÅLING NÅR DEKSEL ÅPNES UNNGÅ EKSPONERING FOR STRÅLEN KLASS 3B SYNLIG OCH OSYNLIG LASERSTRÅLNING NAR DENNA DEL ÄR ÖPPNAD STRÅLEN ÄR FARLIG AVATTAESSA OLET ALTTIINA LUOKAN 3B NÄKYVÄLLE JA NÄKYMÄTTÖMÄLLE LASERSÄTEILYLLE ÄLÄ KATSO SÄTEESEEN CAUTION To avoid electric shock or damage to the unit first firmly insert the small end of the power cord into the AC Adapter until it is no longer wobb...

Страница 3: ...d or aerosol cleaners Ensure that no moisture or liquid comes into contact with the drive during cleaning Exterior of the Burner Wipe dirt off with a dry cloth Disc Tray Wipe off dirt with a soft dry cloth Do not touch the lens To clean the lens use commercially available lens cleaning blower for cameras Using a lens cleaning disc will cause malfunction Disc Use a commercially available cleaning c...

Страница 4: ...ed z DVD R DL discs can be used only when the burner is connected to a high definition Everio camera Caution USB cable Power input To DC jack To DC jack The power lamp lights in green CU VD3 Everio camera Use the AC adapter to power on the Everio camera USB extension cable Use if necessary Important z When the DVD created on this burner cannot be played on other devices play back using this burner...

Страница 5: ... A P 8 1 Press the eject button 2 Pull out completely 3 Insert firmly into place Turn the Everio off and on again if the following display remains unchanged Pay attention to the followings zDo not touch the recording side zDo not place any objects on top Recording and playback may not function properly if the disc is scratched or dirty zDo not topple zDo not subject to mechanical shock CU VD3U_001...

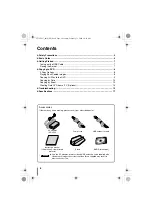
Страница 6: ...nal 14 zTroubleshooting 15 zSpecifications 17 Accessories If there are any items missing please consult your authorized dealer AC adapter AP V3U Power cord USB extension cable Instruction manual this manual other printed material Stand DVD R blank disc z Use the AC adapter power cord and USB extension cable supplied with this burner Using accessories other than those supplied may result in electri...

Страница 7: ...ientation Take note of the top and bottom of the burner and place it in the horizontal orientation Do not place any objects on top of the burner o Vertical orientation Face the feet side towards the left and fix securely on the stand Taking out the USB Cable Placing the Burner Low side High side Back Feet Arrow Front CU VD3U_001D_EN book Page 7 Monday February 11 2008 10 45 AM ...

Страница 8: ...s automatically To stop select o using the touch sensor z When opening closing the disc tray or during copying playback the access lamp lights or blinks in orange USB cable To USB jack AV cable supplied with Everio To Audio Video input terminals To AV jack Use the AC adapter to power on the Everio camera Access lamp Everio LCD monitor screen Select with touch sensor CREATE TOGETHER SELECT AND CREA...

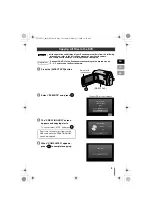
Страница 9: ...nstruction manual of your Everio camera z For some Everio cameras still images cannot be copied Connect CU VD3 to the Everio camera according to the procedures on P 4f5 and turn on the Everio camera Caution Preparations DIRECT DVD Select with touch sensor UNSAVED SCENES READY TO CREATE DVD R EXECUTE RETURN QUIT Everio LCD monitor screen CREATING NOW ELAPSED 3 min STOP 30 Do not turn off the power ...

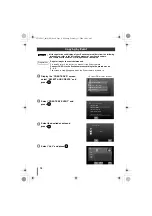
Страница 10: ...es cannot be copied Connect CU VD3 to the Everio camera according to the procedures on P 4f5 The screen in step A appears when the Everio camera is turned on Caution Preparations CREATE TOGETHER SELECT AND CREATE CREATE DUPLICATE PLAYBACK SELECT AND CREATE CREATE DVD Everio LCD monitor screen CREATE BY DATE CREATE BY EVENT CREATE BY PLAYLIST SELECT FROM SCENES CREATE DISC BY DATE SELECT AND CREATE...

Страница 11: ...OP and press G When COMPLETED appears press to complete copying ALL READY TO CREATE DVD R EXECUTE RETURN QUIT CREATING NOW ELAPSED 3 min STOP 30 Do not turn off the power or remove the USB cable while the CREATING NOW screen is displayed COMPLETED OK CU VD3U_001D_EN book Page 11 Monday February 11 2008 10 45 AM ...

Страница 12: ...to events beforehand For details refer to the instruction manual of the Everio camera Connect CU VD3 to the Everio camera according to the procedures on P 4f5 The screen in step A appears when the Everio camera is turned on Caution Preparations CREATE TOGETHER SELECT AND CREATE CREATE DUPLICATE PLAYBACK SELECT AND CREATE CREATE DVD Everio LCD monitor screen CREATE BY DATE CREATE BY EVENT CREATE BY...

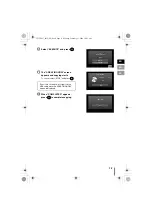
Страница 13: ...OP and press G When COMPLETED appears press to complete copying ALL READY TO CREATE DVD R EXECUTE RETURN QUIT CREATING NOW ELAPSED 3 min STOP 30 Do not turn off the power or remove the USB cable while the CREATING NOW screen is displayed COMPLETED OK CU VD3U_001D_EN book Page 13 Monday February 11 2008 10 45 AM ...

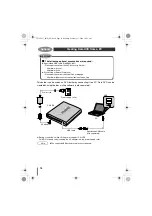
Страница 14: ...supplied USB extension cable cannot be used C Important o The following optional accessories are required z Specialized USB cable QAM1092 001 Please purchase from the JVC Accessory Store at http www jvc com http www jvc ca z Disc writing software Power2Go Please purchase from the CyberLink homepage http www cyberlink com oem jvc cds enu index_2 jsp AC adapter Power cord Specialized USB cable sold ...

Страница 15: ...sc tray manually and take out the disc Reading fails z Insert the disc with the label facing up z Make sure the disc tray is not dirty z Make sure the writing surface of the disc is not damaged z Make sure the special shaped discs are not used z Make sure the audio CD complies with the CD DA standard Copy control CDs cannot be played z For CD R or CD RW make sure it is not recorded using the packe...

Страница 16: ...ction of the camera and dub the DVD discs with the DVD recorder Refer to the instruction manual of the Everio camera Trouble Action PC Cannot play back z If the packet writing software DLA Direct Letter Access has been installed on the PC the disc may not be played back properly due to incompatibility In this case consult the DLA software developer or check out DLA related websites for solutions z...

Страница 17: ...utput DC 5 2 V 2 A Operating temperature 0 C to 40 C 32 F to 104 F Dimensions mm W x H x D 49 x 28 x 79 1 9 10 x 1 1 10 x 3 1 10 Excluding power cord Weight Approx 136 g 0 3 lbs Recommended discs DVD R JVC TDK Verbatim SONY 1 DVD R DL discs can be used when the burner is connected to a high definition Everio camera or a PC 2 Dual layer DVD RW discs cannot be used DVD R DL 1 JVC Verbatim DVD RW 2 J...

Страница 18: ...EN ATTENTION Cet appareil contient des micro ordinateurs Des bruits électroniques externes ou des interférences peuvent causer un mauvais fonctionnement Dans de tels cas éteindre l appareil puis débrancher le cordon d alimentation de la prise secteur Rebrancher ensuite et rallumer l appareil Retirer le disque Après vérification du disque utiliser l appareil comme d habitude ATTENTION Afin d éviter...

Страница 19: ...r Essuyez la saleté à l aide d un chiffon sec Chargeur de disque Essuyez la saleté à l aide d un chiffon doux et sec Ne pas toucher la lentille Pour nettoyer la lentille utilisez un aspirateur spécialement conçu à cet effet disponible sur le marché L utilisation d un disque nettoyant causera des défectuosités Disque Utilisez une lingette de nettoyage disponible en commerce et essuyer doucement de ...

Страница 20: ...disques DVD R DL ne peuvent être utilisés que si le graveur est raccordé à une caméra à haute définition Everio Attention Câble USB Prise d alimentation Vers la fiche c c Vers la fiche c c Le témoin d alimentation tourne au vert CU VD3 Caméra Everio Utilisez l adaptateur c a pour alimenter la caméra Everio Câble d extension USB Utilisez si nécessaire Important z Si vous ne pouvez lire un DVD créé ...

Страница 21: ... A P 8 1 Appuyez sur la touche d éjection 2 Retirez le tiroir complètement 3 Mettez le fermement en place Eteignez et allumez la caméra si l affichage suivant reste tel quel Attention à ce qui suit zNe touchez pas le côté enregistrement zNe placez aucun objet par dessus L enregistrement et la lecture pourraient ne pas fonctionner correctement si le disque est éraflé ou sale zNe faites pas basculer...

Страница 22: ...age 15 zSpécifications 17 Accessoires Si des objets sont absents consultez un revendeur autorisé Adaptateur c a AP V3U Cordon d alimentation Câble d extension USB Manuel d instruction ce manuel autre matériau imprimé Support DVD R disque vierge z Utilisez l adaptateur c a le cordon d alimentation et le câble d extension USB accompagnant ce graveur L utilisation d accessoires autres que ceux fourni...

Страница 23: ...izontale Identifiez le dessus et le dessous du graveur et placez le dans la position horizontale Ne placez aucun objet par dessus le graveur o Position verticale Placez les pieds face vers la gauche et fixez les solidement au support Retirer le câble USB Mise en place du graveur Bas Haut Arrière Pieds Flèche Avant CU VD3U_001D_FR book Page 7 Monday February 11 2008 8 45 PM ...

Страница 24: ...tomatiquement Pour arrêter sélectionnez o en utilisant le capteur tactile z En ouvrant ou fermant le tiroir à disque ou en cours de copie lecture la lampe d accès s allume ou clignote en orange Câble USB Vers fiche USB Câble AV fourni avec Everio Vers bornes d entrée Audio Vidéo Vers fiche AV Utilisez l adaptateur c a pour alimenter la caméra Everio Lampe d accès Sélectionnez avec le capteur tacti...

Страница 25: ...ivent reportez vous au manuel d utilisation de votre caméra Everio z Avec certains caméras Everio les images fixes ne peuvent être copiées Raccordez le CU VD3 à la caméra Everio en suivant les procédures décrites dans P 4f5 et allumez la caméra Everio Attention Préparations DIRECT DVD Sélectionnez avec le capteur tactile SCENES NON SAUVEG PRET POUR LA CREATION DVD R EXECUTER RETOUR FIN Ecran ACL E...

Страница 26: ... z Avec certains caméras Everio les images fixes ne peuvent être copiées Raccordez le CU VD3 à la caméra Everio selon les procédures contenues dans P 4f5 L écran à l étape A s affiche quand la caméra Everio est allumée Attention Préparations CREER ENSEMBLE SELECTION ET CREER CREER COPIE LECTURE SELECTIONNER ET CREER CREER DVD Ecran ACL Everio CREER PAR DATE CREER PAR EVENEMENT CREER PAR L L SELECT...

Страница 27: ...ur G Quand TERMINEE s affiche appuyez sur pour compléter l opération de copie TOUS DVD1 LISTE DE CREAT DVD FIN VERIF TOUS PRET POUR LA CREATION DVD R EXECUTER RETOUR FIN CREATION EN COURS ECOULE 3 MIN ARRETER 30 Ne mettez pas hors tension ou ne retirez pas le câble USB pendant que l écran CREATION EN COURS est affiché TERMINEE OK CU VD3U_001D_FR book Page 11 Monday February 11 2008 8 45 PM ...

Страница 28: ...e peuvent être copiées Enregistrez des images sur des évènements à l avance Pour en savoir davantage reportez vous au Manuel d instruction de la caméra Everio Raccordez le CU VD3 à la caméra Everio selon les procédures contenues dans P 4f5 L écran à l étape A s affiche quand la caméra Everio est allumée Attention Préparations CREER ENSEMBLE SELECTION ET CREER CREER COPIE LECTURE SELECTIONNER ET CR...

Страница 29: ...Quand TERMINEE s affiche appuyez sur pour compléter l opération de copie TOUS DVD1 DVD2 DVD3 LISTE DE CREAT DVD FIN VERIF TOUS PRET POUR LA CREATION DVD R EXECUTER RETOUR FIN CREATION EN COURS ECOULE 3 MIN ARRETER 30 Ne mettez pas hors tension ou ne retirez pas le câble USB pendant que l écran CREATION EN COURS est affiché TERMINEE OK CU VD3U_001D_FR book Page 13 Monday February 11 2008 8 45 PM ...

Страница 30: ...tension USB fourni ne peut pas être utilisé C Important o Les accessoires facultatifs suivants sont requis z Câble USB spécial QAM1092 001 Vous pouvez vous procurer ce câble auprès du magasin d accessoires en ligne de JVC http www jvc com http www jvc ca z Logiciel d écriture de disque Power2Go Achetez sur la page d accueil CyberLink http www cyberlink com oem jvc cds enu index_2 jsp Adaptateur c ...

Страница 31: ...e la lecture z Insérez le disque en plaçant l étiquette face sur le dessus z Assurez vous que le tiroir à disque n est pas encrassé z Assurez vous que la surface d écriture du disque n est pas endommagée z Assurez vous de ne pas utiliser des disques ayant une forme spéciale z Assurez vous que le CD audio est conforme à la norme CD DA Les CD à contrôle de copie ne peuvent pas être lus z Pour les CD...

Страница 32: ...ion de la caméra et copiez les disques DVD à l aide du graveur de DVD Reportez vous au Manuel d instruction de la caméra Everio Panne Action Ordinateur Lecture impossible z Si le logiciel DLA paquet a été installé sur l ordinateur le disque pourrait ne pas être compatible et donc ne pas jouer correctement Dans ce cas communiquez avec le développeur du logiciel DLA ou consultez les sites Internet e...

Страница 33: ...rature de fonctionnement 0 C à 40 C 32 F à 104 F Dimensions mm L x H x P 49 x 28 x 79 1 9 10 x 1 1 10 x 3 1 10 Cordon d alimentation exclus Poids Environ 136 g 0 3 lb Disques recommandés DVD R JVC TDK Verbatim SONY 1 Des disques DVD R DL peuvent être utilisés si le graveur est raccordé à une caméra à haute définition Everio ou à un ordinateur 2 Les disques DVD RW à double couche ne peuvent pas êtr...

Страница 34: ...NA LUOKAN 3B NÄKYVÄLLE JA NÄKYMÄTTÖMÄLLE LASERSÄTEILYLLE ÄLÄ KATSO SÄTEESEEN ATENCIÓN Esta unidad contiene microordenadores La presencia de ruido o interferencias electrónicos externos podría causar fallos de funcionamiento En tales casos apague la unidad y desenchufe el cable de alimentación de CA A continuación enchúfelo de nuevo y vuelva a encender la unidad Saque el disco Tras comprobar el dis...

Страница 35: ...humedad ni ningún líquido en el aparato Exterior del grabador Quite la suciedad con un paño seco Bandeja del disco Quite la suciedad con un paño suave y seco No toque la lente Para limpiar la lente utilice cualquier soplador para limpieza de lentes de cámaras que se encuentra en tiendas Utilizar un disco para limpieza de lentes provocará fallos de funcionamiento Disco Utilice un paño de limpieza d...

Страница 36: ...o cuando la grabadora esté conectada a una cámara Everio de alta definición Precaución Cable USB Entrada de alimentación Al toma de CC Al toma de CC La luz de alimentación se enciende de color verde CU VD3 Cámera Everio Utilice el adaptador de CA para alimentar la cámara Everio Cable USB de extensión Utilícelo si es necesario Importante z Cuando el DVD creado en esta grabadora no se pueda reproduc...

Страница 37: ...s A P 8 1 Presione el botón de expulsión 2 Sáquela completamente 3 Introdúzcalo firmemente en su lugar Apague y encienda la Everio de nuevo si la siguiente pantalla no cambia Preste atención a lo siguiente zNo toque el lado de grabación zNo sitúe ningún objeto encima La grabación y la reproducción puede que no funcionen correctamente si el disco está arañado o sucio zNo la vuelque zNo la someta a ...

Страница 38: ... problemas 15 zEspecificaciones 17 Accesorios Si falta algún elemento por favor consulte con su distribuidor autorizado Adaptador de CA AP V3U Cable de alimentación Cable USB de extensión Manual de instrucciones este manual otro material impreso Base DVD R disco en blanco z Utilice el adaptador de CA el cable de alimentación y el cable USB de extensión que vienen con esta grabadora Utilizar acceso...

Страница 39: ...bserve la parte superior e inferior de la grabadora y colóquela en posición horizontal No sitúe ningún objeto sobre la grabadora o Posición vertical Oriente el lado de los pies hacia la izquierda y fíjelo de forma segura en la base Sacar el cable USB Colocación de la grabadora Lado bajo Lado alto Detrás Pies Flecha Parte frontal CU VD3U_001D_ES book Page 7 Monday February 11 2008 10 52 AM ...

Страница 40: ...Para parar seleccione o utilizando el sensor táctil z Al abrir cerrar la bandeja para discos o durante la grabación reproducción la luz de acceso se ilumina o parpadea en naranja Cable USB A la toma USB Cable AV viene con la Everio A los terminales de entrada de audio vídeo A la toma AV Utilice el adaptador de CA para alimentar la cámara Everio Luz de acceso CREAR CONJUNTAMENTE SELECCIONAR Y CREAR...

Страница 41: ...e instrucciones de su cámara Everio z Para algunas cámaras Everio las fotos fijas no pueden ser copiarse Conecte el CU VD3 a la cámara Everio según los procedimientos de P 4f5 y encienda la cámara Everio Precaución Preparativos DIRECT DVD Seleccionar con el sensor táctil ESCENAS SIN GUARDAR LISTO PARA CREAR DVD R EJECUTAR VOLVER SAL Pantalla del monitor de LCD de la Everio CREANDO TRANSC 3 MIN CAN...

Страница 42: ...s fijas no pueden ser copiarse Conecte el CU VD3 a la cámara Everio según los procedimientos de P 4f5 Aparece la pantalla del paso A cuando se enciende la cámara Everio Precaución Preparativos CREAR CONJUNTAMENTE SELECCIONAR Y CREAR CREAR DUPLICADO REPRODUCCIÓN SELECCIONAR Y CREAR CREAR DVD Pantalla del monitor de LCD de la Everio CREAR POR FECHA CREAR POR EVENTO CREAR POR LISTA REPR SELECC DE ESC...

Страница 43: ...LAR y presione G Cuando aparezca HECHO pulse para completar la copia TODO DVD1 LISTA DE CREACIÓN SAL CHECK TODO LISTO PARA CREAR DVD R EJECUTAR VOLVER SAL CREANDO TRANSC 3 MIN CANCELAR 30 No apague la alimentación ni quite el cable USB mientras que se muestra la pantalla CREANDO HECHO ACEPTAR CU VD3U_001D_ES book Page 11 Monday February 11 2008 10 52 AM ...

Страница 44: ...ágenes de los eventos de antemano Para obtener detalles consulte el manual de instrucciones de la cámara Everio Conecte el CU VD3 a la cámara Everio según los procedimientos de P 4f5 Aparece la pantalla del paso A cuando se enciende la cámara Everio Precaución Preparativos CREAR CONJUNTAMENTE SELECCIONAR Y CREAR CREAR DUPLICADO REPRODUCCIÓN SELECCIONAR Y CREAR CREAR DVD Pantalla del monitor de LCD...

Страница 45: ... presione G Cuando aparezca HECHO pulse para completar la copia TODO DVD1 DVD2 DVD3 LISTA DE CREACIÓN SAL CHECK TODO LISTO PARA CREAR DVD R EJECUTAR VOLVER SAL CREANDO TRANSC 3 MIN CANCELAR 30 No apague la alimentación ni quite el cable USB mientras que se muestra la pantalla CREANDO HECHO ACEPTAR CU VD3U_001D_ES book Page 13 Monday February 11 2008 10 52 AM ...

Страница 46: ... se puede utilizar el cable USB de extensión suministrado C Importante o Los siguientes accesorios opcionales son obligatorios z Cable USB especial QAM1092 001 Adquiera en la tienda de accesorios de JVC en el siguiente sitio Web http www jvc com http www jvc ca z Sofware de copia de discos Power2Go Por favor cómprelo desde la página de inicio de CyberLink http www cyberlink com oem jvc cds enu ind...

Страница 47: ...nte 1 cm tire de la bandeja de discos manualmente y saque el disco El aparato no lee el disco z Inserte el disco con la etiqueta hacia arriba z Compruebe que la bandeja de discos no está sucia z Compruebe que la superficie de grabación del disco no está dañada z Asegúrese de no utilizar discos con forma especial z Asegúrese de que el CD de sonido cumple con la norma CD DA Los CD con control de cop...

Страница 48: ...ción de la cámara y copie los discos DVD con la grabadora de DVD Consulte el manual de instrucciones de la cámara Everio Problema Acción PC No se puede reproducir z Si el software de copia de paquetes DLA acceso directo a letra ha sido instalado en el ordenador el disco puede que no se reproduzca correctamente debido a una incompatibilidad En este caso consulte con el desarrollador del software DL...

Страница 49: ...a de funcionamiento 0 C a 40 C 32 F a 104 F Dimensiones mm An x Al x P 49 x 28 x 79 1 9 10 x 1 1 10 x 3 1 10 Sin el cable de alimentación Peso Aprox 136 g 0 3 libras Discos recomendados DVD R JVC TDK Verbatim SONY 1 Se pueden utilizar discos DVD R DL cuando la grabadora esté conectada a una cámara Everio de alta definición o a su ordenador 2 No se pueden utilizar discos DVD RW de doble capa DVD R ...

Страница 50: ...Memo CU VD3U_Memo fm Page 18 Monday February 11 2008 5 37 PM ...

Страница 51: ...Memo CU VD3U_Memo fm Page 19 Monday February 11 2008 5 37 PM ...

Страница 52: ... 2008 Victor Company of Japan Limited Printed in Malaysia 0208MNH SW VM CU VD3U_001D_EN book Page 18 Monday February 11 2008 10 45 AM ...

Отзывы: