background image

INSTRUCTIONS

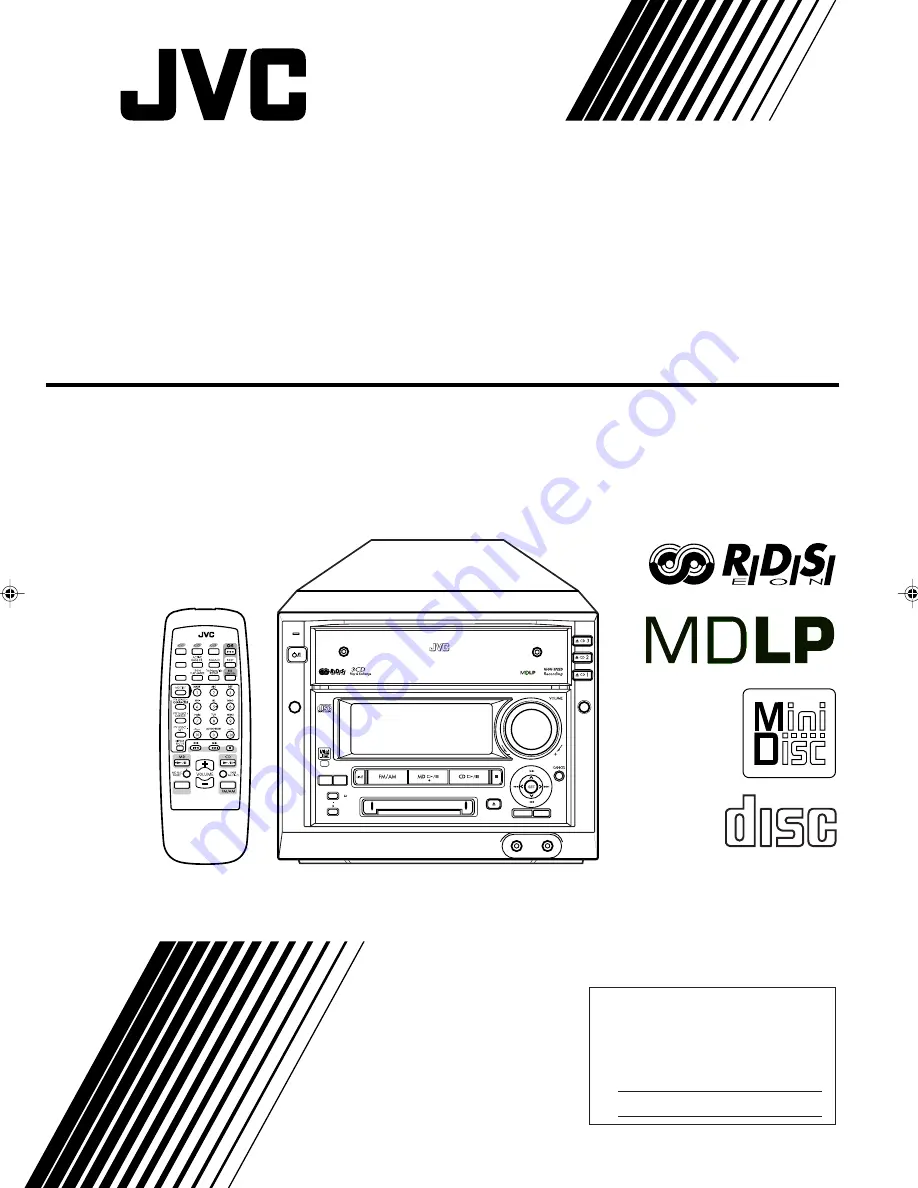
CA-MXS6MDR

For Customer Use:

Enter below the Model No. and Serial 
No. which are located either on the rear, 
bottom or side of the cabinet. Retain this 
information for future reference.

Model No.

Serial No.

LVT0528-001A

[B]

COMPACT COMPONENT MD SYSTEM

COMPACT

DIGITAL AUDIO

DISC LOADING MECHANISM

STANDBY

/ON

LONG
MODE

REC

MODE

SP/LP2/LP4

REC PAUSE

HIGH SPEED

CD  MD

TITLE/EDIT

ENTER

/DEMO

PHONES

LINE 2

MENU

COMPACT COMPONENT MD SYSTEM MX-S6MDR

DISC

DIMMER

LINE

RM-SMXS6MDR

   REMOTE   CONTROL

LEVEL

METER

CA-MXS6MDR[B].COVER

00.8.2, 10:43 AM

1

Содержание CA-MXS6MDR

Страница 1: ...tain this information for future reference Model No Serial No LVT0528 001A B COMPACT COMPONENT MD SYSTEM COMPACT DIGITAL AUDIO DISC LOADING MECHANISM STANDBY ON LONG MODE REC MODE SP LP2 LP4 REC PAUSE HIGH SPEED CD MD TITLE EDIT ENTER DEMO PHONES LINE 2 MENU COMPACT COMPONENT MD SYSTEM MX S6MDR DISC DIMMER LINE RM SMXS6MDR REMOTE CONTROL LEVEL METER ...

Страница 2: ...reen and yellow The wires in the mains lead on this product are coloured in accordance with the following code Blue Neutral Brown Live As these colours may not correspond with the coloured markings identifying the terminals in your plug proceed as follows The wire which is coloured blue must be connected to the terminal which is marked with the letter N or coloured black The wire which is coloured...

Страница 3: ... defeated Avoid direct exposure to beam 3 CAUTION Do not open the top cover There are no user serviceable parts inside the Unit leave all servicing to qualified service personnel 1 CLASSIFICATION LABEL PLACED ON REAR ENCLOSURE 2 WARNING LABEL PLACED INSIDE THE UNIT DANGER Invisible laser radiation when open and interlock failed or defeated AVOID DIRECT EXPOSURE TO BEAM e ADVARSEL Usynlig laser str...

Страница 4: ...erformance from your unit and retain this manual for future reference Precautions Installation Install in a place which is level dry and neither too hot nor too cold between 5 C 41 F and 35 C 95 F Install the unit in a location with adequate ventilation to prevent internal heat buildup in the unit Leave sufficient distance between the unit and the TV Keep the speakers away from the TV to avoid int...

Страница 5: ...ges 70 Troubleshooting 71 Specifications 72 Location of the Buttons and Controls 3 Main Unit 4 Remote Control 5 Getting Started 6 Unpacking 6 Connecting Antennas 6 Connecting Speakers 7 Connecting Other Equipment 8 Putting the Batteries into the Remote Control 9 Basic and Common Operations 10 Turning On the Power 11 Selecting the Sources and Starting Play 11 Adjusting the Volume 12 Reinforcing the...

Страница 6: ...ols on your unit Main unit 1 d s o i u y t a f e r 2 3 4 5 6 7 8 9 p q w DISC LOADING MECHANISM STANDBY ON LONG MODE REC MODE SP LP2 LP4 REC PAUSE HIGH SPEED CD MD TITLE EDIT ENTER DEMO PHONES LINE 2 MENU COMPACT COMPONENT MD SYSTEM MX S6MDR DISC j g h k l z x c v b n Display Window ...

Страница 7: ...t the remote sensor on the front panel Display window g Timer mode indicators 54 58 DAILY Daily Timer and REC Recording Timer h CD indicators 23 CD source and CD numbers 1 to 3 j Main display Shows the source name track number and other information k MD indicators 29 MD source and MD insertion l Recording length mode indicators 35 SP LP2 and LP4 SOUND indicator 13 z A BASS Active Bass Extension in...

Страница 8: ...n 19 Number buttons 1 10 10 buttons 17 24 30 Character entry buttons A Z 0 9 51 ø Ø buttons 50 51 AUTO PRESET button 16 a 7 stop button 11 23 29 37 s 4 reverse search forward search button 24 25 29 31 1 fast reverse fast forward button 16 24 29 d CD 3 8 play pause button 11 23 24 Pressing this button also turns on the unit f FADE MUTING button 12 g FM AM button 11 16 Pressing this button also turn...

Страница 9: ... FM 75 Ω COAXIAL terminal 2 Extend the FM antenna 3 Fasten it up in the position which gives you the best reception About the supplied FM antenna The FM antenna supplied with this unit can be used as temporary measure If reception is poor you can connect an outdoor FM antenna FM antenna supplied Outdoor FM antenna not supplied A 75Ω antenna with coaxial type connector DIN 45325 should be used AM L...

Страница 10: ...s and connecting cords Keep the antennas away from metallic parts of the unit connecting cords and the AC power cord AM antenna Vinyl covered wire not supplied AM loop antenna supplied Connecting Speakers You can connect the speakers using the speaker cords Right speaker Left speaker 1 If cords are covered with insulation twist the core of the cord at the end of each cord then remove the insulatio...

Страница 11: ... signals To input REC By using audio cords not supplied connect Between the audio input jacks on the cassette deck and the LINE 1 OUT jacks For recording on the cassette deck Between the audio output jacks on the cassette deck and the LINE 1 IN jacks For playing a tape To output PLAY Ex cassette deck To output mini jack To connect a portable MD player with a mini output jack By using a cable with ...

Страница 12: ... power cord is reconnected or when a power failure is recovered See To store the display setting in memory on page 66 To start the display demonstration manually Press ENTER DEMO Each time you press the button the display demonstration turns on and off During MD editing and title entry mode The ENTER DEMO button cannot function for the display demonstration To a wall outlet Putting the Batteries i...

Страница 13: ... this section pages 10 to 14 Remote control Main unit DIMMER LINE RM SMXS6MDR REMOTE CONTROL LEVEL METER DIMMER LEVEL METER LINE DISC LOADING MECHANISM STANDBY ON LONG MODE REC MODE SP LP2 LP4 REC PAUSE HIGH SPEED CD MD TITLE EDIT ENTER DEMO PHONES LINE 2 MENU COMPACT COMPONENT MD SYSTEM MX S6MDR DISC STANDBY ON MENU ...

Страница 14: ...ast received station is tuned in For more detailed operations see pages 15 to 21 To select the CD player as the source press CD 3 8 The unit automatically turns on Play starts if a CD is on one of the CD trays To stop play press 7 For more detailed operations see pages 22 to 27 To select the MD player as the source press MD 3 8 The unit automatically turns on Play starts if an MD is in the MD load...

Страница 15: ...ound is maintained regardless of how low you set the volume Active Bass Extension You can use this effect only for playback To get the effect press ACTIVE BASS EX extension on the remote control so that ACTIVE BASS EX ON appears in the main display the A BASS indicator also lights To cancel the effect press the button again so that ACTIVE BASS EX OFF appears in the main display the A BASS indicato...

Страница 16: ...ay To select the level meter press LEVEL METER on the remote control Each time you press the button the level meter alternates between METER 1 and METER 2 METER 1 METER 2 Color relationship between the level meter and the main display The color of the main display is preset for each level meter When a level meter is selected the color of the main display and illumination color of the ring around t...

Страница 17: ... currently selected 3 Push the joy control rightward or leftward to select SET UP Each time you push the joy control the sound modes change as follows 4 Press SET The equalizer pattern adjustment screen appears 5 Adjust the equalizer pattern 1 Push the joy control rightward or leftward to select the frequency range to adjust LOW MID HIGH 2 Push the joy control upward or downward to adjust the leve...

Страница 18: ... section pages 15 to 21 You cannot use the buttons on the front panel to operate the RDS functions Use the buttons on the remote control DIMMER LINE RM SMXS6MDR REMOTE CONTROL LEVEL METER DISC LOADING MECHANISM STANDBY ON LONG MODE REC MODE SP LP2 LP4 REC PAUSE HIGH SPEED CD MD TITLE EDIT ENTER DEMO PHONES LINE 2 MENU COMPACT COMPONENT MD SYSTEM MX S6MDR DISC ...

Страница 19: ...e menu to improve FM reception See FM Reception Mode Setting on page 62 Presetting Stations You can preset 30 FM and 15 AM MW LW stations using either automatic presetting method or manual presetting method In some cases test frequencies have been already memorized for the tuner since the factory examined the tuner preset function before shipment This is not a malfunction You can preset the statio...

Страница 20: ...r buttons Ex For preset number 5 press 5 For preset number 15 press 10 then 5 For preset number 20 press 10 then 10 On the unit Push the joy control rightward or leftward Rightward to increase the preset numbers Leftward to decrease the preset numbers Receiving FM Stations with RDS RDS allows FM stations to send an additional signal along with their regular program signals For example the stations...

Страница 21: ...gion Phone In Travel Leisure Jazz Country Nation M Oldies Folk M Document TEST Alarm back to the beginning More about RDS Not all FM stations provide RDS signals nor do all RDS stations provide the same services If in doubt check with local radio stations for details on RDS in your area RDS may not work correctly if the received station is not transmitting the signals properly or if the signal str...

Страница 22: ...on 4 Press PTY SEARCH again While searching the selected PTY code appears and SEARCH flashes in the main display The unit searches 30 preset FM stations stops when it finds the one you have selected and tunes in that station To continue searching after the first stop Press PTY SEARCH again while the indications in the main display are flashing If no program is found NOT FOUND appears in the main d...

Страница 23: ...be compatible with this unit While listening to a program tuned in by the EON function the station does not change even if another network station starts broadcasting a program of the same EON data While listening to a program tuned in by the EON function you can only use the EON and DISPLAY buttons as the tuner operation buttons If you press any other tuner operation button EON LOCKED appears in ...

Страница 24: ...lassics Performances of major orchestral works symphonies chamber music etc Other M Music not fitting into any of the other categories Weather Weather reports and forecasts Finance Stock Market reports commerce trading etc Children Programs targeted at a young audience Social Programs about sociology history geography psychology and society Religion Religious programs Phone In Involving members of...

Страница 25: ...sed and explained in this section pages 22 to 27 Remote control DIMMER LINE RM SMXS6MDR REMOTE CONTROL LEVEL METER DISC LOADING MECHANISM STANDBY ON LONG MODE REC MODE SP LP2 LP4 REC PAUSE HIGH SPEED CD MD TITLE EDIT ENTER DEMO PHONES LINE 2 MENU COMPACT COMPONENT MD SYSTEM MX S6MDR DISC MENU DISC ...

Страница 26: ...CDs On the unit ONLY 1 Press one of the open close buttons 0 CD1 0 CD2 or 0 CD3 for the disc tray you want to load a CD onto The unit automatically turns on and the selected disc tray comes out 2 Place a CD correctly on the circle of the disc tray with its label side up When using a CD single 8 cm place it on the inner circle of the disc tray 3 Press the same open close button 0 CD1 0 CD2 or 0 CD3...

Страница 27: ...cks Leftward 4 Goes back to the beginning of the current or previous tracks To go to another track directly using the number buttons on the remote control ONLY Pressing the number button s allows you to start playing the track number you want Ex For track number 5 press 5 For track number 15 press 10 then 5 For track number 20 press 10 then 10 For track number 32 press 10 10 10 then 2 Programing t...

Страница 28: ...tracks from a different disc repeat steps 1 to 3 5 Press CD 8 The tracks are played in the order you have programed To stop during play press 7 Program play also stops when you open a disc tray To exit from Program play mode select another playback mode Continuous play or Random play mode before or after play either by pressing PLAY MODE on the remote control or by using the menu on the unit see p...

Страница 29: ...rent play mode setting The current play mode CONTINUE RANDOM or PROGRAM will appear following CD in the main display 3 Push the joy control rightward or leftward to select RANDOM 4 Press SET CD RANDOM appears in the main display The RANDOM indicator also lights 4 Press CD 8 The tracks are played at random Random play stops when all the tracks are played once To skip the playing track press on the ...

Страница 30: ...ou can activate or deactivate Repeat play mode by using the menu see Setting the repeat modes on page 63 REPEAT ALL REPEAT OFF REPEAT 1CD REPEAT 1 Canceled Ex When REPEAT ALL is selected Prohibiting Disc Ejection Disc Lock You can prohibit CD and MD ejection from the unit and can lock discs You cannot use this function while the display demonstration is shown in the main display On the unit ONLY T...

Страница 31: ...e used and explained in this section pages 28 to 32 Remote control DIMMER LINE RM SMXS6MDR REMOTE CONTROL LEVEL METER DISC LOADING MECHANISM STANDBY ON LONG MODE REC MODE SP LP2 LP4 REC PAUSE HIGH SPEED CD MD TITLE EDIT ENTER DEMO PHONES LINE 2 MENU COMPACT COMPONENT MD SYSTEM MX S6MDR DISC MENU ...

Страница 32: ...rts playing the playback mode of the currently playing track lights on the display SP Indicates the tracks recorded in standard stereo recording mode on this unit or those recorded on an MD recorder incompatible with MDLP LP2 Indicates the tracks recorded in 2 times long hour stereo recording mode LP4 Indicates the tracks recorded in 4 times long hour stereo recording mode MDLP features a new soun...

Страница 33: ...s in the main display The PRGM indicator also lights Each time you press the button play mode changes as follows 4 Press the number buttons to select the tracks For how to use the number buttons see To go to another track directly using the number buttons on the remote control ONLY to the left If the selected track has a title it will be shown at the center portion of the main display If the title...

Страница 34: ... press the button the last programed track is erased from the program To add tracks in the program before you start play simply select track numbers you want to add To erase the entire program before or after play press and hold CANCEL on the unit until MD PROGRAM ALL CLEAR appears in the main display When you eject the MD or turn off the unit the entire program is also erased If you try to progra...

Страница 35: ...he unit you can activate or deactivate Repeat play mode by using the menu see Setting the repeat modes on page 63 To prohibit disc ejection Disc Lock You can prohibit CD and MD ejection from the unit and can lock the discs See page 27 for details Ex When REPEAT ALL is selected 4 Press MD 3 8 The tracks are played at random Random play ends when all the tracks are played once On the unit You have t...

Страница 36: ...ons you mainly use the buttons and controls on the unit Remote control DISC LOADING MECHANISM STANDBY ON LONG MODE REC MODE SP LP2 LP4 REC PAUSE HIGH SPEED CD MD TITLE EDIT ENTER DEMO PHONES LINE 2 MENU COMPACT COMPONENT MD SYSTEM MX S6MDR DISC DISC LONG MODE REC MODE SP LP2 LP4 REC PAUSE HIGH SPEED CD MD MENU DIMMER LINE RM SMXS6MDR REMOTE CONTROL LEVEL METER LINE ...

Страница 37: ...see pages 12 and 13 About the track marks When playing an MD you can move among the tracks You can do this because there is a mark recorded at the beginning of each track enabling you to locate the track This mark is called a track mark and the portion between two adjacent track marks is called a track When recording from an analog source such as FM AM broadcasts no track mark is recorded on the M...

Страница 38: ...ecording time of MDs before starting recording The remaining recording time of MDs will be calculated and shown based on the recording length mode SP LP2 LP4 currently selected Before starting recording or using the Recording Timer check the recording time remaining on the MD for each recording length mode SP LP2 LP4 and select the optimum recording length mode To check the remaining recording tim...

Страница 39: ... lamp stops flashing and remains lit and recording starts When recording an FM AM MW LW broadcast The station frequency will be recorded as the track title Continued SP Standard Play LP4 4 Times Long Play LP2 2 Times Long Play About High Speed Recording There are some restrictions to observe for high speed recording exceeding normal speed to protect copyrights HCMS see page 69 This unit is so desi...

Страница 40: ...plied with your equipment To stop recording for a moment press REC PAUSE or MD REC PAUSE again To resume recording press MD 8 again A track mark is recorded when you resume recording To stop recording press 7 WRITING flashes for a while When recording from a CD both the CD player and the MD recorder stop When recording from a CD using Standard Recording Two track marks may be recorded at the begin...

Страница 41: ... unit ONLY You can record the entire CD onto an MD 1 Insert a recordable MD into the MD loading slot To record a single track during play or pause Press HIGH SPEED CD 3 MD while playing back or pausing a CD track you want to record The playback of that CD track is stopped and the same track starts playing from the beginning again This time the MD recorder starts recording the CD track When the tra...

Страница 42: ...ntil the first track of each loaded CD is recorded 2 Prepare a CD Place a CD on one of the disc tray CD 1 CD 2 or CD 3 press CD 8 then 7 before going to the next step 3 Press DISC to select the disc you want to record Make sure that the correct disc number indicator is selected on the display 4 Press LONG MODE on the unit if necessary The recording length mode changes as follows For the recording ...

Страница 43: ...essary The recording length mode changes as follows For the recording length mode see Stereo Long Hour Recording MDLP on page 35 SP Standard Play LP4 4 Times Long Play LP2 2 Times Long Play 4 Select Sound Synchronized Recording 1 Press REC MODE 2 Press SET The REC PAUSE lamp on the unit starts flashing 5 Start playback on the external equipment The REC PAUSE lamp stops flashing and remains lit and...

Страница 44: ...ined in this section pages 41 to 46 You cannot use the remote control to edit MDs Use only buttons on the unit DISC LOADING MECHANISM STANDBY ON LONG MODE REC MODE SP LP2 LP4 REC PAUSE HIGH SPEED CD MD TITLE EDIT ENTER DEMO PHONES LINE 2 MENU COMPACT COMPONENT MD SYSTEM MX S6MDR DISC TITLE EDIT ENTER DEMO ...

Страница 45: ...rases selected tracks After the erasure the subsequent tracks are justified and their track numbers are renumbered automatically You can erase up to 15 tracks at a time B C A1 1st A2 2nd 3rd 4th D 5th 1st 2nd 3rd 4th B C A D After dividing track A Track No C D E A B C D E A B After moving track B Track No 1st 2nd 3rd 4th 5th 1st 2nd 3rd 4th 5th Erasing all tracks ALL ERASE Page 46 This function er...

Страница 46: ...gain see the JOIN function DIVIDE Function This function allows you to divide one track into two separate tracks It is useful for example when you want to add track marks at a certain point within a track or if you want to separate a recording To stop any time during editing process press TITLE EDIT 1 Insert an MD you want to edit into the MD loading slot It takes about 5 seconds for the unit to r...

Страница 47: ...diting process press TITLE EDIT 1 Insert an MD you want to edit into the MD loading slot It takes about 5 seconds for the unit to read the TOC Table Of Contents of the inserted MD While the unit is reading it you cannot go to the next step 2 Press TITLE EDIT The source is changed to MD If MOVE is not shown you cannot move the track JOIN Function This function allows you to join two adjacent tracks...

Страница 48: ...nt to move to the track 5 position 8 Press ENTER DEMO to finish the editing procedure EDITING appears for a while then WRITING flashes while the editing you have made is being recorded on the MD ERASE Function This function allows you to erase unwanted tracks To stop any time during editing process press TITLE EDIT 1 Insert an MD you want to edit into the MD loading slot It takes about 5 seconds f...

Страница 49: ...e editing procedure EDITING appears for a while then WRITING flashes while the editing you have made is being recorded on the MD 5 Press SET appears between track number and track title means the track in the same line will be erased when you finish the editing procedure If you have selected a wrong track number press CANCEL then select the correct track number 6 Repeat step 4 and 5 to select all ...

Страница 50: ...nd explained in this section pages 47 to 52 Remote control DISC LOADING MECHANISM STANDBY ON LONG MODE REC MODE SP LP2 LP4 REC PAUSE HIGH SPEED CD MD TITLE EDIT ENTER DEMO PHONES LINE 2 MENU COMPACT COMPONENT MD SYSTEM MX S6MDR DISC TITLE EDIT ENTER DEMO STANDBY ON MENU DIMMER LINE RM SMXS6MDR REMOTE CONTROL LEVEL METER ...

Страница 51: ...m the very first that is inserting a disc If you have already started recording or playing start from step 2 To exit from the title entry screen any time during the process press TITLE EDIT 1 Insert an MD you want to edit into the MD loading slot It takes about 5 seconds for the unit to read the TOC Table Of Contents of the inserted MD While the unit is reading it you cannot go to the next step 2 ...

Страница 52: ...D You can assign titles during play or recording During play Entering a track title The MD recorder repeats playback of the current track until you press ENTER DEMO in step 9 above When you press ENTER DEMO the next track will be played Entering a disc title The MD recorder repeats playback of all tracks of the MD until you press ENTER DEMO in step 9 above When you press ENTER DEMO the MD recorder...

Страница 53: ... the MD WRITING flashes while the editing you have made is being recorded on the MD To erase all the characters Press CANCEL repeatedly in step 3 above to erase all the characters then go to step 6 On the remote control In the following example the process is explained from the very first that is inserting a disc If you have already started recording or playing start from step 3 To exit from the t...

Страница 54: ...l letters Small letters Numerals 10 Press MD TITLE or ENTER again to finish the title entry 11 Press 0 on the unit for the MD recorder to eject the MD WRITING flashes while the editing you have made is being recorded on the MD Available Symbols are as follows You can assign titles during play or recording During play Entering a track title The MD recorder repeats playback of the current track unti...

Страница 55: ...nd SEE YOU screens To create your own opening and ending screens follow the procedure below You can register up to 26 characters for each screen You have to use the menu for the following operations For general information on the menu see pages 60 and 61 On the unit ONLY 1 Press to turn off the unit if it is on The STANDBY ON lamp lights red 2 Call up the Startup Display setting mode 1 Press MENU ...

Страница 56: ... and explained in this section pages 53 to 59 Remote control DISC LOADING MECHANISM STANDBY ON LONG MODE REC MODE SP LP2 LP4 REC PAUSE HIGH SPEED CD MD TITLE EDIT ENTER DEMO PHONES LINE 2 MENU COMPACT COMPONENT MD SYSTEM MX S6MDR DISC STANDBY ON MENU DIMMER LINE RM SMXS6MDR REMOTE CONTROL LEVEL METER ...

Страница 57: ...ck setting directly on the menu To readjust the clock follow the procedure below 1 Press MENU 2 Push the joy control downward to select REC ON OFF highlighted If REC ON OFF does not appear and CLOCK SET appears the clock setting has been lost In this case simply press SET in the following step 3 Push the joy control rightward or leftward to select CLOCK SET then press SET The hour digit starts fla...

Страница 58: ...Push the joy control rightward or leftward to select the source The source changes as follows FM Tunes into an FM station Select a preset station see below AM Tunes into an AM MW LW station Select a preset station see below LINE1 Selects the external equipment connected to the LINE 1 jacks LINE2 Selects the external equipment connected to the LINE 2 jack DIGITAL IN Selects the external equipment c...

Страница 59: ...y To turn on the Recording Timer press SET after making sure that ON is selected highlighted in the main display The timer and REC indicators light on the display The settings you have done are shown in the main display for your confirmation Continued SP Standard Play LP4 4 Times Long Play LP2 2 Times Long Play Using Daily Timer With Daily Timer you can wake up to your favorite music or radio prog...

Страница 60: ...lect the starting track LINE1 Selects the external equipment connected to the LINE 1 jacks LINE2 Selects the external equipment connected to the LINE 2 jack DIGITAL IN Selects the external equipment connected to the DIGITAL IN terminal To operate these equipment with the Daily Timer they also need to have the timer function If you have changed the source name the changed name will appear 9 If you ...

Страница 61: ...ndby if you have set the timer with the unit turned on The STANDBY ON lamp lights red If the unit is kept turned on when the timer on time comes Daily Timer does not work at all Daily Timer will be canceled and the unit will not turn off automatically in the following When you change the source When you try to start recording When you enter the MD editing or title entry mode When you enter the tim...

Страница 62: ... adjust the clock You can use the Auto Power Off function through the menu to turn off the unit automatically See Auto Power Off Setting on page 66 To sleep with the Sleep Timer and wake up with the Daily Timer The unit turns off when the shut off time comes set by the Sleep Timer and turns on when the timer on time set by the Daily Timer comes 1 Set the Daily Timer as explained on pages 56 to 58 ...

Страница 63: ... control rightward or leftward to select a proper setting after selecting the function on the menu or to move to another setting mode Press to finish the setting or to move to another setting mode MENU Joy control SET CANCEL Press to cancel the menu operation Press to go back to the previous step while setting clock or timers Highlighted when selected These triangles indicate that you can select a...

Страница 64: ...n the unit is turned on and the source is CD but not playing CD repeat mode setting CD REPEAT Appears only when the unit is turned on and the source is CD MD playback mode setting MD Appears only when the unit is turned on and the source is MD but not playing MD repeat mode setting MD REPEAT Appears only when the unit is turned on and the source is MD Display Setting Level Meter Selection LEVEL ME...

Страница 65: ...es 1 Press MENU The menu screen appears in the main display If the current source is not FM you cannot go to the next step 2 Push the joy control downward to select FM MODE current play mode setting The current play mode AUTO or MONO will appear following FM MODE 3 Push the joy control rightward or leftward to select the FM reception mode you want AUTO Normally select this In this mode you can hea...

Страница 66: ... The menu screen appears in the main display 2 Make sure that LEVEL METER is selected highlighted then press SET 3 Push the joy control downward or upward to select the level meter you want METER 1 or METER 2 See page 13 for details 4 Press SET to finish the setting Selecting the display color When you change the display color the illumination color of the ring around the VOLUME control also chang...

Страница 67: ...t one of 24 colors marks in the main display Red Blue White Green Continued 5 Press SET 6 Push the joy control downward or upward to select either Manual 1 or Manual 2 in which you want to store the setting 7 Press SET to finish the setting Selecting the display pattern You can change the display pattern either to positive pattern or to negative pattern 1 Press MENU The menu screen appears in the ...

Страница 68: ... SET Ex When the source is the external equipment connected to the LINE 1 jacks 3 Push the joy control downward or upward to select the input level When the source is the equipment connected to the LINE 1 jacks Level 1 Select when the recorded sound is not loud enough This setting increases the input signal level Initial setting when shipped from the factory Level 2 Select when the recorded sound ...

Страница 69: ... Power Off function CANCEL Cancels the Auto Power Off function 4 Press SET to finish the setting When Auto Power Off function is activated the A P off indicator lights on the display The A P off indicator starts flashing if no sound comes in When the remaining time until the shut off time becomes 20 seconds it will be shown in the main display To store the display setting in memory You can store t...

Страница 70: ...ratch the surface of the CD when placing it back in its case Avoid exposure to direct sunlight temperature extremes and moisture To clean the CD Wipe the CD with a soft cloth in a straight line from center to edge DO NOT use any solvent such as conventional record cleaner spray thinner or benzine to clean the CD Handling MDs Do not open the shutter The shutter is locked so that it will not open Tr...

Страница 71: ...developed for MD This technology cuts out faint sounds that would not be heard by the human beings This technology based on human sensitivity to sounds reduces recorded data volume up to about one fifth of the original data volume Furthermore this unit takes advantage of the latest ATRAC3 techniques which can reduce the amount of data to record to one 10th or one 20th of the original data volume T...

Страница 72: ... are erased The sound drops out during fast forward or fast reverse The amount of recorded time on the MD added to the amount of remaining time is shorter than the MD s total possible recording time Cause There is a maximum number of tracks which can be recorded regardless of recording time More than 254 tracks cannot be recorded on an MD Repeating erasure and recording on the same MD creates many...

Страница 73: ...You are trying to copy a non audio disc like a CD ROM Video CD or DVD You are trying to edit or record on a playback only MD MD is write protected Digital copy of the 2nd generation is prohibited Solution Change the MD with another if you want to enjoy playback This is not a malfunction See MD limitations on pages 44 and 69 This is not a malfunction You cannot listen to the sound during high speed...

Страница 74: ...it while entering disc or track titles Something is wrong with your unit This happens because a strong light strikes the display The built in microprocessor has malfunctioned due to external electrical interference Action Check all connections and make corrections See pages 6 9 Change it with a recordable MD Unprotect the MD See page 34 Reconnect the antenna securely Change the position and direct...

Страница 75: ... LW 144 kHz 288 kHz CD player CD Capacity 3 CDs Dynamic range 92 dB Signal to noise ratio 100 dB Wow and flutter Immeasurable MD recorder Audio playing system MiniDisc digital audio system Recording system Magneto optical overwrite system Reading system Non contact semiconductor laser pickup λ 780 nm Error correction system CIRC Cross Interleave Reed Solomon Code Sampling frequency 44 1 kHz With s...

Страница 76: ...ion finden Sie auf Seite 9 Demostración en pantalla Cada vez que usted enchufa el cable de alimentación de CA en un tomacorriente de CA se iniciará automáticamente la demostración en la pantalla prin cipal Para detener y cancelar la demostración en pantalla pulse ENTER DEMO en la unidad para que se visualice DEMO OFF en la pantalla principal Para una información más detallada sobre la demostración...

Страница 77: ...ous voltages DON T leave equipment switched on when it is unattended unless it is specifically stated that it is designed for unattended operation or has a standby mode Switch off using the switch on the equipment and make sure that your family know how to do this Special arrangements may need to be made for infirm or handicapped people DON T use equipment such as personal stereos or radios so tha...

Отзывы: