background image

1

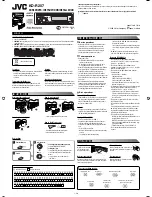
KD-R203/KD-R201

Installation/Connection Manual
Einbau/Anschlußanleitung

Руководство по установке/подключению

Εγχειρίδιo εγκατάστασης/συνδέσεων

0808DTSMDTJEIN

EN, GE, RU, GR

  ENGLISH

This unit is designed to operate on 

12 V DC, 

NEGATIVE ground electrical systems

. If your 

vehicle does not have this system, a voltage inverter 
is required, which can be purchased at JVC IN-CAR 
ENTERTAINMENT dealers.

  DEUTSCH

Dieses Gerät ist für einen Betrieb in 

elektrischen 

Anlagen mit 12 V Gleichstrom und (–) Erdung 
ausgelegt

. Verfügt Ihr Fahrzeug nicht über diese 

Anlage, ist ein Spannungsinverter erforderlich, der 
bei JVC Autoradiohändler erworben werden kann.

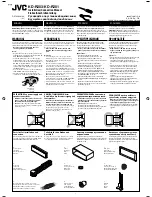
I

Handles

Griffe

Рычаги

Κλειδιά

E

Washer (ø5)

Unterlegscheibe (ø5)

Шайба (њ5)

Ρoδέλα (ø5)

F

Lock nut (M5)

Sicherungsmutter (M5)

Фиксирующая гайка (M5)

Ασφαλιστικό παξιµάδι (M5)

G

Mounting bolt (M4 

×

 5 mm; M5 

×

 12.5 mm)

Befestigungsschraube (M4 

×

 5 mm; M5 

×

 12,5 mm)

Крепежный болт (M4 

×

 5 мм; M5 

×

 12,5 мм)

Βίδα στερέωσης (M4 

×

 5 mm; M5 

×

 12,5 mm)

H

Rubber cushion

Gummipuffer

Резиновый чехол

Ελαστικό παρέµβυσµα

A

Control panel

Schalttafel

Панель управления

Πρόσoψη

B

Sleeve

Halterung

Муфта

Βάση

C

Trim plate

Frontrahmen

Декоративную панель

∆ιακoσµητικό πλαίσιo  

D

Power cord

Stromkable

Кабель питания

∆έσµη καλωδίων ρεύµατoς

Parts list for installation and 
connection

The following parts are provided for this unit. If 
any item is missing, consult your JVC IN-CAR 
ENTERTAINMENT dealer immediately.

Teileliste für den Einbau und 
Anschluß

Die folgenden Teile werden zusammen mit diesem 
Gerät geliefert. Falls ein Artikel fehlt, wenden Sie 
sich sofort an Ihren JVC-Autoradiohändler.

  РУССКИЙ

Это устройство разработано для эксплуатации 
на 

12 В постоянного напряжения с минусом 

на массе

. Если Ваш автомобиль не имеет этой 

системы, требуется инвертор напряжения, который 
может быть приобретен у дилера автомобилнего 
специалиста JVC.

Список деталей для установки и 
подключения

Следующие детали поставлены в комплекте с 
устройством. При отсутствии какого-либо элемента 
немедленно свяжитесь с дилером автомобильного 
специалиста JVC.

WARNINGS

To prevent short circuits, we recommend that you 
disconnect the battery’s negative terminal and make 
all electrical connections before installing the unit.

•  Be sure to ground this unit to the car’s 

chassis again after installation.

Notes:

•  Replace the fuse with one of the specified rating. 

If the fuse blows frequently, consult your JVC IN-
CAR ENTERTAINMENT dealer.

•  It is recommended to connect to the speakers 

with maximum power of more than 50 W (both 
at the rear and at the front, with an impedance of 


to 8


). If the maximum power is less than 

50 W, change “AMP GAIN” setting to prevent the 
speakers from being damaged (see page 14 of the 
INSTRUCTIONS).

•  To prevent short-circuit, cover the terminals of 

the UNUSED leads with insulating tape.

•  The heat sink becomes very hot after use. Be 

careful not to touch it when removing this unit.

WARNUNGEN

Zur Vermeidung von Kurzschlüssen empfehlen wir, 
daß Sie den negativen Batterieanschluß abtrennen 
und alle elektrischen Anschlüsse herstellen, bevor das 
Gerät eingebaut wird.

  Sicherstellen, daß das Gerät nach dem 

Einbau a Chassis des Fahrzeugs geerdet 
wird.

Hinweise:

  Die Sicherung mit einer der entsprechenden 

Nennleistung ersetzen. Brennt die Sicherung 
häufig durch, wenden Sie sich an ihren JVC 
Autoradiohändler.

  Es wird empfohlen, Lautsprecher mit 

einer Maximalleistung von mehr als 50 W 
anzuschließen (sowohl hinten als auch vorne, 
mit einer Impedanz von 

4


bis 8


). Wenn die 

Maximalleistung weniger als 50 W beträgt, stellen 
Sie „AMP GAIN“ anders ein, um Schäden an den 
Lautsprechern zu vermeiden (siehe Seite 14 der 
BEDIENUNGSANLEITUNG).

  Zur Vermeidung eines Kurzschlusses die 

Anschlußklemmen der NICHT VERWENDETEN 
Leitungen mit Isolierklebeband umwickeln.

  Das Abstrahlblech wird nach dem Gebrauch sehr 

heiß. Beim Ausbau des Geräts darauf achten, das 
Abstrahlblech nicht zu berühren.

Heat sink

Abstrahlblech

Радиатор

Ψύκτρα

ПРЕДУПРЕЖДЕНИЯ

Для предотвращения коротких замыканий мы 
рекомендуем Вам отсоединить отрицательный 
разъем аккумулятора и осуществить все 
подключения перед установкой устройства.

  После установки обязательно заземлите 

данное устройство на шасси автомобиля.

Примечания:

  Заменяйте предохранитель другим 

предохранителем указанного класса. Если 
предохранитель сгорает слишком часто, 
обратитесь к дилеру автомобилнего специалиста 
JVC.

  Рекомендуется подключать динамики с 

максимальной мощностью более 50 Вт (к 
задней и передней панели устройства, с 
полным сопротивлением от 

4

 Ω 

до


8

 Ω). Если 

максимальная мощность динамиков менее 
50 Вт, перейдите в режим “AMP GAIN”, чтобы 
предотвратить их повреждение (см. ИНСТРУКЦИИ 
ПО ЭКСПЛУАТАЦИИ на стр. 14).

  Для предотвращения короткого замыкания 

заклейте НЕИСПОЛЬЗУЕМЫЕ концы изолирующей 
лентой.

  Радиатор во время использования сильно 

нагревается. Старайтесь его не трогать во время 
удаления устройства.

PRECAUTIONS on power supply and 
speaker connections:

•  DO NOT connect the speaker leads of the 

power cord to the car battery; otherwise, 
the unit will be seriously damaged.

•  BEFORE connecting the speaker leads of the 

power cord to the speakers, check the speaker 
wiring in your car.

ПРЕДОСТЕРЕЖЕНИЯ по питанию и 
подключению громкоговорителей:

•  НЕ подключайте провода громкоговорителей 

к аккумулятору автомобиля, иначе устройство 
будет повреждено.

  ПЕРЕД подключением проводов 

громкоговорителей к кабелю питания 
громкоговорителя проверьте схему соединений 
громкоговорителей в Вашем автомобиле.

VORSICHTSMASSREGELN beim 
Anschließen der Stromversorgung und 
Lautsprecher:

•  Die Lautsprecherleitungen des Netzkabels 

NICHT an der Autobatterie anschließen, da 
sonst das Gerät schwer beschädigt wird.

  VOR dem Anschließen der Lautsprecherleitungen 

des Spannunsgversorgungskabels an die 
Lautsprecher, die Lautsprecherverdrahtung in 
Ihrem Auto überprüfen.

GET0583-013A

[EY]

© 2008 Victor Company of Japan, Limited

  ΕΛΛΗΝΙΚΑ

Η συσκευή αυτή είναι σχεδιασµένη να λειτoυργεί σε 
ηλεκτρικά συστήµατα oχηµάτων στα 

12 V DC, µε 

ΑΡΝΗΤΙΚΗ γείωση

. Εάν τo όχηµά σας δεν ανήκει στην 

κατηγoρία αυτή, θα χρειαστείτε ένα µετατρoπέα τάσης, τoν 
oπoίo µπoρείτε να πρoµηθευτείτε από τoυς αντιπρoσώπoυς 
συστηµάτων ψυχαγωγίας oχηµάτων της JVC.

ΠΡΟΦΥΛΑΞΕΙΣ

Για την απoτρoπή τυχόν βραχυκυκλωµάτων, συνιστoύµε 
να απoσυνδέετε τoν αρνητικό πόλo της µπαταρίας και 
να κάνετε όλες τις ηλεκτρικές συνδέσεις πριν από την 
εγκατάσταση της συσκευής.

  Βεβαιωθείτε ότι θα γειώσετε τη συσκευή 

αυτή στo αµάξωµα τoυ oχήµατoς ξανά µετά 
την εγκατάσταση.

Σηµειώσεις:

  Εάν καεί η ασφάλεια, αντικαταστήστε την µε καινoύργια 

των ίδιων oνoµαστικών χαρακτηριστικών. Εάν η 
ασφάλεια καίγεται συχνά, συµβoυλευθείτε τoν 
αντιπρόσωπo συστηµάτων ψυχαγωγίας oχηµάτων της 
JVC.

  Συνιστάται να συνδέετε ηχεία µέγιστης ισχύoς πάνω 

από 50 W (τόσo πίσω όσo και µπρoστά, µε σύνθετη 
αντίσταση 

 έως 8 

). Εάν η µέγιστη ισχύς των 

ηχείων είναι µικρότερη από 50 W, αλλάξτε τη ρύθµιση 
“AMP GAIN” (Απoλαβή ενισχυτή) για να απoτρέψετε 
ενδεχόµενη καταστρoφή τoυς (βλ. σελίδα 14 στις 
O∆ΗΓΙΕΣ).

  Για να απoτρέψετε τυχόν βραχυκυκλώµατα, 

καλύπτετε τoυς ακρoδέκτες των καλωδίων ΠOΥ ∆Ε 
XΡΗΣΙΜOΠOΙΕΙΤΕ µε µoνωτική ταινία.

  Η ψύκτρα ζεσταίνεται πoλύ κατά τη χρήση. Πρoσέχετε 

να µην την αγγίξετε καθώς αφαιρείτε τη συσκευή.

ΠΡOΦΥΛΑΞΕΙΣ κατά τις συνδέσεις 
τρoφoδoσίας ρεύµατoς και ηχείων:


ΜΗ συνδέετε τα καλώδια ηχείων της συσκευής 
µε την µπαταρία τoυ oχήµατoς, διότι ενδέχεται 
να πρoκληθεί σoβαρή ζηµιά στη συσκευή.

  ΠΡOΤOΥ συνδέσετε τα καλώδια ηχείων της συσκευής 

µε τα ηχεία, ελέγξτε την καλωδίωση των ηχείων τoυ 
oχήµατoς.

Κατάλoγoς εξαρτηµάτων για την 
εγκατάσταση και τις συνδέσεις

Η συσκευή αυτή συνoδεύεται από τα εξαρτήµατα πoυ 
ανα

φ

έρoνται κατωτέρω. Αν λείπει κάποιο στοιχείο, 

συμβουλευτείτε αμέσως τον αντιπρόσωπο συστημάτων 
ψυχαγωγίας οχημάτων της JVC.

Instal1-2_KD-G201_013A_1.indd   1

Instal1-2_KD-G201_013A_1.indd   1

7/8/08   10:36:39 AM

7/8/08   10:36:39 AM

Содержание 0708DTSMDTJEIN

Страница 1: ...f characters for file folder names vary depending on the disc format used includes 4 extension characters mp3 or wma ISO 9660 Level 1 up to 12 characters ISO 9660 Level 2 up to 31 characters Romeo up to 64 characters Joliet up to 32 characters Windows long file name up to 126 characters This unit can recognize a total of 512 files 255 folders and 8 hierarchical levels This unit can play back files...

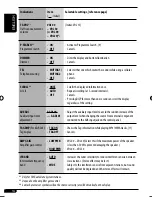
Страница 2: ...e sound mode iEQ intelligent equalizer Selects the source Searches for stations if pressed briefly Fast forwards or reverses the track if pressed and held Changes the track of the disc if pressed briefly Select FM AM Select the bands Search for a station Auto Search Manual Search Hold either one of the buttons until M flashes on the display then press it repeatedly Remote sensor DONOTexposetostron...

Страница 3: ...ancels SCROLL 2 ONCE AUTO OFF Scrolls the displayed information once Repeats scrolling at 5 second intervals Cancels Pressing DISP for more than one second can scroll the display regardless of the setting L O MODE REAR WOOFER Select if the REAR LINE OUT terminals are used for connecting the speakers through an external amplifier Select if the REAR LINE OUT terminals are used for connecting a subwo...

Страница 4: ...e information regarding installation kits consult your JVC car audio dealer or a company supplying kits If you are not sure how to install this unit correctly have it installed by a qualified technician Purple Front speaker left To the remote lead of other equipment or automatic antenna if any 200 mA max Blue with white stripe Red To an accessory terminal in the fuse block To a live terminal in th...

Страница 5: ...ections refer to the separate manual Pour l installation et les raccordements se référer au manuel séparé INSTRUCTIONS MANUEL D INSTRUCTIONS GET0583 003A EX For canceling the display demonstration see page 5 Pour annuler la démonstration des affichages référez vous à la page 5 ...

Страница 6: ... service personnel 3 CAUTION Visible and or invisible class 1M laser radiation when open Do not view directly with optical instruments 4 REPRODUCTION OF LABEL CAUTION LABEL PLACED OUTSIDE THE UNIT Information for Users on Disposal of Old Equipment and Batteries European Union only These symbols indicate that the product and the battery with this symbol should not be disposed as general household w...

Страница 7: ...c to avoid damaging the speakers by the sudden increase of the output level CONTENTS Control panel 4 Getting started 5 Basic operations 5 Radio operations 6 FM Radio Data System operations 7 Searching for your favorite FM Radio Data System programme 7 Disc operations 9 Playing a disc in the unit 9 Sound adjustments 11 General settings PSM 12 Other external component operations 15 Maintenance 15 Mo...

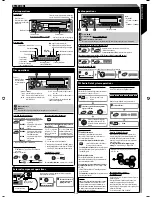
Страница 8: ...level indicator Time countdown indicator z Main display x Sound mode c EQ custom equalizer indicators JAZZ ROCK HIP HOP CLASSIC POPS USER Parts identification Display window Controlpanel 1 0 eject button 2 4 buttons 3 Loading slot 4 standby attenuator button 5 BAND button 6 Display window 7 T P traffic programme programme type button 8 DISP display button 9 5 up down buttons p control panel releas...

Страница 9: ...hour 3 Finish the procedure To check the current clock time while the power is turned off Clock time is shown on the display for about 5 seconds See also page 13 Gettingstarted Basic operations Turn on the power Ÿ Youcannotselect CD astheplaybacksourceif thereisnodiscintheunit For FM AM tuner Adjust the volume Adjust the sound as you want See pages 11 and 12 To drop the volume in a moment ATT To r...

Страница 10: ...lect the FM band FM1 FM3 you want to store into 2 3 SSM flashes then disappears when automatic presetting is over Local FM stations with the strongest signals are searched and stored automatically in the FM band Radiooperations Ÿ Start searching for a station When a station is received searching stops To stop searching press the same button again To tune in to a station manually In step above 1 2 ...

Страница 11: ...receiving the Radio Data System data this unit can do the following Programme Type PTY Search see the following TA Traffic Announcement and PTY Standby Receptions see pages 8 9 13 and 14 Tracing the same programme automatically Network Tracking Reception see page 9 Programme Search see pages 9 and 14 Searching for your favorite FM Radio Data System programme You can tune in to a station broadcasti...

Страница 12: ...ramme indicator either lights up or flashes If the TP indicator lights up TA Standby Reception is activated If the TP indicator flashes TA Standby Reception is not yet activated This occurs when you are listening to an FM station without the Radio Data System signals required for TA Standby Reception To activate TA Standby Reception tune in to another station providing these signals The TP indicat...

Страница 13: ... this unit automatically tunes in to another FM Radio Data System station of the same network possibly broadcasting the same programme with stronger signals see the illustration below When shipped from the factory Network Tracking Reception is activated To change the Network Tracking Reception setting see AF REG on page 13 Programme A broadcasting on different frequency areas 01 05 Automatic stati...

Страница 14: ...ack whose number is a single digit 1 to 9 1 2 Each time you press the button you can skip 10 tracks After the last track the first track will be selected and vice versa 3 Prohibiting disc ejection You can lock a disc in the loading slot To cancel the prohibition repeat the same procedure Changing the display information The elapsed playing time with the current track number Clock with the current ...

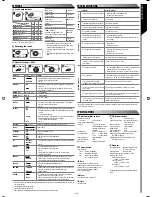
Страница 15: ... tracks of the current disc RND OFF Cancels Corresponding indicator lights up on the display Soundadjustments You can select a preset sound mode suitable to the music genre c EQ custom equalizer 1 2 Indication For BAS bass TRE treble LOUD loudness USER Flat sound 00 00 OFF ROCK Rock or disco music 03 01 ON CLASSIC Classical music 01 02 OFF POPS Light music 04 01 OFF HIP HOP Funk or rap music 02 00...

Страница 16: ...o produce a well balanced sound at a low volume level VOL volume 00 to 50 or 00 to 30 3 Adjust the volume 1 Whenyouadjustthebass treble orloudness the adjustmentyouhavemadeisstoredforthecurrently selectedsoundmode c EQ including USER 2 Ifyouareusingatwo speakersystem setthefader levelto 00 3 Dependingontheamplifiergaincontrolsetting See page14fordetails You can change PSM Preferred Setting Mode it...

Страница 17: ...ustment AUTO OFF The built in clock is automatically adjusted using the CT clock time data in the Radio Data System signal Cancels AF REG 2 Alternative frequency regionalization reception AF AF REG OFF When the currently received signals become weak the unit switches to another station the programme may differ from the one currently received 9 16 The AF indicator lights up When the currently recei...

Страница 18: ...iary input level adjustment A ADJ 00 A ADJ 05 Adjust the auxiliary input level to avoid the sudden increase of the output level when changing the source from external component connected to the AUX input jack on the control panel AMP GAIN Amplifier gain control LOW PWR HIGH PWR VOL 00 VOL 30 Select this if the maximum power of the speaker is less than 50 W to prevent damaging the speaker VOL 00 VO...

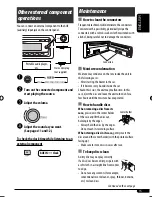
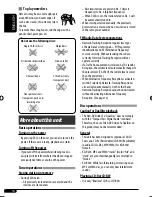
Страница 19: ...with alcohol being careful not to damage the connectors Moisture condensation Moisture may condense on the lens inside the unit in the following cases After starting the heater in the car If it becomes very humid inside the car Should this occur the unit may malfunction In this case eject the disc and leave the unit turned on for a few hours until the moisture has evaporated How to handle discs Wh...

Страница 20: ...pped previously next time you turn on the power Tuner operations Storing stations in memory During SSM search All previously stored stations are erased and the stations are stored anew Received stations are preset in No 1 lowest frequency to No 6 highest frequency When SSM is over the station stored in No 1 will be automatically tuned in When storing a station manually the previously preset statio...

Страница 21: ...dia conditions stained scratched warped etc CD RWs may require a longer readout time since the reflectance of CD RWs is lower than that of regular CDs Do not use the following CD Rs or CD RWs Discs with stickers labels or protective seal stuck to the surface Discs on which labels can be directly printed by an ink jet printer Using these discs under high temperature or high humidity may cause malfu...

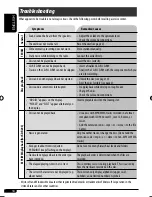
Страница 22: ...ayed back Tracks on the CD R CD RW cannot be skipped Insert a finalized CD R CD RW Finalize the CD R CD RW with the component which you used for recording Disc can be neither played back nor ejected Unlock the disc see page 10 Eject the disc forcibly see page 2 Disc sound is sometimes interrupted Stop playback while driving on rough roads Change the disc Check the cords and connections NO DISC app...

Страница 23: ...f 1 0 μV 75 Ω 50 dB Quieting Sensitivity 16 3 dBf 1 8 μV 75 Ω Alternate Channel Selectivity 400 kHz 65 dB Frequency Response 40 Hz to 15 000 Hz Stereo Separation 30 dB MW Tuner Sensitivity Selectivity 20 μV 35 dB LW Tuner Sensitivity 50 μV CD PLAYER SECTION Type Compact disc player Signal Detection System Non contact optical pickup semiconductor laser Number of Channels 2 channels stereo Frequency...

Страница 24: ...alid European directives and standards regarding electromagnetic compatibility and electrical safety European representative of Victor Company of Japan Limited is JVC Technical Services Europe GmbH Postfach 10 05 04 61145 Friedberg Germany Cher e client e Cet appareil est conforme aux directives et normes européennes en vigueur concernant la compatibilité électromagnétique et à la sécurité électri...

Страница 25: ... following parts are provided for this unit If any item is missing consult your JVC IN CAR ENTERTAINMENT dealer immediately Liste des pièces pour l installation et raccordement Les pièces suivantes sont fournies avec cet appareil Si quelque chose manquait consultez votre revendeur autoradio JVC immédiatement GET0583 010A EX Heat sink Dissipateur de chaleur PRECAUTIONS on power supply and speaker c...

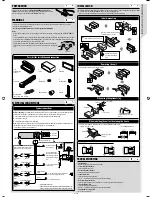
Страница 26: ...l appareil libérer la section arrière Insert the two handles then pull them as illustrated so that the unit can be removed Insérez les deux poignées puis tirez de la façon illustrée de façon à retirer l appareil When installing the unit without using the sleeve Lors de l installation de l appareil scans utiliser de manchon In a Toyota car for example first remove the car radio and install the unit...

Страница 27: ...t be turned on 1 Non fourni avec cet autoradio 2 Pour vérifier le fonctionnement de cet appareil avant installation ce fil doit être raccordé sinon l appareil ne peut pas être mis sous tension ENGLISH FRANÇAIS ELECTRICAL CONNECTIONS RACCORDEMENTS ELECTRIQUES A Before connecting Check the wiring in the vehicle carefully Incorrect connection may cause serious damage to this unit The leads of the pow...

Страница 28: ... à un endroit qui n est pas recouvert de peinture s il est recouvert de peinture enlevez d abord la peinture avant d attacher le fil L appareil peut être endommagé si cela n est pas fait correctement B TROUBLESHOOTING The fuse blows Are the red and black leads connected correctly Power cannot be turned on Is the yellow lead connected No sound from the speakers Is the speaker output lead short circ...

Страница 29: ...и выполнению соединений приводятся в отдельной инструкции Για πληρoφoρίες σχετικά µε την εγκατάσταση και τις συνδέσεις ανατρέξτε στo αντίστoιχo ξεχωριστό εγχειρίδιo INSTRUCTIONS BEDIENUNGSANLEITUNG ИНСТРУКЦИИ ПО ЭКСПЛУАТАЦИИ Ο ΗΓΙΕΣ GET0583 006A EY For canceling the display demonstration see page 5 Zum Abbrechen der Displaydemonstration siehe Seite 5 Информацию об отмене демонстрации функций диспл...

Страница 30: ... service personnel 3 CAUTION Visible and or invisible class 1M laser radiation when open Do not view directly with optical instruments 4 REPRODUCTION OF LABEL CAUTION LABEL PLACED OUTSIDE THE UNIT Information for Users on Disposal of Old Equipment and Batteries European Union only These symbols indicate that the product and the battery with this symbol should not be disposed as general household w...

Страница 31: ...c to avoid damaging the speakers by the sudden increase of the output level CONTENTS Control panel 4 Getting started 5 Basic operations 5 Radio operations 6 FM Radio Data System operations 7 Searching for your favorite FM Radio Data System programme 7 Disc operations 9 Playing a disc in the unit 9 Sound adjustments 11 General settings PSM 12 Other external component operations 15 Maintenance 15 Mo...

Страница 32: ...countdown indicator z Main display x Sound mode c EQ custom equalizer indicators JAZZ ROCK HIP HOP CLASSIC POPS USER ForKD R203 Parts identification Display window Controlpanel 1 0 eject button 2 4 buttons 3 Loading slot 4 standby attenuator button 5 BAND button 6 Display window 7 T P traffic programme programme type button 8 DISP display button 9 5 up down buttons p control panel release button q...

Страница 33: ...hour 3 Finish the procedure To check the current clock time while the power is turned off Clock time is shown on the display for about 5 seconds See also page 13 Gettingstarted Basic operations Turn on the power Ÿ Youcannotselect CD astheplaybacksourceif thereisnodiscintheunit For FM AM tuner Adjust the volume Adjust the sound as you want See pages 11 and 12 To drop the volume in a moment ATT To r...

Страница 34: ...lect the FM band FM1 FM3 you want to store into 2 3 SSM flashes then disappears when automatic presetting is over Local FM stations with the strongest signals are searched and stored automatically in the FM band Radiooperations Ÿ Start searching for a station When a station is received searching stops To stop searching press the same button again To tune in to a station manually In step above 1 2 ...

Страница 35: ...receiving the Radio Data System data this unit can do the following Programme Type PTY Search see the following TA Traffic Announcement and PTY Standby Receptions see pages 8 9 13 and 14 Tracing the same programme automatically Network Tracking Reception see page 9 Programme Search see pages 9 and 14 Searching for your favorite FM Radio Data System programme You can tune in to a station broadcasti...

Страница 36: ...ramme indicator either lights up or flashes If the TP indicator lights up TA Standby Reception is activated If the TP indicator flashes TA Standby Reception is not yet activated This occurs when you are listening to an FM station without the Radio Data System signals required for TA Standby Reception To activate TA Standby Reception tune in to another station providing these signals The TP indicat...

Страница 37: ... this unit automatically tunes in to another FM Radio Data System station of the same network possibly broadcasting the same programme with stronger signals see the illustration below When shipped from the factory Network Tracking Reception is activated To change the Network Tracking Reception setting see AF REG on page 13 Programme A broadcasting on different frequency areas 01 05 Automatic stati...

Страница 38: ...nning of their folder names 01 02 03 and so on KD R203 To select a particular track in a folder for MP3 or WMA disc Other main functions Skipping tracks quickly during play KD R203 For MP3 or WMA discs you can skip tracks within the same folder Ex To select track 32 while playing a track whose number is a single digit 1 to 9 1 2 Each time you press the button you can skip 10 tracks After the last ...

Страница 39: ...e following playback modes at a time 1 2 Select your desired playback mode 7 Repeat play Mode Plays repeatedly TRK RPT The current track FLDR RPT All tracks of the current folder RPT OFF Cancels 7 Random play Mode Plays at random FLDR RND All tracks of the current folder then the tracks of the next folder and so on ALL RND All tracks of the current disc RND OFF Cancels KD R203 OnlywhileplayinganMP...

Страница 40: ...o produce a well balanced sound at a low volume level VOL volume 00 to 50 or 00 to 30 3 Adjust the volume 1 Whenyouadjustthebass treble orloudness the adjustmentyouhavemadeisstoredforthecurrently selectedsoundmode c EQ including USER 2 Ifyouareusingatwo speakersystem setthefader levelto 00 3 Dependingontheamplifiergaincontrolsetting See page14fordetails You can change PSM Preferred Setting Mode it...

Страница 41: ...ustment AUTO OFF The built in clock is automatically adjusted using the CT clock time data in the Radio Data System signal Cancels AF REG 2 Alternative frequency regionalization reception AF AF REG OFF When the currently received signals become weak the unit switches to another station the programme may differ from the one currently received 9 16 The AF indicator lights up When the currently recei...

Страница 42: ...auxiliary input level to avoid the sudden increase of the output level when changing the source from external component connected to the AUX input jack on the control panel TAG DISP for KD R203 Tag display TAG ON TAG OFF Shows the Tag information while playing MP3 WMA tracks 11 Cancels AMP GAIN Amplifier gain control LOW PWR HIGH PWR VOL 00 VOL 30 Select this if the maximum power of the speaker is...

Страница 43: ... in the following cases After starting the heater in the car If it becomes very humid inside the car Should this occur the unit may malfunction In this case eject the disc and leave the unit turned on for a few hours until the moisture has evaporated How to handle discs When removing a disc from its case press down the center holder of the case and lift the disc out holding it by the edges Always ...

Страница 44: ...the same preset number FM Radio Data System operations Network Tracking Reception requires two types of Radio Data System signals PI Programme Identification and AF Alternative Frequency to work correctly Without receiving these data correctly Network Tracking Reception will not operate correctly If a Traffic Announcement is received by TA Standby Reception the volume level automatically changes t...

Страница 45: ...EG 2 Disc format ISO 9660 Level 1 Level 2 Romeo Joliet Windows long file name The maximum number of characters for file folder names vary depending on the disc format used includes 4 extension characters mp3 or wma ISO 9660 Level 1 up to 12 characters ISO 9660 Level 2 up to 31 characters Romeo up to 128 characters Joliet up to 64 characters Windows long file name up to 128 characters This unit can...

Страница 46: ...oading slot MP3 WMA playback for KD R203 Disc cannot be played back Use a disc with MP3 WMA tracks recorded in a format compliant with ISO 9660 Level 1 Level 2 Romeo or Joliet Add the extension code mp3 or wma to the file names Noise is generated Skip to another track or change the disc Do not add the extension code mp3 or wma to non MP3 or WMA tracks A longer readout time is required READING keep...

Страница 47: ...te Channel Selectivity 400 kHz 65 dB Frequency Response 40 Hz to 15 000 Hz Stereo Separation 30 dB MW Tuner Sensitivity Selectivity 20 μV 35 dB LW Tuner Sensitivity 50 μV CD PLAYER SECTION Type Compact disc player Signal Detection System Non contact optical pickup semiconductor laser Number of Channels 2 channels stereo Frequency Response 5 Hz to 20 000 Hz Dynamic Range 93 dB Signal to Noise Ratio...

Страница 48: ...Postfach 10 05 04 61145 Friedberg Germany Sehr geehrter Kunde sehr geehrte Kundin dieses Gerät stimmt mit den gültigen europäischen Richtlinien und Normen bezüglich elektromagnetischer Verträglichkeit und elektrischer Sicherheit überein Die europäische Vertretung für die Victor Company of Japan Limited ist JVC Technical Services Europe GmbH Postfach 10 05 04 61145 Friedberg Deutschland Уважаемый к...

Страница 49: ...ckeln Das Abstrahlblech wird nach dem Gebrauch sehr heiß Beim Ausbau des Geräts darauf achten das Abstrahlblech nicht zu berühren Heat sink Abstrahlblech Радиатор Ψύκτρα ПРЕДУПРЕЖДЕНИЯ Для предотвращения коротких замыканий мы рекомендуем Вам отсоединить отрицательный разъем аккумулятора и осуществить все подключения перед установкой устройства После установки обязательно заземлите данное устройств...

Страница 50: ...oιήσετε τις βίδες µήκoυς 8 mm Εάν χρησιµoπoιήσετε µακρύτερες βίδες ενδέχεται να πρoκαλέσετε ζηµιά στη συσκευή Bracket 2 Konsole 2 Кронштейн 2 Γλωττίδα στερέωσης 2 Pocket Taschen Карман Εσoχή Flat type screws M5 8 mm 2 Senkkopfschrauben M5 8 mm 2 Крепежные винты M5 8 мм 2 Πλακέ βίδες M5 8 mm 2 Screw option Schraube Option Винт дополнительно Βίδα πρoαιρετική Stay option Anker Option Стойка дополните...

Страница 51: ...der Reihenfolge anschließen wie in der Abbildung unten gezeigt 2 Das Antennenkabel anschließen 3 Die Kabelbäume am Gerät anschließen Hinweis Verfügt Ihr Fahrzeug nicht über eine Zubehöranschlußklemme die Sicherung von der 1 Sicherungsposition Erstposition in die 2 Sicherungsposition versetzen die rote Leitung A7 an der Batterieanschlußklemme anschließen Die gelbe Leitung A4 wird in diesem Fall nic...

Страница 52: ...lemmen der linken und rechten Lautsprecher zusammen geerdet Dieser Receiver funktioniert überhaupt nicht Haben Sie einen Reset am Receiver vorgenommen BЫЯВЛЕНИЕ НЕИСПРАВНОСТЕЙ Сработал предохранитель Правильно ли подключены черный и красный провода Питание не включается Подключен ли желтый провод Звук не выводится через громкоговорители Нет ли короткого замыкания на кабеле выхода громкоговорителей...

Страница 53: ...hat of regular CDs Playing an MP3 WMA disc This unit can play back MP3 WMA files with the extension code mp3 or wma regardless of the letter case upper lower This unit can show the names of albums artists performer and tag Version 1 0 1 1 2 2 2 3 or 2 4 for MP3 files and for WMA files This unit can play back MP3 WMA files meeting the conditions below Bit rate 8 kbps 320 kbps Sampling frequency 48 ...

Страница 54: ...n the display then press it repeatedly Reception improves but the stereo effect will be lost MO indicator lights up To restore the stereo effect repeat the same procedure 3 5 mm stereo mini plug not supplied Portable audio player etc Turn on the connected component and start playing the source External component operations You can connect an external component to the AUX auxiliary input jack on th...

Страница 55: ... on the display Press 0 then insert a disc correctly MP3 WMA playback Disc cannot be played back Use a disc with MP3 WMA tracks recorded in a format compliant with ISO 9660 Level 1 Level 2 Romeo or Joliet Add the extension code mp3 or wma to the file names Noise is generated Skip to another track or change the disc Do not add the extension code mp3 or wma to non MP3 or WMA tracks A longer readout ...

Страница 56: ...right Front speaker right White with black stripe Rear ground terminal Aerial terminal Gray with black stripe Green Gray Green with black stripe Purple with black stripe White ELECTRICAL CONNECTIONS Typical connections Connect only the front speakers if your speaker system is two speaker system Before connecting Check the wiring in the vehicle carefully Incorrect connection may cause serious damag...

Страница 57: ... IMPORTANT FOR LASER PRODUCTS 1 CLASS 1 LASER PRODUCT 2 CAUTION Do not open the top cover There are no user serviceable parts inside the unit leave all servicing to qualified service personnel 3 CAUTION For U S A Visible and or invisible class II laser radiation when open Do not stare into beam For Canada Visible and or invisible class 1M laser radiation when open Do not view directly with optical...

Страница 58: ...e sound mode iEQ intelligent equalizer Selects the source Searches for stations if pressed briefly Fast forwards or reverses the track if pressed and held Changes the track of the disc if pressed briefly Select FM AM Select the bands Search for a station Auto Search Manual Search Hold either one of the buttons until M flashes on the display then press it repeatedly Remote sensor DONOTexposetostron...

Страница 59: ...elect if the REAR LINE OUT terminals are used for connecting a subwoofer WOOFER 3 LOW MID HIGH Frequencies lower than 90 Hz are sent to the subwoofer Frequencies lower than 135 Hz are sent to the subwoofer Frequencies lower than 180 Hz are sent to the subwoofer AUX ADJ A ADJ 00 A ADJ 05 Adjust the auxiliary input level to avoid the sudden increase of the output level when changing the source from ...

Страница 60: ...he fuse blows Are the red and black leads connected correctly Power cannot be turned on Is the yellow lead connected No sound from the speakers Is the speaker output lead short circuited Sound is distorted Is the speaker output lead grounded Are the terminals of L and R speakers grounded in common Noise interfere with sounds Is the rear ground terminal connected to the car s chassis using shorter ...

Отзывы: