


Replacing the SRX5800 Services Gateway Console or Auxiliary Cable
To use a system console to configure and manage the Routing Engine, connect it to the CONSOLE port
on the Routing Engine. To use a laptop, modem, or other auxiliary device, connect it to the AUX port on
the Routing Engine. Both ports accept a cable with an RJ-45 connector. One RJ-45/DB-9 cable is provided
with the services gateway. If you want to connect a device to both ports, you must supply another cable.
Before you begin to replace the console or auxiliary Cable:
•
Ensure you understand how to prevent electrostatic discharge (ESD) damage. See
Electrostatic Discharge Damage” on page 505
.
Ensure that you have the following available:
•
ESD grounding strap
To replace a cable connected to a management console or auxiliary device:
1. Wrap and fasten one end of the ESD grounding strap around your bare wrist, and connect the other
end of the strap to the ESD point on the chassis.
2. Press the tab on the connector and pull the connector straight out of the port.
3. Disconnect the cable from the console or auxiliary device.
4. Plug the RJ-45 end of the replacement serial cable into the CONSOLE or AUX port.
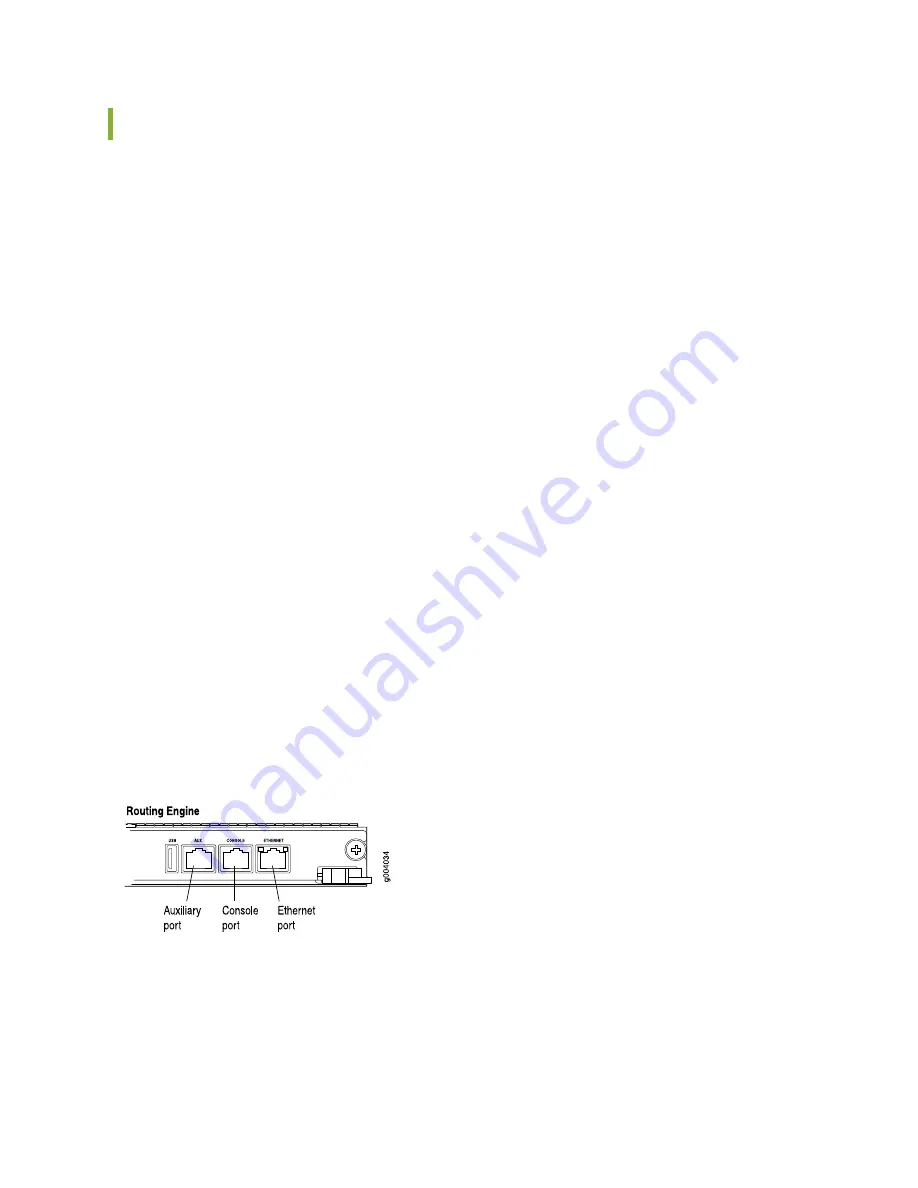
shows the external device ports on the Routing Engine.
5. Plug the female DB-9 end into the console or auxiliary device's serial port.
Figure 152: Auxiliary and Console Ports
392
Содержание SRX 5800
Страница 1: ...SRX5800 Services Gateway Hardware Guide Published 2020 02 10 ...
Страница 23: ......
Страница 30: ...Figure 2 Rear View of a Fully Configured AC Powered Services Gateway Chassis 31 ...
Страница 111: ...LEDs 112 ...
Страница 121: ...Port and Interface Numbering 122 ...
Страница 127: ...Port and Interface Numbering 128 ...
Страница 161: ......
Страница 179: ... One SRX5K MPC IOC2 Modular Port Concentrator with two Modular Interface Cards MICs 180 ...
Страница 180: ... One SRX5K 40GE SFP I O card IOC 181 ...
Страница 205: ......
Страница 261: ......
Страница 324: ...c Upload the configuration to RE2 from the USB device 325 ...
Страница 365: ...Figure 143 Installing an SPC 366 ...
Страница 367: ...368 ...
Страница 422: ...5 CHAPTER Troubleshooting Hardware Troubleshooting the SRX5800 425 ...
Страница 423: ......
Страница 457: ......
Страница 473: ...475 ...
Страница 476: ...Restricted Access Area Warning 478 ...
Страница 483: ...485 ...
Страница 496: ...Jewelry Removal Warning 498 ...
Страница 499: ...Operating Temperature Warning 501 ...
Страница 509: ...DC Power Disconnection Warning 511 ...
Страница 513: ...DC Power Wiring Sequence Warning 515 ...
Страница 516: ...DC Power Wiring Terminations Warning 518 ...
Страница 519: ...DC Power Disconnection Warning 521 ...
Страница 523: ...DC Power Wiring Sequence Warning 525 ...
Страница 526: ...DC Power Wiring Terminations Warning 528 ...