


Installing the JATP400 in a Rack | 29
Installing the JATP400 in a Rack
IN THIS SECTION
Installing the JATP400 Appliance | 29
Installing the JATP400 Appliance
Place the shipping container on a flat surface and carefully remove the hardware components.
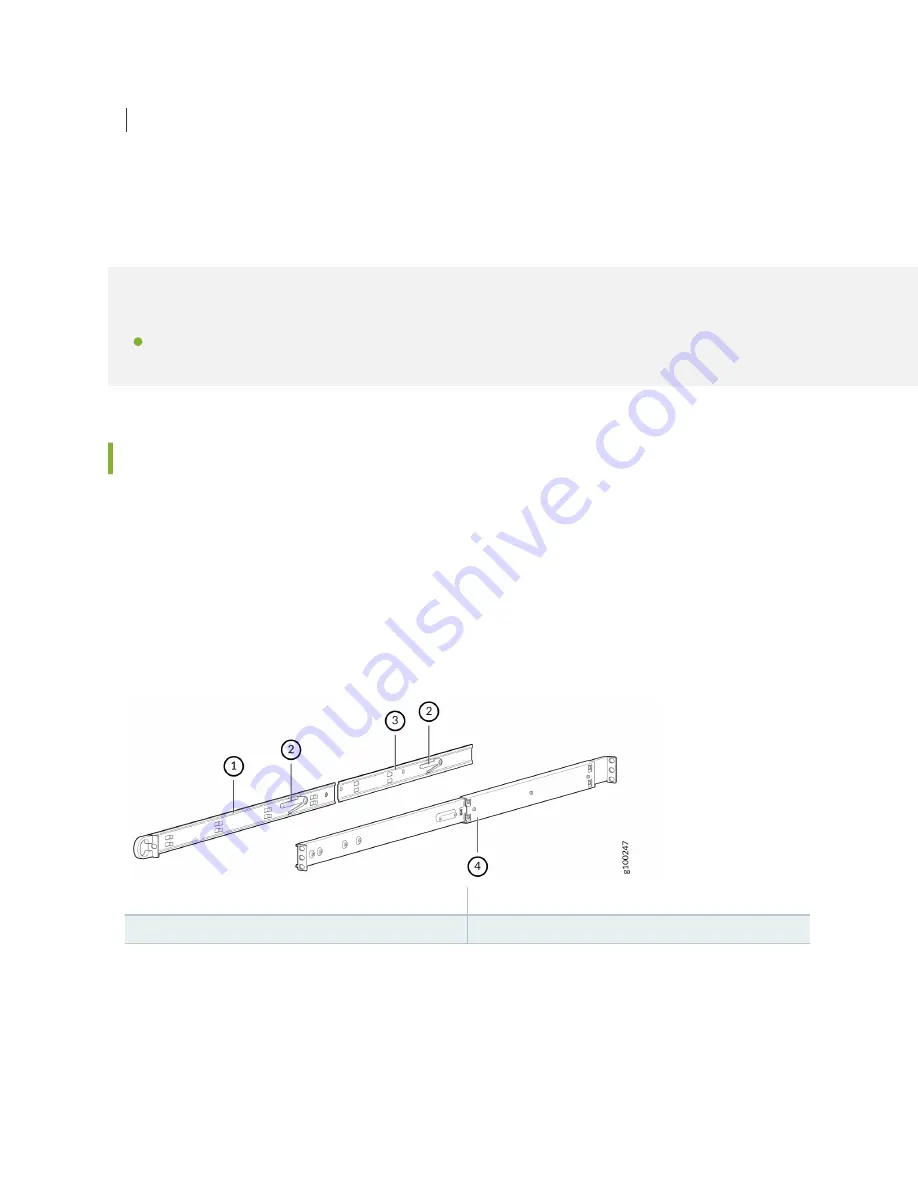
The chassis package includes a pair of rack rail assemblies and mounting screws required to install the
chassis in a rack. Each rail assembly consists of an inner, a middle, and an outer rail, as shown in
Figure 6: Identifying the Inner, Middle, and Outer Rails
1
—
Inner rail
3
—
Middle rail
2
—
Locking tab
4
—
Outer rail
To install the JATP400 appliance:
1. To mount the JATP400 appliance in a four-post rack:
a. Install the inner rail extensions.
29
Содержание JATP400
Страница 1: ...JATP400 Appliance Hardware Guide Published 2021 05 17...
Страница 8: ...1 CHAPTER Overview JATP400 System Overview 2 JATP400 Chassis 4...
Страница 58: ...4 CHAPTER Maintaining Components Maintaining JATP400 Power System 52 Maintaining the JATP400 Hard Disk Drive 56...
Страница 64: ...The hard drive pops partially out of the slot 57...
Страница 65: ...Figure 24 Removing a Drive Carrier g100245 58...
Страница 67: ...5 CHAPTER Troubleshooting Hardware Contacting Juniper Networks Technical Assistance Center 61...
Страница 69: ...6 CHAPTER Returning the Chassis or Components Returning the JATP400 Chassis or Components 63...
Страница 72: ...Maintaining the JATP400 Hard Disk Drive 56 65...


