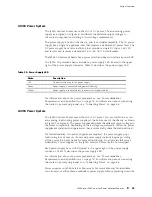
System Overview
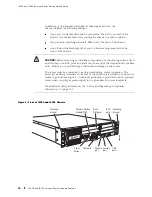
HA LED
The
HA
(high availability) LED is for future use. The LED lights when
the router starts, but otherwise remains unlit.
RESET CONFIG Button
Use the
RESET CONFIG
button to return the router to either the rescue
configuration or the factory default configuration. The button is recessed
to prevent it from being pressed accidentally.
For example, if someone inadvertently commits a configuration that denies
management access to a Services Router, you can delete the invalid configuration
and replace it with a rescue configuration by pressing the
RESET CONFIG
button. You
must have previously set the rescue configuration through the J-Web interface or the
CLI. The rescue configuration is a previously committed, valid configuration.
CAUTION:
Pressing and holding the
RESET CONFIG
button for 15 seconds or
more—until the configuration LED blinks red—deletes
all
configurations on the
router, including the backup configurations and rescue configuration, and loads
and commits the factory configuration.
You can change the default behavior of the
RESET CONFIG
button. For
more information, see the
J-series Services Router Basic LAN and
WAN Access Configuration Guide
.
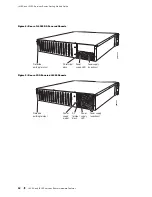
Built-In Gigabit Ethernet Ports
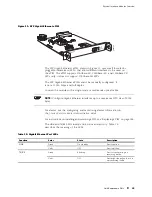
Four built-in Gigabit Ethernet ports provide LAN connections over copper
interfaces to hubs, switches, local servers, and workstations. You can also
designate an Ethernet port for management traffic. When configuring one
of these ports, you use the interface name that corresponds to the port’s
location. From left to right on the front panel, the interface names for the
ports are
ge-0/0/0
,
ge-0/0/1
,
ge-0/0/2
, and
ge-0/0/3
.
For Gigabit Ethernet port pinout information, see “RJ-45 Connector Pinout
for Gigabit Ethernet Ports” on page 195.
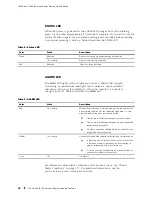
Each port has two LEDs, a
TX/RX
LED on the left side and a
LINK
LED on the
right side. Table 10 describes the built-in Ethernet port LEDs.
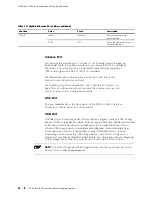
Table 10: Gigabit Ethernet Port LEDs
Function
Color
State
Description
Green
On steadily
Port is online.
LINK
Unlit
Off
Port is offline.
J4350 and J6350 Services Router Hardware Features
19
Содержание J4350
Страница 14: ...J4350 and J6350 Services Router Getting Started Guide xiv Table of Contents...
Страница 22: ...2 J series Overview...
Страница 68: ...J4350 and J6350 Services Router Getting Started Guide 48 Field Replaceable PIMs...
Страница 75: ...Services Router User Interface Overview Figure 25 J Web Layout Using the J Web Interface 55...
Страница 88: ...J4350 and J6350 Services Router Getting Started Guide 68 Using the Command Line Interface...
Страница 90: ...70 Installing a Services Router...
Страница 100: ...J4350 and J6350 Services Router Getting Started Guide 80 Site Preparation Checklist...
Страница 112: ...J4350 and J6350 Services Router Getting Started Guide 92 Powering a Services Router On and Off...
Страница 144: ...J4350 and J6350 Services Router Getting Started Guide 124 Verifying Secure Web Access...
Страница 160: ...J4350 and J6350 Services Router Getting Started Guide 140 Verifying J series License Management...
Страница 162: ...142 Maintaining Services Router Hardware...
Страница 194: ...J4350 and J6350 Services Router Getting Started Guide 174 Troubleshooting Hardware Components...
Страница 202: ...J4350 and J6350 Services Router Getting Started Guide 182 Packing a Router or Component for Shipment...
Страница 204: ...184 J series Requirements and Specifications...
Страница 220: ...J4350 and J6350 Services Router Getting Started Guide 200 ISDN RJ 45 Connector Pinout...
Страница 267: ...Part 5 Index Index 247...
Страница 268: ...248 Index...


